
Subscribe to Our Youtube Channel
Related Manuals for Empava EMPV-24WOA16


Summary of Contents for Empava EMPV-24WOA16
- Page 1 INSTRUCTION MANUAL Built-in Electric Oven EMPV-24WOA16 EMPV-24WOA01 EMPV-24WOB14 EMPV-24WOB17...
- Page 2 DEAR CUSTOMER The oven is exceptionally easy to use and extremely efficient. After reading the instruction manual. Operating the oven will be easy. Before being packaged and leaving the manufacturer, the oven was thoroughly checked with regard to safety and functionality. Before using the appliance, please read the instruction manual carefully.
-
Page 3: Table Of Contents
TABLE OF CONTENTS Safety instructions ........................3 Description of the appliance ....................7 Installation ............................12 Make electrical connection .....................13 Operation ............................16 Cleaning and maintenance ......................20 Technical data ..........................23... -
Page 4: Safety Instructions
SAFETY INSTRUCTIONS NOTE: Ensure there is a grounded socket nearby (behind the unit) A dedicated power circuit is recommended for the unit but not required. Additional electrical appliances on the same circuit may exceed the current (amperage) rating for that circuit. If after the installation of your unit. - Page 5 !To reduce the risk of fire, do not place or install this unit in areas where the ventilation or circulation ducts may become blocked. !The unit's power cord must be connected to a properly grounded and protected,220-240V electrical outlet. Always use ground fault protection where required by the electrical code. To reduce the risk of fire, avoid running the power cord under rugs, carpets, etc.
- Page 6 Hazards involved. Children shall not play with the appliance. Children without supervision shall not make cleaning and user maintenance. During use, the appliance becomes hot. Care should be taken to avoid touching heating elements inside the oven. WARNING: Accessible parts may become hot during use. Young children should be kept away.
- Page 7 UNPACKING During transportation, protective packaging was used to protect the appliance against any damage. After unpacking, please dispose of all elements of packaging in a way that will not cause damage to the environment. All materials used for packaging the appliance are environmentally friendly; they are100% recyclable and are marked with the appropriate symbol.
-
Page 8: Description Of The Appliance
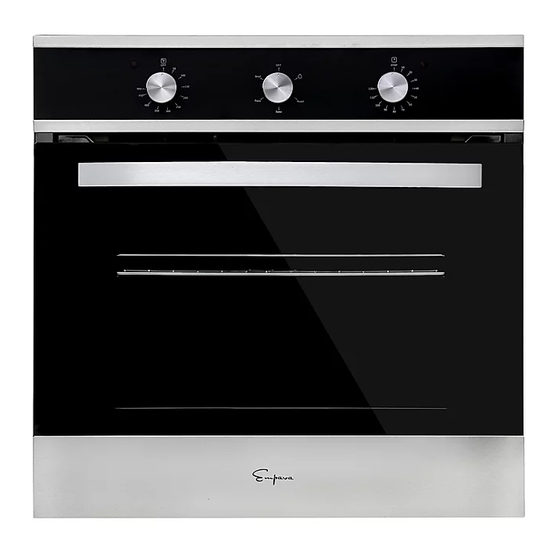
DESCRIPTION OF THE APPLIANCE KQP65A-16 Light CONTROL PANEL Light 1.Temperature control knob 2.Timer knob 3. Oven function selection knob 4. Handle... - Page 9 KQP65A-01 Light CONTROL PANEL Light 1.Temperature control knob 2.Timer knob 3. Oven function selection knob 4. Handle...
- Page 10 KQP65B-14 Light CONTROL PANEL Light 1.Temperature control knob 2.Timer knob 3. Oven function selection knob 4. Handle...
- Page 11 KQB65C-17 1 Temperature control knob 2 Oven function selection knob 3 Handle Clock heating Timer Re-heat...
- Page 12 Baking tray Grill grate-drying rack) Rotisserie (According to cooking function)
-
Page 13: Installation
INSTALLATION !The kitchen area should be dry and aired and equipped with efficient ventilation. When installing the oven, easy access to all control elements should be ensured. !This is a built-in oven, and its back wall and one side wall can be placed next to a high piece of furniture or a wall. -
Page 14: Make Electrical Connection
MAKE ELECTRICAL CONNECTION This oven is manufactured with a neutral (white) power supply wire and a cabinet-connected green(or bare)ground wire twisted together. Disconnect power. Feed the flexible conduit from the through the opening in the cabinet. Remove junction box cover, if it is present. Install a UL listed or CSA approved conduit connector to the junction box. - Page 15 MAKE ELECTRICAL CONNECTION Electrical Connection Options Chart 4-Wire Cable from Home Power Supply Cable from home power supply Black wires C. Red wire...
- Page 16 MAKE ELECTRICAL CONNECTION D. 3-wire flexible conduit from oven Junction box White wires (No need connect) G. UL listed wire connectors H. Green (or bare) ground wires UL listed or CSA approved conduit connector Connect the 2 black wires (B) together using a UL listed wire connector. Connect red wire (C) together using a UL listed wire connector.
-
Page 17: Operation
1. Connect the two black wires (C) together using a UL listed wire connector. 2. Connect the white wires from home (D) and the green (or bare) ground wire (of the oven cable) (E) using a UL listed wire connector. 3. - Page 18 shut. Preheat (Central element with fan on) this cooking mode allows homogenous distribution of the heat inside the oven, making it possible to cook several items of food at the same time. Pizza (Top heater on) When the knob is turned to this position, the oven is heated using only the top heater.
- Page 19 The oven can be switched off by setting both of these knobs to the position “OFF”. About symbol : : Clock 1. : heating 2. : Re-heat 3. : Timer 4. WARNING: The clock is just a reminder, it cannot control circuit About function :...
- Page 20 In turn on /working condition, press ,and activate to set up the function and clock, press again, start “heating time set up” ,”preheat time set up”, “current time”. After 5s, reminding to set up, and back to current time In function set up condition, press for decrease the time In function set up condition, press for increase the time...
-
Page 21: Cleaning And Maintenance
“ ”or” ” to adjust heating time, after 5s no operating ,backup the revised time and exit to current time.It will heating according to the set up time ,and display with current remain heating time.You can also re-set a new heating time when in working . Max heating time is 10hr, when add to max heating time, continues “... - Page 22 Caution! The sharp blade should always be protected by adjusting the cover (just push it with your thumb).Injuries are possible so be careful when using this instrument-keep out of reach of reach of children ! Appropriate light cleaning or washing products are recommended, such as e.g. any kind of liquids or emulsions for fat removal.
- Page 23 Oven light bulb Door removal In order to obtain easier access to the oven chamber for cleaning, it is possible to remove the door, To do this, tilt the safety catch part of the hinge upwards. Close the door lightly, lift and pull it out towards you. In , ensure order to fit the door back on to the cooker, do the inverse.
-
Page 24: Technical Data
TECHINCAL DATA Voltage rating: 220-240V~ 50/60Hz Power rating: KQP65A max. 2000W KQP65B max.2800W KQB65C max.2800W Oven dimensions H/W/D (in):23.4/23.4/22.6 Net weight: KQP65A, Approx. 64LB KQP65B, Approx.71.6LB KQB65C, Approx.71.6LB...
Need help?
Do you have a question about the EMPV-24WOA16 and is the answer not in the manual?
Questions and answers