Table of Contents
Advertisement
Quick Links
Appliances
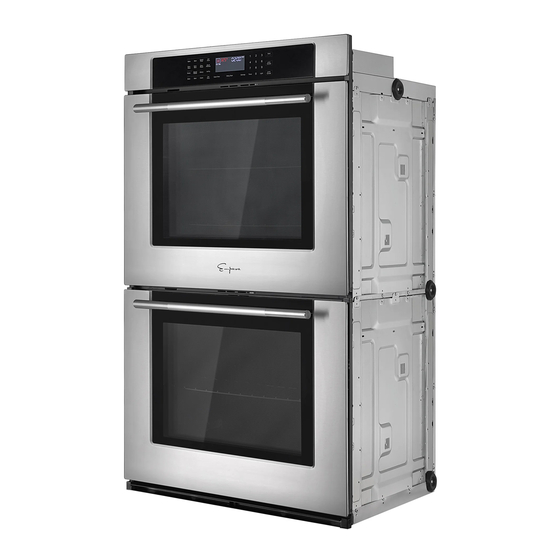
30" Double Wall Oven
EMPV-30WO05
User Manual
IMPORTANT SAFETY INSTRUCTIONS
Carefully read the important information
regarding installation, safety and maintenance.
Keep these instructions for future reference.
Designed and Engineered in USA
Distributed by Empava Appliances Inc.
Add: 15253 Don Julian Road, City of Industry, CA, 91745 USA
Tel: (888) 682 - 8882
WWW.EMPAVA.COM
Advertisement
Table of Contents

Related Manuals for Empava EMPV-30WO05


Summary of Contents for Empava EMPV-30WO05
- Page 1 Carefully read the important information regarding installation, safety and maintenance. Keep these instructions for future reference. Designed and Engineered in USA Distributed by Empava Appliances Inc. Add: 15253 Don Julian Road, City of Industry, CA, 91745 USA Tel: (888) 682 - 8882 WWW.EMPAVA.COM...
-
Page 3: Table Of Contents
TABLE OF CONTENTS OVEN SAFETY ......................1 Warnings for Electric Installation ..................2 PARTS AND FEATURES ....................5 CONTROL PANEL....................... 6 Key and icon definitions ......................7 Functional Operation ......................8 Cooking Settings ........................9 Self clean mode ........................9 Setting function .........................10 Child key function ........................11 The alarm function... -
Page 4: Oven Safety
OVEN SAFETY Your safety and the safety of others are very important. We have provided many important safety messages in this manual and on your appliance. Always read and obey all safety messages. This is the safety alert symbol. This symbol alerts you to potential hazards that can kill or hurt you and others. -
Page 5: Warnings For Electric Installation
WARNINGS FOR ELECTRIC INSTALLATION WARNING Electrical Shock Hazard Installation and service must be performed by a quali ed installer or service agency. The models may be powered at 240V or 208V. Always disconnect the power before servicing this unit. This appliance must be properly grounded. Failure to do so could result in death or serious injury. - Page 6 IMPORTANT SAFETY INSTRUCTIONS • • Do not cover or block any Be sure the blower fan runs openings on this appliance. whenever the oven is in operation. If the fan does not • Use this appliance only for operate, do not use the oven. its intended use as described Call an authorized service in this manual.
- Page 7 IMPORTANT SAFETY INSTRUCTIONS • Safety for the Self-cleaning During and after use, do not Oven: touch or let clothing or other flammable materials contact • Before self-cleaning the oven, the heating elements or the remove the broiler pan, oven interior surfaces of the oven racks (only when not made of until they have had sufficient porcelain), other utensils and...
-
Page 8: Parts And Features
PARTS AND FEATURES Cooling Vents Temperature Probe (Upper Oven Only) Broil Element Door Gasket Control Panel Oven Rack Back Halogen Light Oven Rack Front Convection Fan and Element Broiler Pan Rack Bottom Element (not visible) Broiler Pan Model and Serial # Plate... -
Page 9: Control Panel
CONTROL PANEL... -
Page 10: Key And Icon Definitions
1. Key and icon definitions 1) Start: Start button, start operation or start Settings to take effect. 2) Cancel: Cancel button to cancel the current operation. 3) Cook time: Bake time button, used to set the bake time. 4) Delay start: The Appointment time button is used to set the start time. -
Page 11: Functional Operation
2. Functional Operation Default temperature Adjustable Preheat Operating Mode (°F) range phase Oven Bake 170-550 Hi Lo Broil Proof(Press for 3 seconds in 80-120 Warm Mode temp) 140-210 Warm Convect bake 170-500 Convect broil 170-550 Conv Convect roast 170-550 1. Meats Easy 2. -
Page 12: Cooking Settings
3. Cooking Settings 1) Select the required baking function, touch the button on the display screen, the interface will light up the function options, and the default temperature and default time will appear on the display panel. 2) Click Start to Start the operation. When the actual temperature of the furnace core is lower than 170°F, the temperature digital tube only displays Lo. -
Page 13: Setting Function
5. Setting function To access the setting function, press the Settings button on the switch panel. There are seven Settings. You can press the Settings button repeatedly to select the Settings Parameter that can Touch Settings Configurable content Default be set repeatedly Clock Touch one... -
Page 14: Child Key Function
6. Child key function 1). When the oven is on standby, touch the "Start" button and hold for 3 seconds. The control panel is locked. At this time, only the Start key is effective in the control panel, and other keys are invalid. When other keys are touched, the child lock icon on the screen blinks and an invalid tone is heard concurrently. -
Page 15: Oven Use
OVEN USE BEFORE USING THE OVEN 1. Turn the Temperature Control to the highest setting. 2. Turn the Cooking Mode Selection control to a cooking mode. 3. Allow the oven to operate for 30 minutes with the door closed and no food in the cavity. - Page 16 • Preheating is necessary for good results when baking cakes, cookies, pastry and breads. • Preheating will help to sear roasts and seal in meat juices. • Place oven racks in their proper position before preheating. • During preheating, the selected cooking temperature is always displayed. •...
- Page 17 5. Press START. The set oven temperature will appear on the display throughout cooking. 6. Enter the desired internal food temperature by pressing the numbers on the keypad, and then press START. NOTES: • The internal food temperature can be set between 110°F and 200°F (43°C and 93°C).
-
Page 18: Oven Temperature Control
OVEN DOOR To avoid oven door glass breakage: • Do not close the oven door if the racks are not fully inserted into the oven cavity or if bakeware extends past the front edge of an oven rack. • Do not set objects on the glass surface of the oven door. •... -
Page 19: Oven Modes
ADJUSTMENT °F (ADJUSTMENT °C) COOKS FOOD 10°F (6°C) a little more 20°F (12°C) moderately more 30°F (17°C) much more -10°F (-6°C) a little less -20°F (-12°C) moderately less -30°F (-17°C) much less To Adjust Oven Temperature Calibration: 1. Press SETTINGS. The various Options will appear in the display. 2. - Page 20 BROIL Broiling uses direct radiant heat to cook food. The lower the temperature, the slower the cooking. Thicker cuts and unevenly shaped pieces of meat, fish and poultry may cook better at lower broiling temperatures. • For best results, use a broiler pan and rack (not provided). It is designed to drain juices and help avoid spatter and smoke.
- Page 21 WARM (LOWER OVEN) The Warm mode keeps hot, cooked foods at serving temperature. WARNING Food Poisoning Hazard Do not let food sit in oven more than one hour before or after cooking. Doing so can result in food poisoning or sickness. IMPORTANT: Food must be at serving temperature before placing it in the warmed oven.
-
Page 22: Convection (Upper Oven Only)
5. Let the dough rise until nearly doubled in size, checking after 20-25 minutes. Proofing time may vary depending on dough type and quantity. 6. Press CANCEL when finished proofing. 7. Before second proofing, shape the dough, place it in baking pan(s) and cover loosely with plastic wrap, coated with cooking spray. - Page 23 NOTE: After selecting an Oven Mode and Temperature, you have the option to set a Cook Time and Start Time before pressing START. See “Cook Time” and “Start Time.” 4. The oven will begin preheating once Start is pressed. A tone will sound when the oven is at the set temperature.
-
Page 24: Bake Tips
BAKE TIPS • For best results, bake food on a single rack with at least 1" - 1 ½" (2,5 - 3cm) space between utensils and oven walls. • Use one rack when selecting the bake mode. • Check for doneness at the minimum time. •... -
Page 25: Convection Bake Tips
CONVECTION BAKE TIPS Reduce recipe baking temperatures by 25°F (15°C). • For best results, foods should be cooked uncovered, in low-sided pans to take advantage of the forced air circulation. Use shiny aluminum pans for best results unless otherwise specified. •... - Page 26 FOODS RECOMMENDED FOR CONVECTION BAKE MODE: Appetizers, Biscuits, Coffee Cakes Cookies (2 to 4 racks), Yeast Breads Cream Puffs, Popovers Casseroles and One-Dish Entreés Oven Meals (rack positions 1, 2, 3) Air Leavened Foods (Soufflés, Meringue, Meringue-Topped Desserts, Angel Food Cakes, Chiffon Cakes) CONVECTION BAKE CHART Reduce standard recipe temperature by 25 ºF (15 °C) for Convection Bake.
-
Page 27: Convection Roast Tips
CONVECTION ROAST TIPS • Do not preheat for Convection Roast. • Roast in a low-sided, uncovered pan. • When roasting whole chickens or turkey, tuck wings behind back and loosely tie legs with kitchen string. • Use the 2-piece broil pan for roasting uncovered. WARNING Burn Hazard Use an oven mitt to remove temperature probe. - Page 28 CONVECTION ROAST CHART TIME WEIGHT OVEN TEMP. RACK INTERNAL MEATS (min. per (lb) °F (°C) POSITION TEMP. °F (°C) Beef Rib Roast 325 (160) 16-20 145 (63) medium rare 18-22 160 (71) medium Rib Eye Roast, 325 (160) 16-20 145 (63) (boneless) medium rare 18-22...
-
Page 29: Convection Broil Tips
CONVECTION BROIL TIPS • Place rack in the required position needed before turning on the oven. • Use Convection Broil mode with the oven door closed. • Do not preheat oven. • Use the 2-piece broil pan. • Turn meats once halfway through the cooking time (see convection broil chart). CONVECTION BROIL CHART BROIL INTERNAL... - Page 30 DEHYDRATE CHART APPROXIMATE FOOD PREPARATION DRYING TIME* TEST FOR DONENESS (hrs) Fruit Apples Dipped in ¼ cup lemon 11-15 Slightly pliable juice and 2 cups water, ¼ slices Bananas Dipped in ¼ cup lemon 11-15 Slightly pliable juice and 2 cups water, ¼...
-
Page 31: Broil Tips
BROIL TIPS • Place rack in the required position needed before turning on the oven. • Use Broil mode with the oven door closed. • Preheat oven for 5 minutes before use. • Use the 2-piece broil pan. • Turn meats once halfway through the cooking time (see convection broil chart). BROIL CHART BROIL TIME... -
Page 32: Food Service Temperature Guidelines From Fsis
FOOD SERVICE TEMPERATURE GUIDELINES FROM FSIS (USDA FOOD SAFETY & INSPECTION SERVICE) 140°F Ham, precooked ( to Reheat) Stuffing (cooked alone or in (60°C) bird) 165°F (74°C) 145°F Fresh beef, Veal, Lamb (medium Leftovers & Casseroles (63°C) rare) Ground Meat & Meat mixtures Fresh beef, Veal, Lamb (well (Beef, Pork, Veal Lamb) done) -
Page 33: Oven Care
OVEN CARE GENERAL CLEANING IMPORTANT: Before Cleaning, make sure all controls are off and the oven is cool. Always follow the instructions printed on the label of the cleaning products. USING THE CLEANING CHART 1. Locate the number of the part to be cleaned in the following illustration. 2. - Page 34 PART CLEANING METHOD PART CLEANING METHOD BLACK STAINLESS BLACK STAINLESS & WHITE STEEL OVEN & WHITE STEEL OVEN OVEN OVEN Door Frame E Mesh Gasket Interior Interior Door Oven Windows Door Removable A or E A or E Door Oven Racks Handle Side Trim Door...
- Page 35 The cleaners listed below indicate types of products to use and are not being endorsed. Use all products according to package directions. Part Cleaning Method A Chrome Wash with hot sudsy water. Rinse thoroughly and dry. Or, gently rub Plated with Soft Scrub , Bon-Ami , Comet...
-
Page 36: Automatic Self-Cleaning
AUTOMATIC SELF-CLEANING WARNING Burn Hazard Do not touch the oven during the Self-Cleaning cycle. Keep children away from oven during Self-Cleaning cycle. Failure to do so can result in burns. This oven features a self-cleaning function that eliminates the need to manually scrub the oven interior. - Page 37 BEFORE SELF-CLEANING 1. Remove all utensils and bakeware. 2. Remove non-porcelain oven racks. If chromed racks are left in the oven during the self-clean cycle, they will permanently lose the shiny finish and change to a dull dark finish. See Oven Cleaning Chart for proper care. 3.
-
Page 38: Oven Door Removal
SELF-CLEAN CYCLE NOTE: Only one oven can use the Self-Clean cycle at a time, and a 24-hour wait is recommended before starting the next Self-Clean cycle. To Self-Clean: 1. Close the oven door. 2. Press SELF CLEAN. “Press 1 for Upper Oven” will appear in the upper oven text area of the display and “Press 2 for Lower Oven”... - Page 39 To Remove the Oven Door: 1. Open the door completely. 2. Flip up the hinge latch on each side. Hinge Bracket 3. Holding the door firmly, close the oven door completely. 4. Grasping both sides, lift up on the oven door while pushing it closed, and then pull it away from the door frame.
-
Page 40: Replacing An Oven Light
REPLACING AN OVEN LIGHT WARNING Electrical Shock Hazard Make sure the oven and lights are cool and power to the oven has been turned off before replacing the light bulb(s). The lenses must be in place when using the oven. The lenses serve to protect the light bulb from breaking. -
Page 41: Troubleshooting
NOTE: To avoid damage to or decreasing the life of the new bulb, do not touch the bulb with bare fingers. Wear cotton gloves or use a tissue when replacing the light bulb. 4. Replace the bulb, and then replace the bulb cover. 5. -
Page 42: Operation
• Cakes pale, flat and may not be Oven temperature too low done inside • Incorrect baking time • Cake tested too soon • Oven door opened too often • Pan size may be too large • Cakes high in middle with crack Oven temperature too high on top •... - Page 43 Oven is not Oven rack is not in Refer to cook charts for recommended cooking evenly correct position. rack position. Convection Bake Always reduce recipe temperature Mode by 25°F (15 °C) when baking with Convention Bake mode. Oven light is Light bulb is loose Replace or reinsert the light bulb if loose not working...
Need help?
Do you have a question about the EMPV-30WO05 and is the answer not in the manual?
Questions and answers