Table of Contents
Advertisement
Quick Links
MPX100 e-Manual D07-00-022 Rev A00
Page 1 of 46
MPX100 e-Manual
Please direct all questions to your local VeEX Sales Office, Representative or Distributor or contact VeEX technical support at
www.veexinc.com © Copyright 2010 VeEX Incorporated. All rights reserved.
No part of this user manual may be reproduced, translated into a foreign language or be transmitted electronically without
prior agreement and written consent of VeEX Incorporated as governed by International copyright laws. Information contained
in this manual is provided "as is" and is subject to change without notice. ™Trademarks of VeEX Incorporated have been
identified where applicable, however the absence of such identification does not affect the legal status of any trademark.
Advertisement
Table of Contents

Related Manuals for VeEX MPX100


Summary of Contents for VeEX MPX100
- Page 1 VeEX Incorporated as governed by International copyright laws. Information contained in this manual is provided "as is" and is subject to change without notice. ™Trademarks of VeEX Incorporated have been identified where applicable, however the absence of such identification does not affect the legal status of any trademark.
-
Page 2: Table Of Contents
MPX100 e-Manual D07-00-022 Rev A00 Page 2 of 46 Table of Contents 1.0 Product Introduction 2.0 About this User Manual 3.0 Safety Information 4.0 Basic Operation 4.0.1 Interfaces 4.0.2 Applications 4.0.3 Usage 4.0.4 Application 4.1 Installation Procedure 5.0 ReVeal Software 5.1 System Requirements... -
Page 3: Product Introduction
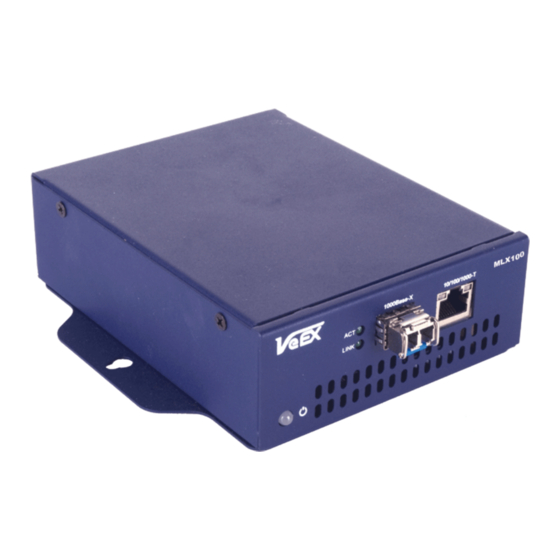
1.0 Product Introduction Overview The MPX100 is an intelligent 1GE, 10/100/1000Base-T and 1000Base-X, loopback device that is the perfect companion to the MX product family (MX100, MX120, MPX100, MX300) and TX300. Loopback control can be performed in-band or via the built-in 10/100BaseT Ethernet port via an internet connection. -
Page 4: About This User Manual
Four modes are available for looping back test traffic: layer 1, layer 2, layer 3, and layer 4. The optional loopback-ready boot-up profile, allows for fast and easy setup of the MPX100 to begin testing as soon as the device is powered on. This convenient feature can be easily configured with the accompanying PC software, ReVeal MPX100. -
Page 5: Basic Operation
Do not operate the instrument in the presence of flammable gases or fumes or any other combustible environment. VeEX Inc. assumes no liability for the customer's failure to comply with safety precautions and requirements. - Page 6 MPX100 e-Manual D07-00-022 Rev A00 Page 6 of 46 Go back to top The MPX100 is equipped with the following connectors located at the rear of the unit: Power Input - 15Volts DC 10/100Base-T port - Ethernet applications include: Transfer test profiles between the unit and a computer using ReVeal MPX100 software...
-
Page 7: Applications
MPX100 e-Manual D07-00-022 Rev A00 Page 7 of 46 Go back to top 4.0.2 Applications The MPX enters the centralized systems test market Deployment of MPXs in a centralized location and distributed across the telco/service provider network Reduction of truck rolls, 24/7/365 network monitoring and on-demand testing... -
Page 8: Installation Procedure
MPX100 e-Manual D07-00-022 Rev A00 Page 8 of 46 Dedicated MPX probes distributed throughput the network, controlled via ReVeal MPX Go back to top 4.1 Installation Procedure The following illustrates the procedure for installing the rack mount:... - Page 9 MPX100 e-Manual D07-00-022 Rev A00 Page 9 of 46...
-
Page 10: Reveal Software
Page 10 of 46 Go back to top 5.0 ReVeal MPX100 Software ReVeal MPX100 software forms an integral part of the MPX100 Loopback device and is required to configure and manage tests applications. 5.1 System Requirements ReVeal MPX software has the following minimum system requirements: Operating System: Windows 2000, Windows XP or Windows Vista. -
Page 11: Installation Procedure
4. COPYRIGHT All title, including but not limited to copyrights, in and to ReVeal and any copies thereof are owned by VeEX Incorporated or its suppliers. All title and intellectual property rights in and to the content which may be accessed through use of ReVeal is the property of the respective content owner and may be protected by applicable copyright or other intellectual property laws and treaties. -
Page 12: Getting Started
6) The program will guide you through the installation Note: If you do not have a copy of ReVeal software supplied with the MPX100 unit, you can download the necessary version for your device from the VeEX website (http://www.veexinc.com/) and registering as a user. Links will guide you to the software location. - Page 13 MPX100 e-Manual D07-00-022 Rev A00 Page 13 of 46 USB-to-Serial connection: Select the corresponding COM port for the USB-to-Serial cable STEP 2 Configure the serial port settings. STEP 3 Power on the MPX The HyperTerminal should automatically display the following boot-up process...
- Page 14 MPX100 e-Manual D07-00-022 Rev A00 Page 14 of 46 Boot-up process STEP 4 Press ENTER at this point of the boot-up process At the login prompt, type "root" and press ENTER STEP 5 At the end of the boot-up process, the command line "#" appears. Type the following commands:...
- Page 15 MPX100 e-Manual D07-00-022 Rev A00 Page 15 of 46 # cd /usr/app # ls -l Note: After commands are entered, verify that "mpxconfig" file exists. STEP 6 Change the IP settings of the 10/100T (IP address, subnet, gateway) and give the MPX a location name (optional) with the following command string: ./mpxconfig –n "IP"...
- Page 16 MPX100 e-Manual D07-00-022 Rev A00 Page 16 of 46 STEP 7 Type "ipconfig" to verify the new IP settings.
- Page 17 MPX100 e-Manual D07-00-022 Rev A00 Page 17 of 46 STEP 8 Connect the MPX100 (with new IP settings) to the network via the 10/100T port. Ping the MPX100 to verify connectivity. Now we are ready to use ReVeal MPX! Go back to top...
-
Page 18: Test System Management
6.2 Step 1 - Launch ReVeal MPX100 Software Once the default IP address is known, launch ReVeal MPX100 software from the shortcut on your desktop or wherever the software has been installed. The screen below will be displayed while the software application is being launched. - Page 19 MPX100 e-Manual D07-00-022 Rev A00 Page 19 of 46 From the Home menu, access "Test System Management" STEP 2 Press "Add" and enter the IP address of the MPX you will add Press "Check": ReVeal MPX will check for the MPX online...
- Page 20 Note: Green check mark appears if ReVeal MPX finds the MPX100. Press "Finish" to close the window. STEP 3 The MPX100 just added now appears in the table with an "Online" status Press "Save" to save the table entry to the ReVeal MPX management table...
-
Page 21: Test System Management Comments
MPX100 e-Manual D07-00-022 Rev A00 Page 21 of 46 STEP 4 Repeat steps 1 through 3 to add more MPX100s! Go back to top 6.3.1 Test System Management Comments Every time the user enters the Test System Management menu, ReVeal MPX will check the status of all of the MPX100s... -
Page 22: Performance Tests
MPX100 e-Manual D07-00-022 Rev A00 Page 22 of 46 At the end of the status checking process "Online" or "OOS" (out of service) will appear under the Status column Go back to top 6.4 Performance Tests 6.4.1 Test Profiles STEP 1 The Test Profiles menu in ReVeal MPX is the same as ReVeal MX! One additional settings in ReVeal MPX test profiles is the test port configuration;... - Page 23 MPX100 e-Manual D07-00-022 Rev A00 Page 23 of 46 Create a new BERT profile From = New Name = user-defined Type = BERT Press "Create"...
- Page 24 MPX100 e-Manual D07-00-022 Rev A00 Page 24 of 46 STEP 2 Configure the Port settings Select the test port: 10/100/1000T or 1000Base-X Select the auto-negotiation settings and flow control settings STEP 3 Configure the Header...
- Page 25 MPX100 e-Manual D07-00-022 Rev A00 Page 25 of 46 Same as the MX100/120! Make sure the MAC/IP destination addresses are correct. Destination addresses = source addresses of the remote test partner STEP 4 Configure the traffic profile Error injection settings can also be configured.
-
Page 26: Test Profiles Comments
MPX100 e-Manual D07-00-022 Rev A00 Page 26 of 46 Go back to top 6.4.2 Test Profiles Comments The most important thing to remember is to configure the correct MAC/IP/VLAN/etc. settings so that a test between two MPXs or an MPX and an MX can be carried out properly! Go back to top 6.4.3 Test Port IP Setup... - Page 27 MPX100 e-Manual D07-00-022 Rev A00 Page 27 of 46 2. Assign IP address to the test port of the unit. Select the MPX100 Click "Activate" 3. IP Step tab appears.
- Page 28 MPX100 e-Manual D07-00-022 Rev A00 Page 28 of 46 Configure Port settings Click "Save" 4. Ping tab...
-
Page 29: On-Demand Testing Overview
MPX100 e-Manual D07-00-022 Rev A00 Page 29 of 46 Input Destination Click "Ping" to generate Ping Report Go back to top 6.4.4 On-Demand Testing Overview The On-Demand Testing menu is where the user selects which MPX100s to activate for testing and runs tests. -
Page 30: Operations
MPX100 e-Manual D07-00-022 Rev A00 Page 30 of 46 It is important to always activate the Port settings before starting a test (next pages for more information) Go back to top 6.4.5 Operations STEP ONE From the Home Menu, access Performance Tests. Enter the On-Demand Testing menu. - Page 31 MPX100 e-Manual D07-00-022 Rev A00 Page 31 of 46 STEP TWO Select the MPX100 that you want to connect to and run tests on Press "Activate"...
- Page 32 MPX100 e-Manual D07-00-022 Rev A00 Page 32 of 46 STEP THREE You will then be brought to the Activated MPXs tab. Here, select the MPX/s to start a test on and select the test Profile All the MPX profiles available appear in the Profiles pull down menu...
- Page 33 MPX100 e-Manual D07-00-022 Rev A00 Page 33 of 46 STEP FOUR After the Port Setup is completed, click "Start" The results display format is similar to the Results viewing format for ReVeal MX and ReVeal MPX (the only difference is...
- Page 34 MPX100 e-Manual D07-00-022 Rev A00 Page 34 of 46 In the case of more than one MPX100 running a test each MPX has its own tab Select the corresponding tab to view the results for each MPX100 running a test.
- Page 35 MPX100 e-Manual D07-00-022 Rev A00 Page 35 of 46 STEP SIX Close the Test Results window to exit the results menu and return the On-Demand testing menu.
- Page 36 MPX100 e-Manual D07-00-022 Rev A00 Page 36 of 46 Press "Close". This will return the user to the Activated MPXs tab. STEP SEVEN Disconnect from the MPX100. This is done when no more tests need to be carried out Select MPX. Press "Disconnect"...
-
Page 37: On-Demand Testing Comments
MPX100 e-Manual D07-00-022 Rev A00 Page 37 of 46 Go back to top 6.4.6 On-Demand Testing Comments Real-time results viewing for all MPX100s running a test Remember to select the correct test profile Remember to close all the MPX results windows before exiting... - Page 38 MPX100 e-Manual D07-00-022 Rev A00 Page 38 of 46 2. Select the MPX100 3. Click "Schedule" 4. Scheduled Tests Detail tab opens...
- Page 39 MPX100 e-Manual D07-00-022 Rev A00 Page 39 of 46 Indicate the Start and Stop times for testing Select the Test type...
-
Page 40: Result
MPX100 e-Manual D07-00-022 Rev A00 Page 40 of 46 Select Profile Select the TX Start 5. Click "Save" Go back to top 6.5 Result Follows the same process as ReVeal MX, with one exception…... -
Page 41: Results Viewing And Printing
MPX100 e-Manual D07-00-022 Rev A00 Page 41 of 46 You do not need to "Connect". Simply go to the Result menu. 6.5.1 Result Viewing and Printing STEP ONE From the Home Menu, go to Result Go to Manage Results to view and print the results... - Page 42 MPX100 e-Manual D07-00-022 Rev A00 Page 42 of 46 STEP TWO View the results Select the results to view and press "Open" STEP THREE Print the results PDF printing/conversion example below:...
-
Page 43: Software
Go back to top 7.0 Software Select Software from the Home menu. The two main applications are described below. 7.1 Downloading New Software VeEX will upgrade the MPX100 software during the warranty period to meet your regular test requirements. Provided you are a... -
Page 44: Connecting A Unit
However the PC application can connect to any test set, provided that the IP address is a public IP address. For such applications, enter the unit’s IP address manually. To discover and connect to a MPX100 unit, click on "Connect" at the top of the screen. -
Page 45: Product Specifications
Replace the software and/or firmware which prove to be defective This is provided that the products that the customer elects to replace is returned to VeEX Inc by the customer along with proof of purchase within thirty (30) days of the request by the customer, freight prepaid. - Page 46 MPX100 e-Manual D07-00-022 Rev A00 Page 46 of 46 VeEX Inc, the Verification EXperts, is an innovative designer and manufacturer of test and measurement solutions addressing numerous technologies. Global presence through a worldwide distribution channel provides uncompromised product support. Visit us online at http://www.veexinc.com/...
Need help?
Do you have a question about the MPX100 and is the answer not in the manual?
Questions and answers