Wood-mizer LT15 Safety, Setup, Operation & Maintenance Manual
Hide thumbs
Also See for LT15:
- User manual (105 pages) ,
- Safety, setup, operation & maintenance manual (102 pages) ,
- Safety, operation, maintenance & parts manual (33 pages)
Table of Contents
Advertisement
Advertisement
Table of Contents

Related Manuals for Wood-mizer LT15


Summary of Contents for Wood-mizer LT15
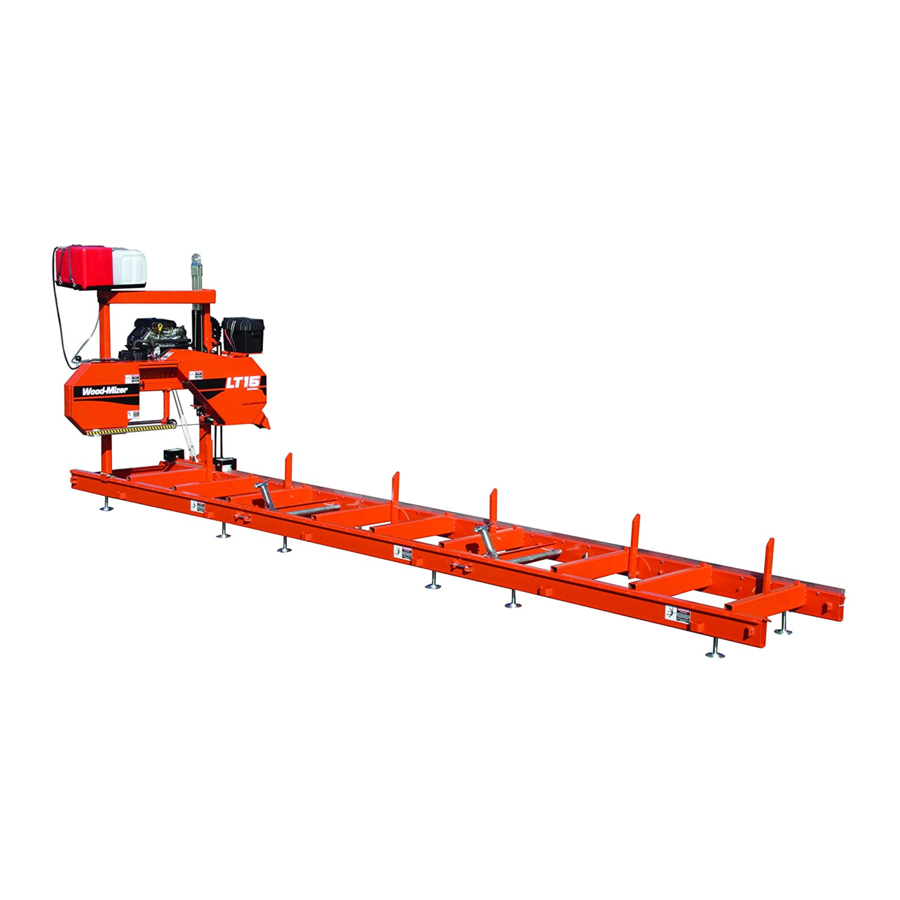
- Page 1 ® Wood-Mizer Sawmill Safety, Setup, Operation & Maintenance Manual LT15 rev. E8.13 LT15W rev. A1.14 Safety is our #1 concern! Read and understand all safety information and instructions before oper- ating, setting up or maintaining this machine. Form #798...
- Page 2 Active Patents assigned to Wood-Mizer, LLC Wood-Mizer, LLC has received patents that protect our inventions which are a result of a dedication to research, innovation, development, and design. Learn more at: woodmizer.com/patents ©2021 Wood-Mizer LLC Printed in the United States of America, all rights reserved. No part of this manual may be reproduced in any form by...
-
Page 3: Table Of Contents
Table of Contents Section-Page SECTION 1 INTRODUCTION About This Manual.................1-1 Getting Service ..................1-1 Specifications ..................1-1 Options and Accessories.................1-1 SECTION 2 GENERAL SAFETY Safety Symbols..................2-1 Safety Instructions ..................2-1 Electrical Lockout Procedures..............2-3 SECTION 3 SAWMILL ASSEMBLY Leg Assembly..................3-1 Bed Section Assembly................3-1 Clamp Assembly ..................3-2 Frame Leg Adjustment ................3-3 Saw Carriage Assembly .................3-3 Feed Rope Assembly................3-5... - Page 4 Table of Contents Section-Page SECTION 6 MAINTENANCE Wear Life....................6-1 Blade Guides ..................6-1 Sawdust Removal ..................6-1 Carriage Track, Wiper & Scrapers ............6-1 Vertical Mast Rails .................6-3 Miscellaneous ..................6-3 Blade Wheel Belts ..................6-3 Drive Belt Adjustment................6-3 Up/Down System..................6-4 6.10 Charging The Battery ................6-6 6.11 Maintenance chart ..................6-1 6.11...
- Page 5 Limited Product Warranty Wood-Mizer LLC (“Warrantor”), an Indiana corporation with its principal place of business at 8180 West Tenth Street, Indianapolis, IN 46214-2400 USA, warrants to the purchaser (“Purchaser”) that for the time periods specifically stated herein and subject to the terms, conditions and limitations stated herein, the equipment manufactured by the Warrantor will be free from defects in material and workmanship attributable to Warrantor so long as, during the warranty periods stated herein, the equipment is installed, operated and maintained in accordance with the instructions provided by Warrantor.
-
Page 6: Introduction
Options and Accessories Your Wood-Mizer product may have options that can be added to the machine or accessories available to purchase. Different power configurations are also available. Option: Your specific product can have accessories installed at the factory, or installed in the field. For example, a sawmill might have a debarker or power-feed option. -
Page 7: General Safety
Safety Instructions Do not use flammable fuels or liquids such as diesel OWNER/OPERATOR'S RESPONSIBILITY fuel. Use ONLY water and Wood-Mizer Lube Additive with the water lube accessory. The procedures listed in this manual may not include all ANSI, OSHA, or locally required safety procedures. It is the MILL SETUP owner/operator’s responsibility and not Wood-Mizer LLC... - Page 8 General Safety Observe ALL Safety Instructions Disengage the blade and shut off the sawmill engine DISPOSE OF WOOD BY-PRODUCTS PROPERLY before changing the blade. NOTICE Properly dispose of all wood by-products, WARNING! Avoid contact with any hot parts including sawdust, chips, and other debris, including (motors).
-
Page 9: Electrical Lockout Procedures
General Safety Electrical Lockout Procedures Electrical Lockout Procedures GENERAL The following simple lockout procedure is provided to assist RULES FOR USING LOCKOUT PROCEDURE owner/operators in developing their procedures so they meet the requirements of OSHA regulation 1910.147. When the The equipment shall be locked out to protect against acciden- energy isolating devices are not lockable, tagout may be tal or inadvertent operation when such operation could cause used, provided the owner/operator complies with the provi-... - Page 10 General Safety Electrical Lockout Procedures CAUTION! Return operating control(s) to neutral or "off" position after verifying the isolation of the equip- ment. The machine or equipment is now locked out. RESTORING EQUIPMENT TO SERVICE When the servicing or maintenance is completed and the machine or equipment is ready to return to normal operating condition, the following steps shall be taken.
-
Page 11: Sawmill Assembly
Sawmill Assembly Leg Assembly SECTION 3 SAWMILL ASSEMBLY NOTICE LT15 shipped after 5/12 only: The saw- mill is shipped properly secured to the pallet. Before starting sawmill assembly, remove the shipping brackets securing the sawmill to the pal- let. Also, remove the shipping bracket and the shipping bolt securing the saw head to the mast. -
Page 12: Clamp Assembly
Sawmill Assembly Clamp Assembly Insert the splice pins into the holes in the track rail and secure with two 3/8-16 x 1” hex head bolts. Thread bolts in end Splice holes to remove splice 3/8-16 x 1" Hex Head Bolt (2 150070B FIG. -
Page 13: Frame Leg Adjustment
Sawmill Assembly Frame Leg Adjustment Frame Leg Adjustment Use a 1 1/4” wrench to adjust each leg until the top of the leg is approxi- mately 1” (25mm) below the bed tube. See FIG. 3-6. 1" (25mm) Saw Carriage Assembly The saw carriage is equipped with two lock pins at the bottom of the mast Turn hex nut near the track rollers. - Page 14 Head Bolt 3/8" Flat Washer 150228-3 FIG. 3-9 LT15 WIDE HEAD ONLY 8. Assemble the retaining bracket to the idle side upright with two 3/8-16 x 3/4” hex head bolts and lock washers. WARNING! Do not operate the sawmill without the retaining bracket properly installed. The saw head may tip and fall from the sawmill resulting in possible injury or damage to the machine.
-
Page 15: Feed Rope Assembly
Sawmill Assembly Feed Rope Assembly Feed Rope Assembly 1. Install a feed rope mounting bracket at each end of the bed assembly using a 1/2-13 x 2 1/4” hex head bolt, spacer, flat washer and nylon lock nut. NOTICE Use the brackets so they are angled toward the end of the frames as shown. 1/2”... -
Page 16: Battery Assembly
Sawmill Assembly Battery Assembly 7. Loop the rope counterclockwise around the feed crank spool and route back down to the lower feed pulley. 8. Loop the feed rope around the crank spool twice.See FIG. 3-13. TOP VIEW Lower Feed Pulley Crank Spool 150125-18B FIG. -
Page 17: Sawdust Deflector And Push Handle Assembly
Sawmill Assembly Sawdust Deflector and Push Handle Assembly 3. Secure the battery box assembly with three 3/8-16 x 1 hex head bolts. See FIG. 3-16. Engine Harness Battery Box Assembly 150210-11 FIG. 3-16 4. Locate the wire harness connected to the engine starter. Route the harness between the engine and the saw head, toward the battery box. -
Page 18: Fuel Tank Installation
Sawmill Assembly Fuel Tank Installation Fuel Tank Installation 3/8” SAE Flat 1. Install the provided fuel tank assembly to the saw head mast Washer (2) using the provided fasteners. See FIG. 8-19. 3/8-16 x 3” Hex Head Bolt (2) 3/8-16 Hex Nylon Lock Fuel Tank Nut (2) -
Page 19: Sawmill Setup
Sawmill Setup Sawmill Setup SECTION 4 SAWMILL SETUP Sawmill Setup NOTE: The following setup procedure should be performed whenever the sawmill is moved or reassembled. If sawing problems occur and misalignment is suspected, See Section SECTION 8 for complete alignment instructions. Section SECTION 8 for sawmill assembly instructions. -
Page 20: Carriage Side Adjustment
Sawmill Setup Carriage Side Adjustment 4. Adjust as necessary so the space is 1/32” - 1/16” (0.8 - 1.6mm). See FIG. 4-2. Loosen Bearing Nut And Adjust Space from Mast to 1/32" - 1/16" (0.8 - 1.6mm) 150125-10 Turn Tilt Adjustment Nut Clockwise to raise outside of saw head;... -
Page 21: Carriage Locking Pins
Sawmill Setup Carriage Locking Pins Carriage Locking Pins Prior to mill operation, make sure both lock pins are in the operation position (lock pins seated in lower notches of pin rest brackets). To reposition pin, pull pin outward, rotate as desired, and release into proper position. See FiIGs. 4-4 and 4-5. Operation Lock 150256-03... -
Page 22: Tensioning The Blade
Sawmill Setup Tensioning The Blade 5. Position 1 1/4” wide blades on the wheels so the gullet is 1/8" (3.0 mm) out from the edge of the wheel. 6. Close the blade housing covers. 7. Use the tension handle to tension the blade correctly. Tensioning The Blade The blade tensioner is factory-set so proper blade tension is achieved when the rubber spring is compressed 3/16”... -
Page 23: Starting The Engine
Sawmill Setup Starting The Engine 6. Position 1 1/4” wide blades so the gullet is 1/8" (3.0 mm) out from the edge of the blade wheel (±1/32 [.75 mm]). See FIG. 4-7. 150060 1/8” (3.0 mm) ± 1/32” (0.75 mm) 1 1/4”... -
Page 24: Sawmill Operation
NOTE: Logs also may be loaded onto the mill with a tractor or other equipment specifically designed for that purpose. *.Also available as part of the LT15OP, Optional Package Kit for the LT15. **.Also available as part of the LT15OP, Optional Package Kit for the LT15. -
Page 25: Up/Down Operation
(100mm) (2” (50mm) for gas engine options only) . See FIG. 5-3. 5. Release the handle lock to lock the saw head in place. *.Also available as part of the LT15OP, Optional Package Kit for the LT15. Sawmill Operation WM doc 2/12/21... -
Page 26: Blade Guide Arm Operation
Sawmill Operation Blade Guide Arm Operation 6. Use the pointer and the round up/down blade height scale for quick reference when cutting. See FIG. 5-4. Lock Release Turn crank clockwise to lower saw head; counterclockwise to raise saw head Pointer 150210-3 FIG. -
Page 27: Feed Operation
Sawmill Operation Feed Operation Feed Operation 1. Use the feed crank handle to move the saw carriage forward. See FIG. 5-6. 2. Squeeze the engagement lever and rotate the feed crank clockwise. Turn crank clockwise for forward feed; counterclockwise to return carriage Engagement Lever 150125-19C FIG. -
Page 28: Cutting The Log
Sawmill Operation Cutting The Log 4. Ensure the blade housing and pulley covers are in place and secure before starting the engine or motor. Use the rubber latches to fasten the blade housing covers shut. The clutch lever is located next to the engine. See FIG. 5-7. 5. -
Page 29: Blade Height Scale
Sawmill Operation Blade Height Scale 5. Loosen the clamps and turn the edged boards over to edge the other side. 6. Repeat steps 2-4. 7. Loosen the clamps and remove the boards that have good clean edges on both sides. Clamp the remaining flitches and repeat steps 2-5. - Page 30 Wipe the blade dry with a rag before storing or sharpening. For further lubrication benefits, add one 12oz. (0.35L) bottle of Wood-Mizer Lube Additive to 5 gallons (18.9 liters) of water. Wood-Mizer Lube Additive enables some difficult timbers to be cut by significantly reducing resin buildup on the blade, heat buildup, wavy cuts, and blade noise.
-
Page 31: 5.10 Loading & Transporting The Sawmill
Loading & Transporting the Sawmill WARNING! Use ONLY water and Wood-Mizer Lube Additive with the water lube accessory. DO NOT use flammable fuels or liquids such as diesel fuel. If the blade needs solvents to clean, remove it and wipe it with a rag. - Page 32 Sawmill Operation Loading & Transporting the Sawmill Lock Release Turn crank clockwise to lower saw head; counterclockwise to raise saw head Pointer 150210-3 FIG. 5-12 CAUTION! Adjust the saw head up just far enough so it will clear the sides of your truck bed when loaded. NOTE: For most pickup trucks, a minimum of 18”...
- Page 33 Sawmill Operation Loading & Transporting the Sawmill CAUTION! Be sure the lock pin engages the hole in the bed frame to secure the saw carriage in place. The other lock pin remains in the operation position. 4. Remove the tailgate from your truck to eliminate the possibility of damage and/or injury, 5.
-
Page 34: Maintenance
Maintenance Wear Life SECTION 6 MAINTENANCE This section lists the maintenance procedures that need to be performed. See the Maintenance chart located after this section for a complete list of maintenance procedures and intervals. Keep a log of machine maintenance by recording in the machine hours and the date you perform each procedure. Refer to option and engine manuals for other maintenance procedures. - Page 35 Track roller housing Middle track cover Track roller housing Track wipers Idle track wipers Rev. A1.00 - E7.03 150210-22B FIG. 6-1 LT15 Track roller housing Middle track cover Track wipers Track roller housing FIG. 6-2 LT15 WIDE ONLY Maintenance WM doc 2/12/21...
-
Page 36: Vertical Mast Rails
See the Table 6-2 below for drive belt tension specifications for your model sawmill. Measure the belt tension with a gauge. NOTE: Wood-Mizer offers a belt tension gauge (Part No. 016309) that will let you accurately measure the belt tension. -
Page 37: Up/Down System
Maintenance Up/Down System ADJUST THE DRIVE BELT TENSION 1. Loosen the drive belt jam and hex nuts. Turn the jam nut counterclockwise (as viewed from the top) to tighten the belt. Belt Tension Gauge Throttle Linkage Adjustment After 4/15 Turn jam nut clockwise to loosen drive belt 1/2“... - Page 38 Maintenance Up/Down System ADJUST THE UP/DOWN CHAIN TENSION AS NEEDED. 1. Measure chain tension with the head all the way to the top of the vertical mast. WARNING! Always secure the saw head with a chain with at least 1900 lbs. working load capacity before adjusting the up/down chain.
-
Page 39: 6.10 Charging The Battery
Maintenance Charging The Battery WARNING! Do not disassemble the gas spring cylinders; the gas spring cylinders are pressurized. 4. Lift the top assist housing to access the gas spring cylinders. The cylin- ders can be unthreaded from the bottom mounts without removing the bot- tom housing from the mast. - Page 40 Maintenance Charging The Battery EMERGENCY TREATMENT FOR CONTACT WITH BATTERY COMPONENTS (LEAD/SULFURIC ACID) per SDS (Safety Data Sheet) INGESTION Sulfuric Acid: Administer large amounts of water. Do NOT induce vomiting or aspiration into the lungs may occur and can cause permanent injury or death;...
-
Page 41: 6.11 Maintenance Chart
Maintenance chart 6.11 Maintenance chart MAINTENANCE LOG MANUAL MAINTENANCE REFERENCE INTERVAL (Check Engine And Option Manuals for additional mainte- nance procedures) Clean sawdust from ,battery box lid & track cover See Section 5.3 8 hours Clean and lubricate top/bottom track See Section 5.4 8 hours Check blade guide roller wear... -
Page 42: Troubleshooting Guide
Troubleshooting Guide Sawing Problems SECTION 7 TROUBLESHOOTING GUIDE Sawing Problems WARNING! Before performing service near moving parts such as blades, pulleys, motors, belts and chains, first turn the key switch to the OFF (#0) position and remove the key. PROBLEM CAUSE SOLUTION Blades Dull Quickly... -
Page 43: Sawmill Alignment
Sawmill Alignment Routine Alignment Procedure SECTION 8 SAWMILL ALIGNMENT Two alignment procedures are available to realign the sawmill. The Routine Alignment instructions should be performed as necessary to solve sawing problems not related to blade performance. The Complete Alignment procedure should be per- formed approximately every 1500 hours of operation (sooner if you regularly transport the sawmill over rough terrain). - Page 44 Sawmill Alignment Blade Guide Arm Alignment 7. Adjust as necessary so the space is 1/32” - 1/16” (0.8 - 1.6mm). Loosen Bearing Nut And Adjust Space from Mast to 1/32" - 1/16" (0.8 - 1.6mm) 150125-10 Turn Tilt Adjustment Nut Clockwise to raise outside of saw head;...
- Page 45 Sawmill Alignment Blade Guide Vertical Tilt Alignment 7. With the blade guide arm still all the way in toward the other blade guide, tighten all the side screws until they touch the arm. See FIG. 8-3. 8. Back the screws off 1/4 turn and tighten the jam nuts. Blade Guide Arm Parallel to Blade Adjust side screws to 150036B...
- Page 46 Sawmill Alignment Blade Guide Horizontal Tilt Adjustment 6. If the measurement from the tool to the bed rail is not equal within 1/32" (.75 mm), adjust the vertical tilt of the outer blade guide roller. 7. Loosen one set screw at the side of the blade guide assembly. Top Vertical Tilt See FIG.
- Page 47 Sawmill Alignment Side Support Alignment 1. Measure the distance between the flange on the outer blade guide roller to the back edge of the blade. This distance should measure 1/8" (3.0 mm). Adjust the roller back or forward if necessary. 2.
-
Page 48: Complete Alignment Procedure
Sawmill Alignment Blade Height Scale Adjustment Blade Height Scale Adjustment After the entire sawmill has been aligned and all adjustments made, check that the blade height scale indicates the true distance from the blade to the bed rails. 1. Move the saw carriage so the blade is positioned directly above one of the bed rails. - Page 49 Sawmill Alignment Saw Head Tilt “Saw Head Tilt” on page 1 Saw Head Tilt “Saw Head Tilt” on page 1 Blade Wheel Alignment The blade wheels should be adjusted so they are level in the vertical and horizontal planes. If the blade wheels are tilted up or down, the blade will want to travel in the tilted direction.
- Page 50 Sawmill Alignment Blade Wheel Alignment 11. Measure from the tool to the bed rail at both ends of the tool. If the measurements at the front and rear ends of the tool differ by more than 1/16" (1.5 mm), adjust the vertical tilt of the idle-side blade wheel.
- Page 51 Blade Guide Installation Each Wood-Mizer sawmill has two blade guide assemblies that help the blade maintain a straight cut. The two blade guide assemblies are positioned on the saw head to guide the blade on each side of the material being cut.
- Page 52 Sawmill Alignment Blade Guide Arm Alignment “Blade Guide Arm Alignment” on page 2 NOTE: Before installing the blade guide assemblies, Top Vertical remove the blade guide adjusting screws and apply a Adjustment Jam Nut Tilt Adjustment lubricating oil such as 10W30 or Dexron III to each Screws (4) screw.
Need help?
Do you have a question about the LT15 and is the answer not in the manual?
Questions and answers