Table of Contents
Advertisement
Advertisement
Table of Contents

Related Manuals for Garmin DESCENT MK1


Summary of Contents for Garmin DESCENT MK1
- Page 1 DESCENT ™ Owner’s Manual...
- Page 2 © 2017 Garmin Ltd. or its subsidiaries All rights reserved. Under the copyright laws, this manual may not be copied, in whole or in part, without the written consent of Garmin. Garmin reserves the right to change or improve its products and to make changes in the content of this manual without obligation to notify any person or organization of such changes or improvements. Go to www.garmin.com...
-
Page 3: Table Of Contents
Pairing Your Smartphone with Your Stopping an Activity......22 Device............3 Adding or Removing a Favorite Product Updates........4 Activity........... 23 Setting Up Garmin Express....4 Creating a Custom Activity....23 Indoor Activities........23 Diving..........5 Calibrating the Treadmill Distance.. 24 Dive Warnings......... 5 Recording a Strength Training Dive Modes..........6... - Page 4 Garmin Connect........33 Notifications........43 Updating the Software Using the Detecting Performance Garmin Connect App......33 Measurements Automatically..43 Updating the Software Using Garmin Syncing Activities and Performance Express..........34 Measurements........43 Using Garmin Connect on Your Training Status........43 Computer........
- Page 5 Marking and Starting Navigation to a Turning Off Activity Tracking..54 Man Overboard Location...... 63 Workouts..........54 Navigating with Sight 'N Go....63 Following a Workout From Garmin Navigating to Your Starting Point During Connect..........55 an Activity..........63 Starting a Workout......55 Navigating to the Starting Point of a About the Training Calendar....
- Page 6 Controlling a VIRB Action Camera During an Activity......77 Device Information......86 Using the Stress Level Widget..77 Customizing the Controls Menu..77 Descent Mk1 Specifications....86 Watch Face Settings......77 Battery Information......86 Customizing the Watch Face... 78 Data Management........ 86 Sensors Settings........
- Page 7 My daily step count does not appear..........91 My step count does not seem accurate..........91 The step counts on my device and my Garmin Connect account don't match..........91 The floors climbed amount does not seem accurate........92 My intensity minutes are flashing..92 Getting More Information.....
-
Page 9: Introduction
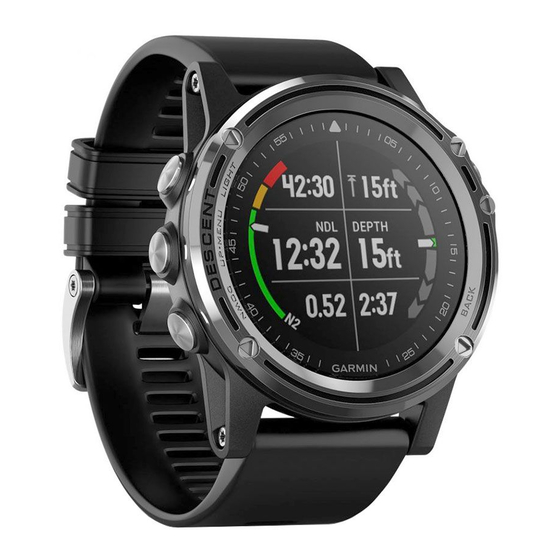
Introduction WARNING See the Important Safety and Product Information guide in the product box for product warnings and other important information. Always consult your physician before you begin or modify any exercise program. Device Overview Select to turn the backlight on and off. Hold to view the controls menu. -
Page 10: Viewing The Controls Menu
Viewing the Controls Menu The controls menu contains options, such as turning on do not disturb mode, locking the keys, and turning the device off. NOTE: You can add, reorder, and remove the options in the controls menu (Customizing the Controls Menu, page 77). -
Page 11: Charging The Device
4 Select an option to add your device to your Garmin Connect account: • If this is the first time you are pairing a device with the Garmin Connect app, follow the on-screen instructions. • If you already paired another device with the Garmin Connect app, from the menu, select Garmin Devices >... -
Page 12: Product Updates
Product Updates On your computer, install Garmin Express (www.garmin.com/express). On your smartphone, install the Garmin ™ Connect app. This provides easy access to these services for Garmin ® devices: • Software updates • Map updates • Course updates • Data uploads to Garmin Connect •... -
Page 13: Diving
Diving Dive Warnings WARNING • The diving features of this device are for use by certified divers only. This device should not be used as a sole dive computer. Failure to input the appropriate dive-related information into the device can lead to serious personal injury or death. -
Page 14: Dive Modes
Dive Modes The Descent Mk1 device supports six dive modes. Each dive mode has four phases: dive pre-check, surface display, in-dive, and post-dive. Single-Gas: This mode allows you to dive with a single gas blend. You can set up to 11 additional gases as backup gases. -
Page 15: Dive Setup
HRM-Tri device, that stores heart rate ™ ™ data with the dive. You can view chest heart rate monitor data in the Garmin Dive app after you complete ™ the dive. Double Tap to Scroll: Allows you to double tap the device to scroll through the dive data screens. -
Page 16: Setting Up Your Breathing Gases
Setting Up Your Breathing Gases You can enter up to twelve gases for each gas dive mode. Decompression calculations include your decompression gases, but do not include your backup gases. 1 Hold MENU. 2 Select Dive Setup > Gases. 3 Select a dive mode. 4 Select the first gas in the list. -
Page 17: Setting Ccr Setpoints
Setting CCR Setpoints You can configure the high and low partial pressure of oxygen (PO2) setpoints for closed-circuit rebreather (CCR) dives. 1 Hold MENU. 2 Select Dive Setup > CCR Setpoints. 3 Select an option: • To configure the lower PO2 setpoint, select Low Setpoint. •... -
Page 18: Single-Gas, Multi-Gas, And Ccr Data Screens
Single-Gas, Multi-Gas, and CCR Data Screens Primary data screen: Displays the main dive data, including your breathing gas and rate of ascent or decent. Your nitrogen (N2) and helium (He) tissue load level. Green: 0 to 79% tissue load. Yellow: 80 to 99% tissue load. Red: 100% or greater tissue load. - Page 19 Blue: Zone 2. Green: Zone 3. Orange: Zone 4. Red: Zone 5. Your central nervous system (CNS) oxygen toxicity level. Green: 0 to 79% CNS oxygen toxicity. Yellow: 80 to 99% CNS oxygen toxicity. Red: 100% or greater CNS oxygen toxicity. Diving...
-
Page 20: Gauge Data Screens
Gauge Data Screens Dive stopwatch: Displays the bottom time stopwatch; current, maximum, and average depth; and rate of ascent or decent (Using the Dive Stopwatch, page 15). Dive compass: Allows you to view the compass and set a directional heading to aid with underwater navigation (Navigating with the Dive Compass, page 14). -
Page 21: Apnea And Apnea Hunt Data Screens
Apnea and Apnea Hunt Data Screens Surface interval screen: Displays the current surface interval time, as well as the elapsed time, maximum depth, and temperature for your last apnea dive. Time of day screen: Displays the time of day and your heart rate data. Map: Displays your current location on the map (Diving with the Map, page 16). -
Page 22: Starting A Dive
Starting a Dive 1 From the watch face, press 2 Select a dive mode (Dive Modes, page 3 If necessary, press DOWN to edit the dive settings, such as the gases, water type, and alerts (Dive Setup, page 4 Wait with your wrist out of the water until the device acquires GPS signals and the status bar turns green (optional). -
Page 23: Using The Dive Stopwatch
Using the Dive Stopwatch TIP: You can add a simplified stopwatch screen to any of the gas dive modes (Customizing the Data Screens, page 69). 1 Start a Gauge dive. 2 Scroll to the stopwatch screen. 3 Press , and select Reset Avg. Depth to set the average depth to your current depth. 4 Press , and select Start Stopwatch. -
Page 24: Performing A Safety Or Decompression Stop
You can view your dive entry and exit locations on the map during apnea surface intervals. TIP: You can view map data for all dive modes in the dive log widget and in the Garmin Dive app. 1 During an apnea dive activity, scroll to the map. -
Page 25: Viewing The Dive Log Widget
Viewing the Dive Log Widget The widget displays summaries of your recently recorded dives. 1 From the surface interval widget, press UP. 2 Press to view more information about a dive. 3 Select a dive. 4 Select an option: • To view additional information about the activity, select Details. •... -
Page 26: Creating A Decompression Plan
Creating a Decompression Plan You can create open-circuit decompression plans and save them for future dives. 1 Press 2 Select Plan Dive > Deco Plans > Add New. 3 Enter a name for the decompression plan. 4 Select an option: •... -
Page 27: Tips For Wearing The Device With An Exposure Suit
Tips for Wearing the Device with an Exposure Suit • Use the extra long silicone diving band to wear the device over a thick exposure suit. • Use the extension on the titanium watch band to increase the length of the band. •... -
Page 28: Dive Alerts
The current depth and stop depth flash safety stop. safety stop ceiling. yellow. The device has invalid or missing depth Do not dive. Failed to read Do not start a dive. Call Garmin sensor data before you start a dive depth sensor. Product Support. activity. Diving... -
Page 29: Dive Terminology
The device has invalid or missing depth Use a backup dive computer or dive Failed to read depth sensor data after you have started a dive plan and end your dive. Call Garmin sensor. End your dive now. activity. Product Support. -
Page 30: Activities And Apps
Activities and Apps Your device can be used for indoor, outdoor, athletic, and fitness activities. When you start an activity, the device displays and records sensor data. You can save activities and share them with the Garmin Connect community. You can also add Connect IQ ™... -
Page 31: Adding Or Removing A Favorite Activity
Adding or Removing a Favorite Activity The list of your favorite activities appears when you press from the watch face, and it provides quick access to the activities you use most. The first time you press to start an activity, the device prompts you to select your favorite activities. -
Page 32: Calibrating The Treadmill Distance
1 Start a treadmill activity (Starting an Activity, page 22). 2 Run on the treadmill until your Descent Mk1 device records at least 1.5 km (1 mi.). 3 After you complete your run, press 4 Select an option: • To calibrate the treadmill distance the first time, select Save. -
Page 33: Using The Metronome
Using the Metronome The metronome feature plays tones at a steady rhythm to help you improve your performance by training at a faster, slower, or more consistent cadence. NOTE: This feature is not available for all activities. 1 From the watch face, select 2 Select an activity. -
Page 34: Tips For Triathlon Training Or Using Multisport Activities
Tips for Triathlon Training or Using Multisport Activities • Select to start your first activity. • Select BACK to transition to the next activity. If transitions are turned on, the transition time is recorded separately from the activity times. • If necessary, select BACK to start the next activity. •... -
Page 35: Resting During Pool Swimming
Resting During Pool Swimming The default rest screen displays two rest timers. It also displays time and distance for the last completed interval. NOTE: Swim data is not recorded during a rest. 1 During your swim activity, select BACK to start a rest. The display reverses to white text on a black background, and the rest screen appears. -
Page 36: Hole Information
Hole Information Because pin locations change, the device calculates the distance to the front, middle, and back of the green, but not the actual pin location. Current hole number Distance to the back of the green Distance to the middle of the green Distance to the front of the green Par for the hole Next hole... -
Page 37: Viewing Hazards
Viewing Hazards You can view distances to hazards along the fairway for par 4 and 5 holes. Hazards that affect shot selection are displayed individually or in groups to help you determine the distance to layup or carry. 1 From the hole information screen, press 2 Select Hazards. -
Page 38: Keeping Score
Your device is compatible with the TruSwing sensor. You can use the TruSwing app on your watch to view swing metrics recorded from your TruSwing sensor. See the owner's manual for your TruSwing sensor for more information www.garmin.com/manuals/truswing. Using the Golf Odometer You can use the odometer to record the time, distance, and steps traveled. -
Page 39: Connected Features
Phone notifications: Displays phone notifications and messages on your Descent device. LiveTrack: Allows friends and family to follow your races and training activities in real time. You can invite followers using email or social media, allowing them to view your live data on a Garmin Connect tracking page. -
Page 40: Replying To A Text Message
Refer to the owner's manual for your mobile device to turn off Bluetooth technology on your mobile device. Turning On and Off Smartphone Connection Alerts You can set the Descent Mk1 device to alert you when your paired smartphone connects and disconnects using Bluetooth wireless technology. -
Page 41: Garmin Dive App
Garmin Dive App The Garmin Dive app allows you to upload your dive logs from your compatible Garmin device. You can add more detailed information about your dives, including environmental conditions, photos, notes, and dive buddies. You can use the map to browse for new dive locations, and view the location details and photos shared by other users. -
Page 42: Updating The Software Using Garmin Express
2 Pair your smartphone with the Descent Mk1 device (Pairing Your Smartphone with Your Device, page 3 On the Descent Mk1 device, hold MENU, and select Settings > GroupTrack > Show on Map to enable viewing connections on the map screen. -
Page 43: Tips For Grouptrack Sessions
Connect IQ Features You can add Connect IQ features to your watch from Garmin and other providers using the Connect IQ app. You can customize your device with watch faces, data fields, widgets, and device apps. -
Page 44: Downloading Connect Iq Features Using Your Computer
Heart Rate Features The Descent Mk1 device has a wrist-based heart rate monitor and is also compatible with chest heart rate monitors (sold separately). You can view heart rate data on the heart rate widget. If both wrist-based heart rate and chest heart rate data are available when you start an activity, your device uses the chest heart rate data. -
Page 45: Viewing The Heart Rate Widget
7 days. Broadcasting Heart Rate Data to Garmin Devices You can broadcast your heart rate data from your Descent Mk1 device and view it on paired Garmin devices. NOTE: Broadcasting heart rate data decreases battery life. -
Page 46: Setting An Abnormal Heart Rate Alert
2 Wet the electrodes on the back of the heart rate monitor to create a strong connection between your chest and the transmitter. 3 Wear the heart rate monitor with the Garmin logo facing right-side up. The loop and hook connection should be on your right side. -
Page 47: Tips For Erratic Heart Rate Data
Tips for Erratic Heart Rate Data If the heart rate data is erratic or does not appear, you can try these tips. • Reapply water to the electrodes and contact patches (if applicable). • Tighten the strap on your chest. •... -
Page 48: Training With Running Dynamics
(Pairing Your Wireless Sensors, page 83). If your Descent Mk1 was packaged with the accessory, the devices are already paired, and the Descent Mk1 is set to display running dynamics data screens. 1 Select an option: •... -
Page 49: Ground Contact Time Balance Data
Elite runners tend to have quick and balanced strides. You can watch the color gauge or data field during your run or view the summary on your Garmin Connect account after your run. As with the other running dynamics data, ground contact time balance is a quantitative measurement to help you learn about your running form. -
Page 50: Performance Measurements
HRV stress test: The HRV (heart rate variability) stress test requires a Garmin chest heart rate monitor. The device records your heart rate variability while standing still for 3 minutes. It provides your overall stress level. -
Page 51: Turning Off Performance Notifications
3 Select an option. Syncing Activities and Performance Measurements You can sync activities and performance measurements from other Garmin devices to your Descent Mk1 device using your Garmin Connect account. This allows your device to more accurately reflect your training status and fitness. -
Page 52: Tips For Getting Your Training Status
In simple terms, VO2 max. is an indication of athletic performance and should increase as your level of fitness improves. The Descent Mk1 device requires wrist-based heart rate or a compatible chest heart rate monitor to display your VO2 max. estimate. The device has separate VO2 max. -
Page 53: Getting Your Vo2 Max. Estimate For Running
(Pairing Your Wireless Sensors, page 83). If you are using a chest heart rate monitor, you must put it on and pair it with your device. If your Descent Mk1 device was packaged with a heart rate monitor, the devices are already paired. -
Page 54: Training Load
Training Load Training load is a measurement of your training volume over the last seven days. It is the sum of your excess post-exercise oxygen consumption (EPOC) measurements for the last seven days. The gauge indicates whether your current load is low, high, or within the optimal range to maintain or improve your fitness level. The optimal range is determined based on your individual fitness level and training history. -
Page 55: About Training Effect
About Training Effect Training Effect measures the impact of an activity on your aerobic and anaerobic fitness. Training Effect accumulates during the activity. As the activity progresses, the Training Effect value increases, telling you how the activity has improved your fitness. Training Effect is determined by your user profile information, heart rate, duration, and intensity of your activity. -
Page 56: Viewing Your Heart Rate Variability And Stress Level
(Pairing Your Wireless Sensors, page 83). If your Descent Mk1 device was packaged with a heart rate monitor, the devices are already paired. TIP: Garmin recommends that you measure your stress level at approximately the same time and under the same conditions every day. -
Page 57: Performing A Guided Test To Determine Your Lactate Threshold
Performing a Guided Test to Determine Your Lactate Threshold This feature requires a Garmin chest heart rate monitor. Before you can perform the guided test, you must put on a heart rate monitor and pair it with your device (Pairing Your Wireless Sensors, page 83). -
Page 58: Conducting An Ftp Test
Conducting an FTP Test Before you can conduct a test to determine your functional threshold power (FTP), you must pair a chest heart rate monitor and a power meter with your device (Pairing Your Wireless Sensors, page 83), and you must get your VO2 max. -
Page 59: Setting Your Heart Rate Zones
• Run often with the wrist or chest heart rate monitor. • Try a few heart rate training plans, available from your Garmin Connect account. • View your heart rate trends and time in zones using your Garmin Connect account. Training... -
Page 60: Heart Rate Zone Calculations
Your calories burned includes your base metabolism plus activity calories. The number of steps taken during the day appears on the steps widget. The step count is updated periodically. For more information about activity tracking and fitness metric accuracy, go to garmin.com/ataccuracy. Training... -
Page 61: Auto Goal
Your device creates a daily step goal automatically, based on your previous activity levels. As you move during the day, the device shows your progress toward your daily goal If you choose not to use the auto goal feature, you can set a personalized step goal on your Garmin Connect account. -
Page 62: Intensity Minutes
You can create workouts using Garmin Connect or select a training plan that has built-in workouts from Garmin Connect, and transfer them to your device. You can schedule workouts using Garmin Connect. You can plan workouts in advance and store them on your device. -
Page 63: Following A Workout From Garmin Connect
About the Training Calendar The training calendar on your device is an extension of the training calendar or schedule you set up in Garmin Connect. After you have added a few workouts to the Garmin Connect calendar, you can send them to your device. -
Page 64: Interval Workouts
You can resume the timer or end the interval workout. Segments You can send running or cycling segments from your Garmin Connect account to your device. After a segment is saved to your device, you can race a segment, trying to match or exceed your personal record or other participants who have raced the segment. -
Page 65: Strava™ Segments
You can download Strava segments to your Descent Mk1 device. Follow Strava segments to compare your performance with your past rides, friends, and pros who have ridden the same segment. To sign up for a Strava membership, go to the segments widget in your Garmin Connect account. For more information, go to www.strava.com. -
Page 66: Setting A Training Target
5 Select an option: • Select From History to select a previously recorded activity from your device. • Select Downloaded to select an activity you downloaded from your Garmin Connect account. 6 Select the activity. The Virtual Partner screen appears indicating your estimated finish time. -
Page 67: Restoring A Personal Record
Restoring a Personal Record You can set each personal record back to the one previously recorded. 1 Hold MENU. 2 Select History > Records. 3 Select a sport. 4 Select a record to restore. 5 Select Previous > Yes. NOTE: This does not delete any saved activities. Clearing a Personal Record 1 Hold MENU. -
Page 68: Starting The Countdown Timer
Starting the Countdown Timer 1 From the watch face, hold MENU. 2 Select Clock > Timer. 3 Enter the time. 4 If necessary, select Restart > On to automatically restart the timer after it expires. 5 If necessary, select Sounds, and select a type of notification. 6 Select Start Timer. -
Page 69: Syncing The Time With Gps
Syncing the Time with GPS Each time you turn on the device and acquire satellites, the device automatically detects your time zones and the current time of day. You can also manually sync the time with GPS when you change time zones, and to update for daylight saving time. -
Page 70: Navigating To A Point Of Interest
Navigating to a Point of Interest If the map data installed on your device includes points of interest, you can navigate to them. 1 From the watch face, select 2 Select an activity. 3 Hold MENU. 4 Select Navigation > Points of Interest, and select a category. A list of points of interest near your current location appears. -
Page 71: Marking And Starting Navigation To A Man Overboard Location
Marking and Starting Navigation to a Man Overboard Location You can save a man overboard (MOB) location, and automatically start navigation back to it. TIP: You can customize the hold function of the keys to access the MOB function (Customizing the Hot Keys, page 83). -
Page 72: Navigating To The Starting Point Of A Saved Activity
1 During an activity, hold MENU. 2 Select Stop Navigation. Your device comes preloaded with maps and can display several types of Garmin map data, including topographical contours and nearby points of interest. To purchase additional map data and view compatibility information, go to garmin.com/maps. -
Page 73: Saving Or Navigating To A Location On The Map
Saving or Navigating to a Location on the Map You can select any location on the map. You can save the location or start navigating to it. 1 From the map, hold MENU. 2 Select Pan/Zoom. Controls and crosshairs appear on the map. 3 Pan and zoom the map to center the location in the crosshairs. -
Page 74: Altimeter And Barometer
Altimeter and Barometer The device contains an internal altimeter and barometer. The device collects elevation and pressure data continuously, even in low-power mode. The altimeter displays your approximate elevation based on pressure changes. The barometer displays environmental pressure data based on the fixed elevation where the altimeter was most recently calibrated (Altimeter Settings, page 79). -
Page 75: Viewing Data Totals
Viewing Data Totals You can view the accumulated distance and time data saved to your device. 1 Hold MENU. 2 Select History > Totals. 3 If necessary, select an activity. 4 Select an option to view weekly or monthly totals. Using the Odometer The odometer automatically records the total distance traveled, elevation gained, and time in activities. -
Page 76: Customizing Your Device
Customizing Your Device Activities and App Settings These settings allow you to customize each preloaded activity app based on your needs. For example, you can customize data pages and enable alerts and training features. Not all settings are available for all activity types. Hold MENU, select Settings >... -
Page 77: Customizing The Data Screens
Customizing the Data Screens You can show, hide, and change the layout and content of data screens for each activity. 1 Hold MENU. 2 Select Settings > Activities & Apps. 3 Select the activity to customize. 4 Select the activity settings. 5 Select Data Screens. -
Page 78: Alerts
Alerts You can set alerts for each activity, which can help you to train toward specific goals, to increase your awareness of your environment, and to navigate to your destination. Some alerts are available only for specific activities. There are three types of alerts: event alerts, range alerts, and recurring alerts. Event alert: An event alert notifies you once. -
Page 79: Setting An Alert
Setting an Alert 1 Hold MENU. 2 Select Settings > Activities & Apps. 3 Select an activity. NOTE: This feature is not available for all activities. 4 Select the activity settings. 5 Select Alerts. 6 Select an option: • Select Add New to add a new alert for the activity. •... -
Page 80: Auto Lap
Auto Lap Marking Laps by Distance You can use Auto Lap to mark a lap at a specific distance automatically. This feature is helpful for comparing your performance over different parts of an activity (for example, every 1 mile or 5 kilometers). 1 Hold MENU. -
Page 81: Enabling Auto Climb
Enabling Auto Climb You can use the auto climb feature to detect elevation changes automatically. You can use it during activities such as climbing, hiking, running, or biking. 1 Hold MENU. 2 Select Settings > Activities & Apps. 3 Select an activity. NOTE: This feature is not available for all activities. -
Page 82: Power Save Timeout Settings
Power Save Timeout Settings The timeout settings affect how long your device stays in training mode, for example, when you are waiting for a race to start. Hold MENU, select Settings > Activities & Apps, select an activity, and select the activity settings. -
Page 83: Widgets
Widgets Your device comes preloaded with widgets that provide at-a-glance information. Some widgets require a Bluetooth connection to a compatible smartphone. Some widgets are not visible by default. You can add them to the widget loop manually. ABC: Displays combined altimeter, barometer, and compass information. Alternate time zones: Displays the current time of day in additional time zones. -
Page 84: Inreach Remote
Remote The inReach remote function allows you to control your inReach device using your Descent device. Go to buy.garmin.com to purchase a compatible inReach device. Using the inReach Remote Before you can use the inReach remote function, you must set the inReach widget to be shown in the widget... -
Page 85: Controlling A Virb Action Camera During An Activity
Controlling a VIRB Action Camera During an Activity Before you can use the VIRB remote function, you must enable the remote setting on your VIRB camera. See the VIRB Series Owner's Manual for more information. You must also set the VIRB widget to be shown in the widget loop (Customizing the Widget Loop, page 75). -
Page 86: Customizing The Watch Face
Customizing the Watch Face Before you can activate a Connect IQ watch face, you must install a watch face from the Connect IQ store (Connect IQ Features, page 35). You can customize the watch face information and appearance, or activate an installed Connect IQ watch face. 1 From the watch face, hold MENU. -
Page 87: Setting The North Reference
Setting the North Reference You can set the directional reference used in calculating heading information. 1 Hold MENU. 2 Select Settings > Sensors & Accessories > Compass > North Ref.. 3 Select an option: • To set geographic north as the heading reference, select True. •... -
Page 88: Map Settings
Map Settings You can customize how the map appears in the map app and data screens. Hold MENU, and select Settings > Map. Orientation: Sets the orientation of the map. The North Up option shows north at the top of the screen. The Track Up option shows your current direction of travel at the top of the screen. -
Page 89: Customizing Map Features
Customizing Map Features 1 Hold MENU. 2 Select Settings > Navigation > Data Screens. 3 Select an option: • Select Map to turn on or off the map. • Select Guide to turn on or off the guide screen that displays the compass bearing or course to follow while navigating. -
Page 90: System Settings
USB Mode: Sets the device to use mass storage mode or Garmin mode when connected to a computer. Restore Defaults: Allows you to reset user data and settings (Restoring All Default Settings, page 89). -
Page 91: Customizing The Hot Keys
Wireless Sensors Your device can be used with wireless ANT+ or Bluetooth sensors. For more information about compatibility and purchasing optional sensors, go to buy.garmin.com. Pairing Your Wireless Sensors The first time you connect a wireless sensor to your device using ANT+ or Bluetooth technology, you must pair the device and sensor. -
Page 92: Extended Display Mode
83). You can customize the optional data fields (Customizing the Data Screens, page 69). The Descent Mk1 device displays current adjustment values when the sensor is in adjustment mode. Situational Awareness Your Descent device can be used with the Varia Vision ™... -
Page 93: Calibrating Your Foot Pod Manually
Sensors, page 83). Manual calibration is recommended if you know your calibration factor. If you have calibrated a foot pod with another Garmin product, you may know your calibration factor. 1 Hold MENU. 2 Select Settings > Sensors & Accessories. -
Page 94: Device Information
® ® ® The device withstands pressure equivalent to a depth of 100 m. For more information, go to www.garmin.com/waterrating. Designed to comply with CSN EN 13319. Aside from normal wear and tear, performance is not affected by aging. Device Information... -
Page 95: Disconnecting The Usb Cable
If you do not know the purpose of a file, do not delete it. Your device memory contains important system files that should not be deleted. 1 Open the Garmin drive or volume. 2 If necessary, open a folder or volume. -
Page 96: Changing The Quickfit Bands
3 Scroll down to the second to last item in the list, and select 4 Select 5 Select your language. Is my smartphone compatible with my device? The Descent Mk1 device is compatible with smartphones using Bluetooth technology. Go to www.garmin.com/ble for compatibility information. -
Page 97: My Phone Will Not Connect To The Device
• Enable Bluetooth technology on your smartphone. • Update the Garmin Dive app to the latest version. • Remove your device from the Garmin Dive app and the Bluetooth settings on your smartphone to retry the pairing process. • If you bought a new smartphone, remove your device from the Garmin Dive app on the smartphone you intend to stop using. -
Page 98: Resetting The Surface Pressure
◦ Sync your device to the Garmin Dive app using your Bluetooth enabled smartphone. ◦ Connect your device to your Garmin account using a Wi‑Fi wireless network. While connected to your Garmin account, the device downloads several days of satellite data, allowing it to quickly locate satellite signals. -
Page 99: Maximizing The Battery Life
(Manually Syncing Data with Garmin Connect, page 34). 2 Wait while the device syncs your data. Syncing can take several minutes. NOTE: Refreshing the Garmin Connect app or the Garmin Connect application does not sync your data or update your step count. Troubleshooting... -
Page 100: The Floors Climbed Amount Does Not Seem Accurate
You can find more information about this product on the Garmin website. • Go to support.garmin.com for additional manuals, articles, and software updates. • Go to buy.garmin.com, or contact your Garmin dealer for information about optional accessories and replacement parts. Troubleshooting... -
Page 101: Appendix
Appendix Data Fields %FTP: The current power output as a percentage of functional threshold power. %HRR: The percentage of heart rate reserve (maximum heart rate minus resting heart rate). 10s Avg. Power: The 10-second moving average of power output. 10s Avg Balance: The 10-second moving average of the left/right power balance. 24-Hour Max.: The maximum temperature recorded in the last 24 hours from a compatible temperature sensor. - Page 102 Avg Dist Per Stk: Swimming. The average distance traveled per stroke during the current activity. Avg Dist Per Stk: Paddle sports. The average distance traveled per stroke during the current activity. Avg GCT: The average amount of ground contact time for the current activity. Avg HR %Max.: The average percentage of maximum heart rate for the current activity.
- Page 103 Glide Ratio Dest.: The glide ratio required to descend from your current position to the destination elevation. You must be navigating for this data to appear. GPS: The strength of the GPS satellite signal. GPS Elevation: The altitude of your current location using GPS. GPS Heading: The direction you are moving based on GPS.
- Page 104 Lap Descent: The vertical distance of descent for the current lap. Lap Distance: The distance traveled for the current lap. Lap Dist Per Stk: Swimming. The average distance traveled per stroke during the current lap. Lap Dist Per Stk: Paddle sports. The average distance traveled per stroke during the current lap. Lap GCT: The average amount of ground contact time for the current lap.
- Page 105 Left PPP: The current power phase peak angle for the left leg. Power phase peak is the angle range over which the rider produces the peak portion of the driving force. Lengths: The number of pool lengths completed during the current activity. LL 500m Pace: The average rowing pace per 500 meters for the last lap.
- Page 106 Strokes: Swimming. The total number of strokes for the current activity. Strokes: Paddle sports. The total number of strokes for the current activity. Sunrise: The time of sunrise based on your GPS position. Sunset: The time of sunset based on your GPS position. Temperature: The temperature of the air.
-
Page 107: Vo2 Max. Standard Ratings
VO2 Max. Standard Ratings These tables include standardized classifications for VO2 max. estimates by age and gender. Males Percentile 20–29 30–39 40–49 50–59 60–69 70–79 Superior 55.4 52.5 48.9 45.7 42.1 Excellent 51.1 48.3 46.4 43.4 39.5 36.7 Good 45.4 42.4 39.2 35.5... -
Page 108: Wheel Size And Circumference
Wheel Size and Circumference Your speed sensor automatically detects your wheel size. If necessary, you can manually enter your wheel circumference in the speed sensor settings. The tire size is marked on both sides of the tire. This is not a comprehensive list. You can also measure the circumference of your wheel or use one of the calculators available on the internet. -
Page 109: Symbol Definitions
Tire Size Wheel Circumference (mm) 27 × 1-1/4 2161 27 × 1-3/8 2169 29 x 2.1 2288 29 x 2.2 2298 29 x 2.3 2326 650 x 20C 1938 650 x 23C 1944 650 × 35A 2090 650 × 38B 2105 650 ×... -
Page 110: Index
25 phone calls 31 fitness 47 favorites 23 text messages 32 foot pod 84, 85 saving 22 starting 22 activity tracking 52–54 odometer 30, 67 Garmin Connect 3, 31, 33–35, 54, 55 alarms 59, 70 storing data 34 alerts 60, 70–72, 81 Garmin Express 4, 35 pairing heart rate 38 updating software 4 ANT+ sensors 37 altimeter 66, 79... - Page 111 target 58 tempe 85, 90 temperature 85, 90 text messages 32 time alerts 71 settings 82 zones and formats 82 time zones 61 timer 24, 66 countdown 60 tones 25, 60 TracBack 22, 63, 64 tracks 61 training 31, 56, 58 plans 54, 55 Training Effect 43, 47 training load 46 training status 43, 44 treadmill 24 triathlon training 26 troubleshooting 20, 36, 39, 41, 88–92 UltraTrac 73 unit...
- Page 112 June 2021 GUID-A642345F-528F-4D38-9458-B43A025FA972 v4...
Need help?
Do you have a question about the DESCENT MK1 and is the answer not in the manual?
Questions and answers