Charge Amps Amp Guard Installation Manual
Hide thumbs
Also See for Amp Guard:
- Quickmanual installation (57 pages) ,
- Quick manual (56 pages) ,
- Installation manual (31 pages)
Table of Contents
Advertisement
Quick Links
Advertisement
Table of Contents

Related Manuals for Charge Amps Amp Guard


Summary of Contents for Charge Amps Amp Guard
- Page 1 Charge Amps Amp Guard Installation Manual...
-
Page 2: Table Of Contents
6.5. Create an organisation ................12 6.6. Add an EV charger ................... 13 6.7. Settings ..................... 13 6.8. Add the Charge Amps Amp Guard ............13 6.9. Create load balancing................14 6.10. Import charging boxes ................14 6.11. Activate load balancing ................14 7. - Page 3 Visit www.chargeamps.com for the latest document releases. © Copyright Charge Amps AB 2022. All rights reserved. Copying, amending and translating are strictly forbidden without the prior written approval of Charge Amps AB. © Copyright Charge Amps AB Charge Amps chargeamps.com...
-
Page 4: Safety
Do not immerse the product in water, subject it to physical misuse or insert • foreign objects into any part of the product. Never attempt to dismantle the product in any way. • © Copyright Charge Amps AB Charge Amps chargeamps.com All rights reserved. Frösundaleden 2B Org. -
Page 5: Technical Data
Sensor cable length Must not be tampered with, otherwise measurement accuracy may deteriorate. Max. diameter of measuring object 400 A: 34 mm 100 A: 13 mm © Copyright Charge Amps AB Charge Amps chargeamps.com All rights reserved. Frösundaleden 2B Org. No. 556897-7192 Doc. -
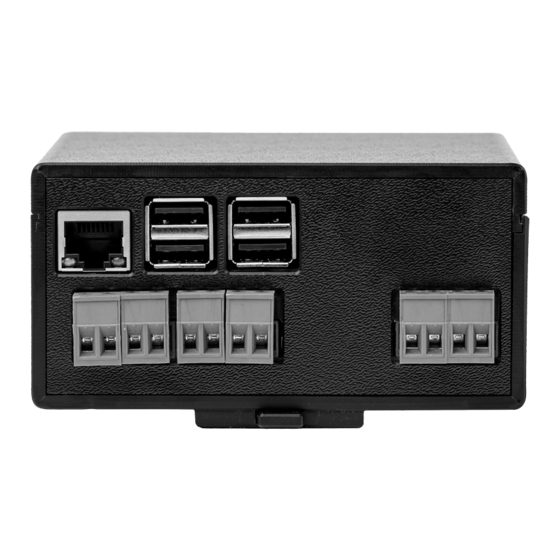
Page 6: Product Overview
• 4.2. Internet access The Charge Amps Amp Guard must be connected to the internet to supply data to the load balancer. The load balancer communicates with the charging station(s). The customer must provide an internet connection via a network cable (LAN) or Wi-Fi (2.4 GHz). -
Page 7: Installation
The Wi-Fi password may contain a maximum of 30 ASCII characters. • 5. Installation Install the Charge Amps Amp Guard directly after the main switch of the building, to allow monitoring of all power usage. For one-phase systems, L2 and L3 are not used. -
Page 8: Installation
Each phase must be connected to the correct terminal connector to ensure that current measurement and load balancing function correctly. The mains are used to power the Charge Amps Amp Guard and are used to measure voltage. © Copyright Charge Amps AB Charge Amps chargeamps.com... -
Page 9: Final Result Of The Electrical Installation
N and L1. 5.2.1. Final result of the electrical installation Overview of installation of the Charge Amps Amp Guard Home Overview of installation of the Charge Amps Amp Guard Public © Copyright Charge Amps AB Charge Amps chargeamps.com... -
Page 10: Network Installation
N.B. Only 2.4 GHz Wi-Fi is supported. There is a risk of malfunction if 5 GHz and 2.4 GHz have the same SSID. The Wi-Fi password may contain a maximum of 30 ASCII characters. Connect to the Charge Amps Amp Guard Wi-Fi using a smartphone, tablet or a computer. To avoid conflicting Wi-Fi, set the airplane/flight mode. -
Page 11: Configuration
6. Configuration 6.1. Cloud connectivity The Charge Amps Cloud and Charge Amps App are available for the Charge Amps Amp Guard connected to Charge Amps as the cloud provider. To connect the Charge Amps Amp Guard to other cloud providers, please check with your cloud provider regarding portals and apps. -
Page 12: Create A Charge Amps Partner Account
3. Charge Amps will notify you by email when your Partner account has been created. 6.3. Cloud configuration Connect the Charge Amps Amp Guard to the Charge Amps App or Cloud service to complete the installation. To ensure the Charge Amps Amp Guard works correctly, it is necessary to set the parameters in a load balancer group via the Charge Amps cloud service. -
Page 13: Add An Ev Charger
If there are several chargers, it´s recommended to use different phases for each of them. 4. Click Save. 6.8. Add the Charge Amps Amp Guard In the Partner interface, select the Measurement devices tab in the menu bar. 2. Click Add. -
Page 14: Create Load Balancing
Enter Min Current Per Phase. The minimum current that a charger will get • from load balancing. Enter Supply Max Current, the facility main fuse, where the Charge Amps • Amp Guard is set to measure. 6.10. Import charging boxes Select the Charger tab and click the blue option Import.
Need help?
Do you have a question about the Amp Guard and is the answer not in the manual?
Questions and answers