Table of Contents
Advertisement
Quick Links
Open the hatch on the top of the camera and insert 4 x 1.2v AA batteries. Ensure you have inserted
the batteries the correct way around as per the + and – polarity signs on the inside of the hatch.
Please read the section, later in these information pages, about which batteries to use.
Battery choice is vital to the performance of your Ltl Acorn trail camera.
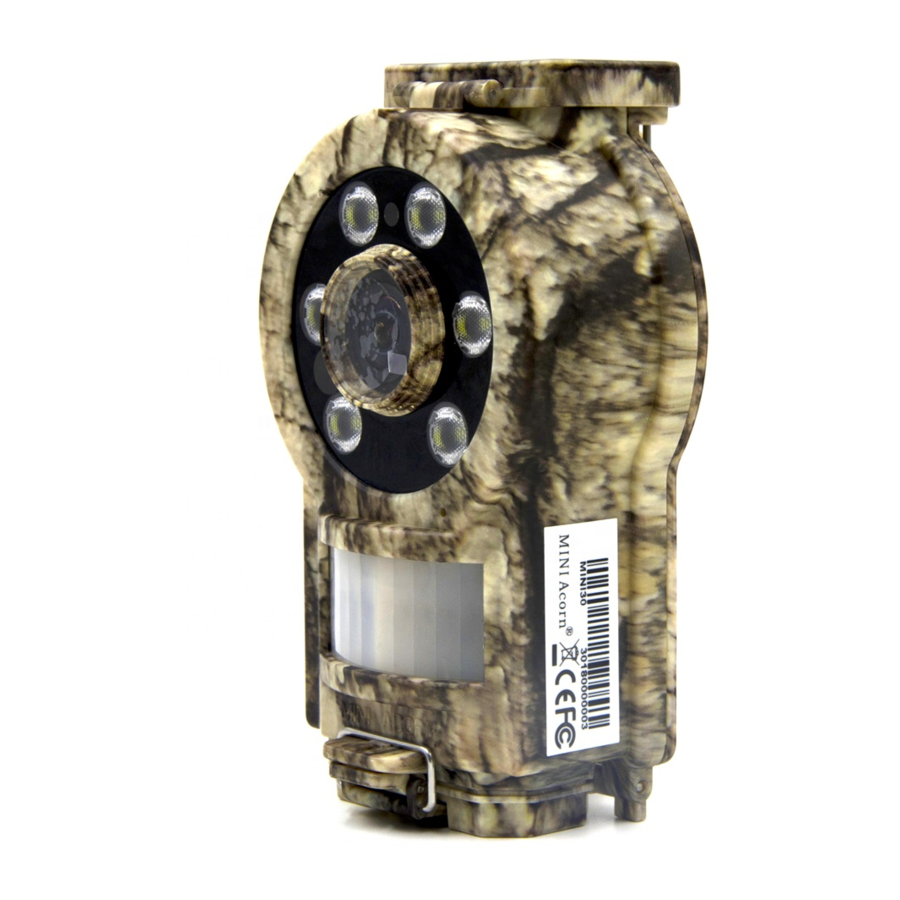
Now undo the clip on the bottom of the camera and open that hatch. You will see (from left to
right) the ON/OFF switch, a mini USB style socket and the micro SD card slot.
Ensure you are using a genuine branded card and not a fake bought from Amazon or eBay!
The online marketplaces are flooded with fake goods including cheap, fake memory cards.
Connect your external LCD screen (supplied with the camera) via the mini USB slot and carefully
move the ON/OFF switch to the ON position. The LCD screen will now come on and you'll see the
*how many recordings there are stored on the micro SD card (plus the maximum that could
If you wish to manually take a photo or record video you can push the SHOT button.
If you are in camera mode (image of a camera in top left corner of screen) an image will be taken
If you are in video mode (image of a video camera in top left corner of screen) a video recording
will start. To stop the video recording just push the SHOT button again.
To playback any of your recordings you can push the OK/Replay button.
From here you can scroll through all recordings using the UP & DOWN arrow buttons. If you
currently have a video recording selected you can push the RIGHT arrow button to play the video.
Ltl Acorn Mini30 Trail Camera
LCD screen (if purchased)
warranty card (for your own records)
Close the hatch and carefully fix it down with the clip.
Insert your micro SD card. Maximum capacity is 128G.
live view from the camera.
From this screen you can:
*manually take a photo,
*manually record a video clip,
*view captured images & videos
The on screen icons and information also show:
* which video/image resolution you currently have set,
possibly be stored using the current recording settings)
*approximate indication of battery life.
and stored on the micro SD card.
If you want to exit Playback mode just push the OK button.
Box contents:
trail camera
strap
these instructions
Set Up:
*access the Menu,
Advertisement
Table of Contents

Subscribe to Our Youtube Channel
Related Manuals for Ltl Acorn Mini30


Summary of Contents for Ltl Acorn Mini30
- Page 1 Please read the section, later in these information pages, about which batteries to use. Battery choice is vital to the performance of your Ltl Acorn trail camera. Now undo the clip on the bottom of the camera and open that hatch. You will see (from left to right) the ON/OFF switch, a mini USB style socket and the micro SD card slot.
- Page 2 The Menu Pushing the MENU button, when you have the LCD screen connected and the camera switched ON, will take you into the built in Menu. You can use the UP & DOWN arrow buttons to move up and down through the menu options and you can use the left and right arrow buttons to scroll through the various different settings available for each selected menu option.
- Page 3 Timelapse: this feature allows you to set you camera to record a video or capture an image every X amount of hours, minutes or seconds regardless of whether or not there is any subject triggering the camera at that moment in time. For instance you may want to record the changes on a construction project and so take a new image every 12 hours to monitor progress over time.
- Page 4 Panasonic Eneloop Pro 2500mA rechargeable 1.2v AA. Do not use any Alkaline, Lithium or any other 1.5v batteries as the Mini30 is designed for 1.2v input and higher than that could give performance and/or sensor burn out issues over time.
- Page 5 Trail Camera Triggering & Placement - Best Practice & Information: Your trail camera records when triggered, the trigger occurs when the camera senses heat change within the image that is different to the ambient air temperature. This increased heat signature within the image is usually (but not always) caused by something new entering the camera view such as a human or creature.
- Page 7 Some Troubleshooting Tips.. Batteries & SD Card First port of call if you think your camera is not working correctly is always power! Have a read of the section within these instruction pages about batteries and always try new ones of the recommended type before assuming a fault with the camera itself.
Need help?
Do you have a question about the Mini30 and is the answer not in the manual?
Questions and answers