PRESONUS Revelator io24 Owner's Manual
2-channel audio interface for streamers, podcasters, and music creators
Hide thumbs
Also See for Revelator io24:
- Quick start manual (4 pages) ,
- Owner's manual (107 pages) ,
- Owner's manual (136 pages)

Related Manuals for PRESONUS Revelator io24


Summary of Contents for PRESONUS Revelator io24
- Page 1 Revelator io24 2-channel audio interface for streamers, podcasters, and music creators Owner’s Manual ® English www.presonus.com...
-
Page 2: Table Of Contents
What is in your MyPreSonus account — 2 3.2.9 Using Revelator io24 with iOS/iPadOS devices — 31 1.3.1 Step 1: Register Revelator io24 — 2 3.2.10 Using Revelator io24 with 1.3.2 Step 2: Download and Install Android devices — 31 Universal Control —... - Page 3 Advanced Features and Customization Tools — 50 Settings Menu — 50 Advanced Fat Channel and Voice Effects Controls — 51 High Pass Filter — 51 7.2.1 7.2.2 Noise Gate — 51 7.2.3 Compressor — 52 7.2.4 Changing the Signal Chain — 55 7.2.5 Equalizer —...
-
Page 4: Overview
CAUTION: Changes or modifications to this device not expressly approved by PreSonus Audio Electronics could void the user’s authority to dropped. All PreSonus products in the USA should be serviced at the PreSonus factory operate the equipment under FCC rules. -
Page 5: What Is In Your Mypresonus Account
What is in your MyPreSonus account What is in your MyPreSonus account There’s more to your Revelator io24 than what comes in the box! Let’s take a moment to register your Revelator io24 and download the digital products that come with it. These include: Universal Control. - Page 6 What is in your MyPreSonus account 2. Fill in the form with the required information. Make sure to verify that you are, in fact, human and agree to our PreSonus Terms of Use. If you’d like to receive occasional emails about promotions and new video content, check that box now as well.
-
Page 7: Step 2: Download And Install Universal Control
What is in your MyPreSonus account 6. In the pop-up menu, click on the Hardware tab. 7. Select your purchase date and enter your Revelator io24 Serial Number. You can find your serial number on the bottom of your interface as well as on your Quick Start Guide. -
Page 8: Step 3: Download And Install Studio One Artist (Optional)
1.3.3 Step 3: Download and Install Studio One Artist (Optional) 1. From the Revelator io24 product listing in MyPreSonus, locate Studio One Artist from the product listing. Quick links to every digital product that comes with your Revelator io24 will be listed here. Click the “Download Installer”... -
Page 9: Step 4: Download And Install Studio Magic (Optional)
Overview Owner’s Manual What is in your MyPreSonus account Power User Tip: You may be prompted to enter your My.PreSonus user account information. Clicking “Remember Credentials” will allow you to have immediate access to any content you purchase from shop.presonus.com. -
Page 10: Connections And Controls
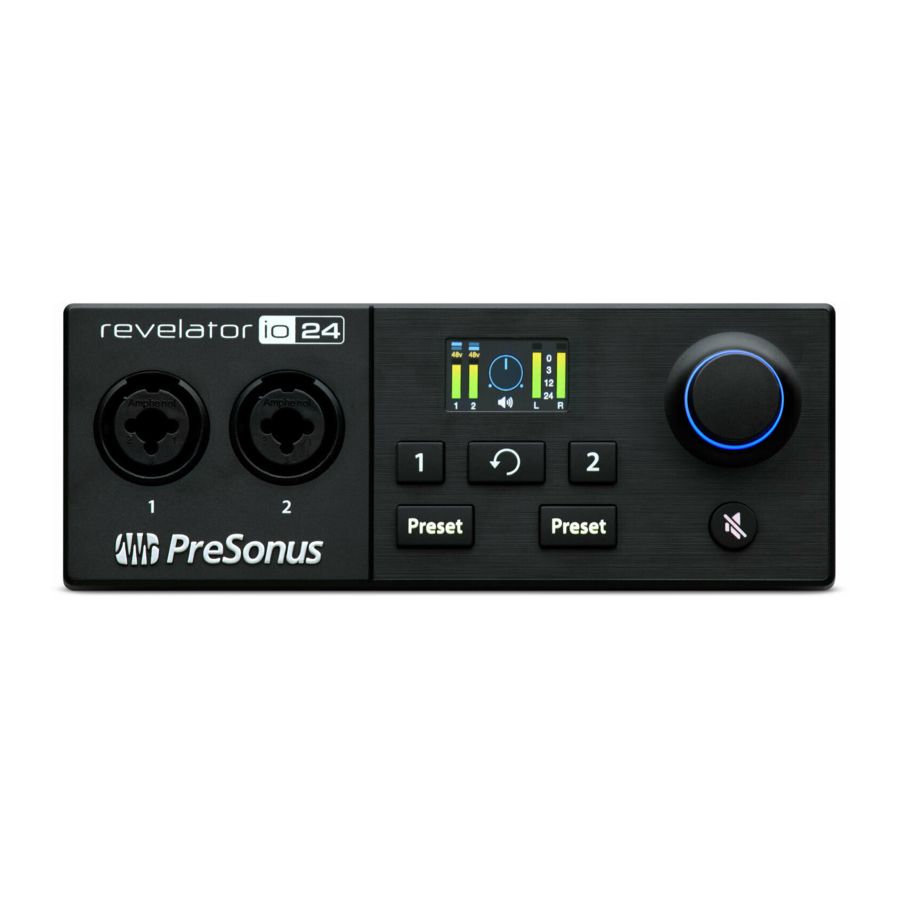
Multipurpose Encoder Knob. This is a lot more than a simple volume knob! It’s also a button, and can be used to control many features of your Revelator io24: From the Home screen, press it to cycle through Headphone volume, •... -
Page 11: The Screen
The screen displays metering, preset selection, and other important information. The following information is displayed on Revelator io24’s Home screen. This is the default screen you’ll see when you first use Revelator io24. 1. Input Meters. These meters indicate the input level of the analog inputs on your Revelator io24. - Page 12 Other information on the Channel screen includes: 4. Input Meter. This meter indicates the input level of the selected channel on your Revelator io24, just like on the Home screen. 5. Gain reduction meter. If you’re running any compression or limiting via Revelator io24’s DSP (Digital Signal Processing), the amount of...
-
Page 13: Back Panel
Headphone Output. Connect your headphones here. Level can be controlled from the Home screen using the Encoder. Main Outs. These are the Main outputs for the Revelator io24. The output level of the Main outputs is controlled by the Main level control on the front of the unit. Playback streams 1 and 2 are routed to these outputs. -
Page 14: Connection Diagram
Connection Diagram Connection Diagram Standalone controls While many of the features available for your Revelator io24 can be found in Universal Control, critical controls are available right at your fingertips. Most of these settings can be changed from Universal Control to customize your Revelator io24 to your application and needs. -
Page 15: Setting The Microphone Level
2.4.1 Setting the Microphone Level To set your Revelator io24’s input level, press the Channel button for the Channel you would like to use. Next, press the encoder to cycle through the available options. A yellow underline will indicate the currently-selected option. Once you’ve selected the Gain setting—it’s shown below the Channel indicator number and measured in... -
Page 16: Setting Monitor Blend
Selecting Presets EQ and compression are the secret behind the professional broadcast studio sound we all know so well. Your Revelator io24 has you covered with 8 easy-to-use, professionally crafted processing and effects presets. These presets are designed to give you great-sounding results with no audio engineering experience required! The first two presets can be accessed right from the Preset buttons on your... -
Page 17: Stream Mix Mode
When to use Default mode: When you would like to record directly from the Revelator io24’s inputs into a • DAW, and you don’t want to mix in any sources from Skype, Zoom, Spotify, etc. -
Page 18: Universal Control
64 to 8,192 samples. Lowering the buffer size will lower latency, which is the amount of time it takes for your audio to go from Revelator io24 to the computer and back to your ears; however, this will also increase performance demands on your computer. -
Page 19: Launch Window Menu Items
(like the output of a Skype call to the audio input of your Facebook Live stream), that’s where Multi Mode comes in. In this mode, your Revelator io24 will show up as 3 different devices on your computer: Revelator IO 24, Revelator IO24 Loopback 1, and Revelator IO 24 Loopback 2. -
Page 20: Using Your Revelator Io24 With Popular
Revelator io24, it will also set your default Internet browser to use Revelator io24 as well. Power User Tip: Setting your Revelator io24 as the default sound card for your system will also route music streaming applications like Spotify and Apple Music to the headphone output on your new interface. - Page 21 Revelator io24 Universal Control Owner’s Manual Using Your Revelator io24 with Popular Applications Windows 1. Click on start icon in lower left corner 2. Click on Settings gear icon 3. Click on System 4. Click on Sound...
- Page 22 Universal Control Owner’s Manual Using Your Revelator io24 with Popular Applications 5. Click on “Choose your Output Device” and choose HP Out L/R (Revelator IO 24) 6. Click on “Choose your input device” and choose Mic/Inst 1/2 (Revelator IO 24)
- Page 23 1. From the Apple Menu, go to System Preferences. 2. Click on Sound. 3. Click on the Outputs tab and select Revelator IO 24 from the device list. This will route all audio from your computer to the headphone output on your Revelator io24.
-
Page 24: Using Revelator Io24 For Skype
Using Your Revelator io24 with Popular Applications 4. Click on the Inputs tab and select Revelator IO 24 from the device list. This will set your Revelator io24 interface as the input source for your computer. Your Revelator io24 is ready to use! 3.2.2... -
Page 25: Using Revelator Io24 For Zoom
Revelator io24 Universal Control Owner’s Manual Using Your Revelator io24 with Popular Applications 3.2.3 Using Revelator io24 for Zoom 1. Launch Zoom, and click the cog wheel icon to enter Zoom Preferences. 2. Click the “Audio” tab. - Page 26 Power User Tip: When this option is selected, the sliders in Zoom will not have any effect on the Speaker output or Microphone Input gain, as these are controlled by the Revelator io24 itself—either by the on-board controls and/or through the Universal Control software.
- Page 27 In Zoom’s Advanced Audio settings menu, please populate the checkboxes and the drop-down menu with the settings shown below. If you need to switch your audio device to Revelator io24 while in a meeting, select the arrow next to the Mute Button to select your audio device list.
- Page 28 Owner’s Manual Using Your Revelator io24 with Popular Applications macOS users running Revelator io24 in Single Mode will see Revelator IO 24 appear in Zoom’s Microphone and Speaker selections as follows: All Windows users and Mac users running Revelator io24 in Multi...
-
Page 29: Using Revelator Io24 For Google Meet
There is a chance that the next time you open Google Meet that it may default to a different audio device without notifying you. Be sure to check your audio settings to make sure Revelator io24 is selected. PreSonus has no control over how this device selection works. -
Page 30: Using Revelator Io24 For Obs
Revelator io24 Universal Control Owner’s Manual Using Your Revelator io24 with Popular Applications 3.2.5 Using Revelator io24 for OBS 1. Click on Settings under “Controls” 2. Click “Audio. ” 3. Under Mic/Auxiliary Audio, select Revelator IO 24. 4. If you would like to source the audio for other applications, you can set Mic/ Auxiliary Audio 2 and 3 to Revelator IO 24 Loopback 1 and 2 respectively. -
Page 31: Using Revelator Io24
Owner’s Manual Using Your Revelator io24 with Popular Applications 5. Under Advanced, set the Monitoring Device to Revelator IO 24. This will route the output audio from OBS to the headphone output on Revelator io24. 6. Click Apply. 7. Click OK. -
Page 32: Using Revelator Io24 With Zoom On Chromebook
3.2.7 Using Revelator io24 with Zoom on Chromebook You can use Revelator io24 on a Chromebook to conduct Zoom meetings. Chrome does not install an application for Zoom like it does on macOS or Windows. Instead, on Chromebook, Zoom installs a widget for the Chrome browser, through which you can select your audio device and toggle some advanced audio settings. -
Page 33: Using Revelator Io24 With Google Meet On Chromebook
There is a chance that the next time you open Google Meet that it may choose a different audio device without notifying you. Be sure to check your audio settings to make sure Revelator io24 is selected. PreSonus has no control over how this device selection works. -
Page 34: Using Revelator Io24 With Ios/Ipados Devices
Revelator io24 works when connected directly to iOS/iPadOS devices like iPads, though you should be aware of the following: When connected to iPad Pro tablets with USB-C ports, Revelator io24 will function as intended without additional power or direct connect. However, there’s no way to charge the iPad while Revelator io24 is connected. -
Page 35: Presets And Scenes
Presets and Scenes Preset Management Your Revelator io24 can access 2 presets using the Preset button... but there are 6 more presets created by PreSonus for you to enjoy—plus another 6 preset slots for you to create custom presets. These presets are all available from Universal Control. -
Page 36: Changing Preset Button Slots
Preset Management 4.1.1 Changing Preset Button Slots To change one of the presets available from Revelator io24: 1. Click to select the slot you would like to change. 2. Select the desired preset using either the Preset selection knob or selecting it from the dropdown menu. -
Page 37: Storing New Presets
Revelator io24 Presets and Scenes Owner’s Manual Preset Management 3. “Vintage Channel” is now the preset stored in this slot. That’s it! 4.1.2 Storing New Presets We’re going to get into all the Fat Channel settings later (Section 5), but while we’re here, let’s talk about storing new Presets. - Page 38 Revelator io24 Presets and Scenes Owner’s Manual Preset Management 3. Enter the name you’d like to use. 4. Click Store. Done!
-
Page 39: Exporting/Importing Presets
Chromebook, iPad, or a camera with an audio input. You can Import and Export Presets from Universal Control to Revelator io24 and vice-versa. This way, you can build a wide inventory of presets to use for many different applications—and always make sure you have them ready for whatever task comes your way. - Page 40 To find where the exported Preset has been stored on your computer, right-click on it and choose Show in Finder (Mac) or Show in Explorer (Windows). Have fun sharing this file with other Revelator io24 users! To Import a new preset to one of the 6 User Slots: 1.
-
Page 41: Scenes - Save And Recall
4.1.4 Scenes - Save and Recall Scenes allow you to store all of the Revelator io24’s settings for recall at a later time. This is useful for if you have various projects that require specific settings—you won’t have to set up every little detail of your Revelator io24 every time you change projects! For example, you might have a podcasting setup with a preset for your frequent guest, and also have a setup you like for recording acoustic guitar. -
Page 42: Fat Channel And Voice Effects
Revelator io24 Fat Channel and Voice Effects Owner’s Manual Fat Channel and Voice FX Fat Channel and Voice Effects Fat Channel and Voice FX The Fat Channel provides essential signal processing tools to sculpt your sound, as well as Voice FX section to warp, distort, and bounce it around. -
Page 43: Gate
In other words, you’ll still sound like you. For more advanced compression controls and to learn about the different compressor models onboard your Revelator io24, see Section 7.2.3. -
Page 44: Equalizer (Eq)
Everybody’s voice is unique and because EQs are entirely dependent on the frequency of the source, your ears are your best tool in finding the right sound for your voice. Like the Compressor, Revelator io24 offers advanced controls and several EQ models to choose from when you’re ready to dive... -
Page 45: Limiter
Experiment with different sound sources! Note: Revelator io24’s Voice FX can only be used on one of the two Inputs at a time. You can select Channel 1 or 2 for use with Voice FX from the Settings menu. -
Page 46: Reverb
To adjust the amount of Reverb you hear in your mix, raise or lower the Reverb Fader in the mixer. See Section 6.2.2 for more information on your Revelator io24 mixer. 1. Preset. Choose between Small, Medium, and Large. These presets emulate room size. - Page 47 Revelator io24 Fat Channel and Voice Effects Owner’s Manual Fat Channel and Voice FX 3. HPF (High Pass Filter). Like the High Pass Filter in Fat Channel, this setting will cut frequencies in the reverb’s output below the threshold you set here.
-
Page 48: Mixing And Loopback Audio
Best of all, the Revelator io24’s mixer makes it easy to monitor any mix you create, so you can record and stream with confidence, knowing that what... -
Page 49: Mixer Controls
2. Gain. Use this control to set the gain for your connected microphone or instrument. Gain can also be set using the Encoder knob on your Revelator io24. 3. Reverb. Use this control to set the amount of Reverb applied to the signal. -
Page 50: Mixer Channel Controls
Mixer Controls 6.2.2 Mixer Channel Controls Your Revelator io24 mixer has four Channels: 1. Playback. This is the output channel for the Revelator io24 Playback Device in each stereo mix. 2. Loopback 1. This is the output channel for the Revelator io24 Loopback 1 Device in each stereo mix. -
Page 51: Main Output Controls And Mix Selection
Monitor, Main, Loopback 1, or Loopback 2. 5. Main. Click on this tab to bring up the mix for the Revelator io24 Device. 6. Record. Click on this tab to bring up the mix for the Main USB Output stream. -
Page 52: Feedback Loops Are Bad
Feedback Loops are Bad Feedback Loops are Bad While loopback audio and the Revelator io24 mixer makes it really easy to mix and record the sound of one piece of software into another, there is also the potential to send the output of a software application back into itself and create what is known as a “feedback loop. -
Page 53: Advanced Features And Customization Tools
Settings button in the upper right corner to get started. 1. Reset All. Click this button to reset your Revelator io24 to its factory default state. 2. Fat Channel on USB Stream Outputs. By default, your Revelator io24 will record audio just as you hear it in your headphones, complete with the Fat Channel preset. -
Page 54: Advanced Fat Channel And Voice Effects Controls
Revelator io24 Advanced Features and Customization Tools Owner’s Manual Advanced Fat Channel and Voice Effects Controls Advanced Fat Channel and Voice Effects Controls To open the advanced Fat Channel and Voice Effects Controls, click on the Fat Channel menu at the top right of Universal Control, or click “Fat Channel. ”... -
Page 55: Compressor
As previously mentioned, a compressor is a dynamics processor that reduces the dynamic range of a signal by attenuating it by a set ratio when it exceeds a defined threshold. Your Revelator io24 is equipped with three compressor models from which to choose: Standard, Tube, and FET. - Page 56 Revelator io24 Advanced Features and Customization Tools Owner’s Manual Advanced Fat Channel and Voice Effects Controls Standard Compressor 1. On/Off. Turns the Compressor on or off in the signal chain. 2. Threshold. Sets the level above which the compressor begins to attenuate the signal.
- Page 57 Revelator io24 Advanced Features and Customization Tools Owner’s Manual Advanced Fat Channel and Voice Effects Controls Tube Leveling Amplifier 1. On/Off. Turns the Compressor on or off in the signal chain. 2. Gain. Sets input gain to the compressor. Because this type of compressor operates in a different way than a standard compressor,...
-
Page 58: Changing The Signal Chain
You can boost or cut the level of ranges of frequencies, to make corrective or creative changes to the signal. Like the compressor, your Revelator io24 is equipped with three EQ models from which to choose: Standard, Passive, and Vintage. - Page 59 Revelator io24 Advanced Features and Customization Tools Owner’s Manual Advanced Fat Channel and Voice Effects Controls Standard EQ 1. On/Off. Turns the EQ on or off in the signal chain. 2. Frequency. This control sets the center frequency at which signals are boosted or cut for the currently selected band.
- Page 60 Revelator io24 Advanced Features and Customization Tools Owner’s Manual Advanced Fat Channel and Voice Effects Controls Passive Program EQ 1. On/Off. Turns the EQ on or off in the signal chain. 2. Low Boost. Sets the level of boost applied around the chosen low frequency.
-
Page 61: Limiter
7.2.7 Voice FX Your Revelator io24 is equipped with six Voice FX processors that can make your voice sound ethereal, otherworldly, or just plain weird… your choice! This section will go through each effect in detail. Note that while you can use any of these effects with the Fat Channel and Reverb, you can only use one effect at a time. - Page 62 Revelator io24 Advanced Features and Customization Tools Owner’s Manual Advanced Fat Channel and Voice Effects Controls Detuner True to its name, the Detuner will artificially lower your voice. 1. Tune. Sets the amount your voice will be lowered. 2. Wet/Dry. Blends the affected sound with the dry sound of your voice. Set to 100% to only hear the processed sound.
- Page 63 Revelator io24 Advanced Features and Customization Tools Owner’s Manual Advanced Fat Channel and Voice Effects Controls Ring Modulator A Ring Modulator basically takes two separate signals (your voice and an oscillator) and creates a new signal that is made up of the sum and differences of the original sources.
- Page 64 Revelator io24 Advanced Features and Customization Tools Owner’s Manual Advanced Fat Channel and Voice Effects Controls Delay A delay essentially creates an echo, although you can often use delays to create more complex time-based effects. The source signal is delayed so that it is heard later than it actually occurred.
-
Page 65: Studio One Artist Quick Start Guide
Power User Tip: As a valued PreSonus customer, you are eligible for a discount upgrade to Studio One Professional. For more details on the Studio One upgrade program for PreSonus customers, please visit https://shop.presonus.com/products/software/studio-... -
Page 66: Setting Up Studio One
Internet when you launch the application for the first time. Power User Tip: You may be prompted to enter your My.PreSonus user account information. Clicking “Remember Credentials” will allow you to have immediate access to any content you purchase from the PreSonus Marketplace. -
Page 67: Configuring Audio Devices
In the middle of the Start page, you will see the Setup area. Studio One Artist automatically scans your system for all available drivers and selects a driver. By default, it will choose a PreSonus driver if one is available. If you do not see your device listed on the Start page when you launch Studio One, click on the Configure Audio Devices... - Page 68 Make sure you have connected the MIDI Out of your external MIDI controller to a MIDI In on your PreSonus audio interface (if available) or other MIDI interface. If you are using a USB MIDI controller, connect it to your computer and power it on.
- Page 69 Revelator io24 Studio One Artist Quick Start Guide Owner’s Manual Setting Up Studio One 3. From the menu on the left, select your MIDI controller from the list of manufacturers and models. If you do not see your MIDI controller listed, select New Keyboard.
- Page 70 Revelator io24 Studio One Artist Quick Start Guide Owner’s Manual Setting Up Studio One Make sure you have connected the MIDI In of your external sound module to the MIDI Out of your MIDI interface. 1. In the External Devices window, click the Add button.
-
Page 71: Creating A New Song
Revelator io24 Studio One Artist Quick Start Guide Owner’s Manual Creating a New Song Creating a New Song Now that you’ve configured your audio and MIDI devices, let’s create a new Song. We’ll start by setting up your default audio I/O. -
Page 72: Configuring Your I/O
I/O. 2. Click on the Audio I/O Setup tab. 3. From the Inputs tab, you can enable the inputs for your Revelator io24, including the Loopback Inputs. that you’d like to have available. We recommend you create a mono input using Input 1 of your Revelator io24 and two Stereo Inputs;... -
Page 73: Creating Audio And Instrument Tracks
4. Click on the Outputs tabs to enable any or all of the outputs on your Revelator io24. In the lower right corner, you will see the Audition Select menu. This allows you to choose the output from which you will audition audio files prior to importing them into Studio One... - Page 74 Revelator io24 Studio One Artist Quick Start Guide Owner’s Manual Creating a New Song 2. In the Add Tracks window, you can customize the track name and color, add a preset rack of effects, and set the physical source for the input and output of your audio tracks.
-
Page 75: Recording An Audio Track
1. To begin recording, create an audio track from the Add Tracks window, set its input to Input 1 on your Revelator io24, and connect a microphone to the same input. 2. Select Record Enable on the track. Turn up the Input 1 level on your Revelator io24 while speaking/singing into the microphone. - Page 76 Revelator io24 Studio One Artist Quick Start Guide Owner’s Manual Creating a New Song Drag-and-Drop Virtual Instruments To add a virtual instrument to your session, open the browser and click on the Instrument button. Select the instrument or one of its patches from the Instrument browser and drag it into the Arrange view.
-
Page 77: Resources
Revelator io24 Resources Owner’s Manual Gain Staging 101: Begin at the Beginning Resources Gain Staging 101: Begin at the Beginning It may seem counterintuitive to boost the signal closest to its source and cut it later in the signal path if it is too loud, but this is precisely the best way to get a noise- and feedback-free recording. -
Page 78: Microphone Tips And Tricks
Don’t worry, we’ve all been there, and PreSonus has put together this tutorial to help you mitigate the most common mistakes... -
Page 79: Pickup Patterns
Revelator io24 Resources Owner’s Manual Microphone Tips and Tricks 9.2.1 Pickup Patterns Microphones are designed with different pickup patterns. A pickup pattern represents the particular areas around the microphone’s capsule where it is most sensitive to sound. The most common pattern for vocal and broadcast microphones is called Cardioid, because it’s heart-shaped. -
Page 80: Putting It All Together
Software Controls: Mic Gain, Monitor Mix, Preset Management Onboard DSP PreSonus StudioLive Fat Channel: High Pass Filter, Noise Gate / Expander, 3 Compressor models, 3 EQ models, and Limiter; Voice Effects: Doubler, Vocoder, Ring Modulator, Comb Filter, Detuner, Delay, Reverb... - Page 81 Revelator io24 Resources Owner’s Manual Technical Specifications Main Outputs Type ¼” TRS, Female Maximum Level +10 dBu (1 kHz, unity gain, z-balanced) Frequency Response 20 Hz – 20 kHz (+0.1dB/-0.3 dB, unity gain, unwtd) THD + N 0.003% ( 1 kHz, -1 dBFS, unity gain)
- Page 82 BONUS: Extra cabbage can be used as a condiment with meat, eggs, sandwiches, etc. ©2021 PreSonus Audio Electronics, Inc. All Rights Reserved. AudioBox USB, Capture, CoActual, EarMix, Eris, FaderPort, FireStudio, MixVerb, Notion, PreSonus, PreSonus AudioBox, QMix, RedLightDist, SampleOne, Sceptre, StudioLive, Temblor, Tricomp, and WorxAudio are registered trademarks of PreSonus Audio Electronics, Inc. Studio One is a registered trademark of PreSonus Software Ltd.
- Page 83 Revelator io24 2-channel audio interface for streamers, podcasters, and music creators Owner’s Manual 18011 Grand Bay Ct. • Baton Rouge, ® Louisiana 70809 USA• 1-225-216-7887 Part# 70-12000167-A www.presonus.com...
Need help?
Do you have a question about the Revelator io24 and is the answer not in the manual?
Questions and answers