Table of Contents
Advertisement
Quick Links
Advertisement
Table of Contents

Related Manuals for AND BA-TE Series


Summary of Contents for AND BA-TE Series
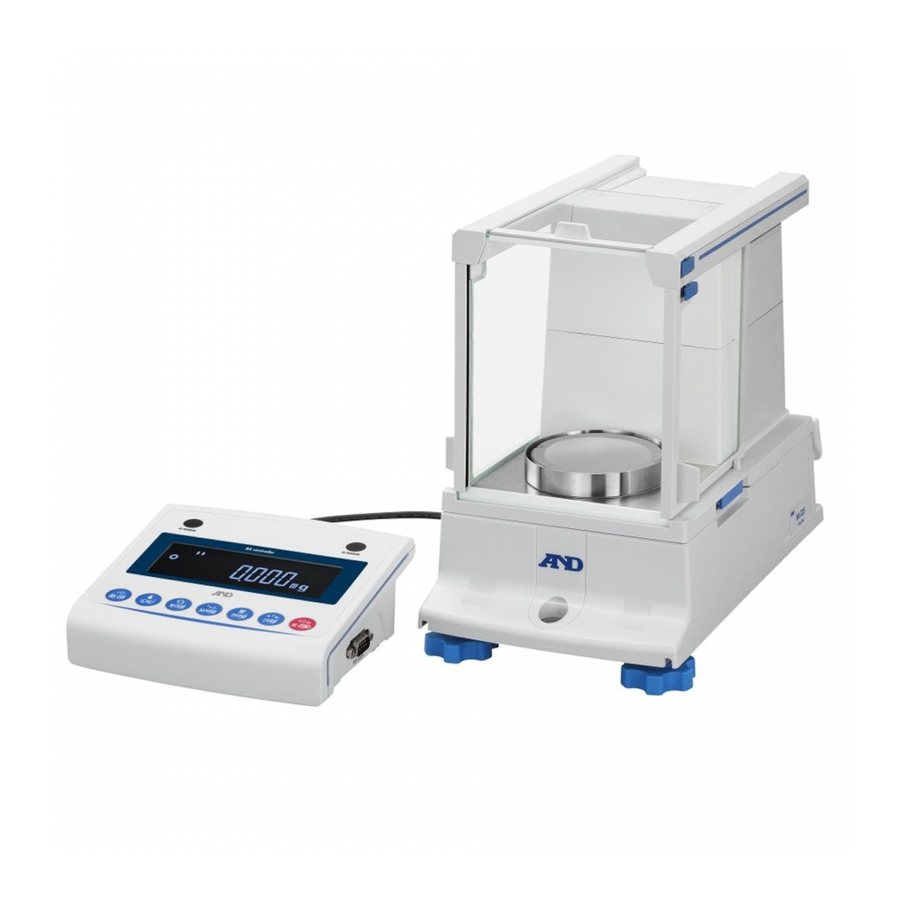
- Page 1 BA-6TE BA-6DTE BA-225TE BA-225DTE BA-125DTE 1WMPD4004296...
- Page 2 A&D Company Ltd. The contents of this manual and the specifications of the instrument covered by this manual are subject to change for improvement without notice. Windows, Word and Excel are registered trademarks of the Microsoft Corporation.
-
Page 3: Table Of Contents
Installation Considerations, Weighing Preparation and Precautions ..............9 3.1. How to adjust the level of the balance ..................9 On-Screen Buttons and Key Panel (Basic Operation) ..............10 IR sensors and Automatic Doors ....................12 5.1. IR sensors ..........................12 5.2. -
Page 4: Quick Start Guide
Detailed manuals are available for download from the A&D website (https://www.aandd.jp): BA-TE Series Instruction Manual This is the manual to help you understand the functions and operations of the BA-TE series in detail and make full use of them. Ionizer (static eliminator) Instruction Manual This is the manual describing the functions of the AX-ION-25 ionizer and instructions on use. -
Page 5: Unpacking
2.1. Unpacking Packing contents common to BA-TE series Breeze break Breeze break Weighing unit Display unit protection cover top door bottom plate Display unit Tweezers Cable C Cable A Cable B AC adapter ID labels This document AC adapter USB cable Ionizer Attach the AC adapter labels to the adapter. -
Page 6: Assembly
2.2. Assembly The BA-6TE is used here for the example of assembly. Other models can be assembled in the same way. Breeze break unit Step 1 Pull out the breeze break Step 1 locking handles. Step 3 Step 2 Place the breeze break unit on the weighing unit. - Page 7 Step 7a from the handle side. Step 6 Step 7 Assemble the breeze break Step 8b doors on the left and right sides. Step 7b Insert the breeze break doors on the left and right sides. Step 7a Secure the breeze break doors with the latches.
- Page 8 Step 9 Using the included cable A and cable B, connect the "weighing unit" and "breeze break unit" and the "display unit" and "weighing unit" respectively, paying attention to the direction of the arrow on each cable. Step 10 Connect the breeze break unit and ionizer with the included cable C.
-
Page 9: Installation Considerations, Weighing Preparation And Precautions
Place the balance on a horizontal table, and make sure that it is not tilted. Install the balance in a stable location, avoiding vibration and shock. Corners of rooms on the first floor are best, as they are less prone to vibration. -
Page 10: On-Screen Buttons And Key Panel (Basic Operation)
On-Screen Buttons and Key Panel (Basic Operation) Standby screen ON/OFF key Weighing screen P-TEST button CAL button 10. Communication device 2. Application button setting button 3. Left IR sensor function 11. Right IR sensor function change button change button 4. Left IR sensor 12. - Page 11 This is one of the IR sensors (touchless sensor). Left IR sensor When you bring your hand close to it, it reacts and the assigned breeze break door opens/closes. For details, refer to “5.2. Automatic doors”. Turns the screen display on and off. The ON:OFF key is active during any operation.
-
Page 12: Ir Sensors And Automatic Doors
At factory setting, each breeze break door opens to the position it was previously opened to. It is also possible to change which sensors the breeze break doors are assigned to and for the doors to be fully open or partially open in the function table of the balance. -
Page 13: Check Function
Check Function The check function performs daily inspections and regular inspections. Additionionally, whether or not the balance's performance is being exhibited can be easily checked by checking the repeatability with the internal mass. The check function can be selected from the menu screen. For details, refer to the separate instruction... -
Page 14: Sensitivity Adjustment / Calibration Test
Internal sensitivity The internal mass is used to automatically adjust the balance. adjustment The internal mass is used to check the accuracy of weighing, and Internal calibration test the result is output. Note that the balance is not adjusted. -
Page 15: Typical Errors (Error Codes)
Internal mass error Applying the internal mass does not yield a change in the mass value Error 6 EC,E16 as specified. Confirm that there is nothing on the pan and perform the operation from the beginning. Internal mass error Error 7 EC,E17... - Page 16 The mass value is too light. Check that the weighing pan is installed correctly. Set the weighing pan correctly. Calibrate the balance. Clock battery error The clock backup battery has been depleted. Set the time and date. rtc PF Even if the clock backup battery is depleted, the clock and calendar function works normally as long as the balance is powered with the AC adapter.
-
Page 17: Ionizer (Ax-Ion-25)
Step 1. Make sure that the AC adapter of the balance is not connected, and then connect the balance and the ionizer (as noted in "2. Assembly and Installation"). Step 2. Connect the AC adapter, plug it in, and then turn on the power. The power lamp of the ionizer lights up. -
Page 18: Specifications
±0.010 mg Display 5-inch W VGA TFT LCD color display Operation Touchscreen and key switches RS-232C (printer, PLC, etc.) Communication USB type A (USB drive, for data storage), USB type B (PC) LAN (TCP/IP), Stereo jack (external switch), Bluetooth (PC, etc.) *... -
Page 19: Compliance
Note: This equipment has been tested and found to comply with the limits for a class A digital device, pursuant to part 15 of the FCC rules. These limits are designed to provide reasonable protection against harmful interference when the equipment is operated in a commercial environment. - Page 20 MEMO...
- Page 21 MEMO...
- Page 22 MEMO...
- Page 24 3-23-14 Higashi-Ikebukuro, Toshima-ku, Tokyo 170-0013, JAPAN Telephone: [81] (3) 5391-6132 Fax: [81] (3) 5391-1566 A&D ENGINEERING, INC. 1756 Automation Parkway, San Jose, California 95131, U.S.A. Telephone: [1] (408) 263-5333 Fax: [1] (408)263-0119 A&D INSTRUMENTS LIMITED Unit 24/26 Blacklands Way, Abingdon Business Park, Abingdon, Oxfordshire OX14 1DY United Kingdom Telephone: [44] (1235) 550420 Fax: [44] (1235) 550485 A&D AUSTRALASIA PTY LTD...