Cuppone Giotto GT110 Use And Maintenance Manual
Hide thumbs
Also See for Giotto GT110:
- User manual (56 pages) ,
- Pre-installation and installation manual (48 pages) ,
- Use and maintenance manual (44 pages)
Table of Contents
Advertisement
Quick Links
Advertisement
Table of Contents

Subscribe to Our Youtube Channel
Related Manuals for Cuppone Giotto GT110


Summary of Contents for Cuppone Giotto GT110
- Page 1 Giotto OVEN Use and maintenance manual GT110 GT140...
-
Page 3: Table Of Contents
Creating a recipe by duplicating an already stored recipe ..23 Our company was founded in 1963 by the Lorenzo, Luigi and Modifying a stored recipe ...............24 Paolo Cuppone brothers. It immediately specialized in the production of ovens and equipment to prepare and cook Programmed switch-on .................25 pizza. -
Page 4: Safety Instructions
Safety instructions Symbols used in the manual and on • This appliance can be used by children aged • Read this guide carefully before us- from 8 years and above and persons with re- ing and maintaining the appliance, the labels applied to the machine duced physical, sensory or mental capabilities or and keep it with care in an accessible lack of experience and knowledge if they have... - Page 5 Safety instructions • If you notice any anomaly (e.g. damaged power cable, etc.), malfunction or fault, do not use the appliance and contact a Service Centre author- ized by the Manufacturer. Demand original spare parts, or the Warranty will be null and void. • Place the emergency phone numbers in a visible location.
-
Page 6: Basic Notions
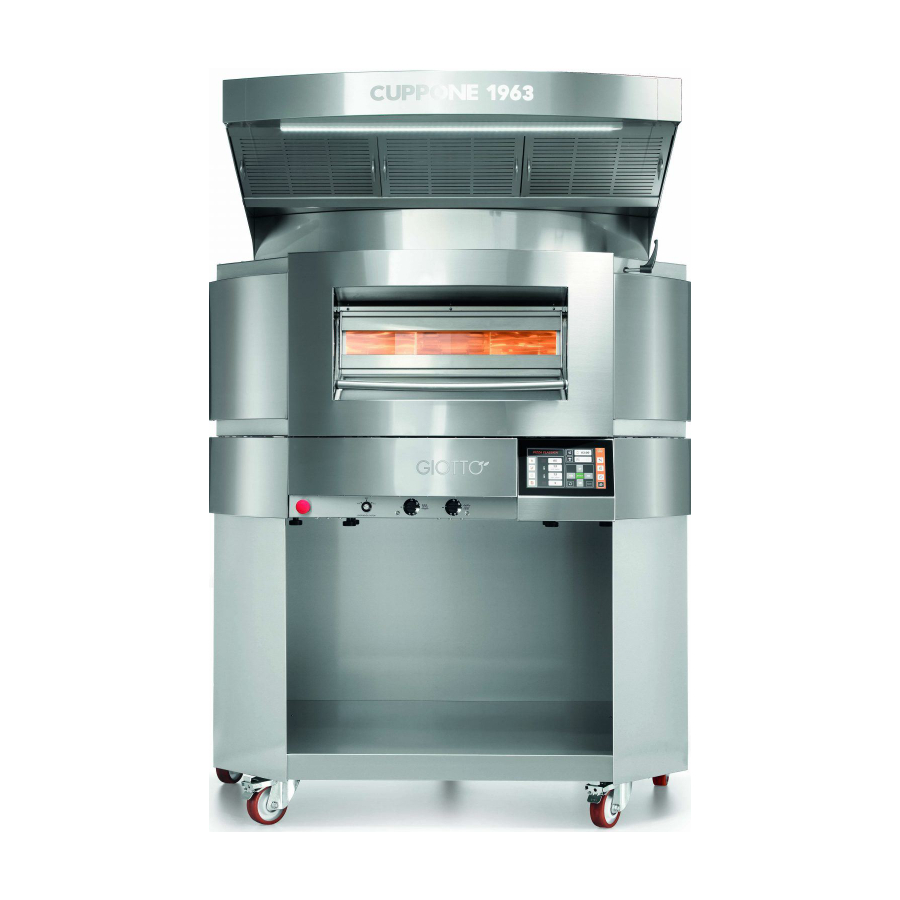
Basic notions Knowing your oven Fig. 2 Fig. 2 Your oven can be used only to bake pizzas or similar dishes, such as bread or focaccia and to grill vegetables. Its main parts are: Cooking chamber in stainless steel Chimney to vent any cooking fumes Cooking surface in refractory bricks Power cable socket Face in stainless steel... -
Page 7: Basic Notions
Basic notions Emergency controls This possibility is useful when there is a Fig. 3 breakdown of an electronic component (EMERGENCY SYSTEM) (e.g. Touch board or heater control board) which does not allow heating or adjust- Emergency mushroom: if pressed, it disables the turn- ing the heaters. -
Page 8: Some Piece Of Advice
Basic notions Some piece of advice... top heaters (TOP) Fig. 5 • Before starting cooking, always preheat the oven: this is vital must last at least an In the ovens, products cook thanks to the combined action of: to get good food. Preheating the oven radiation: hour, •... -
Page 9: The Turntable
Basic notions The turntable Fig. 7 The refractory turntable allows cooking pizzas evenly without having to turn them over manually. To control the turntable, see page Productivity GIOTTO 110: 60 pizzas/hour GIOTTO 140: 110 pizzas/hour 35 cm [13.78 in.] 50 cm [19.7 in.] 30 cm [11.81 in.] 60x40 cm [23.62x 5.7 in.] PIZZA ø... -
Page 10: Use
Use | KNOWING THE CONTROL PANEL Contents Knowing the control panel ............10 Turntable controls ................12 Baking ......................14 Turning the oven on manually ..........14 Setting the preheating .............. 15 Starting cooking ................16 Activating an end-of-cooking signal (buzzer) ....17 Switching the light on (optional) ......... - Page 11 Use | KNOWING THE CONTROL PANEL This panel controls the rotation of the refractory plate in an advanced way, see the following page for more infor- mation Fig. 9 Hood speed setting key Fig. 9 20 Shows the time and date. OVEN IN BAKING MODE SERVICE (settings) key Gives access to the user’s settings.
-
Page 12: Controlling The Turntable
Use | TURNTABLE CONTROLS Controlling the turntable CONTROLLING THE TURNTABLE WITH THE JOYSTICK Fig. 11 the turntable can be controlled in two ways: using either the joystick control panel. or the Fig. 10 To switch the control from one to the other, it is necessary to press the “joystick”... - Page 13 Use | TURNTABLE CONTROLS CONTROLLING THE TURNTABLE WITH THE CONTROL PANEL Fig. 12 START Key switching between joystick and control panel STOP: Stops the plate rotation. Use it only in case of real need; during preheating or STOP Pressing the key, the control of the rotation of the plate passes from the joystick to the cooking, the turntable should rotate continuously to ensure uniform cooking and to control panel and vice versa.
-
Page 14: Cooking
Use | COOKING How to enter the values Fig. 13 Imposta valore tempo Imposta valore tempo 01:20 01:20 To enter the values with the keypad: number keys • enter the desired value using the (e.g. if 1-2-0 is pressed in sequence, 01:20 is displayed, that is one minute and 20 seconds) or, alternatively “+”... -
Page 15: Setting The Preheating
Use | COOKING B - Setting the preheating Preheating must have the same cooking parameters as the recipe to be used. It must be carried out without products in the cooking chamber and takes about an hour for the oven to be ready for cooking. -
Page 16: Starting Cooking
Use | COOKING USING AN ALREADY STORED RECIPE Fig. 17 Touch the program key or the name area teglia Touch the name of the recipe you want to use: the oven starts heating up straight away with the parameters set for that recipe;... -
Page 17: Activating An End-Of-Cooking Signal (Buzzer)
Use | COOKING Fig. 19 The hood can also be checked and set from the cooking win- dow (light on/off and suction speed setting): suction off suction on light off light off suction on suction off light on light on minimum suction speed turns the hood light on/off... -
Page 18: Switching The Light On (Optional)
Use | COOKING after how much time the buzzer will go The display shows (e.g. 3:10 that is three minutes and ten seconds). After setting it, the countdown starts, at the end of which a buzzer will sound to highlight the end of cooking. To stop the buzzer, touch the buzzer key. - Page 19 Special programs ECO program: The ECO program is used to preserve the functionality of the oven when it is not working. Default values of the ECO program duration • according to requirements temperature • 280°C - 536°F • power 45% and bottom 5% This program can be customized by selecting it and modifying its Fig.
-
Page 20: Managing Recipes
Use | MANAGING RECIPES Saving a recipe means you can reuse it without having to reset its cooking parameters. Moreover, by giving it a name (e.g. CLASSIC), it can be found teglia easily and started quickly. Using a stored recipe classica teglia Fig. -
Page 21: Creating A New Recipe
Use | MANAGING RECIPES Creating a new recipe A recipe can be created in two different ways: Teglia Fig. 26 • from the work screen, while cooking Fig. 27 • from the service screen, with the oven in stand-by CREATING A RECIPE FROM THE WORK SCREEN Fig. -
Page 22: Creating A Recipe From The Service Screen
Use | MANAGING RECIPES SET 320°C CREATING A RECIPE FROM THE SERVICE SET 320°C SCREEN SET 300°C From the Service screen, you can create a recipe: SET 300°C base recipe starting from a and setting it according to your requirements; Setting the recipe NAME or, to speed the process up, duplicating... -
Page 23: Creating A Recipe By Duplicating An Already Stored Recipe
Use | MANAGING RECIPES Touching the various fields, you can set: parameters; - the cooking parameters; - the turntable rotation name; - its confirm the entered name with Save with the disk symbol : the new recipe will have the parameters set by the user and will follow all the already stored recipes. -
Page 24: Modifying A Stored Recipe
Use | MANAGING RECIPES Modifying a stored recipe To modify an already stored recipe, you can act during cooking or from the service screen. EDITING A RECIPE FROM THE WORK SCREEN While cooking is in progress, if you intervene manually modi- fying a parameter (for example, the temperature is increased), an asterisk appears next to the name (e.g. -
Page 25: Programmed Switch-On
Programmed switch-on Fig. 31 The programmed switch-on function is very useful because the oven can be already hot, and therefore ready to bake, when the restaurant is opened. the oven switching on With this function, you can program and off automatically for the whole week. - Page 26 At the end, make the weekly function operational touching the icon in the bottom RH corner. If it is: I wish to delete the first event on Mon- white= is not the weekly function is programmed but days active (user’s manual switch-on/switch-off 11.00/14.30 19.00/22.30 and no longer automatic)
-
Page 27: Setting The Note List
Setting the Note list The note list function allows setting up up to 10 notes that will be displayed at the set time and on the set days. Each note can have up to 200 text characters and it is possible to program when the note will expire or has to be repeated (e.g. -
Page 28: Setting A Holiday
Setting a Holiday Fig. 34 Entering the date and time of If enables, the function interrupts the weekly on and the end of the holiday off programming (page 25), if present, up to the set time and day, without having to delete it: this is useful if the restaurant remains closed for holidays and therefore the oven must not switch on automatically during that period. -
Page 29: User Settings
User settings Language Fig. 36 Fig. 38 Fig. 36 In this section you can set the language used in the menu dis- To access the “Settings” section, touch the corresponding icon. plays: the active language is highlighted in red. To exit, touch the same key. At the end of the setting, confirm with “OK”... - Page 30 Program management In this section you can save a recipe: this means you can reuse it without having to reset its cooking parameters. Parametri Furthermore, by assigning a name, it is possible to find and use Creating a new recipe). it quickly (for details see page Fig.
-
Page 31: Maintenance And Cleaning
Maintenance and cleaning Warnings Oven cleaning switch off the Before any cleaning, it is necessary to Cleaning the external steel parts power to the appliance (acting on the system switch) Use a cloth dampened with hot soapy water and end with rins- and wear suitable personal protection equipment (e.g. -
Page 32: Cleaning The Chamber With The Pyrolysis Function
Maintenance and cleaning Cleaning the chamber with the pyrolysis function Pyrolysis is a thermochemical crystallization process of food res- idues that have deposited in the cooking chamber, which takes place by bringing the oven up to 400°C - 725°F. Before starting the pyrolysis, remove the coarser food residues with a natural fibre brush. -
Page 33: Replacing Components
Maintenance and cleaning Replacing components only The user must replace the stated components: in case of a fault or for extraordinary maintenance, contact the retailer, requesting service from an authorised tech- nician. As replacements, always use original spare parts to be requested from the Manufacturer: using non original parts might cause injuries to people, non optimal performance and even serious damage of the appliance itself. -
Page 34: Oven Downtime For Prolonged Periods
Maintenance and cleaning Disposing of ashes and food residues Oven downtime for prolonged periods Disposal at end of life During any downtime, switch the power off. Protect the steel To avoid any unauthorised use and associated risks, be- The ash and food residues removed with cleaning must outside surfaces passing over them with a soft cloth slightly fore discarding the machine make sure it cannot be be disposed of according to the regulations in force in... -
Page 35: Warranty
• 8.1 Each product sold is to be considered compliant when • c) Alternatively, the Seller may opt for the replacement of site www.cuppone.com within 48 hours after the time the delivered in the quantity, quality and type indicated in the the defective Products;... -
Page 36: Something Is Not Working
• Make sure the oven is correctly connected to the mains (plug correctly inserted into the socket) and CUPPONE 1963 The oven does not that the mains are working. turn on Cuppone F.lli S.r.l. • Make sure the main switch is ON. Via Sile, 36 The oven turns on but 31057 Silea (TV) - ITALY • Make sure you set the cooking parameters correctly. - Page 37 Ed. 0621 - 70702562 - REV05 - Valid from serial number21052570 - Giotto - Use and maintenance...
- Page 38 CUPPONE 1963 Cuppone F.lli S.r.l. Via Sile, 36 31057 Silea (TV) - ITALY T +39 0422 361143 F +39 0422 360993 info@cuppone.com - www.cuppone.com...
Need help?
Do you have a question about the Giotto GT110 and is the answer not in the manual?
Questions and answers