Table of Contents
Advertisement
Quick Links
Advertisement
Table of Contents

Related Manuals for Guldmann GH


Summary of Contents for Guldmann GH
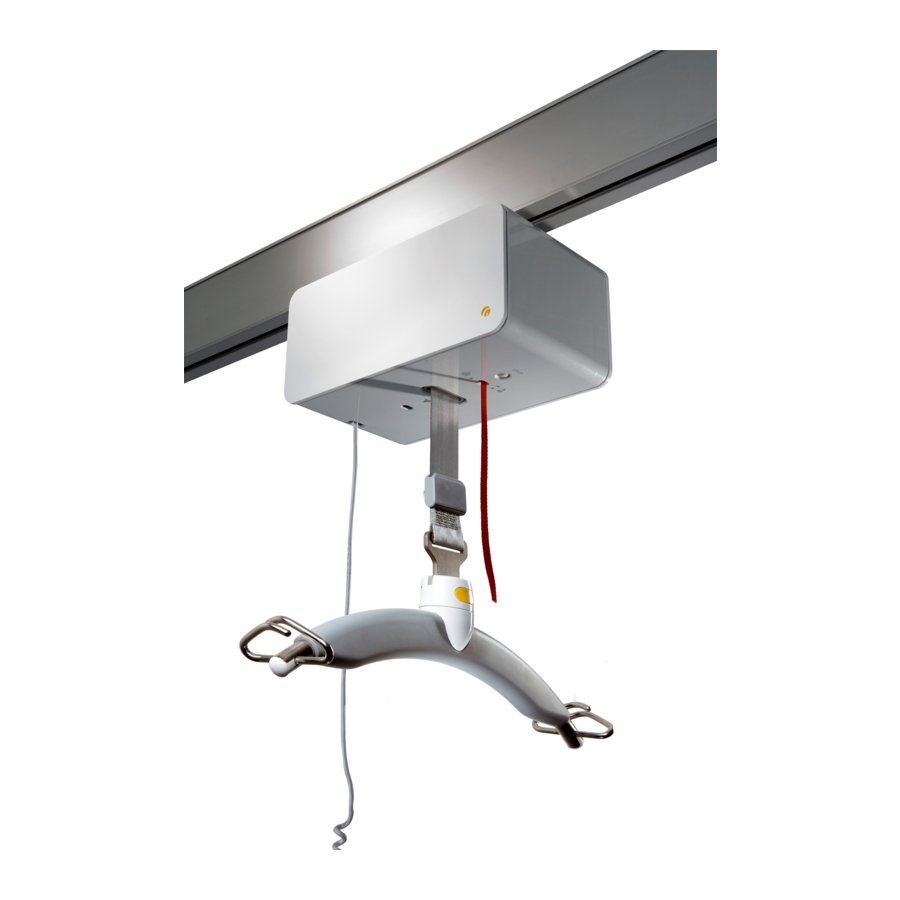
- Page 1 SERVICE GUIDE GENERAL INFORMATION FOR GH SERVICE AND REPAIR TECHNICAL DRAWINGS Vers. 3.00 CONTROL 23W1 23W1 Guldmann develops, manufactures, distributes and maintains products and services that make the daily lives of disabled people and their carer a little easier.
-
Page 2: Table Of Contents
GH lifting modules, configurations . . . . . . . . . . . . . . . . . . - Page 3 Turn tabel GH . . . . . . . . . . . . . . . . . . . . . . . . . . . . . . . .158 GH Horizontal traverse Drive Motor . . . . . . . . . . . . . . .159...
-
Page 4: General Conditions
., must be covered Hilti HUS-H 8 x 85 – 150 screws are tightened with a torque with paint . of 45 Nm . The two M10 nuts at the GH Plasterboard Wall bracket are thightened with a torque of 30Nm . - Page 5 Fixed rail systems are class I equipment and must be The hand control and cable must be free from the hanger, installed by a qualified technician or by Guldmann Service Team . patient or any other object before the hoist is activated up Equipment is disconnected from Supply Mains by breaking or down .
-
Page 6: Key To Symbols And General Information
Key to symbols and general information Ikons/symbols Description Temperature operation, transport and storage -10 and +40°C / 14 and 104°F 40ºC 104ºF -10ºC 14ºF A relative air humidity of between 30 and 70 % for operation, transport and storage . Air pressure of between 70 and 106 kPa for operation, transport and storage . -
Page 7: Gh Lifting Modules, Configurations
GH lifting modules, configurations GH3 lifting modules, configurations Guldmann Product Load in Number Number Number of Wi-Fi Scale Service User hoist type line of lifting of lifting horizontal module module module module interface straps motors drive motors None None None... -
Page 8: Types Of Rail
Types of rail GH3 & GH3+ There are three different types of rails: The overall height of the rails in a room-covering system Rail A, B and C. can vary from 99 mm (4") for two Rail A (traverse rail mounted between Rail A parallel rails, System “A”... -
Page 9: Gh1
Types of rail There are seven different types of GH rails: Rail A, B and C, Mini, Midi, Maxi and Jumbo . Max distance between projection supporting points 0,23 1,25 1,75 4,75 5,25 6,25 6,75 7,25 Meter Inch GH1 – Max 205 kg (450 lbs) GH1 –... -
Page 10: Technical Specifications
Technical specifications GH3 and GH3+ Weight and materials Functions : 200 kg (440 lbs), 250 kg (550 lbs) Operation : Hand control / IR Own weight : 9,6 kg (21 .1 lbs) Sound level : 52 dB (A) with horizontal motor : 10,5 kg (23 .1 lbs) Horizontal speed : 300 mm/sec . -
Page 11: Gh3 Twin
Technical specifications GH3 Twin Functions Weight and materials Operation : Hand control / IR : 250 kg (550 lbs), 500 kg (1100 lbs) Sound level : 52 dB (A) Own weight : 19,2 kg (42 .2 lbs) Safety Covers : Impact-resistant UL 94 V-0 flame Emergency stop : Yes retardant recyclable plastic... -
Page 12: Gh1
Technical specifications Weight and materials Functions : 205 kg (450 lbs) 175 kg (385 lbs), Operation : Hand control 255 kg (560 lbs), Sound level : 52 dB (A) Own weight : 8,0 kg (17 .6 lbs) Safety Emergency stop : Yes Covers : Impact-resistant UL 94 V-0 flame... -
Page 13: Gh1 F
Technical specifications GH1 F Weight and materials Functions Operation : Hand control : 175 kg (385 lbs), 205 kg (450 lbs), Sound level : 52 dB (A) 255 kg (560 lbs) Lifting module : 11,0 kg Safety Lifting module Emergency stop : Yes incl . -
Page 14: Gh1 Q
Technical specifications GH1 Q Weight and materials Functions : 175 kg (385 lbs), 205 kg (450 lbs), Operation : Hand control 255 kg (560 lbs) Sound level : 52 dB (A) Own weight : 8 .0 kg (17 .6 lbs) Safety Covers : Impact-resistant UL 94 V-0 flame... -
Page 15: Trolley And Transport Trolley For Gh1 F
Technical specifications Trolley and Transport trolley for GH1 F Trolley for GH1 F Transport trolley for GH1 F Functions Functions Max . load : 255 kg (560 lbs) Capacity, bag : 2-3 slings 2-3 lifting hangers Weight Capacity, max . : 25 kg (55 lbs) Travelling trolley : 1 .2 kg (2 .6 lbs) -
Page 16: Power Supply
Fixed rail systems must be installed by a qualified installer the double-encased symbol ) can be connected to the or by Guldmann Service Team . mains direct by the user . Equipment is disconnected from Supply Mains by breaking The transformer is disconnected from the supply mains by the main breaker switch . -
Page 17: Electrical Installations
There may be special local requirements for the installation of rail systems in medical treatment areas . Any special requirements carried out without the partici- pation of Guldmann are at the purchaser’s own risk . See illustrations on page 20 + 21. - Page 18 Electrical installations Electrical installations Protection against electric shock Protection against electric shock a) Bathtub b) Bathtub with fixed partition wall Area 1 Area 1 IPx4 IPx4 Area 2 Area 3 Area 2 Area 3 IPx4 IPx4 IPx4 IPx0 2,40 m 0,60 m 2,40 m Area 0...
- Page 19 Electrical installations Protection against electric shock g) Bathtub Ceiling Area 3 Outside area IPx0 Outside area Area 1 Area 2 Area 3 IPx4 IPx4 IPx0 3,00 m 2,25 m 0,60 m 2,40 m (2') (8') Area 0 IPx7 Area 1 IPx4 h) Showerbasin Ceiling...
-
Page 21: Service And Repair
Switch track GH . . . . . . . . . . . . . . . . . . . -
Page 22: Gh3
Before service or repair starts The emergency stop must be pulled before any service is made on the hoist... -
Page 23: Removing Side Covers
Removing side covers Removing side covers Remove the side covers, by pressing down with your fin- gers the 2 grey plastic inserts, located in each corner of the hoists top cover . Tip the side cover forward and remove . Unplug charging wire When the trolley is supplied with pick-up for charging, unplug charging wire from hoist, remove wire from groove... -
Page 24: Removing Hoist From Trolleys
Removing hoist from trolleys Removing hoist from trolleys Place one hand under the hoist to take the weight, .Then pull out the connection pins, (marked with yellow tops) The hoist will now be released from the trolley . Note: Before working inside the hoist you must always use a Anti Static Mat Place the hoist so the top cover is not damaged while working on the hoist. -
Page 25: Replacement Of Batteries - 1 Drive Belt
Replacement of batteries - 1 drive belt When disconnecting batteries You must un-plug wires in the following order . 1 . Red wire + 2 . Black wire – 3 . Charging wires When connecting batteries You must plug in wires in the following order 1 . -
Page 26: Replacement Of Batteries - 2 Drive Belt
Replacement of batteries - 2 drive belt Removing of batteries When there are two motors, there are two batteries The batteries are disconected in the same way as in a hoist with one drive belt, the only differnce is the possition of the batteries - see page 27 . -
Page 27: Replacement Or Adjustment Of Hand Control
Replacement or adjustment of hand control Removing hand control Unplug the hand control and pull out the wire reservoir from the hoist . Unwind the hand control cable . Take out the screw from the cable clamp . Remove cable from reservoir and replace with new hand control . - Page 28 Replacement or adjustment of hand control Replacment or adjustment of hand control Put the replacement hand control next to the removed hand control . Mark the cable length needed . Refix cable clamp and wind the cable on to the reser- voir, remembering to keep wires side by side and leaving approximately 250 mm (10 inch) of cable to be routed over motor before connecting to PCB .
- Page 29 Replacement or adjustment of hand control Replacment or adjustment of hand control Put cable reservoir back into hoist by pulling on cable com- ing from bottom of hoist and pushing in reservoir . Loop the cable over motor and plug back in to PCB .
-
Page 30: Replacement Of Lifting Strap
Replacement of lifting strap Removing the lifting strap Completely lower the strap to reveal white tag attached to lifting strap . This can be located on top of hoist in centre cut out of top cover . Pull on the white tag to reveal grey lifting strap, remove pin located in strap fold . - Page 31 Replacement of lifting strap Mounting the strap Take the white tag attached to the new lifting strap and guide it through the strap wheel . This can only be done if the slot on the strap wheel is inline top and bottom . IT IS IMPORTANT to mount the lifting strap correctly.
- Page 32 Replacement of lifting strap Turn the strap wheel To turn the strap wheel back in upright position, you must release the motor brake by turning the handle bearing the words “EMERGENCY DOWN” . This handle is located behind the side cover and must be turned clockwise . There is one handle for each motor on the hoist .
-
Page 33: Replacement Of Timing Belt
Replacement of timing belt Replacement of timing belt Remove the timing belt by sliding it off the large white gear- ing wheel . Replace the timing belt by putting the belt over the small motor wheel then slide the belt over the large gearing wheel . -
Page 34: Removing Covers
Removing covers Removing bottom cover Remove the 3 screws on both sides of the hoist . Using a small flat screw driver, release the U shape clips located inside the hoist, on the 4 corners of the top cover . NOTE: Do not force the clip to open a gentle twist of the screw driver is enough to release the clip. - Page 35 Removing covers Removing top cover When taking the top cover of, gently pull on the cover to release the clips . Before the cover can be lifted off disconnect the wire from the charge PCB .
-
Page 36: Replacement Of Safety Control Mechanism
Replacement of safety control mechanism Replacement of safety control mechanism Unplug the wire from the PCB to the safety control mechanism . Use a flat head screw diver or similar to remove the mech- anism, by pushing in one side to release the clip and pull- ing up on the mechanism . -
Page 37: Replacement Of Belt Drive
Replacement of belt drive Removing the belt drive Remove the cable holder on the side of the cooling plate . Unplug all wires attached to belt drive from PCB . This should be A . Motor wires B . Mechanical brake wires C . - Page 38 Replacement of belt drive Removing the belt drive Release the mechanical brake . Undo the three screws on the drive belt and release it from the strap wheel . Use torx 25 . Replace belt drive and plug all plugs back in place . Remember to put the cable holder back in place .
-
Page 39: Coating At Gh1/Gh3 During Annual Inspection
Coating at GH1/GH3 during annual inspection All PCB’s, plugs and switches must be coated during service inspection . . The white circles at the pictures indicate where it is allowed to spray coating . Remember to coat both sides at the PCB’s . NOTICE: Lifting strap, strap guide and emergency stop may not be coated . -
Page 40: Replacing Or Adding Pcbs
Replacing or adding PCBs Identifying the different PCBs It is very important to use a anti static mat and wrist band 3 . The auxiliary motor PCB is located above the Motor when working with PCB’s safety PCB and is connected to it via a green connector strip . -
Page 41: Replacing The Leader Motor Safety Pcb
Before removing the leader Motor Safety PCB it is impor- tant to upload hoist data on to your computer or note book . This will be done through the Guldmann service console . The data is to be saved and loaded on to the replacement PCB . - Page 42 Reconnect wires and reassemble hoist leaving the battery’s until last . Before the hoist can be put back into service the PCB needs to be configured, this is done through the Guldmann service console . NOTE: It is important to register all PCB exchanges on the...
-
Page 43: Replacing The Auxiliary Motor Pcb
Connect the new PCB to the connector strip and refix the screws to the cooling plate . Reconnect wires and reassemble hoist leaving the battery’s until last . NOTE: It is important to register all PCB exchanges on the Guldmann traceability web site. -
Page 44: Replacement A Communication Pcb
Before removing the Communication PCB it is important to upload the data on to your computer or note book . This will be done through the Guldmann service console . The data is to be saved and loaded on to the replacement PCB . -
Page 45: Replacement Of Charger Pcb
. Put all the plugs back in place . NOTE: Remember to move the jumpers at the Charger PCB in a Twin hoist. NOTE: It is important to register all PCB exchanges on the Guldmann traceability web site. -
Page 46: 550548_01 Motor Safety 2010 Pcb, Spare Part
550548_01 Motor safety 2010 PCB, spare part No . Description From Image, drawing Charger signal, cable 550396 550397 Communication cable 550396 550396 MotorSafe/MotorSafe J10 or J11 J10 or J11 Communication 550396 551203 Power cable until ed . 5 Cable, RS 485 com, 550396 551203 L = 350 mm... - Page 47 550548_01 Motor safety 2010 PCB, spare part Connecting 550396 Motor Safety pcb to 551203 Communication pcb (edition 8+) Cable 5: Connects to J105 on communication PCB to J2 on MotorSafety PCB Connecting 550396 Motor Safety pcb to 551203 Communication pcb (until edition 5, with SD card) Cable 3: Connects to J5 on communication PCB to J2 on Motor Safety PCB Cable 4: Connects to J8 on communication PCB to J3 on Motor Safety PCB...
- Page 48 550548_01 Motor safety 2010 PCB, spare part Connecting 550396 Motor Safety pcb to another 550396 Motor Safety pcb Cable 2: Connects J10 or J11 on pcb 1 to J10 or J11 on pcb 2 (Note .: J10 and J11 are identical, and the spare one are used to connect hoists in a twin configuration) .
- Page 49 550548_01 Motor safety 2010 PCB, spare part Connecting 550396 Motor Safety pcb to 550397 Charger pcb Cable 1: Connects J20 on 550396 MotorSafety pcb to J4/J6 on 550397 Charger pcb . Connecting 550396 Motor Safety pcb to 550201 Motor AUX pcb When connecting to 550201 Motor AUX, re-use the RS485 connection and connect to J3 .
- Page 50 550548_01 Motor safety 2010 PCB, spare part Connecting 550396 Motor Safety pcb to 551287 Motor AUX pcb When connecting to 551278 Motor AUX, No cables are needed .
-
Page 51: 550550_00 Communication Pcb, Addition
550550_00 Communication PCB, addition No . Description From Image, drawing Cable RS485, 5V com, 550396 551203 ed . L = 350 mm 8+J105 Cable RS485, 5V com, 550202 551203 ed . legacy J2 and RS485 8+J105 -pcb 551203 ed . 8+ Communication pcb Handcontrol Assy, 550396... - Page 52 550550_00 Communication PCB, addition Connecting a 551203 Communication pcb to 550396 MotorSafety pcb Cable 1: Connects J105 on communication PCB to J2 on MotorSafety PCB Connecting a 551203 Communication pcb to 550202 MotorSafety pcb Cable 2: Connects J105 on communication PCB to J2 and RS485 communication PCB on MotorSafety PCB .
- Page 53 550550_00 Communication PCB, addition Connecting Load cells If Load cells are present they must be connected to J100 and J101 . Jumper Setting (Only for Twin hoist follower) When used in follower Twin Hoist a jumper must be mounted on J303 at the white dot .
-
Page 54: 552714_01 Motor Aux, Spare Part
552714_01 Motor AUX, Spare part No . Description From Image, drawing 551278 Motor AUX PCB 2012 Cable, 1 horizontal drive... - Page 55 552714_01 Motor AUX, Spare part Connecting a 551278 Motor AUX PCB 2012 to 550396 MotorSafety pcb The AUX pcb plugs directly into the MotorSafety pcb, no cables are needed . NOTE: If it replaces the previous type 550201 Motor AUX PCB on a hoist with 1 drive motor, the cable to the drivemotor must be replaced (the new cable is 5 cm.
- Page 56 552714_01 Motor AUX, Spare part Connecting a 551278 Motor AUX PCB 2012 to 550396 MotorSafety pcb via extension cable The AUX pcb plug into the MotorSafety pcb via the extension cable, no extra cables are needed.
-
Page 57: Wi-Fi Pcb, Spare Part
Wi-Fi PCB, Spare part Description From Image, drawing… Wi-Fi PCB 2014 Cable RS485 24V, J2 Motor J100 Wi-Fi 280 mm Safety PCB Cable RS485 24V, J2 Motor J100 Wi-Fi 140 mm Safety PCB... -
Page 58: Wifi Sequence
WiFi sequence • Open the hoist, disconnect the battery, and remove the bottom cover . • Mount the Wi-Fi PCB (described in this document) . • Connect the batteries, and assemble the hoist again (Final assembly may wait until everything works) . •... -
Page 59: Wifi Description
WiFi description The Wi-Fi PCB is mounted on top of the Communication PCB as a Piggyback . If it is necessary to disconnect the two PCBs, then be very careful, as the connectors are fragile . Note that the connectors are aligned . The Wi-Fi PCB can only be mounted on a Communication PCBs ed . -
Page 60: Installation Of Wi-Fi Pcb
Installation of Wi-Fi PCB If it is an upgrade: Remove the communication cable . It shall not be used any more . If it is a sparepart: Reuse or replace the communication cable . Gently align the connectors on the two PCBs . When everything is ok gently press the Wi-Fi PCB onto the Communication PCB . - Page 61 Installation of Wi-Fi PCB For one motor hoist: When installing the Wi-Fi PCB on a one motor hoist, use the long wire to connect the J100 on the Wi-Fi PCB to J2 on the Motor Safety PCB . For two motor hoist: When installing the Wi-Fi PCB on a two motor hoist, use the short wire to connect the J100 on the Wi- Fi PCB to J2 on the nearest Motor Safety PCB .
-
Page 62: Adjusting The Bottom Cover
Adjusting the bottom cover If it is an upgrade: Remove the rib part of the bottom cover to make physical space for the Wi-Fi module . Note: The rib was removed from the cover in 2015 . -
Page 63: Product And Wi-Fi Label
Product and Wi-Fi Label If it is an upgrade: Remove the original product label and clean the surface . Mount the Wi-Fi label and the new product label . The extra labels should be stored with the Logbook . -
Page 64: Upgrade Gh3
Upgrade GH3+ GH3+ Upgrade The upgrade will always generate a new serial number, It is possible to upgrade GH3+ from one version to and the old serial number label must be replaced by a new another label . The new label will be delivered with the upgrade package . -
Page 65: Cover Cut-Out Instruction
Cover cut-out instruction Place the cover on a hard surface and using a sharp wood chisel break out area needed . Loadcell 1 Drive motor 2 Drive motor... -
Page 66: Gh1
Before service or repair starts The emergency stop must be pulled before any service is made on the hoist... -
Page 67: Removing The Side Covers
Taking the hoist down from rail Take a small flat head screw driver and locate it in the slot of the side cover which is found under the Guldmann logo . Gently ease the side cover towards you and run the screw- driver along the edge, this will remove the cover from the slot . -
Page 68: Removing The Trolleys, Gh1 & Gh1Q
Removing the Trolleys, GH1 & GH1Q GH1 trolley set . GH1Q trolley set . Before you can detach the GH1Q trolley from the hoist you will need to unplug the wire attached to the Motor safety PCB in side the hoist . See page 73 ”Removing the hoist covers”... -
Page 69: Removing Top Assambly, Gh1F
Removing top assambly, GH1F GH1F top assambly . Before you can remove the GH1F top assambly you will need to remove the cover . This is done by squeezing the sides in so that the clips can unclip from the hoist top cover . - Page 70 Removing top assambly, GH1F Once the cover is removed you can then unplug the cable . With the cable unplugged and the pins pulled out it is pos- sible to detach the trolley from the hoist . Take care when removing Trolley that the motor dose not damage the PCB in the hoist .
-
Page 71: Removing The Hoist Covers
Removing the hoist covers There are 4 clips one located in each corner of the eye shape side Take a flat head screwdriver and put it into the slot were the clip is sitting, with a gentle twist the casing should open, repeat this on all four clips . -
Page 72: Replacing Battery
Replacing Battery To replace the battery, pull the emergency cord to turn the hoist off . Remove the bottom cover . Note: It is important to always use a anti-static mat and wrist band when working inside the hoist . Unplugging the battery it is important to unplug the wires in order: 1 . -
Page 73: Replacing The Lifting Strap
Replacing the lifting strap After removing the hoist from the traveling trolley you can then remove the large oval yellow rubber grommet, located in the center of the top cover . Completely lower the strap to reveal the white tag attached to lifting strap . - Page 74 Replacing the lifting strap Pull out strap from bottom of hoist . Take the white tag attached to the new lifting strap and guide it through the strap wheel, this can only be done if the slot on the strap wheel is inline top and bottom . NOTE: It is important to mount the lifting strap correctly, Place the strap with the fold turned away from the L .E .D going in from bottom of hoist .
-
Page 75: Replacing The Hand Control
Replacing the Hand control To replace the hand control, pull the emergency cord to turn the hoist off, Remove the bottom cover . Note: It is important to always use a anti-static mat and wrist band when working inside the hoist . Mark the lead so that you can replace it with the correct length . -
Page 76: Replacing Safety Control Mechanism
Replacing safety control mechanism To replace the safety control mechanism pull the emergen- cy cord to turn hoist off, remove the bottom cover . Note: It is important to always use a anti-static mat and wrist band when working inside the hoist . Disconnect battery wires, as described on page 74 . -
Page 77: Replacing The Timing Belt
Replacing the timing belt To replace timing belt pull the emergency cord to turn hoist off . Remove top and bottom covers . Remove the timing belt by sliding it off the large white gea- ring wheel . -
Page 78: Replacing Belt Drive
Replacing belt drive To replace the belt drive, pull emergency cord to turn off hoist, take covers off and disconnect battery . Note: it is important to always use a antistatic mat and wrist band when working inside the hoist . Unplug all wires from motor to PCB and remove them from cable stay . -
Page 79: Replacing The Charge Pcb
Disconnect the battery wires as described on page 74 . Unplug all wires from the PCB and remove from the plastic housing . Replace PCB and reconnect wires leaving battery wires until last . Note: It is important to register all PCB exchanges on the Guldmann traceability web site. -
Page 80: Replacing The Motor Safety Pcb
Replacing the Motor safety PCB Note: Before replacement can be done, the data stored on the PCB must be down loaded on to the, Guldmann ser- vice console . See how to do this in the SIC manual . After data has been loaded on to service console it is safe to replace the Motor safety PCB, pull the emergency cord to turn the hoist off, and remove the bottom cover . -
Page 81: Instructions For Installing Pcb And Battery Unit
Instructions for installing PCB and Battery unit Assembly of GH1 and GH1 Q electronic supports, and PCB’s Move upwards, untill part is locked . - Page 82 Instructions for installing PCB and Battery unit Move downwards, untill part is locked .
- Page 83 Instructions for installing PCB and Battery unit First attachment First attachment First attachment First attachment...
- Page 84 Instructions for installing PCB and Battery unit Second attachment Second attachment The tube-formed detail has to snap The tube-formed detail has to snap into the bearing hole for the strap reel. into the bearing hole for the strap reel . Push down and inwards Push down snd inwards .
- Page 85 Instructions for installing PCB and Battery unit Connect wires to charger PCB before attaching it to fixing unit . Locate fixing points and attach charger PCB to unit . The motor safety PCB has 4 fixing points . 2 slots 1 insert through hole and a side clip .
- Page 86 Instructions for installing PCB and Battery unit For GH1 F Connect wire to PCB before it is fastened to unit . Fasten PCB to unit . . Connect wire to motor safety PCB .
-
Page 87: Gh1 F Trolley Recomendations
GH1 F Trolley recomendations Every second year or after 2000 installations: • Dismantle the complete locking and winding mechanism • Install new, complete Quick lock (551245 spare part) • If the cord does not show any sign of wear it can be in use for another year . -
Page 88: Battery Storage Nimh
Battery storage NiMH Battery Maintenance Storage temperature Periodic visual inspection of the battery is recommended . As already mentioned, the self-discharge reaction rate If the battery is stored for over six months, it is recom- increases with higher temperatures . Prolonged storage of mended to charge and discharge the battery several times the battery material deteriorating faster;... -
Page 89: Ir Remote Control
The IR-receiver offers the opportunity to shift between channels (Ch .1/Ch .2) . The IR receiver is set to Ch .1 from Guldmann . Adapt the IR-receiver to perform the desired function . NB! If the rail system includes two hoists the channel on... - Page 90 Key no . 7: The wire mounted in pos . 6 is moved to pos . 8 Guldmann rail systems . The IR remote control is by Key no . 8: The wire mounted in pos . 6 is moved to pos . 9 Guldmann set to control all additional products by pressing key no .
- Page 91 IR remote control Switch track, Transverse drive motor The IR-receiver is connected to the PCB for Switch track or Transverse drive motor, by ”IR-receiver cable” Motor Control Control Supply Le Puri Le Puri 16 15 Brown Pink Grey IR PCB Green Yellow White...
- Page 92 IR remote control IR-PCB for Combi-lock Do the following on the IR-receivers: Remove the 4 screws and the cover to get access to the wiring . IR-receiver Key no . 5: Mount the orange wire on NH (standard) Channel # Key no .
-
Page 93: Guidelines For Troubleshooting
Guidelines for troubleshooting Guidelines for troubleshooting The fault code is combined by the logic module number and a fault code type . The logic module number can be seen in the figure below . Leader hoist Follower hoist ”Twin” Motor safety -follower- (32) (17) - Page 94 Guidelines for troubleshooting Hand control Fault description Fault mitigation – Technician display Fault 18/1 Communication fault – Twin hoist (18) • Check cables and connection between PCB on leader hoist (J10/J11 on 16) and follower hoist (J10/J11 on 18) • Check battery voltage on (18), minimum 16 volt . •...
- Page 95 Guidelines for troubleshooting Hand control Fault description Fault mitigation – Technician display Low battery 16 Low battery on leader • Check connection between battery and charger (J3) • Charge battery ½-2 hours Low battery 17 Low battery on follower Low battery 18 Low battery on leader –...
-
Page 96: Gh Combi Lock
GH Combi lock Check points • Check for corrosion (in case of corrosion, replace • Check that the gap between the rails is 3 mm . (if not, safety locks) change it) • Check for dust at the two track parts . (if so, clean them) •... - Page 97 GH Combi lock Push the bearing (1), and the gate (2) will move outwards on the traverse rail’s safety lock . Be sure all parts are moving easily . When the bearing is released the gate shall return to closed position .
- Page 98 GH Combi lock Check that the safety lock on the fixed rail is installed with safety screws (1) on the right side . Check that the safety lock on the fixed rail is installed with safety screws (1) on the left side .
- Page 99 GH Combi lock GH Check that the safety lock’s tongue (1) for the fixed rail is flush with rail end (2) . Check that the four M10 lock nuts (1) are tightened with correct torque setting (54Nm) . Check that the safety locks are covering the rail slot, when the Combi lock is not activated (Closed) .
- Page 100 GH Combi lock After mounting the covers, check that the Combi lock acti- vates and deactivates correctly . Check that the covers are not interfering . Check that the marking label (1) is mounted correctly . If not change the label and place it 100 (98-102) cm from the...
-
Page 101: Combi Lock 3
Combi lock 3 Check points • Check for corrosion (in case of corrosion, replace • Check that the safety locks are installed with safety safety locks) screws . (if not, do it) • Check for dust inside rails where safety locks are •... - Page 102 Combi lock 3 Push and release the bearing (1) – it shall move easily both ways . Check that the latch (tongue) is in the right position (2) . The measurement from rail end to the U-shaped cutout shall be between 12 –...
- Page 103 Combi lock 3 Check that the wing (1) at the traverse rail’s safety lock moves freely between the wing and rail at the fixed rail’s safety lock . Check that the wing (1) will prevent the traverse rail from moving away from the fixed rail when the safety lock is open .
- Page 104 Combi lock 3 Check that the safety locks are covering the rail slot, when the Combi lock is not activated (CLOSED) . Check that the safety locks are completely open and not interfering with the slot, when the Combi lock is activated (OPEN) .
- Page 105 Combi lock 3 Perform a pull test on the Combi lock system Perform a pull test on the Combi lock system to check that the traverse rail’s safety lock functions even when incor- rectly used . The reason for making this test is to ensure that the resist- ance at the lock is sufficient, if it is forced open (not intend- ed use) .
- Page 106 Combi lock 3 Step 3: Attach the scale to the hoist trolley and with a firm grip pull it steadily through the unopened safety gate . Stop pulling when the scale shows 4 kg/8 .8 lbs on the dis- play . If the safety lock releases the hoist and allows it to travel through the safety gate before the display shows 4 kg/8 .8 lbs, then the safety lock must be replaced .
-
Page 107: Installing Non-Fric Tape, Fixed Part
Combi-lock 3 Installing non-fric tape, fixed part Placing of tape from roll, 552814 F ( 1 : 1 ) Wipe off the area with a clean cloth before placing the tape Edge of tape flush with edge on fixed part Bend tape around edge, will keep the tape in place, when installing on rail end. -
Page 108: Switch Track Gh
Switch track GH Installation of Cover kit 1 Important When installation PCB and cables etc . protection against static electricity must be used . 1 Switch off transformer supplying switch track before removing plate . 2 . Remove the screws holding the change plate and remove the plate . - Page 109 Switch track GH Diconnect the cables from the motor and carefully remove the PCB . Remove the two screws holding the motor-unit and remove the unit . Remove the screw and nut holding the turning arm and remove the turning arm from the old cover .
- Page 110 Switch track GH Change the cover and re-install the turning arm with the screw and nut holding the turning arm . The screw and nut holding the turning arm must be tight- ened but still the turning arm must be able to turn easily Carefully remove the adhesive circuit board support and replace them with the new adhesive circuit board supports .
- Page 111 PC board and place the PC board in the middle of the cover . The spare label for switch track GH with the barcode is removed from the pocket inside the motorhousing and placed on the end of the top cover .
- Page 112 Switch track GH Install the cover, make sure that the cables lies at the side and with out risk of getting caught, secure the screws with Kemlock AS 43 or similar and tighten the three screws . Install the change plate, secure the two screws with Kem- lock AS 43 or similar and tighten the screws .
- Page 113 Switch track GH Installation of cover kit 2 Important When installation PCB and cables etc . protection against static electricity must be used . Remove the screws holding the old top cover . Remove the cover Install the two cable grommets .
- Page 114 Switch track GH Replacement of motor Important When installation PCB and cables etc . protection against static electricity must be used . Reconnect the motorunit to the PC board according to the electrical diagram (page 155) . Make sure to lead the wires behind the PC board .
- Page 115 Switch track GH Installation of PCB switch track GH, sparepart Important When installation PCB and cables etc . protection against static electricity must be used . Un pack the new PC board . Switch 1 and 7 set to ”ON”...
- Page 116 Switch track GH Place the cover correct and test that the function on of the e) Control that the change arm and the turning arm are switch track by pulling the turning arm from side to side . connected correct .
- Page 117 Switch track GH Installation of Tongue Important When installation PCB and cables etc . protection against static electricity must be used . Remove screws holding the change plate and remove the change plate . Remove the screws holding the cover plate .
- Page 118 Switch track GH Remove the set screw and the pin . Remove the two washers . Remove the second setscrew . Remove the activation arm .
- Page 119 Switch track GH Remove the old tongue . The axle of the new tongue is greased with Molykote and installed . Install the installation arm, secure the first setscrew with Kemlock AS 43 or similar and tighten it .
- Page 120 Switch track GH Make sure that the installation arm is installed in between the legs of the change arm . Place the two washers and the pin, secure the second set- screw with Kemlock AS 43 or similar and tighten it .
- Page 121 Switch track GH Install the cover, make sure that the cables lies at the side and with out risk of getting caught in moving parts . Secure the screws with Kemlock AS 43 or similar and tighten the three screws .
- Page 122 Remove the screws holding the guide rails and remove the old guide rails . Place the distance guide rail curve GH and the two noise damping for tongue ø12x5 mm . Secure the 8 screws with Kemlock AS 43 or similar and tighten all 8 .
-
Page 123: End Stop
End stop Fitting of End stops • If there is a risk that the End stop may fall out, a hole of 4 .5 mm ( ") is drilled through the rail – not through the End stops must always be used at the ends of rails, angle bracket of the End stop . -
Page 124: Swivel Assembly Instruction
Swivel assembly instruction The Swivel is compalible with: The swivel attachment is assembled by inserting the shaft 14600 - Mobile bath chair as shown in diagram 1 . 14610 - Mobile Bath stretcher 28445 - Horizontal stretcher Both set screws must be secured with thread locking adhe- 28456 - Horizontal lifting support asive ”Permelock AN2242”... -
Page 125: Technical Drawings
Turn tabel GH . . . . . . . . . . . . . . . . . . . . . . . . . . . . . . . .158 GH Horizontal traverse Drive Motor . . . . . . . . . . . . . . .159... -
Page 126: Spare Part Overview
Spare part overview GH3+... - Page 127 Spare part overview GH3+ Pos. no. Part Drawing/Item no. Wire reservoire assembly, spare part 550123 Connection trolley, spare part 550545 Beltdrive, spare part 550546 4 .1 Strap, spare part 550547 4 .2 Strap for corrosive surroundings 554305 5 .1 Motor safety PCB 2010, spare part incl . Cables 550548 5 .2 Motor safety PCB 2010, spare part...
-
Page 128: Gh3
Spare part overview... - Page 129 Spare part overview Pos. no. Part Drawing/Item no. Wire reservoire assembly, spare part 550123 Connection trolley, spare part 550545 Beltdrive, spare part 550546 Strap, spare part 550547 5 .1 Motor safety PCB 2010 incl . Cables, spare part 550548 5 .2 Motor safety PCB 2010, spare part 550593 IR PCB, spare part...
-
Page 130: Gh3 Twin
Spare part overview GH3 twin Pos. no. Part Drawing/Item no. Safety control mechanics, spare part 550564 GH3+ Bottom cover Follow unit, spare part 550557 3 .1 Twin connection, spare part, 2010 550559 3 .2 Twin connection, spare part “after 17-05-2011” 551231 Straps, Twin Hoist, spare part 550777... -
Page 131: Gh1 & Gh1 Q
Spare Part overview GH1 & GH1 Q... - Page 132 Spare Part overview GH1 & GH1 Q Pos. no. Quantity Part Drawing/Item no. Sidecover, zebra & fish, spare part 551109 Trolley assembly GH1, spare part 551099 Hoist cover, top, GH1, spare part 551107 Rubber Sealing, set of 2, spare part 552884 Belt transmission cpl .
-
Page 133: Gh1 F
Spare Part overview GH1 F... - Page 134 Spare Part overview GH1 F Pos. no. Quantity Part Drawing/Item no. Strap, spare part 550547 Safety control assembly, mechanics, spare part 550564 Charger PCB, spare part 550573 Ni-mH battery pack 24V 2,8Ah, Spare part 550574 Belt GT 3mm Pitch, W=9 mm, 550580 Motor safety PCB 2010, spare part 550593...
-
Page 135: Wiring Diagram
Wiring Diagram GH3 200 kg & 250 kg Hand Pick-up, wire Control Hand- Control- Charger signal, cable Serial Pick- Charger J7/J25 Emerg.Switch Emergency Strap Switchs StrapSwitches MotorSafety to Mec. Brake MotorSafety- MotorSafety To StrapMotor Leader MotorSafety LiftingMotor/ to Tacho Belt Drive IR receiver, cable Soldered Module... -
Page 136: Gh3 200 Kg & 250 Kg Drive
Wiring Diagram GH3 200 kg & 250 kg drive Pick- Hand Control Charger signal, cable Hand- Pick-up, wire Control- Serial J7/J25 Emerg.Switch Emergency Charger Strap Switchs StrapSwitches MotorSafety to Mec. Brake MotorSafety- MotorSafety MotorAux DriveMotor To StrapMotor Leader MotorSafety LiftingMotor/ AuxMotor to Tacho Belt Drive... -
Page 137: Gh3 Twin 250 Kg & 500 Kg
Wiring Diagram GH3 Twin 250 kg & 500 kg Pick- Hand Control Pick-up, wire Hand- Control- Serial Charger signal, cable J7/J25 Emerg.Switch Emergency Charger Strap Switchs StrapSwitches MotorSafety to Mec. Brake MotorSafety- MotorSafety To StrapMotor Leader MotorSafety LiftingMotor/ to Tacho Belt Drive IR receiver, cable Leader... -
Page 138: Gh3+ 200 Kg & 250 Kg
Wiring Diagram GH3+ 200 kg & 250 kg Pick- Hand Control Hand- Pick-up, wire Control- Serial Charger signal, cable J7/J25 Emerg.Switch Emergency Charger Strap Switchs StrapSwitches MotorSafety to Mec. Brake MotorSafety- MotorSafety To StrapMotor Leader MotorSafety LiftingMotor/ to Tacho Belt Drive IR receiver, cable Soldered Module... -
Page 139: Gh3+ 200 Kg & 250 Kg Drive
Wiring Diagram GH3+ 200 kg & 250 kg drive Pick- Hand Control Charger signal, cable Hand- Pick-up, wire Control- Serial J7/J25 Emerg.Switch Emergency Charger Strap Switchs StrapSwitches MotorSafety to Mec. Brake MotorSafety- MotorSafety MotorAux DriveMotor To StrapMotor Leader MotorSafety LiftingMotor/ AuxMotor to Tacho Belt Drive... -
Page 140: Gh3+ 200 Kg & 250 Kg Drive Wifi
Wiring Diagram GH3+ 200 kg & 250 kg drive WiFi WiFi... -
Page 141: Gh3+ 300 Kg, 350 Kg & 375 Kg Drive
Wiring Diagram GH3+ 300 kg, 350 kg & 375 kg drive Pick- Hand Control Charger signal, cable Hand- Pick-up, wire Control- Serial J7/J25 Emerg.Switch Emergency Charger Strap Switchs StrapSwitches MotorSafety to Mec. Brake MotorSafety- MotorSafety MotorAux DriveMotor To StrapMotor Leader MotorSafety LiftingMotor/ AuxMotor... -
Page 142: Gh3+ 300 Kg, 350 Kg & 375 Kg Drive Wifi
Wiring Diagram GH3+ 300 kg, 350 kg & 375 kg drive WiFi WiFi... -
Page 143: Gh3+ Twin 250 Kg & 500 Kg Clm
Wiring Diagram GH3+ Twin 250 kg & 500 kg CLM Pick- Hand Control Hand- Pick-up, wire Control- Serial J7/J25 Charger signal, cable Emerg.Switch Emergency Charger Strap Switchs StrapSwitches MotorSafety to Mec. Brake MotorSafety- MotorSafety To StrapMotor Leader MotorSafety LiftingMotor/ to Tacho Belt Drive IR receiver, cable Soldered... -
Page 144: Gh3+ Twin 250 Kg & 500 Kg Load Cell
Wiring Diagram GH3+ Twin 250 kg & 500 kg load cell Pick- Hand Control Hand- Pick-up, wire Control- Serial J7/J25 Charger signal, cable Emerg.Switch Emergency Charger Strap Switchs StrapSwitches MotorSafety to Mec. Brake MotorSafety- MotorSafety To StrapMotor Leader MotorSafety LiftingMotor/ to Tacho Belt Drive IR receiver, cable... -
Page 145: Gh3+ Twin 250 Kg & 500 Kg Clm Wifi
Wiring Diagram GH3+ Twin 250 kg & 500 kg CLM WiFi WiFi... -
Page 146: Gh3+ Twin 250 Kg & 500 Kg Load Cell Wifi
Wiring Diagram GH3+ Twin 250 kg & 500 kg load cell WiFi WiFi... -
Page 147: Gh1
Wiring Diagram Hand Control Hand- Control- Serial J7/J25 Charger signal, cable Emerg.Switch Emergency Charger Strap Switchs StrapSwitches MotorSafety to Mec. Brake MotorSafety- MotorSafety To StrapMotor Leader MotorSafety LiftingMotor/ to Tacho Belt Drive Soldered Soldered Battery + Battery - Batt to Charger Battery pack... -
Page 148: Gh1 F
Wiring Diagram GH1 F Hand Control Hand- Control- Charger signal, cable Serial J7/J25 Emerg.Switch Emergency Charger Strap Switchs StrapSwitches MotorSafety to Installed Mec. Brake switch MotorSafety MotorSafety- To StrapMotor MotorAux DriveMotor Leader MotorSafety to Tacho AuxMotor LiftingMotor/ Belt Drive Soldered Soldered Battery + Battery -... -
Page 149: Gh1 Q
Wiring Diagram GH1 Q Hand Control Hand- Control- Serial J7/J25 Charger signal, cable Emerg.Switch Emergency Charger Installed Strap Switchs StrapSwitches switch MotorSafety to Mec. Brake MotorSafety MotorSafety- To StrapMotor Leader MotorSafety to Tacho LiftingMotor/ Belt Drive Soldered Soldered Battery + Battery - Batt to Charger Battery... -
Page 150: Jumper Settings
Jumper settings GH3 & GH3+ Leader Follower... -
Page 151: Gh3 & Gh3+ Twin
Jumper settings GH3 & GH3+ Twin... -
Page 152: Gh1, Gh1 Q And Gh1 F
Jumper settings GH1, GH1 Q and GH1 F Leader... -
Page 153: Electrical Diagram
Electrical diagram Switch track GH Electrical diagram PC board Important When installation PCB and cables etc . protection against static electricity must be used . -
Page 154: Combi-Lock 3, Single Electrical
Electrical diagram Combi-lock 3, single electrical... -
Page 155: Combi-Lock 3, Double Electrical
Electrical diagram Combi-lock 3, double electrical Yellow Black Blue Brown White Brown Blue ASTABLE: Combi lock returns automatically to starting position after a specified period PC board: PO 10 A Male Molex 5 pol plug Female Molex 5 pol plug... -
Page 156: Turn Tabel Gh
Electrical diagram Turn tabel GH CHANGE OF STARTING POSITION OF TURN TABLE Endstop LS2 (pos. x4) tobe replaced by endstop LS1 (pos. x3) and motor lines GREEN/BLACK in pos. x5 are replaced. P010A Black Motor Green 24V DC Blue Brown... -
Page 157: Gh Horizontal Traverse Drive Motor
Electrical diagram GH Horizontal traverse Drive Motor Red wire Black wire 550514 550514 Motor 2 Motor 1 Black wire Red wire Battery Black 550514 550514 Motor 2 Motor 1 Black 9395093 551061 550870 Wire no. 932018 Til Pick-up Charger 93950615... -
Page 159: Control
CONTROL Checklist . . . . . . . . . . . . . . . . . . . . . . . . . . . . . . . . . . . . . .162 Hoist and rail systems . -
Page 160: Checklist
Guldmann. the system until an inspection has taken place. Without an inspection Any observations of importance... - Page 161 Checklist Hoist and rail systems Periodic Inspection according to DS/EN ISO 10535:2006 12-month inspection of hoist and rail systems Checklist 5. Switch track Check that the tongue moves fully and easily. 1. Rail System Check that all brackets are tightened with correct torque 6.
-
Page 162: Slings
Melting/charring your facility and any special fea- tures (if applicable). Guldmann is offering a training program in Inspection of Slings according to DS/EN ISO 10535:2006... - Page 163 Check for any imbedded particles 4. Are slings the original size and length without the use of knots, pins, tape or other methods to change the shape, shorten or lengthen them? V. Guldmann A/S Graham Bells Vej 21-23A DK-8200 Århus N Tel.
Need help?
Do you have a question about the GH and is the answer not in the manual?
Questions and answers