
Related Manuals for Queclink GL300A


Summary of Contents for Queclink GL300A
- Page 1 GL300A User Manual GL300A User Manual GSM/GPRS/GNSS Tracker TRACGL300AUM001 Revision: 1.01 TRACGL300AUM001 - 1 -...
- Page 2 TRACGL300AUM001 General Notes Queclink offers this information as a service to its customers, to support application and engineering efforts that use the products designed by Queclink. The information provided is based upon requirements specifically provided to Queclink by the customers. Queclink has not undertaken any independent search for additional relevant information, including any information that may be in the customer’s possession.
-
Page 3: Table Of Contents
GL300A User Manual Contents Contents ........................... 3 Table Index ........................4 Figure Index ........................5 Revision History ......................6 Introduction ....................... 7 Product Overview ....................... 8 2.1. Appearance ......................8 2.2. Parts List ....................... 8 2.3. Button, USB and GNSS Interface ................9 2.4. - Page 4 GL300A User Manual Table Index Table 1: Parts List Table ....................9 Table 2: Definition of Device Status and LED ..............15 Table 3: Troubleshooting ..................... 16 TRACGL300AUM001 - 4 -...
- Page 5 GL300A User Manual Figure Index Figure 1: Appearance of GL300A ..................8 Figure 2: Power On Button .................... 9 Figure 3: Micro USB and GNSS Interface ............... 10 Figure 4: Display of LED On ..................11 Figure 5: SIM Card Holder ................... 11 Figure 6: Light Sensor, Temperature &...
- Page 6 GL300A User Manual 0. Revision History Revision Date Author Description of Change 1.00 2017-11-07 Evan Shi Initial. 1.01 2018-01-19 Evan Shi Modified the Parts List. TRACGL300AUM001 - 6 -...
-
Page 7: Introduction
GL300A User Manual 1. Introduction The GNSS locator GL300A is a perfect fit for monitoring a multitude of temporarily-dispatched, outsourced vehicles and containers in logistics industry. It boasts ultra-long standby time with large-capacity internal battery and low power consumption. Its power button is pressed for direct usage with no installation required at all. -
Page 8: Product Overview
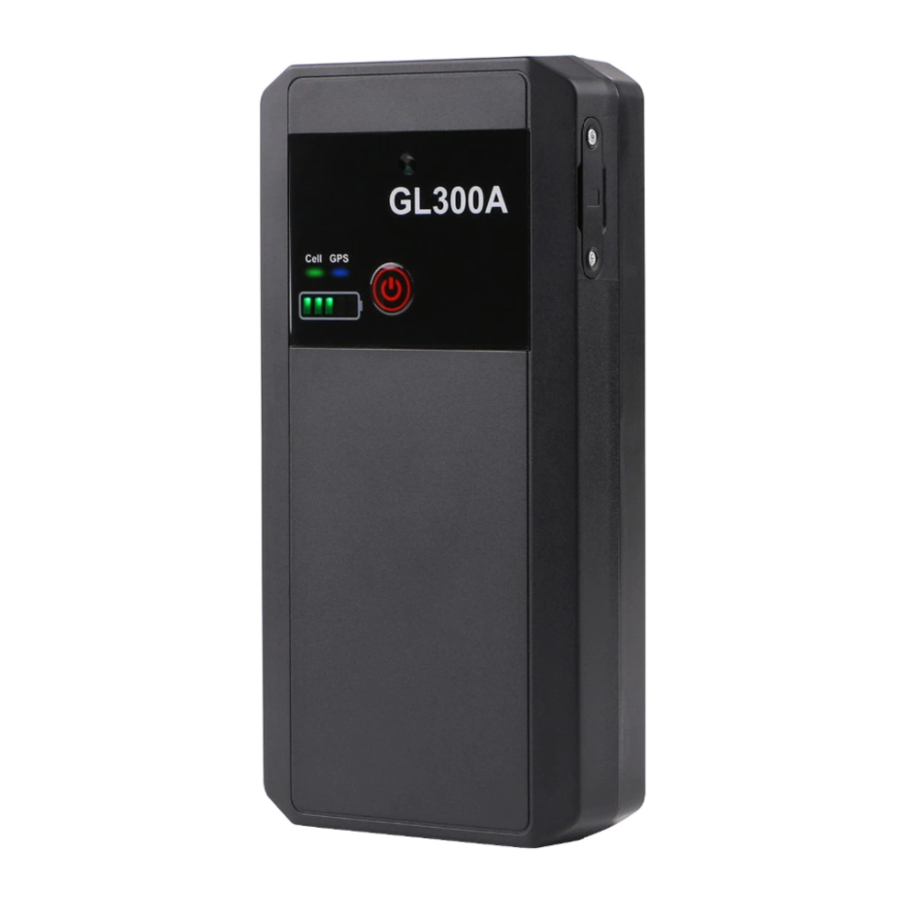
GL300A User Manual 2. Product Overview 2.1. Appearance Figure 1: Appearance of GL300A 2.2. Parts List Item Description GL300A Locator 151*74*34.5 mm Micro USB 5Pin Cable 1.2M (Optional) GL300A Adapter TRACGL300AUM001 - 8 -... -
Page 9: Button, Usb And Gnss Interface
GL300A User Manual External GNSS Active Antenna (Optional) GL300A Magnet Set (Optional) Table 1: Parts List Table 2.3. Button, USB and GNSS Interface Figure 2: Power On Button TRACGL300AUM001 - 9 -... -
Page 10: Led
GL300A User Manual Figure 3: Micro USB and GNSS Interface 2.4. LED There are seven LED lights. The two in the first row are Cell and GPS lights, which indicate GSM and GNSS signals. In the second row, there are five power lights indicating the power. -
Page 11: External Sim Card Holder
GL300A User Manual Figure 4: Display of LED On 2.5. External SIM Card Holder Figure 5: SIM Card Holder The external SIM card slot cover can be opened directly from outside the device to install the SIM card. TRACGL300AUM001 - 11 -... -
Page 12: Light Sensor, Temperature & Humidity Sensor
GL300A User Manual When the device is ready to start up, the toggle switch needs to be moved to the ON position. After the device is turned off by command, move the toggle switch to the OFF position. The device supports lid detection. When the device is turned on and the SIM card cover is opened, the system will send cover removal report. -
Page 13: Getting Started
GL300A User Manual 3. Getting Started 3.1. Open the External SIM Card Holder Figure 7: Opening the External SIM Card Holder Remove the screws with a screwdriver first and then remove the SIM card cover to open the SIM card holder. -
Page 14: Install A Sim Card
GL300A User Manual 3.2. Install a SIM Card Figure 8: Installing a SIM Card Insert the SIM card and move the toggle switch to the ON position. 3.3. Power on the Device Put the case back in place and fix it with screws. Press the power-on button to turn the device 3.4. - Page 15 GL300A User Manual GNSS chip is powered off. GNSS sends no data or data format error occurs. Slow flashing GPS (Blue) GNSS chip is searching GNSS information. Fast flashing GNSS chip has got GNSS information. The external power supply is connected and LED1-LED5 lighting up in the device is charging.
-
Page 16: Troubleshooting And Safety Information
GL300A User Manual 4. Troubleshooting and Safety Information 4.1.Troubleshooting Trouble Possible Reason Solution After GL300A is turned on, the The SIM card is not inserted. Please insert the SIM card into GSM LED always flashes GL300A. quickly. The signal is too weak;... -
Page 17: Safety Information
GL300A User Manual 4.2.Safety Information Please do not disassemble the device by yourself. Please do not put the device in overheated or too humid place, and avoid exposure to direct sunlight. Too high temperature will damage the device or even cause battery explosion.
Need help?
Do you have a question about the GL300A and is the answer not in the manual?
Questions and answers