
Related Manuals for Fujitsu ARYG72LHTA


Summary of Contents for Fujitsu ARYG72LHTA
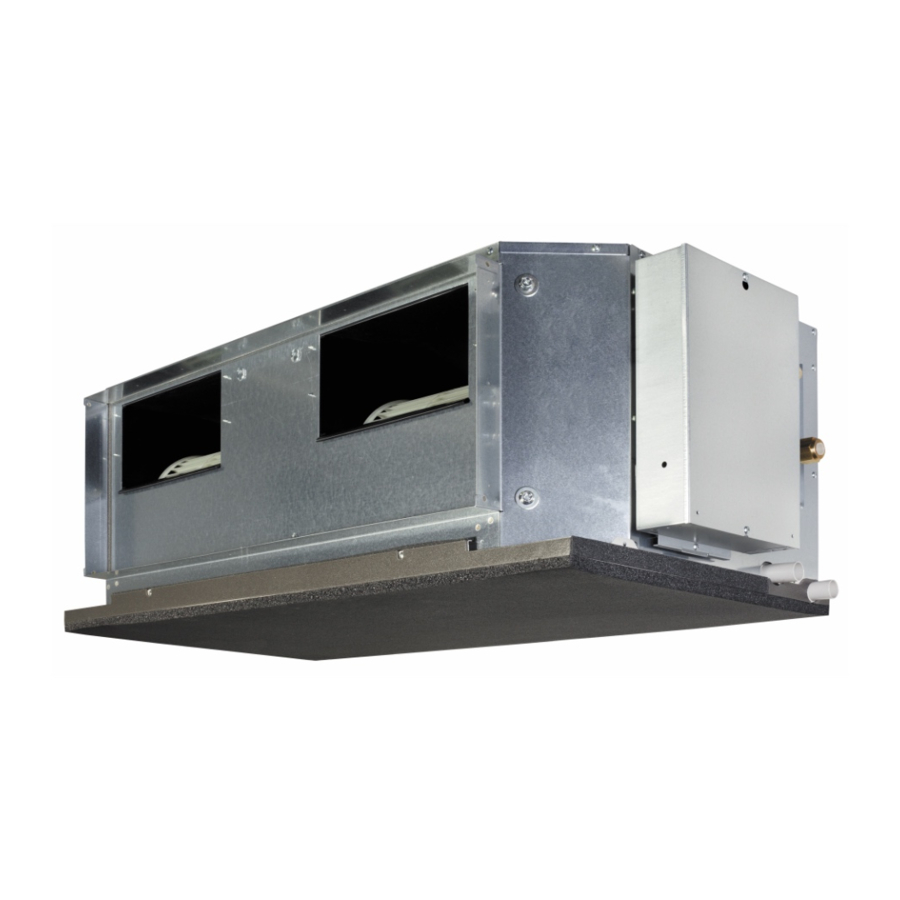
- Page 1 SPLIT TYPE ROOM AIR CONDITIONER DUCT type INVERTER SERVICE INSTRUCTION Models Indoor unit Outdoor unit AOYG72LRLA ARYG72LHTA AOYG90LRLA ARYG90LHTA R410A...
-
Page 2: Table Of Contents
CONTENTS 1. SPECIFICATIONS 1. DESCRIPTION OF EACH CONTROL OPERATION 1-1 SYSTEM OUTLINE ....................01-01 1-2 COOLING OPERATION.................... 01-02 1-3 HEATING OPERATION..................... 01-03 1-4 DRY OPERATION...................... 01-04 01-05 1-5 AUTO CHANGEOVER OPERATION................ 1-6 INDOOR FAN CONTROL..................01-07 1-7 OUTDOOR FAN CONTROL..................01-10 1-8 COMPRESSOR CONTROL.................. - Page 3 CONTENTS 3. APPENDING DATA 3-1 FUNCTION SETTING....................03-01 3-2 THERMISTOR RESISTANCE VALUES..............03-06 3-3 EXTERNAL INPUT AND OUTPUT................03-08 3-4 BUZZER SOUND......................03-19 3-5 SEPARATION METHOD..................... 03-22 3-6 INSTALLATION OF ZONE CONTROL INTERFACE..........03-23...
-
Page 4: Description Of Each Control Operation
R410A DUCT type INVERTER 1 . DESCRIPTION OF EACH CONTROL OPERATION... -
Page 5: System Outline
1-1. SYSTEM OUTLINE Indoor unit Outdoor unit Circuit breaker (over current) Earth leakage breaker Power supply 230V 50Hz : Power supply [Outdoor Unit] ( Circuit breaker : Piping ( (over current) : Transmission line [O.U. - I.U] ( Earth leakage : Power supply [Indoor Unit] ( breaker Power... -
Page 6: Cooling Operation
However, the maximum frequency is limited in the range shown in Fig.1 based on the fan speed mode and the outdoor temperature. ( Table 1 : Compressor Frequency Range ) minimum maximum frequency frequency ARYG72LHTA 15rps 81rps ARYG90LHTA 15rps 90rps ( Fig. 1 : Limit of Maximum Frequency based on Outdoor Temperature ) -
Page 7: Heating Operation
* When the room temperature is between +1.0°C to -6.0°C of the setting temperature, the compressor frequency is controlled within the range shown in Table2. ( Table 2 : Compressor Frequency Range ) minimum maximum frequency frequency 15rps ARYG72LHTA 81rps ARYG90LHTA 15rps 90rps 01-03... -
Page 8: Dry Operation
1-4. DRY OPERATION 1-4-1 INDOOR UNIT CONTROL The compressor rotation frequency shall change according to set temperature and room temperature variation which the room temperature sensor of the indoor unit has detected as shown in the Table 3. ( Table 3 : Compressor frequency ) Operating frequency X zone 38rps... -
Page 9: Auto Changeover Operation
1-5. AUTO CHANGEOVER OPERATION When the air conditioner is set to the Auto mode by remote controller, operation starts in the optimum mode from among the Heating, Cooling, and Monitoring mode. During operation, the optimum mode is automatically switched in accordance with temperature changes. The temperature can be set between 18°C and 30°C in 0.5°C (wireless and 2 wire remote controller) or 1.0°C(standard remote controller) steps. - Page 10 AUTO CHANGEOVER operation flow chart START Setting temperature Monitor mode Room temp. Ts+2 °C ? Room temp. Ts -2 °C ? Middle zone Auto change over is second or more? Operation mode before the monitor mode is cooling mode? Operation mode of HEATING OPERATION COOLING OPERATION outdoor unit : Cooling?
-
Page 11: Indoor Fan Control
1. Fan speed ( Table 5 : Standard of Indoor Fan Speed ) *The following fan speed is a standard value. (Static pressure : 72Pa) Operation Air flow Speed (rpm) mode mode ARYG72LHTA ARYG90LHTA Heating HIGH 1130 1210 1040 1100 Quiet... - Page 12 4. HEATING OPERATION Switch the airflow [AUTO], and the indoor fan motor will run according to a room temperature, as shown in Fig.6. On the other hand, if switched in [HIGH] ~ [LOW], the indoor motor will run at a constant airflow of [HEAT] operation modes LOW, MED, HIGH, as shown in Table 5.
- Page 13 7. FAN CONTROL FOR ENERGY SAVING When the air flow setting except AUTO mode, the indoor fan motor will run as shown in Fig.8. ( Fig 8 : Indoor Fan Control) Compressor Indoor fan Setting air flow Rotational speed at thermo-off S-Lo (sec) 01-09...
-
Page 14: Outdoor Fan Control
1-7. OUTDOOR FAN CONTROL 1. Outdoor Fan Motor Following table shows the fan speed of the outdoor unit. ( Table 6 : Fan speed of the outdoor unit ) Cooling Heating 780/ 680/ 660/ 590/ 680/ 660/ 590/ 520/ Upper fan 520/ 450/ 440/ 380/ 300 rpm 450/ 440/ 380/ 300 rpm AOYG72LRLA... -
Page 15: Compressor Control
1-8. COMPRESSOR CONTROL 1. OPERATION FREQUENCY RANGE The operation frequency of the compressor is different based on the operation mode as shown in Table 7. (Table 7 : Compressor Operation Frequency Range) Cooling Heating ARTG72LHTA 15rps 81rps 15rps 81rps ARTG90LHTA 15rps 90rps 15rps... -
Page 16: Electronic Expansion Valve Control
1-9. ELECTRONIC EXPANSION VALVE CONTROL The most proper opening of the electronic expansion valve is calculated and controlled under the present operating condition based on the following values. The compressor frequency, the temperatures detected by the discharge temperature sensor and the outdoor temperature sensor. The pulse range of the electronic expansion valve control is AOYG72/90LRLA 50 ~ 500 pulses (Cooling) and 50 ~ 500 pulses (Heating). -
Page 17: Pump Down
1-14. PUMP DOWN 14.2. Pump down procedure WARNING (1) Check the 3-way valves (both the liquid side and gas side) are opened. Never touch electrical components such as the terminal blocks except the button on (2) Turn the power on. the display board. -
Page 18: Compressor Preheating
1-15. COMPRESSOR PREHEATING When the outdoor temperature is lower than 60°C and the all operation mode has been stopped for 30 minutes, Turn on the belt heater power. (By heating the compressor, warm air is quickly discharged when operation is started.) When operation was started and when the outdoor temperature rises to 65°C or greater, preheating is ended. -
Page 19: Defrost Operation Control
1-18. DEFROST OPERATION CONTROL 1. CONDITION OF STARTING THE DEFROST OPERATION The defrost operation starts as shown in the following Table 11, 12, and 13. ( Table 11 : Condition of 1st defrost operation) Compressor integrating operation time 1st defrost Less than 22 minutes More than 22 minutes More than 62 minutes... - Page 20 3. Defrost Flow Chart The defrosting shall proceed by the integrating operation time, outdoor temperature and outdoor heat exchanger temperature as follows. Heating operation start : Compressor ON (Not defrosted for 10 minutes) 1st defrost 2nd and later defrost Integrating defrost (Constant monitoring) Compressor Compressor...
-
Page 21: Off Defrost Operation Control
1-19. OFF DEFROST OPEARTION CONTROL When operation stops in the [Heating operation] mode, if frost is adhered to the outdoor unit heat exchanger, the defrost operation will proceed automatically. In this time, if indoor unit operation lamp flashes slowly (7 sec ON / 2 sec OFF), the outdoor unit will allow the heat exchanger to defrost, and then stop. -
Page 22: Various Protections
,the compressor is stopped and the indoor unit LED starts blinking. (Table16 : Discharge Temperature Over Rise Prevention Control / Release Temperature) Temperature Temperature Temperature ARYG72LHTA 105°C 101°C 115°C ARYG90LHTA 2. CURRENT RELEASE CONTROL The compressor frequency is controlled so that the outdoor unit input current does not exceeds the current limit value that was set up with the outdoor temperature. - Page 23 [ Cooling ] (Control / Release) Outdoor unit fan speed (UP / LO) AOYG72LRLA 780/740rpm 680/680rpm 680/680rpm 660/660rpm 590/510rpm 520/400rpm 440/330rpm 380/300rpm 300/300rpm 450/ 0rpm 300/ 0rpm AOYG90LRLA 780/740rpm 780/740rpm 730/690rpm 660/660rpm 590/510rpm 520/400rpm 440/330rpm 380/300rpm 300/300rpm 450/ 0rpm 300/ 0rpm °C <...
- Page 24 3. ANTIFREEZING CONTROL (Cooling and Dry mode) The compressor frequency is decrease on cooling & dry mode when the indoor heat exchanger temperature sensor detects the temperature lower than Temperature . Then, the anti-freezing control is released when it becomes higher than Temperature . (Table 18 : Anti-freezing Protection Operation / Release Temperature) Outdoor temperature Temperature...
-
Page 25: Compressor Stop Control
6. HIGH PRESSURE PROTECTION When the pressure switch becomes OFF (Open : higher than 4.2 MPa), the compressor is stopped. It is released when the pressure switch becomes ON (Close : lower than 3.2 MPa) after 3 minutes of compressor stop. 7. -
Page 26: Automatic Airflow Adjustment
1-21. COMPOMRESSOR SPEED CONTROL When the detection value of outdoor temperature sensor is lower than temperature in the table below, the compressor speed is controlled. (Table 19 : Operation temperature of compressor speed control) Temperature Cooling Heating Operation temperature - 20°C Operation overview 120 rpm (Max) Operation release... -
Page 27: Low Noise Operation
1-23. LOW NOISE OPERATION The compressor speed and the outdoor unit fan sp eed are limited to reduce the operation noise by External Input. During the LOW NOISE OPERATION, "CURRENT OVERLOAD OPERATION", "ECONOMY OPERATION" and "PEAK CUT OPERATION" are effective, and the outdoor unit operates by lowest current of them. However, during the DEFROST OPERATION, the compressor operates by the speed for DEFROST OPERATION. -
Page 28: Drain Pump Operation (Option)
1-24. DRAIN PUMP OPERATION (OPTION) During Cooling / Dry mode 1. When the compressor starts, the drain pump starts simultaneously. 2. The drain pump operates continuously for 3 minutes after the compressor is turned off as show in Fig15. 3. When the compressor stops by the "Anti- freezing protection", the drain pump is turned off in 1 hour after the compressor stops. -
Page 29: Peak Cut Operation
1-25. PEAK CUT OPERATION The Current Value is limited to reduce the power consumption by External Input. During the PEAK CUT OPERATION, "CURRENT OVERLOAD OPERATION", "ECONOMY OPERATION" and "LOW NOISE OPERATION" are effective, and the outdoor unit operates by lowest current of them. However, this function becomes invalid during DEFROST OPERATION. -
Page 30: Description Of Display Unit
1-26. DESCRIPTION OF DISPLAY UNIT 1-26-1 Layout of Display Unit Various settings can be adjusted by changing Push switches on the board of the outdoor unit. • (Excerpt from the “INSTALATION MANUAL”) LED DISPLAY PUSH SWITCH Display lamp Function or operation method Lights on while power on. - Page 31 1-26-2 Display mode 1-00. ERROR HISTORY MODE In this mode, the "Operation Condition" and "Error Code" can be displayed by Push Switch on outdoor unit PCB • : Light OFF : Light ON : Blinking 1 : 1 Time Blinking (Table :23 Procedure for Present Value) Power Error...
- Page 32 : Light OFF : Light ON 1 : 1 Time Blinking (Table 25 : Detail of LED Display Data) Power Error Item No, Display Item Mode Compressor 1 ~ 15 Frequency 16 ~ 30 ( 0 ~ 95rps ) 31 ~ 45 46 ~ 60 61 ~ 75 76 ~ 90...
- Page 33 : Light OFF : Light ON 1 : 1 Time Blinking Power Error Item No, Display Item Mode ~ -15 Outdoor Air -15 ~ -5 Temperature -5 ~ 5 ° ( -30 ~ 70 5 ~ 15 15 ~ 25 25 ~ 35 35 ~ 45 45 ~...
- Page 34 1-26-3 Error history mode 1-00. ERROR HISTORY MODE In this mode, the history of abnormality that occurred in the past can be confirmed. • n : n Times Blinking (Table : 26 Procedure for History Mode ) : Light OFF : Light ON : Blinking 2 : 2 Times Blinking...
- Page 35 (Table : 28 Error Code) : Light OFF : Light ON 2 : 2 Times Blinking : 1~ 15 Times Blinking Combination error Indoor unit combination error 1-26-4 ERROR CHECK MODE 1-00. ERROR HISTORY MODE In this mode, abnormality that is occurring now can be confirmed. •...
-
Page 36: Trouble Shooting
R410A DUCT type INVERTER 2 . TROUBLE SHOOTING... -
Page 37: Error Display
2 ERROR DISPLAY 2-1 INDOOR UNIT AND WIRED REMOTE CONTROLLER DISPLAY ERROR DETECTION If you use a wireless remote control, the lamp onthe photo detector unit will output error codes by way of blinking patterns. If you use a wired type remote control, error codes will appear on the remote control display. See the lamp blinking patterns and error codes in the table. - Page 38 2-1-2 OUTDOOR UNIT DISPLAY You can determine the operating status by the lighting up and blinking of the LED lamp. Display when an error occurs. PUMP PEAK POWER/ DOWN NOISE ERROR MODE LED display part (L1) (L2) (L3) (L4) (L5) (L6) ●...
-
Page 39: Trouble Shooting With Error Code
2-2 TROUBLE SHOOTING WITH ERROR CODE Trouble shooting 1 Indicate or Display: Outdoor unit : No indication OUTDOOR UNIT Error Method: Serial Communication Error Error code : 11 (Serial Reverse Transfer Error) Detective Actuators: Detective details: When the indoor unit cannot receive the serial signal from Outdoor unit Outdoor unit Main PCB more than 2minutes after power ON, or the indoor unit cannot receive Outdoor unit Fan motor... - Page 40 Outdoor unit : Trouble shooting 2 Indicate or Display: PUMP PEAK POWER INDOOR UNIT Error Method: DOWN NOISE ERROR MODE (L1) (L2) (L3) (L4) (L5) (L6) Serial Communication Error Error code : 11 (Serial Forward Transfer Error) Detective Actuators: Detective details: When the outdoor unit cannot properly receive the serial signal from Indoor unit Controller PCB indoor unit for 10 seconds or more.
- Page 41 Trouble shooting 3 Indicate or Display: Outdoor unit : INDOOR UNIT Error Method: PUMP PEAK POWER DOWN NOISE ERROR Error code : 12 Wired Remote Controller (L1) (L2) (L3) (L4) (L5) (L6) MODE Communication Error Detective Actuators: Detective details: Indoor unit Controller PCB When the indoor unit cannot properly receive the signal from Wired Remote Controller Wired Remote Controller for 1 minute or more.
- Page 42 Indicate or Display: Trouble shooting 4 Outdoor unit : INDOOR UNIT Error Method: PUMP PEAK POWER DOWN NOISE ERROR Error code : 15 (L1) (L2) (L3) (L4) (L5) (L6) MODE Automatic Air flow Adjustment Error Detective Actuators: Detective details: On automatic airflow adjustment operation, when the fan speed other than Indoor unit controller PCB 0rpm is detected at the 0rpm operation.
- Page 43 Trouble shooting 5 Indicate or Display: Outdoor unit : INDOOR UNIT Error Method: PUMP PEAK POWER DOWN NOISE ERROR Error code : 18 MODE (L1) (L2) (L3) (L4) (L5) (L6) External communication error Detective Actuators: Detective details: External communication error After receiving a signal from the external I/O PCB, the same a signal has not been received for 15sec Forecast of Cause :...
- Page 44 Trouble shooting 6 Indicate or Display: Outdoor unit : INDOOR UNIT Error Method: PUMP PEAK POWER DOWN NOISE ERROR Error code : 23 (L1) (L2) (L3) (L4) (L5) (L6) MODE Combination error Detective Actuators: Detective details: 1. When the outdoor unit type is multi. Indoor unit Forecast of Cause: 1.
- Page 45 Trouble shooting 7 Indicate or Display: Outdoor unit : INDOOR UNIT Error Method: PUMP PEAK POWER DOWN NOISE ERROR Error code : 26 MODE (L1) (L2) (L3) (L4) (L5) (L6) Indoor unit address setting error Detective details: Detective Actuators: When the address number set by auto setting and manual setting are mixed in Wired remote controller ( 2-Wire ) one RC group.
- Page 46 Trouble shooting 8 Indicate or Display: Outdoor unit : INDOOR UNIT Error Method: PUMP PEAK POWER DOWN NOISE ERROR Error code : 29 Connection unit number error (Indoor MODE (L1) (L2) (L3) (L4) (L5) (L6) unit in Wired remote controller system) Detective details: Detective Actuators: When the number of connecting indoor units are out of specified rule.
- Page 47 Trouble shooting 9 Indicate or Display: Outdoor unit : INDOOR UNIT Error Method: PUMP PEAK POWER DOWN NOISE ERROR Indoor unit PCB model Error code : 32 (L1) (L2) (L3) (L4) (L5) (L6) MODE information error Detective details: Detective Actuators: When power is on and there is some below case.
- Page 48 Trouble shooting 10 Indicate or Display: Outdoor unit : INDOOR UNIT Error Method: PUMP PEAK POWER DOWN NOISE ERROR Indoor unit motor electricity Error code : 33 (L1) (L2) (L3) (L4) (L5) (L6) MODE consumption detection error Detective details: Detective Actuators: Indoor unit motor electricity When the voltage value or the current value of the motor go beyond the limits.
- Page 49 Indicate or Display: Outdoor unit : Trouble shooting 11 INDOOR UNIT Error Method: PUMP PEAK POWER DOWN NOISE ERROR Error code : 39 (L1) (L2) (L3) (L4) (L5) (L6) Indoor unit power supply error for MODE fan motor Detective Actuators: Detective details: When a momentary power cut off.
- Page 50 Trouble shooting 12 Indicate or Display: Outdoor unit : INDOOR UNIT Error Method: PUMP PEAK POWER DOWN NOISE ERROR Indoor unit Communication circuit Error code : 3A MODE (L1) (L2) (L3) (L4) (L5) (L6) (wired remote controller) error Detective details: Detective Actuators: Detect the communication error of microcomputer and communication PCB.
- Page 51 Indicate or Display: Outdoor unit : Trouble shooting 13 PUMP PEAK INDOOR UNIT Error Method: POWER DOWN NOISE ERROR Error code : 41 MODE (L1) (L2) (L3) (L4) (L5) (L6) Indoor Room Thermistor Error Detective details: Detective Actuators: Indoor Unit Controller PCB Circuit Indoor unit thermistor is open or short is detected always.
- Page 52 Trouble shooting 14 rouble shooting 14 Indicate or Display: Outdoor unit : INDOOR UNIT Error Method: INDOOR UNIT Error Method: PUMP PEAK POWER DOWN NOISE ERROR Error code : 42 MODE (L1) (L2) (L3) (L4) (L5) (L6) Indoor Heat Ex. Thermistor Error Detective Actuators: Detective details: Indoor Unit Controller PCB...
- Page 53 Indicate or Display: Outdoor unit : Trouble shooting 15 PUMP PEAK POWER INDOOR UNIT Error Method: DOWN NOISE ERROR Error code : 51 MODE (L1) (L2) (L3) (L4) (L5) (L6) Indoor Unit Fan Motor1 Error Detective Actuators: Detective details: Indoor unit Controller PCB When the fan motor speed is less than 1/3 of the target fan speed Indoor unit fan motor for 56 seconds.
- Page 54 Indicate or Display: Outdoor unit : Trouble shooting 16 PUMP PEAK POWER INDOOR UNIT Error Method: DOWN NOISE ERROR Error code : 53 MODE (L1) (L2) (L3) (L4) (L5) (L6) Drain pump Error Detective details: Detective Actuators: Indoor Unit Controller PCB Circuit When Float switch is ON for more than 3 minutes.
- Page 55 Trouble shooting 17 Indicate or Display: Outdoor unit : OUTDOOR UNIT Error Method: PUMP PEAK POWER DOWN NOISE Outdoor unit main PCB model ERROR Error code : 62 (L1) (L2) (L3) (L4) (L5) (L6) MODE information error Detective Actuators: Detective details: Access to EEPROM failed due to some cause after outdoor unit started.
- Page 56 Indicate or Display: Trouble shooting 18 Outdoor unit : OUTDOOR UNIT Error Method: PUMP PEAK POWER DOWN NOISE ERROR Error code : 63 Inverter Error MODE (L1) (L2) (L3) (L4) (L5) (L6) Detective Actuators: Detective details: Transistor PCB Error information received from Transistor PCB Main PCB Forecast of Cause : 1.
- Page 57 Indicate or Display: Trouble shooting 20 Outdoor unit : OUTDOOR UNIT Error Method: PUMP PEAK POWER DOWN NOISE ERROR Error code : 65 MODE (L1) (L2) (L3) (L4) (L5) (L6) IPM Error Detective details: Detective Actuators: When more than normal operating current to IPM in Transistor PCB flows, Transistor PCB the compressor stops.
- Page 58 Indicate or Display: Trouble shooting 21 Outdoor unit : OUTDOOR UNIT Error Method: PUMP PEAK POWER DOWN NOISE ERROR Error code : 71 MODE (L1) (L2) (L3) (L4) (L5) (L6) Discharge Thermistor Error Detective Actuators: Detective details: Discharge temperature thermistor short detected Discharge temperature thermistor Discharge thermistor open detected Forecast of Cause :...
- Page 59 Indicate or Display: Trouble shooting 22 Outdoor unit : OUTDOOR UNIT Error Method: PUMP PEAK POWER DOWN NOISE ERROR Error code : 72 (L1) (L2) (L3) (L4) (L5) (L6) MODE Compressor Thermistor Error Detective Actuators: Detective details: Compressor temperature thermistor short detected Compressor temperature thermistor Compressor thermistor open detected Forecast of Cause :...
- Page 60 Outdoor unit : Indicate or Display: Trouble shooting 23 PUMP PEAK OUTDOOR UNIT Error Method: POWER DOWN NOISE ERROR MODE (L1) (L2) (L3) (L4) (L5) (L6) Error code : 73 Heat Ex. Outlet Temp. Thermistor Error Detective Actuators: Detective details: Heat exchanger liquid temperature Heat exchanger outlet temperature thermistor short or open detected thermistor...
- Page 61 Indicate or Display: Trouble shooting 24 Outdoor unit : OUTDOOR UNIT Error Method: PUMP PEAK POWER DOWN NOISE ERROR Error code : 74 MODE (L1) (L2) (L3) (L4) (L5) (L6) Outdoor Thermistor Error Detective Actuators: Detective details: Outdoor temperature thermistor short or open detected Outdoor temperature thermistor Forecast of Cause : 1.
- Page 62 Indicate or Display: Outdoor unit : Trouble shooting 25 OUTDOOR UNIT Error Method: PUMP PEAK POWER DOWN NOISE ERROR Error code : 77 (L1) (L2) (L3) (L4) (L5) (L6) MODE Heat Sink Thermistor Error Detective Actuators: Detective details: Heat sink temp. thermistor open/short detected Heat sink temp.
- Page 63 Indicate or Display: Trouble shooting 26 Outdoor unit : OUTDOOR UNIT Error Method: PUMP PEAK POWER DOWN NOISE ERROR Error code : 84 MODE (L1) (L2) (L3) (L4) (L5) (L6) Current Sensor Error Detective details: Detective Actuators: When Input Current Sensor has detected 0A, while Inverter Compressor is Power supply PCB operating at higher than 50rps, after 1minute upon starting the Compressor.
- Page 64 Indicate or Display: Outdoor unit : Trouble shooting 27 OUTDOOR UNIT Error Method: PUMP PEAK POWER DOWN NOISE ERROR Error code : 86 ( 86.4 ) MODE (L1) (L2) (L3) (L4) (L5) (L6) Pressure Switch Error Detective Actuators: Detective details: High pressure switch When the power was turned on, "high pressure switch : open"...
- Page 65 Indicate or Display: Trouble shooting 28 Outdoor unit : OUTDOOR UNIT Error Method: PUMP PEAK POWER DOWN NOISE ERROR Error code : 94 MODE (L1) (L2) (L3) (L4) (L5) (L6) Over Current Error Detective details: Detective Actuators: "Protection stop by overcurrent generation after inverter compressor start Outdoor unit Main PCB processing completed'' generated consecutively 10 times.
- Page 66 Outdoor unit : Indicate or Display: Trouble shooting 29 OUTDOOR UNIT Error Method: PUMP PEAK POWER DOWN NOISE ERROR MODE (L1) (L2) (L3) (L4) (L5) (L6) Error code : 95 Compressor Control Error Detective details: Detective Actuators: While running the compressor, if the detected rotor location is out of Compressor phase with actual rotor location more than 90°, Transistor PCB...
- Page 67 Indicate or Display: Trouble shooting 30 Outdoor unit : OUTDOOR UNIT Error Method: PUMP PEAK POWER DOWN NOISE ERROR Error code : 97 MODE (L1) (L2) (L3) (L4) (L5) (L6) Outdoor Unit Fan Motor 1 Error Detective Actuators: Detective details: When outdoor fan rotation speed is less than 100rpm in 20 seconds Outdoor unit Main PCB after fan motor starts, fan motor stops.
- Page 68 Trouble shooting 31 Outdoor unit : Indicate or Display: OUTDOOR UNIT Error Method: PUMP PEAK POWER DOWN NOISE ERROR MODE (L1) (L2) (L3) (L4) (L5) (L6) Error code : 98 Outdoor Unit Fan Motor 2 Error Detective Actuators: Detective details: When outdoor fan rotation speed is less than 100rpm in 20 seconds Outdoor unit Main PCB after fan motor starts, fan motor stops.
- Page 69 Indicate or Display: Trouble shooting 32 Outdoor unit : OUTDOOR UNIT Error Method: PUMP PEAK POWER DOWN NOISE ERROR Error code : 99 4-Way Valve Error (L1) (L2) (L3) (L4) (L5) (L6) MODE Detective Actuators: Detective details: When the indoor heat exchanger temperature is compared with Indoor Unit Controller PCB Circuit the room temperature, and either following condition is detected Heat Exchanger Temperature Thermistor...
- Page 70 Trouble shooting 33 Indicate or Display: Outdoor unit : OUTDOOR UNIT Error Method: PUMP PEAK POWER DOWN NOISE ERROR Discharge Temp. Error Error code : A1 MODE (L1) (L2) (L3) (L4) (L5) (L6) Detective details: Detective Actuators: °C "Protection stop by "discharge temperature during compressor Discharge temperature thermistor operation'''' generated 2 times within 24 hours.
- Page 71 Indicate or Display: Trouble shooting 34 Outdoor unit : OUTDOOR UNIT Error Method: PUMP PEAK POWER DOWN NOISE ERROR Error code : A3 MODE (L1) (L2) (L3) (L4) (L5) (L6) Compressor Temp. Error Detective details: Detective Actuators: °C "Protection stop by "compressor temperature" during compressor Compressor temperature thermistor operation""generated 2 times within 24 hours...
- Page 72 Indicate or Display: Trouble shooting 35 Outdoor unit : OUTDOOR UNIT Error Method: PUMP PEAK POWER DOWN NOISE ERROR Error code : A5 (L1) (L2) (L3) (L4) (L5) (L6) MODE Low Pressure Error Detective details: Detective Actuators: "Protection stop by suction pressure 0.02MPaG continued for 5 minutes Suction pressure sensor (Low) repeats 5 times within 2 hours.
- Page 73 Trouble shooting 36 E86. 1 Indicate or Display: Outdoor unit : OUTDOOR UNIT Error Method: PUMP PEAK POWER DOWN NOISE ERROR Discharge Pressure Sensor Error Error code : 86 ( 86.1 ) (L1) (L2) (L3) (L4) (L5) (L6) MODE Detective Actuators: Detective details: When any of the following conditions is satisfied, a discharge pressure Discharge pressure sensor...
- Page 74 Trouble shooting 37 E86. 3 Indicate or Display: Outdoor unit : OUTDOOR UNIT Error Method: PUMP PEAK POWER DOWN NOISE ERROR Suction Pressure Sensor Error Error code : 86 ( 86.3 ) MODE (L1) (L2) (L3) (L4) (L5) (L6) Detective details: Detective Actuators: When any of the following conditions is satisfied, a suction pressure Suction pressure sensor...
-
Page 75: Trouble Shooting With No Error Code
2-3 TROUBLE SHOOTING WITH NO ERROR CODE Forecast of Cause: Trouble shooting 38 1. Power Supply failure 2. External cause Indoor Unit - No Power 3. Electrical Component defect Attention point An indoor unit and an outdoor unit are connected, and a power supply has be connected to an indoor unit. Check Point 1 : Check Installation Condition Isn’t the breaker down? Check loose or removed connection cable. - Page 76 Forecast of Cause: Trouble shooting 39 1. Power Supply failure 2. External cause Outdoor Unit - No Power 3. Electrical Component defect Check Point 1 : Check Installation Condition Isn’t the breaker down? Check loose or removed connection cable. >>If abnormal condition was found, correct it by referring to Installation Manual or Data &...
- Page 77 Forecast of Cause: Trouble shooting 40 1. Setting/ Connection failure 2. External cause No Operation (Power is ON) 3. Electrical Component defective Check Point 1 : Check indoor and outdoor installation condition Indoor Unit - Check incorrect wiring between Indoor Unit - Remote Control. Or, check if there is an open cable connection.
- Page 78 Forecast of Cause: Trouble shooting 41 1. Indoor Unit error 2. Outdoor Unit error No Cooling / No Heating 3. Effect by Surrounding environment 4. Connection Pipe / Connection Wire failure 5. Refrigeration cycle failure Check Point 1 : Check Indoor Unit Does Indoor Unit FAN run on HIGH FAN? Is Air Filter dirty? Is Heat Exchanger clogged?
- Page 79 Forecast of Cause : Trouble shooting 42 1. Abnormal installation (Indoor/ Outdoor) Abnormal Noise 2. Fan failure (Indoor/ Outdoor) 3. Compressor failure (Outdoor) Diagnosis method when Abnormal Noise is occurred Abnormal noise is coming from Indoor Unit. Abnormal noise is coming from Outdoor Unit. (Check and correct followings) (Check and correct followings) Is Main Unit installed in stable condition?
-
Page 80: Service Parts Information
2-4 SERVICE PARTS INFORMATION SERVICE PARTS INFORMATION 1 Compressor Diagnosis method of Compressor ( If Outdoor Unit LED displays Error, refer to Trouble shooting ) Abnormal noise Stops soon after starting up Does not start up Check if vibration noise by Is there open or loose connection Is there open or loose connection cable? - Page 81 SERVICE PARTS INFORMATION 2 Inverter Compressor Check Point 1 : Check Connection Check terminal connection of Compressor (loose or incorrect wiring) (BLACK) (WHITE) (BLACK) Transistor PCB TM305 TM304 TM303 Transistor PCB BLACK WHITE Compressor (RED) Check Point 2 : Check Winding Resistance Check winding resistance of each terminal If the resistance value is 0 or infinite, replace Compressor.
- Page 82 SERVICE PARTS INFORMATION 3 Outdoor unit Electronic Expansion Valve ( EEV ) Check Point 1 : Check Connections Check connection of connector ( Loose connector or open cable ) EXPANSION VALVE COIL BLUE CN116 ORANGE YELLOW WHITE Check Point 3 : Check Noise at start up Check Point 2 : Check Coil of EEV Remove connector, check each winding Turn on Power and check operation noise.
- Page 83 SERVICE PARTS INFORMATION 4 Indoor unit fan motor Check Point 1 : Check rotation of Fan Rotate the fan by hand when operation is off. (Check if fan is caught, dropped off or locked motor) >>If Fan or Bearing is abnormal, replace it. Check Point 2 : Check resistance of Indoor Fan Motor Check resistance when the main power supply is OFF.
- Page 84 SERVICE PARTS INFORMATION 7 Mounted on Transistor PCB) Check Point 1 Disconnect the connection wires between the Transistor PCB - Capacitor PCB and Transistor PCB - Inverter Compressor. Set the tester to the "Resistance" mode, and measure the resistance between the following terminals. Judge the result of as follows: Terminal...
- Page 85 SERVICE PARTS INFORMATION 8 Thermistor Check Point : Check Thermistor resistance value Remove connector and check Thermistor resistance value. Temperature Resistance Value [ k ] [°C] Thermistor A Thermistor B Thermistor C Thermistor D - 20 105.4 - 10 27.8 27.4 58.2 20.7...
- Page 86 SERVICE PARTS INFORMATION 9 Pressure Sensor 1. High Pressure Sensor Check Point : Check Voltage from Main PCB With the connector connected to the PCB, measure the voltage between CN118:2-3 of the Main PCB. CN118 PRESSURE WHITE SENSOR BLACK (HIGH) Characteristics of pressure sensor Pressure [MPa] 2.
-
Page 87: Appending Data
R410A DUCT type INVERTER 3 . APPENDING DATA... -
Page 88: Function Setting
3-1. FUNCTION SETTING 3-1-1 INDOOR UNIT Follow the instructions in the Local Setup Procedure, which is supplied with the remote control, in accordance with the installed condition. After the power is turned on, perform the Function Setting on the remote control. The settings may be selected between the following two: Function Number or Setting Value. - Page 89 Automatic airfloe adjustment NOTE Be sure to conduct this setting before any other operation. If the motor is warm or the heat exchanger is wet, false and detection may lead to incorrect adjustments. Check if the electrical wirings and duct installations are complete. If there is a damper installed in the system, make sure the damper is open.
- Page 90 Setting the Room temperature control for wired remote controller sensor Depending on the installed environment, correction of the wire remote temperature sensor may be required. Select the approriate control drtting according to the installed environment. To change this setting, set Function 42 to Both “01”. Ensure that the Thermo Sensor icon is displayed on the remote controller screen.
- Page 91 Cold air prevention This setting is to disable the cold air prevention function during heating operation. When disabled, the fan setting will always follow the setting on the remote controller. (Excluding defrost mode) Factory setting) Setting Description Function Number Setting Value Enable Disable External input control...
- Page 92 3-1-2 Procedures to change the Function Setting This item cannot be set from slave remote controllers. 03-05...
- Page 93 Wierless remote controller (option) Perform the “FUNCTION SETTING” according to the installation conditions using the remote controller. CAUTION • • in place. This procedure changes to the function settings used to control the indoor unit according to • the installation conditions. Incorrect settings can cause the indoor unit to malfunction. •...
- Page 94 2-Wire remote controller (option) UTY-RSR*/ UTY-RHR* 03-08...
- Page 95 2-Wire remote controller (option) UTY-RNR*Z2 03-07...
-
Page 96: Thermistor Resistance Values
3-2. THERMISTOR RESISTANCE VALUES Room temperature thermistor Indoor heat exchanger thermistor Characteristics of room temperature thermistor Tempe F Tempe C Resistance(K ) Voltage(V) Tempe F Tempe C Resistance(K ) Voltage(V) 40.00 32.0 33.62 1.15 32.0 176.03 1.10 35.00 41.0 25.93 1.39 41.0 134.23... - Page 97 Outdoor heat exchanger thermistor Outdoor Temprature thermistor Characteristics of heat exchanger thermistor (Outdoor) Tempe F Tempe C Resistance(K ) Voltage(V) Tempe F Tempe C Resistance(K ) Voltage(V) 100.00 -22.0 -30.0 88.42 0.25 -22.0 -30.0 181.60 0.87 -13.0 -25.0 64.89 40.341 -13.0 -25.0 133.30...
- Page 98 3-3. EXTERNAL INPUT AND OUTPUT CN71 Rotary switch (Drain pump) (Float switch) CN47 (External out) (Remote sensor) CN65 (External in/out PCB) Fig. External input and output PCB CN48 (IR receiver) Fig. Indoor unit PCB Terminal (External in) External Input External input External output Connector Input select connect kit signal...
-
Page 99: External Input And Output
External input and output PCB The indoor unit Operation/Stop can be set by using the input terminal on the PCB. Input select Use either one of these types of terminals according to the application. (Both types of terminals cannot be used simultaneously.) •... - Page 100 3-3-2. External output Use an external output cable with appropriate external dimension, depending on the number of ca- bles to be installed. Indoor unit • A twisted pair cable (22AWG) should be used. Maximum length of cable is 25 m. •...
- Page 101 3-3-3. Combination of external input and output By combining the function setting of the indoor unit and rotary switch setting of the External input and output PCB, you can select various combinations of functions. Combination examples of external input and output are as follows: External input External Function...
- Page 102 3-3-4. Details of function Control input function When function setting is "Operation/Stop" mode 1 • In the case of "Edge" input Rotary SW of Function External input and External input Input signal Command setting / output PCB Off → On Operation Input of indoor unit Terminal...
- Page 103 When function setting is "Forced stop" mode • In the case of "Edge" input Rotary SW of Function External input and External input Input signal Command setting / output PCB Off → On Forced stop Input of indoor unit Terminal On →...
- Page 104 When function setting is "Operation/Stop" mode 2 • In the case of "Edge" input Rotary SW of Function External input and External input Input signal Command setting / output PCB Off → On Operation Input of indoor unit Terminal Stop (R.C.
- Page 105 Forced thermostat off function Function Rotary SW of External External input Input signal Command setting / input and output PCB 60-00 / 2 Thermostat Off →On 60-09 / B External input and output Input 1 60-10 / C Normal On →...
- Page 106 Error status Function Rotary SW of External Output External output Command setting / input and output PCB signal Low → High Error 60-09 / B Output of indoor unit CN47 High → Low Normal Off → On Error 60-00 / 2 Output 1 On →...
- Page 107 External heater output Function Rotary SW of External Output External output Command setting / input and output PCB signal Low → High Heater on 60-11 / D Output of indoor unit CN47 High → Low Heater off 60-00 / 2 Off →...
-
Page 108: Buzzer Sound
3-4. BUZZER SOUND Hearing feeling improvement of the buzzer sound function 1. Change the buzzer sound The buzzer sound is changed based on "ISO24500, JIS-S-0013" in consideration for the accessibility of the consumers. Sound frequency Current model New model (Before) (After) 4kHz 2kHz... -
Page 109: Separation Method
3-5. SEPARATION METHOD It is possible to install the indoor unit through narrow openings by separating the heat exchanger unit and fan unit. The separation method is as follows; 1. Remove parts (1) and (2). (1) Control box cover (2) Connection plates 2. - Page 110 3-3-17,Suenaga,Takatsu-ku,Kawasaki 213-8502,Japan Aug. 2015 Printed in Japan...
Need help?
Do you have a question about the ARYG72LHTA and is the answer not in the manual?
Questions and answers