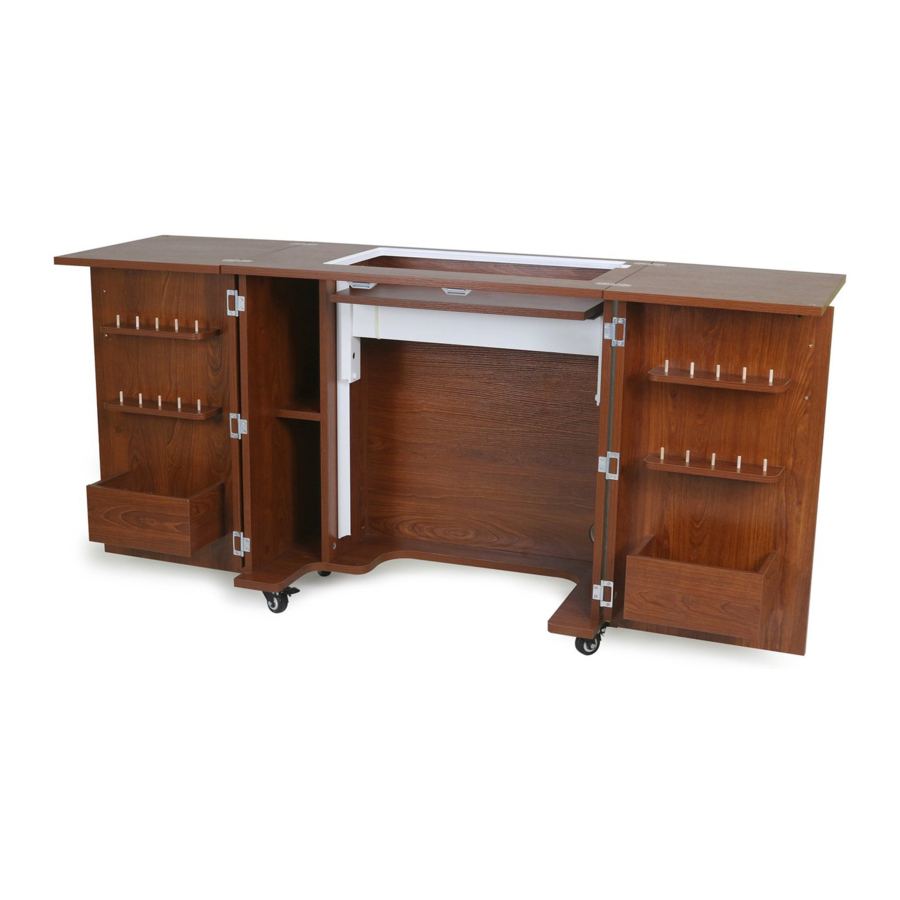
Summary of Contents for Kangaroo Bandicoot II K8205
- Page 1 ASSEMBLY INSTRUCTIONS B a n d i co o t I I ITEM NO.: K8205 Teak K8211 Ash White SEW IN COMFORT. SEW LONGER.™...
- Page 2 Read the instructions carefully before starting. Please open and inspect the contents of boxes to see that all parts are included. You will need a Phillips head and a flat head screwdriver. A power screwdriver or cordless drill is preferable. Ensure that the Phillips head fits neatly and fully engages the screw to avoid damage to the screws.
- Page 3 Par ts List ITEM DESCRIPTION QTY. PACK. ITEM DESCRIPTION QTY. PACK. Top Panel 1 of 2 Right Door Panel 2 of 2 Right Leaf 1 of 2 Left Door Edge Panel 2 of 2 Left Leaf 1 of 2 Right Door Edge Panel 2 of 2 Cover 1 of 2...
- Page 4 Par ts List ITEM DESCRIPTION QTY. ITEM DESCRIPTION QTY. 6x35 Cam Bolt 3x14 Screw 6x25 Cam Bolt Handle 8x30 Dowel Pin Flush Hinge 6x50 Dowel Pin 4x20 Fix Bolt ⁄ “ Cam Cover 8x16 Fix Bolt Caster 3.5x14 Screw Wrench Magnet, Catch Plate ⁄...
- Page 5 Step 1. Preparation Panels A, D, X, Z, Y. 1. Insert cams bolts c1 into panels A, X and Z. 2. Insert dowel pins d1 to panels X, Z, Y and D. 6x35 Cam Bolt 3. Attach the door magnet m to Top Panel A using s1 screws. 8x30 Dowel Pin x20 3.5x14 Screw Magnet x2...
- Page 6 Step 2. Preparation Panels V1, V2, Lx2, L1x4, F, F1x4, 01 and 02. 1. Insert cams bolts c1 into panels V1 and V2. 2. Insert dowel pins d1 to panels O1, O2, and F. 6x35 Cam Bolt 3. Insert cam bolt c3 into panels V1, V2, L and L1. 4.
- Page 7 Step 3. Fix Lifter Rail (right) to Z panel with s1 screws following predrilled holes as shown on the illustration below. Lifter Rail (Right) x1 3.5x14 Screw Step 4. 1. Fix Lifter Rail (Left) to Y panel with s1 screws following predrilled holes as shown on the illustration below. 2.
- Page 8 Step 5. Panels D, X, Z assembly. Insert cam bolts c1 on panels X and Z into cams on panel D and tighten in a clockwise direction. Apply cam covers c2 over tightened cams. ⁄ “ Cam Cover 180° Step 6. Panel F and Y assembly. Insert cam bolts c1 on panels X and Y into cams on panel F and tighten in a clockwise direction as illustrated below.
- Page 9 Step 7. Panel G assembly. 1. Fix casters t2 to panel G with bolts b1 as illustrated below. Tighten with wrench a. 2. Turn panel over. 3. Install cam bolts c1 into panel G as illustrated below. 8x16 Fix Bolt x16 Locking Plate Caster x4 Wrench x1...
- Page 10 Step 9. Flip cabinet over. Step 10. Lifter Panel assembly. Fix Lifter to A3 panel with s1 screws following predrilled holes as shown on the illustration below. Note: Remove cable ties (do not remove wooden block). 3.5x14 Screw Lifter x1 Bandicoot II Assembly Instructions...
- Page 11 Step 11. Mounting the Lifter Assembly. 1. Position lifter onto side rails using plastic guides; make sure the cable is hooked into the rail tabs on both sides then lower the lift. See illustration below. 2. When lifter is pushed to first lock position remove a small wooden block that will be released from lifter. Plastic guides Cable Lifter rail...
- Page 12 Step 13. Door Bin Panels Lx2,L1x4 and L2x2 assembly. 1. Insert cam bolts c3 on panel L and L1 into cams on panels L2 and tighten in a clockwise direction as illustrated below. 2. Apply cam covers c2 over tightened cams. ⁄...
- Page 13 Step 15. Panel F1 and L assembly. Insert cam bolts c1 on panel V1 and V2 into cams on panels F1, L1 and L2 and tighten in a clockwise direction as illustrated below. Apply cam covers c2 over tightened cams. ⁄...
- Page 14 LIMITED LIFETIME WARR ANT Y Kangaroo™ Sewing Furniture Limited Lifetime Warranty WHAT THIS WARRANTY COVERS: Kangaroo Sewing Furniture provides the original residential owner with a Limited Lifetime Warranty (warranty) protecting all major components of the furniture from manufacturing defects. Electrical and mechanical components of furniture are warrantied for 5 years.
- Page 15 Arrow Sewing Chairs Enhance your sewing experience with a custom- Our adjustable height sewing chair is a perfect made insert for your Arrow or Kangaroo cabinet. accessory for any craft and sewing room. The Inserts are designed to reduce the gap between chair’s height is adjustable with easy to use...


Need help?
Do you have a question about the Bandicoot II K8205 and is the answer not in the manual?
Questions and answers