Advertisement
Quick Links
Table of Contents
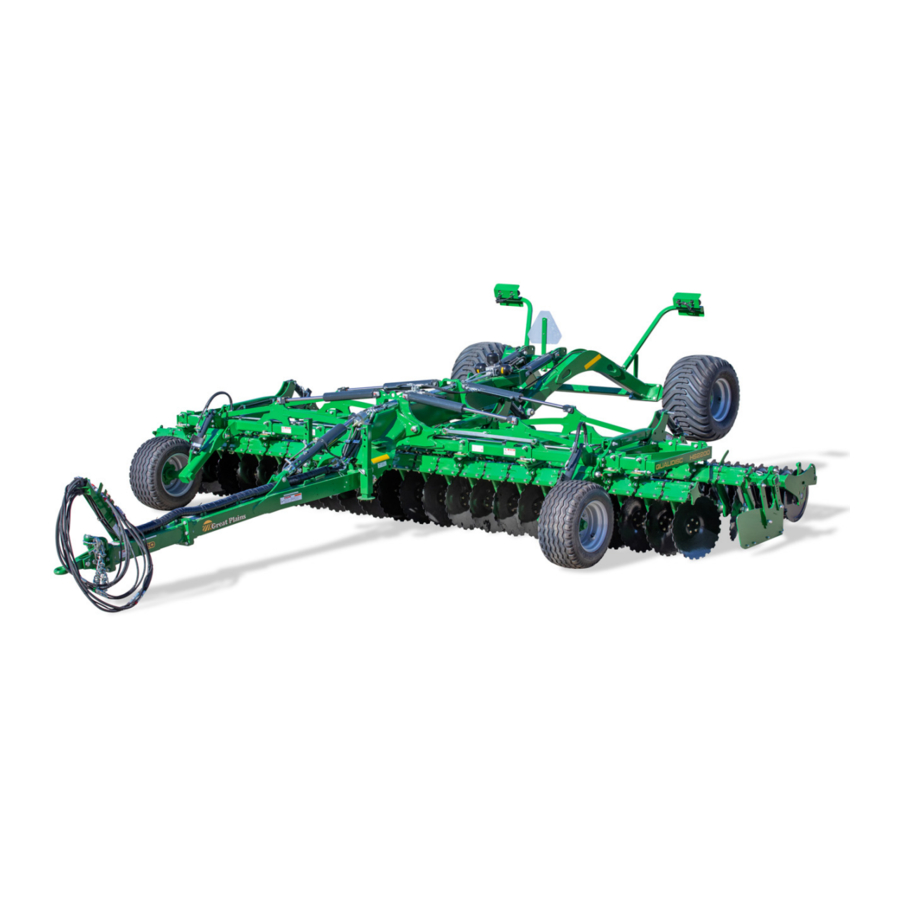
HS2200-13, HS2200-16, HS2200-20 & HS2200-23
Read the operator's manual entirely. When you see this symbol, the
subsequent instructions and warnings are serious - follow without
exception. Your life and the lives of others depend on it!
Illustrations may show optional equipment not supplied with standard unit.
ORIGINAL INSTRUCTIONS
© Copyright 2020
Table of Contents
Index
Operator Manual
Qualidisc
Manufacturing, Inc.
www.greatplainsmfg.com
Printed 2020-12-21
Index
EN
556-436M
Advertisement

Subscribe to Our Youtube Channel
Related Manuals for GREAT PLAINS Qualidisc HS2200-13


Summary of Contents for GREAT PLAINS Qualidisc HS2200-13
- Page 1 Table of Contents Index Operator Manual Qualidisc HS2200-13, HS2200-16, HS2200-20 & HS2200-23 Manufacturing, Inc. www.greatplainsmfg.com Read the operator’s manual entirely. When you see this symbol, the subsequent instructions and warnings are serious - follow without exception. Your life and the lives of others depend on it! Illustrations may show optional equipment not supplied with standard unit.
- Page 2 Machine Identification Record your machine details in the log below. If you replace this manual, be sure to transfer this information to the new manual. If you or the dealer have added options not originally ordered with the machine, or removed options that were originally ordered, the weights and measurements are no longer accurate for your machine.
- Page 3 Great Plains Manufacturing, Inc. assumes no responsibility for errors or omissions. Neither is any liability assumed for damages resulting from the use of the information contained herein. Great Plains Manufacturing, Inc. reserves the right to revise and improve its products as it sees fit.
- Page 4 HS2200-13 - HS2200-23 Table of Contents Index Great Plains | 556-436M | 2020-12-21 Table of Contents Index...
- Page 5 Use Adequate Lifting Means The frame sections and gangs of this machine are extremely heavy. If using multiple lifters, make sure each is rated for at least its share of the load. Great Plains | 556-436M | 12/21/2020 Table of Contents Index...
- Page 6 At higher voltages, electrocution can occur without direct line or body contact. Avoid overhead lines during folding, unfolding, transport and parking. Great Plains | 556-436M | 12/21/2020 Table of Contents Index...
- Page 7 Note: The term “Note” indicates advice and comments regarding use. A key indicates advice on fitting or adjustment work. This pictogram indicates examples to assist with comprehension. A plus sign in square brackets indicates optional equipment. Great Plains | 556-436M | 12/21/2020 Table of Contents Index...
- Page 8 HS2200-13 - HS2200-23 Table of Contents Index Important Safety Information Safety pictograms on the machine Great Plains | 556-436M | 12/21/2020 Table of Contents Index...
- Page 9 HS2200-13 - HS2200-23 Table of Contents Index Important Safety Information Great Plains | 556-436M | 12/21/2020 Table of Contents Index...
- Page 10 Dangerous zone Risk of crushed toes/fingers by a force applied from above. In order to avoid all serious or fatal injuries: maintain a safe distance between you and the machine. Great Plains | 556-436M | 12/21/2020 Table of Contents Index...
- Page 11 Consult the user’s manual for disassembly and repair instructions. CAUTION Maximum hydraulic pressure The tractor’s hydraulic pressure must not exceed 3,045psi (210 bar). To avoid machine damage and injuries: check the hydraulic pressure. Great Plains | 556-436M | 12/21/2020 Table of Contents Index...
- Page 12 Signaling systems - Front view - Optional Markin Dimensions For 4M model (not foldable) For 5M/6M/7M models (foldable) 14’9 (4.54m) 10.5’ (3.20m) 6’ 7” (2.03m) 13’1 (4.00m) 9’10 (3.00m) Great Plains | 556-436M | 12/21/2020 Table of Contents Index...
- Page 13 10’5” (3.20m) Max. 6” (approx. 150 mm) Max. 6” (approx. 150 mm) 10’7” (2.03m) 13’1” (4.00m) 9’10” (3.00m) The working depth of rollers must be set at its maximum level. Great Plains | 556-436M | 12/21/2020 Table of Contents Index...
- Page 14 7. Remove the ignition key. No one should stand between the tractor and the machine unless the vehicle is immobilized (hand brake, chocks, etc.), the engine is switched off and the ignition key removed. Great Plains | 556-436M | 12/21/2020 Table of Contents Index...
- Page 15 For all movements, brakes must be coupled (no single wheel braking). Trips off the farm field No movement should be made outside an agricultural field or close to people, until folding extensions or folding or tipping accessories (where Great Plains | 556-436M | 12/21/2020 Table of Contents Index...
- Page 16 (where fitted) accessories movement area, until they have been locked by the system provided for this purpose. The system may be chain, a pin, a rigid connecting rod or a double control valve. Great Plains | 556-436M | 12/21/2020 Table of Contents Index...
- Page 17 Be sure to always apply the brakes or the vehicle immobilization system prior to any action taken on the tractor-tool assembly. Failing to do so may cause serious or even fatal injuries. Great Plains | 556-436M | 12/21/2020 Table of Contents Index...
- Page 18 10. make sure that the machine is on flat and sufficiently stable ground. 11. operate the tractor’s hydraulic lift slowly and carefully, 12. Connect or disconnect hydraulic tubes, only if there is no pressure in the tractor’s and machine’s hydraulic system. Great Plains | 556-436M | 12/21/2020 Table of Contents Index...
- Page 19 • Accident prevention regulations • generally recognized safety regulations, occupational health require- ments and road traffic regulations, • the notes found in the user’s manual, • instructions for use, maintenance and servicing. Great Plains | 556-436M | 12/21/2020 Table of Contents Index...
- Page 20 The manufacturer cannot be held liable for damage resulting from incorrect settings, choice of equipment, seed, fertilizer, treatments or farming strategy or for any other damage not directly related to the machine. Great Plains | 556-436M | 12/21/2020 Table of Contents Index...
- Page 21 Adjusting the disc overlap Adjusting the working depth of the machine Roller arm Roller Rear lighting Transportation wheel Carriage Comb harrow Deflector Row of discs Lifting bar Drawbar Hitching Front lighting Control wheel Great Plains | 556-436M | 12/21/2020 Table of Contents Index...
- Page 22 Hitching Weight with all options and 9,635 Ibs 10,953 Ibs 12,483 Ibs 13,737 Ibs Actipack roller (approximate (4,370 kg) (4,968 kg) (5,662 kg) (6,231 kg) weight for the heaviest machine) Great Plains | 556-436M | 12/21/2020 Table of Contents Index...
- Page 23 • Thickness 1/4” (6 mm) (standard Disc) Thickness 1/3” (8 mm) (Star disc) • Offers a good compromise between cutting quality and good drive under wet or sticky conditions (soils containing more than 20% clay). Great Plains | 556-436M | 12/21/2020 Table of Contents Index...
- Page 24 • Compaction and crumbing of all types of soil. • This roller is also suitable for clay and sticky soils. Equipment variants Tractor drawbar • Fixed eye with safety chain. Machine lifting • Parallel lift. Great Plains | 556-436M | 12/21/2020 Table of Contents Index...
- Page 25 Important Safety Information Transportation wheel • Wheel 480/45 - 17. • Wheel 520/50 - 17. Axle type • No brake, with large gauge. Other optional equipment [+] • Drawbar extension. Great Plains | 556-436M | 12/21/2020 Table of Contents Index...
- Page 26 • Accident prevention regulations • generally recognized safety regulations, occupational health require- ments and road traffic regulations. • the notes given in this user’s manual. • instructions for use, maintenance and servicing. Great Plains | 556-436M | 12/21/2020 Table of Contents Index...
- Page 27 14. Pivot the row to align the two holes in the supports. 15. Replace the screw A in the borings. 16. Tighten the screw B. 17. Tighten to the torque recommended in section "Standard tightening torques" to page 69. Great Plains | 556-436M | 12/21/2020 Table of Contents Index...
- Page 28 The lateral deflectors are mounted on the row of discs located to the rear of the machine. 22. Place the 4 screws A. 23. Tighten to the torque recommended in section "Standard tightening torques" to page 69. Great Plains | 556-436M | 12/21/2020 Table of Contents Index...
- Page 29 29. Make sure that the rollers are correctly positioned in their brackets or clamps. 30. Tighten the nuts B to the recommended torque. 31. Lastly, tighten the nuts A to the recommended torque. 32. Check all the tightening torques. Great Plains | 556-436M | 12/21/2020 Table of Contents Index...
- Page 30 5. Connect the folding circuit, the lighting and the brakes (if the machine is equipped). 6. Raise the struts into the transport position. 7. Adjust the number of chocks if necessary. Great Plains | 556-436M | 12/21/2020 Table of Contents Index...
- Page 31 Green Right flashing yellow light (yellow) Brown Rear lights (red) Blue Not used • Connect the male plug for the 12V electrical supply to the 7-pin connector on the tractor. Great Plains | 556-436M | 12/21/2020 Table of Contents Index...
- Page 32 As per equipment fitted turning right on tractor off, low On, no flashing Off or low intensity intensity or flashing at Quicker flashing speed the same frequency as the right-side light Great Plains | 556-436M | 12/21/2020 Table of Contents Index...
- Page 33 All tipping elements on the machine must be folded or blocked. This pictogram is placed on the machine and is intended to inform the user of the machine’s maximum height in transport position. Great Plains | 556-436M | 12/21/2020 Table of Contents Index...
- Page 34 All tipping elements on the machine must be folded or blocked. On trailed machines, to ensure that the width of your machine does not exceed 2.55 m, set the working depth to maximum. Great Plains | 556-436M | 12/21/2020 Table of Contents Index...
- Page 35 4 When the disc arm is returned to low position, check that it is fully tightened and does not lock up. 4 If the disc arm stays locked, do not try to unlock it. Call a technician. Great Plains | 556-436M | 12/21/2020 Table of Contents Index...
- Page 36 •Raise the carriage with the distributor fully. •The carriage moves down a few centimetres when the distributor is no longer actuated then stabilises. • When working, the carriage can oscillate up and down. Great Plains | 556-436M | 12/21/2020 Table of Contents Index...
- Page 37 When making adjustments, remember to keep three bearing points. The machine parts are slippery when wet. Be extremely careful when standing on the machine parts to make sure you do not fall. Great Plains | 556-436M | 12/21/2020 Table of Contents Index...
- Page 38 3. Actuate the hydraulic distributor to lower the rollers. 4. Add or remove chocks A. 5. Apply the same setting to all roller cylinders 6. Actuate the hydraulic distributor until the jack(s) bear against the chocks. Great Plains | 556-436M | 12/21/2020 Table of Contents Index...
- Page 39 Machines not equipped with control wheels Parallel lift 7. Add or remove bearing chocks to define your working depth. 8. Lower the machine so that the chocks support on the jack. Great Plains | 556-436M | 12/21/2020 Table of Contents Index...
- Page 40 7. Tighten all nuts A on each attachment (see section "Standard tightening torques" to page 69). Position Diameter ” 600 mm 22” 560 mm ” 520 mm 19” 480 mm ” 440 mm 5/16 Great Plains | 556-436M | 12/21/2020 Table of Contents Index...
- Page 41 15. Lift the deflector using the handle C. 16. Engage the spindle B in one of the positions D. • Top hole: shallowest working depth. • Bottom hole: high working depth. Great Plains | 556-436M | 12/21/2020 Table of Contents Index...
- Page 42 26. Place the spindle A in one of the four positions. • Minimum angle to break up the entire flow. • Maximum angle to smooth the flow. 27. Lock the spindle with the pin. Great Plains | 556-436M | 12/21/2020 Table of Contents Index...
- Page 43 29. Adjust the working depth of the machine. 30. Test at work. 31. Check the quality of the work, if necessary: 32. gradually increase the pressure on the knife skids by setting to position “2” or “3”. Great Plains | 556-436M | 12/21/2020 Table of Contents Index...
- Page 44 11. Set the scrapers to the “OFF” position. The scraper must not touch the central tube, respect a clearance of 3/16” (5 mm) to (10 mm) from the tube. 6/16” Great Plains | 556-436M | 12/21/2020 Table of Contents Index...
- Page 45 3. Choose a position which enables the drawbar to move up and down to make it easier to hitch the machine the next time. 4. Disconnect the hydraulic hoses, lighting and brakes (if present). 5. Unhitch the machine. Great Plains | 556-436M | 12/21/2020 Table of Contents Index...
- Page 46 9. Also check that the assembly is quite level and that none of the struts sink into the ground. 10. Disconnect the hydraulic hoses. 11. Disconnect the road light kit connector. 12. Unhitch the machine. Great Plains | 556-436M | 12/21/2020 Table of Contents Index...
- Page 47 9. Check the tire pressure. Recommended Model Tire pressure 4 bar Front wheels 34055-16 (58 psi) Transportation wheels 3 bar 480/45x17 Wide model (44 psi) Transport wheels 3.3 bar 520/50x17 Extra-wide model (48 psi) Great Plains | 556-436M | 12/21/2020 Table of Contents Index...
- Page 48 Do not use pneumatic grease pumps When lubricating bearing housings, do not use pneumatic grease pumps under any circumstances. Their high pressure would damage the bearings. Great Plains | 556-436M | 12/21/2020 Table of Contents Index...
- Page 49 Never use oil or lubricants to clean your hands. Swarf in such liquids can also cause injury. Do not wear clothing contaminated with oil Remove garments heavily soiled with oil as quickly as possible. Oils may cause health problems. Great Plains | 556-436M | 12/21/2020 Table of Contents Index...
- Page 50 (for example by agricul- tural works businesses), shorten Comply with maintenance maintenance intervals accordingly. intervals. Shorter maintenance intervals are also advisable under extreme working conditions (considerable quantities of dust). Great Plains | 556-436M | 12/21/2020 Table of Contents Index...
- Page 51 Frequency Image Part Every Every 40 Every hours year Folding cylinders Depth control cylinder Grease nipples Depth control wheels Great Plains | 556-436M | 12/21/2020 Table of Contents Index...
- Page 52 HS2200-13 - HS2200-23 Table of Contents Index Important Safety Information Frequency Image Part Every Every 40 Every hours year Depth control wheel hubs Drawbar and folding sides Carrier Carrier jacks Great Plains | 556-436M | 12/21/2020 Table of Contents Index...
- Page 53 HS2200-13 - HS2200-23 Table of Contents Index Important Safety Information Frequency Image Part Every Every 40 Every hours year Carrier wheels Great Plains | 556-436M | 12/21/2020 Table of Contents Index...
- Page 54 10. Regularly check the condition of the articulations (lubrication and lack of play). 11. Replace wear rings if significant play appears on a ringed articulation. Location of the wear rings on the machine Chassis Great Plains | 556-436M | 12/21/2020 Table of Contents Index...
- Page 55 HS2200-13 - HS2200-23 Table of Contents Index Important Safety Information Depth control wheels Great Plains | 556-436M | 12/21/2020 Table of Contents Index...
- Page 56 A number of the working or structural parts of the machine are assembled using a clamping technique. The link is formed by a U-shaped yoke made Great Plains | 556-436M | 12/21/2020 Table of Contents Index...
- Page 57 19. Insert the shaft of the complete hub, making sure that the flat side C is in the right direction on the shaft and in its housing. 20. Insert the lock washer B the right way round. Great Plains | 556-436M | 12/21/2020 Table of Contents Index...
- Page 58 Wear of the knife skids on Actipack 27. Regularly check the wear of the knife skids A. 28. Replace them before wear can cause the part to be lost during operation. Great Plains | 556-436M | 12/21/2020 Table of Contents Index...
- Page 59 • Ensure that the tractor and machine hydraulic systems are not pressurized. • Identify the connectors using the color code to avoid incorrect connections (inverting the functions could cause accidents). Great Plains | 556-436M | 12/21/2020 Table of Contents Index...
- Page 60 HS2200-13 - HS2200-23 Table of Contents Index Important Safety Information Hydraulic diagram Parallel lift (*): Accumulator Folding Great Plains | 556-436M | 12/21/2020 Table of Contents Index...
- Page 61 HS2200-13 - HS2200-23 Table of Contents Index Important Safety Information Depth control Great Plains | 556-436M | 12/21/2020 Table of Contents Index...
- Page 62 Collect hydraulic fluid in clean, sealed containers designed for this purpose. Avoid using food containers or drinks bottles. Take hydraulic fluid and hoses to an appropriate recycling centre. Great Plains | 556-436M | 12/21/2020 Table of Contents Index...
- Page 63 Great Plains reserves the right to make changes in materials or design of the product at any time without notice. The warranty shall not be interpreted to render Great Plains liable for damages of any kind, direct or consequential or contingent to property.
- Page 64 HS2200-13 - HS2200-23 Table of Contents Index Important Safety Information Great Plains | 556-436M | 12/21/2020 Table of Contents Index...
- Page 65 Safety ...........4 General recommendations ..12 Hitching ........12 Hydraulic system ......17 Maintenance ........15 Use ..........14 safety information .........1 Safety rules ........12 safety symbol ........1 Screwed assemblies ......54 shutdown ..........3 Storage ..........45 Great Plains | 556-436M | 2020-12-21 Cover Table of Contents...
- Page 66 Table of Contents Index Table of Contents Index...
- Page 67 Table of Contents Index Great Plains, Mfg. 1525 E. North St. P.O. Box 5060 Salina, KS 67402...
Need help?
Do you have a question about the Qualidisc HS2200-13 and is the answer not in the manual?
Questions and answers