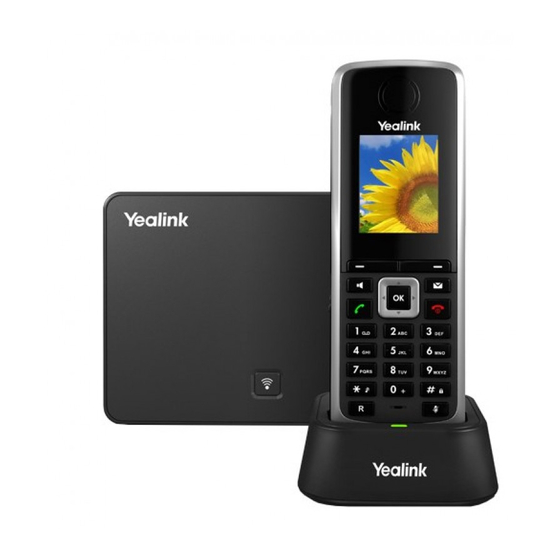
Yealink W52P User Manual
Horizon
Hide thumbs
Also See for W52P:
- Quick start manual ,
- User manual (116 pages) ,
- Configuration manual (102 pages)

Related Manuals for Yealink W52P


Summary of Contents for Yealink W52P
- Page 1 Horizon Yealink W52P User Guide art em is.m arket in g Horizon Yealink W52P User Guide...
-
Page 2: Table Of Contents
Contents Contents ..............................2 Introduction ............................. 4 How to set up the Yealink W52P ......................5 Register Handset ..........................5 Upgrade handset firmware ........................6 Main Menu Structure ..........................7 Status ..............................8 Intercom ..............................8 Voice Mail .............................. 8 Call Features ............................ - Page 3 Connect the Power for the Repeater ....................18 Mount to a Wall ........................... 18 Attach the base stand ......................... 19 Setting up a Repeater ........................... 19 Registering the Repeater ........................20 ID Modification ............................ 20 De-registration ............................. 20 Placement ............................20 Horizon Yealink W52P User Guide...
-
Page 4: Introduction
Introduction This user guide will help you to navigate and use your Yealink W52P. It will give you an overview of your handset, and walk you through tasks so you can successfully use your phone to perform basic and advanced functions. -
Page 5: How To Set Up The Yealink W52P
Horizon user guide. Up to 5 handsets can be registered to a Yealink W52P base station. Usually the handset that comes in the same box with the base station is pre-associated with it. In case that the handset is not already associated with the base station, or if you would like to associate more handsets that have been purchased separately you can find the required steps below. -
Page 6: Upgrade Handset Firmware
Please note, the batteries in the handset are not covered under manufactures warranty. These are standard AAA batteries. In the unlikely event you encounter any issues with the handset holding charge, we recommend you try alternate batteries. Horizon Yealink W52P User Guide... -
Page 7: Main Menu Structure
Status, Intercom, Voice Mail, Call Features, Directory and Settings. The next diagram is showing the structure of the main menu and the options that are available to the end users. For security reasons some options have been locked (L). Horizon Yealink W52P User Guide... -
Page 8: Status
You can configure up to 500 local contacts. All the contacts will be saved on the base station. Currently only the local directory is available. Note: LDAP-Corporate directory search is not available on this particular device. Horizon Yealink W52P User Guide... -
Page 9: Phone Settings
But the backlight is automatically turned on when an incoming call arrives, a key is pressed or the status of handset changes. You can disable the backlight to save power. Horizon Yealink W52P User Guide... -
Page 10: Keypad Light
You can assign the frequently used features to the changeable shortcuts of your handset. This helps you get quick access to a feature by pressing the corresponding shortcut directly without having to scroll through the menu when the handset is idle. Horizon Yealink W52P User Guide... -
Page 11: Language
Eco mode greatly reduces the transmission power and signal output when the phone is in the talk mode. The attenuation range is 20m. When the distance between the base station and the handset is over 20m, the eco mode is disabled automatically. Horizon Yealink W52P User Guide... -
Page 12: Repeater Mode
Later, we will explain how to use the repeater with the base station. Handset Name The handset will be assigned a name by default if successfully registered to the base station (i.e. H1, H2 etc.). You can personalize the handset name. Horizon Yealink W52P User Guide... -
Page 13: Supported Call Features
To perform a blind transfer during a call, select the Options soft key and then press Transfer. Or you can press the key directly. Enter the number or select the handset that you would like to transfer the call to, and then press Transfer or the key. Horizon Yealink W52P User Guide... -
Page 14: Conference Call
To end the conference call, press the key. Call Forwarding There are 3 types of call forwarding that can be managed by the device: Call Forward Always: Incoming calls are immediately forwarded to the specified number Horizon Yealink W52P User Guide... -
Page 15: Call Forward Busy
There are 3 different ways to access your voice mail: Press the message key, and then Select the voice mail Press and hold the digit key 1 Press to go to the main menu, then select Voice Mail and then select Play Message Horizon Yealink W52P User Guide... -
Page 16: Dect Repeater (Rt30)
DECT Repeater (RT30) The Yealink DECT Repeater, RT30, can be deployed to extend the range of the W52P IP DECT phone to cover areas where reception was previously not available in accordance with Digital Enhanced Cordless Telecommunication (DECT) standards. All the usual handset functions are supported by the base station in the extended radio range. -
Page 17: Led Status
Flashing Red [1] De-register the repeater [1] The number of flashes indicates the current ID repeater. When it flashes once, the ID is 1. Radio Link Status DECT LED Excellent to good Green Poor Orange Horizon Yealink W52P User Guide... -
Page 18: Installation
Installation Connect the Power for the Repeater 1. Connect the RT30 to a power outlet using the provided cable and USB power adapter. Mount to a Wall Horizon Yealink W52P User Guide... -
Page 19: Attach The Base Stand
Up to 6 repeaters can be registered to one base station to extend the range in a star layout. All repeaters must be installed within the base station coverage. Horizon Yealink W52P User Guide... -
Page 20: Registering The Repeater
The repeater can be used to extend the coverage range in all directions, allowing several floors to be covered. Note: Whilst Cascade setup is supported on the RT30, this is not supported on the Yealink W52P devices. Registering the Repeater If you want to register more than one repeater, in order to avoid ID conflict, we recommend that you put the repeaters closer to the base station and register the repeaters one by one. - Page 21 • Place the repeater away from other electrical appliances, such as microwaves, wi-fi equipment and computers. • Keep a minimum of 10 meters between multiple repeaters to avoid coverage overlapping. Horizon Yealink W52P User Guide...
Need help?
Do you have a question about the W52P and is the answer not in the manual?
Questions and answers