Table of Contents
Advertisement
Quick Links
Advertisement
Table of Contents

Subscribe to Our Youtube Channel
Related Manuals for Grundig GDT 2561 X


Summary of Contents for Grundig GDT 2561 X
- Page 1 HOOD USER INSTRUCTIONS GDT 2561 X www.grundig.com...
- Page 2 ENGLISH 02-21...
-
Page 3: Important Safety And Environmental Instructions
Important safety and environmental instructions This appliance can be used by prior to its installation. • the children over the age of 8 Be sure that the installation lo- • and by people who have limited cation allows for the user to dis- physical, sensory or mental ca- connect the power cable easily, pacity or who have no experi-... - Page 4 Important safety and environmental instructions Do not cook food on the flame If your product is not cleaned pe- • • under the appliance. riodically and in due time, there could be a fire hazard. Start the appliance after plac- •...
- Page 5 Important safety and environmental instructions please keep them away from Care must be taken when the • children’s reach. appliance is used at the same time with other appliances using If the main plug is damaged, it • the same air, in the same envi- should be replaced by the man- ronment (e.g., gas, gasoline, ufacturer, the Technical Service...
-
Page 6: Package Information
Important safety and environmental instructions • Take care when the cooker Appropriate disposal of used appliance helps prevent potential negative consequences for the hood is operating simultane- environment and human health. ously with an appliance powered by gas or other fuels, as the Conformity to the RoHS Directive room must be sufficiently ven- tilated (this might not apply to... - Page 7 Risk of death, risk of poisoning 2.1 Risk of death, Risk of poisoning For this reason, an adequate intake of fresh air DANGER: Warning - Choking haz- must always be ensured. Fig. 3 ard Packaging materials may be dangerous for children. Do not al- low children to play with the pack- aging material.
-
Page 8: Electric Shock Hazard
Risk of death, risk of poisoning 2.2 Electric shock hazard DANGER: Fire hazard! - The waste oil from the oil filter DANGER: can ignite. Clean the oil filter at - A faulty device can cause elec- least once every 3 months. Never tric shock. - Page 9 Risk of death, risk of poisoning 2.5 Fire and physical injury DANGER: hazard! - Objects placed on the appli- ance may fall. Do not place any DANGER: In case the repairs are object on the device. not performed according to the - The LED lights are very strong rules or according to the require- and can be harmful for the eyes...
-
Page 10: Technical Specifications Of Your Appliance
Technical specifications of your appliance GDT 2561 X Width 599 mm Depth 303 mm (closed position) 473 mm (open position) Height 258 mm Supply voltage 220 - 240V~ 50Hz Control 3 levelled Lamp output 2 x 3 W Exhaust pipe... -
Page 11: Exhaust Air Mode
Usage with or without carbon filter 4.2 Air circulation mode You may use this appliance in the exhaust air mode and the ventilated air mode. The suctioned air is cleaned by the grease fil- ters and by an active carbon filter and is then 4.1 Exhaust air mode retransferred in the kitchen (Fig. - Page 12 Usage with or without carbon filter 4.3 AF 100 Replacing the carbon filter Fig. 6 AF 100 Carbon filter The device that you have purchased is fit for the use of an AF 100 carbon filter. 1. Place your carbon filter in the appropriate slot, Fig.
-
Page 13: Cleaning And Care
Cleaning and care • CAUTION! the metal grease filter. • Do not wash the dirty metal grease filters with • Cleaning and maintenance should not be other dishes. performed by unattended children. • Place the metal grease filters in the dish- •... -
Page 14: Installing The Appliance
Installing the appliance Min.65 cm Min.65 cm Fig. 7 Installing the appliance After installing the hood, the minimum distance • Make sure that there is an adequate air must be 650 mm between the product and any inlet to allow your product to operate effi- other electrical cooker and 650 mm between ciently and with a low operating noise. -
Page 15: Overview Of The Equipment
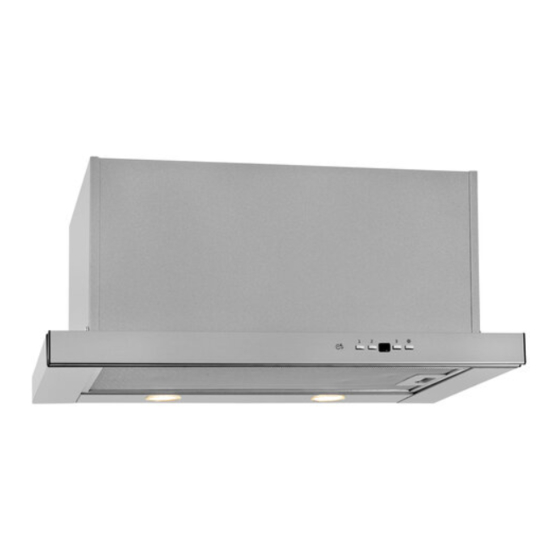
Overview of the equipment Fig. 8: Presentation of the cooker hood 1. Front panel 2. Key 3. Filter 4. Lighting... -
Page 16: Installation Scheme
Installing the appliance 8.1 Installation scheme 8.1.1 Drilling the hanging holes Paste the installation template provided with the product on the surface where the product is to be installed. Drill holes with the diameter of 04 mm on the points marked A, B, C, D on the arrangement scheme (Fig. -
Page 17: Using The Product
Using the product 9.1 Toggle switch spd 3 6. By pressing and holding any engine operating button for more than 2 seconds, a 15 minutes timer function will be initiated. A signal will If you want to operate the ap- be displayed as soon as the chronometer pliance on speed 1, move the starts, and the engine will automatically stop... - Page 18 Using the product 9.3 Using the product with 5 Spd Dig touchscreen control 1. Press this button to turn on the appliance. 2. Press this button to reduce the speed of the engine. 3. By exploring the display, you may follow which speed the product operates at on it.
-
Page 19: Replacing The Lamps
Replacing the lamps 10.1 Replacing spot lamp 10.2 Replacing connection lamp WARNING! Disconnect Remove the support of the aluminum filter. hood’s power supply. Wait for the lamps to cool down, as they are Remove the faulty lamp and replace with a new hot and can cause burns on your one, of the same type. -
Page 20: Replacing The Leds
Replacing the lamps 10.3 Replacing the LEDs Shows the maximum current consumption of the lamp. A lamp of the same power should be used when replacing the lamp. To find out the power rating used in the product, see the declara- tion label in the product. -
Page 21: Possible Faults And Solutions
Authorized Service Center 11.2 Possible faults and solutions Description of the Reason Help fault The appliance does not work Check the power cord The supply voltage must be 220-240V, and connection the product must be connected to an earthed socket The lighting lamp does not Check the power cord The supply voltage must be 220-240V, and...
Need help?
Do you have a question about the GDT 2561 X and is the answer not in the manual?
Questions and answers