Table of Contents

Related Manuals for Miele H 4412 BP


Summary of Contents for Miele H 4412 BP
- Page 1 Operating and installation instructions Ovens H 4412 BP en - AU, NZ To avoid the risk of accidents or damage to the appliance, it is essential to read these instructions before it is installed and used for the first time.
-
Page 2: Table Of Contents
H 4412 BP ........ - Page 3 Contents To check and change an entered time....... 23 Deleting a cooking duration ........23 Settings % .
- Page 4 Contents Universal tray ..........41 Rack, shelf runners .
-
Page 5: Warning And Safety Instructions
Any other usage is at the owner's risk. familiar with the contents. Pass them Miele cannot be held liable for damage on to any future owner. resulting from incorrect or improper use or operation. - Page 6 Warning and Safety instructions Safety with children Technical safety Children should be supervised to Installation, maintenance and ensure that they do not play with the repairs may only be carried out by a appliance. Keep children away from the suitably qualified and competent appliance at all times to avoid the risk person in strict accordance with current of injury.
- Page 7 If the supply cord is damaged, it While the appliance is under must be replaced by a Miele approved warranty, repairs should only be service technician to avoid a hazard. undertaken by a service technician authorised by the manufacturer.
- Page 8 Warning and Safety instructions Correct use Cover any food which is left in the oven to be kept hot. Any moisture in the Danger of burning! food could lead to corrosion damage in High temperatures are produced by the oven. This also prevents the food the oven.
- Page 9 10 minutes. Therefore, when cooking Accessories or reheating foods, e.g. poultry, it is Only use genuine Miele spare parts particularly important that food is fully and accessories with this oven. If spare cooked through. If in doubt, select a parts or accessories from other longer cooking or reheating time.
-
Page 10: Caring For The Environment
Caring for the environment Disposal of the packing Disposal of your old appliance material Electrical and electronic appliances often contain materials which, if The transport and protective packing handled or disposed of incorrectly, has been selected from materials which could be potentially hazardous to are environmentally friendly for disposal human health and to the environment. -
Page 11: Description Of The Appliance
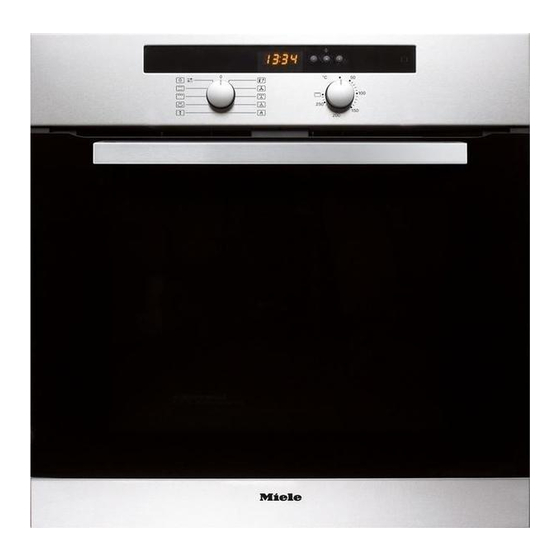
Description of the appliance H 4412 BP a Function selector b Clock timer with buttons O, Q and P c Temperature selector d Temperature indicator light y e Door contact switch, door lock for pyrolytic operation f Top heat/grill element... -
Page 12: Features
Features Oven controls If necessary, the oven door can be dismantled for cleaning. The controls offer various cooking programmes to bake, roast and grill. See "Cleaning and care" for more information. Appliances with a clock timer also offer – a time of day display, Door lock for pyrolytic operation –... -
Page 13: Retractable Controls
– Fan Plus U for roasting on the rack These and other accessories are also or cooking in uncovered containers. available to order from Miele or via the – Fan Grill \. internet at www.miele-shop.com (depending on country). -
Page 14: Controls
Controls Function selector Temperature selector Use the function selector to select the Use the temperature selector to set the required function. required temperature. The function selector can be turned The temperature selector must only clockwise or anti-clockwise. be turned in a clockwise direction as Conventional far as it will go, and then back again. -
Page 15: Oven Functions
Oven functions Your oven has a range of oven functions for preparing a wide variety of recipes. Oven function Notes Fan Plus – For baking and roasting. – You can bake and roast on different levels at the same time. –... -
Page 16: Clock Timer
Clock timer Display and triangle V in the display The clock timer can i3:23 – display the time of day. – be used as a minute minder. – be used to switch cooking l m g ) programmes on or off automatically. Controls If the Q button is pressed, the symbols The clock timer is operated using the... -
Page 17: Setting The Time Of Day
Clock timer While the triangle V is flashing, Setting the time of day change the selected setting with the O or P button: After connecting the appliance to the mains supply or after a power – Pressing the P button increases the cut, "I2:00"... -
Page 18: Using The Minute Minder
Clock timer Using the minute minder At the end of the time set for the minute minder The minute minder can be used to time – the l symbol flashes for approx. any activity in the kitchen, e.g. boiling eggs. one minute. -
Page 19: Before Using For The First Time
Before using for the first time ^ Press and release the function If the controls are pushed in when selector and the temperature the oven is delivered, they will have selector. to be released before the oven can ^ Select "Fan Plus U". be used. -
Page 20: Operation
Operation Using the oven Pre-heating ^ Place the food in the oven. Most dishes can be placed in a cold oven. They will then make use of the ^ Use the function selector to select the heat produced during the heating up required function. -
Page 21: Entering The Cooking Duration (Automatic Switch-Off)
Operation Entering the cooking duration Switching a programme off automatically (Automatic switch-off) A maximum of 12 hours can be set for Along with the usual operation of the the cooking duration. oven, you can also set cooking durations on ovens with a clock timer. If a cooking duration has been entered, Cooking programmes can be the oven will switch off automatically... -
Page 22: Switching On And Off Automatically
Operation Switching on and off automatically Now delay the Finish time: I2:I5 To use the Automatic switch-on and off function on the oven, both the cooking duration and the finish time must be entered. l m g ) For example: The time now is 10:45;... -
Page 23: The End Of A Cooking Programme
Operation The end of a cooking programme To check and change an entered time At the end of the duration It is possible to check or change times entered for a cooking programme at – the oven heating switches off any time by calling up the relevant automatically. -
Page 24: Settings
Settings % On appliances with a clock timer, you can individually modify two settings: – the time of day display, – the buzzer. The settings are retained in the event of a power cut. "P I" will appear in the display. ^ Press the Q button. -
Page 25: Buzzer (P 2)
Settings % Buzzer (P 2) There is a choice of three different tones or the buzzer can be switched off completely. To change the setting: ^ Turn the function selector to % and The following will appear in the display: press the Q button. -
Page 26: Baking Tips
Baking tips Bakeware Please refer to the baking chart for Material recommended temperature ranges, shelf levels and durations. Most types of heat-resistant tins or dishes are suitable. Handling and preparing food V Use baking tins made from dark correctly is essential for maintaining metal or enamel or from good health. -
Page 27: Universal Tray
Baking tips Frozen food Universal tray When baking cakes with fresh fruit When baking frozen products such as toppings and deep sponge cakes, cakes, pizza and baguettes, use the place the tin in the universal tray to lowest temperature quoted on the catch any spillages and keep the oven manufacturer's packaging. -
Page 28: Baking Chart
Baking chart Fan Plus U Cakes / biscuits Temperature Recommended Duration in °C shelf level in min. Creamed mixture Sponge cake 150 – 170 60 – 70 Ring cake 150 – 170 65 – 80 Foam cake (tray) 150 – 170 25 –... -
Page 29: Conventional V
Baking chart Conventional V Cakes / biscuits Temperature Recommended Duration in °C shelf level in min. Creamed mixture Sponge cake 150 – 170 60 – 70 Ring cake 170 – 190 65 – 80 Foam cake (tray) 170 – 190 25 –... -
Page 30: Intensive Bake O
Baking chart Intensive Bake O Particularly suitable for – dishes that require a moist topping and crisp base like pizza and quiche lorraine. – cakes with filling where the base has not been pre-baked. Cakes / biscuits Temperature Recommended Duration in °C shelf level in min. -
Page 31: Roasting Tips
Plus U. You can also use Conventional V. Containers Any heat-proof The Miele Gourmet oven dish, roasting pans with a lid, containers can be earthenware, cast iron, ovenproof china or glass, roasting used: bags, the rack in the universal tray. -
Page 32: Useful Tips
Roasting tips Useful tips Browning Browning only occurs towards the end of the roasting time. Remove the lid about halfway through the roasting time if a more intensive browning result is desired. Standing time At the end of the programme, take the roast out of the oven, wrap in aluminium foil and leave to stand for about 10 minutes. -
Page 33: Roasting Chart
Roasting chart 1)2) Fan Plus U Conventional V Food Recom- mended Temperature Time Temperature Time shelf in °C in min. in °C in min. level Roast beef, approx. 1 kg 170 – 190 100 – 120 190 – 210 100 – 120 Beef fillet, approx. -
Page 34: Grilling Tips
Grilling tips Grill with the oven door closed. If you grill with the door open, hot air will escape from the oven instead of being cooled by the cooling fan. The controls will get hot. Danger of burning. Recommendations Notes Function Grill Y: For grilling thin cuts and for browning food. -
Page 35: Preparing Food For Grilling
Grilling tips ^ Most items should be turned half-way Preparing food for grilling through cooking. Clean, wipe dry and season with pepper and herbs. Do not season meat Useful tips with salt before grilling as this draws the juices out. It is best to grill food of a similar thickness at the same time so that the Add a little oil if necessary. -
Page 36: Fan Grilling Guide (Fan Grill \)
Grilling tips Fan Grilling guide (Fan Grill \) – Use the Fan Grill function for meat, fish, poultry and vegetables. – Insert grease filter when Fan Grilling. – Always pre-heat for at least 5 minutes before Fan Grilling. – It is not necessary to turn food when Fan Grilling. –... -
Page 37: Grilling Guide (Grill Y)
Grilling tips Grilling guide (Grill Y) – Use for thick toasts, muffins, cheese on toast, foccacia, bruschetta and bacon. – Pre-heat grill for at least 5 minutes on 200 °C - 220 °C. – Select the appropriate shelf level for the thickness of the food. –... -
Page 38: Defrosting
Defrosting The Defrost P function uses the fan to Defrosting times circulate air at room temperature. The time needed for defrosting Please note: depends on the type and weight of the food, and at what temperature it was – Where possible, remove the deep frozen. -
Page 39: Cooking
Cooking Cooking ready meals We recommend using Fan Plus U. Cook frozen desserts and pizza on baking paper on the rack rather than in the universal tray. Cooking large frozen items on the universal tray can cause the metal to distort. This distortion will increase with each subsequent use. Frozen food such as oven chips or croquette potatoes can, however, be cooked on the universal tray. -
Page 40: Cleaning And Care
Cleaning and care Do not use a steam cleaner to The external surfaces of this clean the appliance. The steam appliance are all susceptible to could reach electrical components scratching. Scratches on glass and cause a short circuit. surfaces could even cause a breakage in certain circumstances. -
Page 41: Accessories
Cleaning and care Accessories Grease filter Wash the grease filter in hot water with Remove all accessories as well as a little washing-up liquid or in a the runners and any extra dishwasher. accessories from the oven interior before starting the pyrolytic cleaning The cleaning result is better in a process. -
Page 42: Perfectclean
Cleaning and care PerfectClean Allow the oven to cool down PerfectClean treated surfaces before cleaning by hand. Danger of burning! – Universal tray This surface has very good anti-stick For optimum performance of properties and is much easier to keep PerfectClean enamel, it is important to clean than conventional oven enamel, if clean the oven and accessories after... - Page 43 Apply a proprietary oven areas to appear. cleaning spray (such as the Original This discolouration is permanent but Miele oven cleaner) and leave to take will not affect the efficiency of the effect for approx. ten minutes. enamel. Clean these following the...
-
Page 44: Oven Interior
Cleaning and care Oven interior Most cooking residues can be removed with a damp cloth and a mild solution of The oven interior is coated with dark hot water and washing-up liquid. pyrolytic enamel which facilitates cleaning. Do not use hard brushes, wire wool* This is a particularly hard enamel with or other abrasive cleaning agents. -
Page 45: Pyrolytic Cleaning Of The Oven Interior
Cleaning and care Pyrolytic cleaning of the oven The appliance will heat up to over 400 °C during this cleaning process. interior Any residual soiling is broken down and Before starting a pyrolytic cleaning reduced to ash by the high process, please note the following: temperatures. - Page 46 Cleaning and care ^ After selecting either PY I or PY 2, After the pyrolytic process, any start the pyrolytic cleaning process debris (e.g, ash), can easily be wiped by pressing the Q button. away. The door will lock and the oven will Remember to wait until the oven has begin to heat up.
- Page 47 Cleaning and care The pyrolytic process will be cancelled, – if the function selector is turned to "0". – if another function is selected during the pyrolytic process. "PY" will flash and ) will be displayed. – in the event of a power cut. "PY"...
-
Page 48: Removing The Oven Door
Cleaning and care ^ Return the door to an almost vertical Removing the oven door position. The oven door is connected to the oven by hinges. Never attempt to pull the door off the hinge guides from a horizontal position. The hinges can flip back and cause damage to the appliance. -
Page 49: Dismantling The Oven Door
Cleaning and care Dismantling the oven door You need to remove the door before If condensate has worked its way in it can be dismantled. between the glass panes, the door can be dismantled in order to clean in ^ Place the door on a protective between the panes. - Page 50 Cleaning and care ^ Clean the glass panes and other parts individually with a damp microfibre cloth or a clean sponge and a solution of hot water with a little washing-up liquid. Dry all parts with a soft cloth. When reassembling the door, the middle panes must be replaced first.
- Page 51 Cleaning and care ^ Replace the second middle pane, ^ Lift the upper of the middle panes making sure that the missing corner slightly and push the spacers in is at the top left. between the panes. Then click the spacers into place adjacent to the hinge guides.
-
Page 52: To Refit The Door
Cleaning and care ^ Open the door fully. To refit the door ^ Flip both locking clamps back up as far as they will go into a horizontal position. The stoppers on the locking clamps need to clip onto the lugs on the door. -
Page 53: To Remove The Shelf Runners
Cleaning and care To remove the shelf runners Make sure the oven heating elements are switched off and cool. Danger of burning! ^ Pull the runners forwards out of the holder and remove. Reassemble in the reverse order, carefully ensuring all parts are correctly in place. -
Page 54: Problem Solving Guide
With the aid of the following guide, minor problems can be easily corrected without contacting Miele. If you then can't remedy the problem yourself, please call Miele (see back cover for details). Please note that a call-out charge will be applied for unnecessary ser- vice visits where the problem could have been rectified as described in these operating instructions. - Page 55 Problem solving guide Problem Possible cause and remedy The heating works The lamp needs changing. ^ Disconnect the appliance from the electricity supply: but not the oven lighting. Switch off and unplug at the socket, or remove the fuse, or switch off at the isolator as appropriate. ^ Unscrew the lamp cover and the seal.
- Page 56 Remove all coarse soiling before starting the pyrolytic cleaning programme again. If the fault code appears again, please contact Miele. – F 32: The door has not locked. Interrupt the pyrolytic cleaning programme by switching the oven off. Then start the pyrolytic programme again.
-
Page 57: After Sales Service
These are shown on the data plate, – your Miele Chartered Agent visible below the oven interior, with the door fully open. – Miele (see back cover for address) Please note that telephone calls may be monitored and recorded to improve our service. -
Page 58: Optional Accessories
Optional accessories The following accessories may come as standard with some models. They are also available to order from Miele or via the internet at www.miele-shop.com (depending on country). Telescopic runners HCE 62 Handle The handle makes it easier to take the trays and rack out of the oven. - Page 59 Optional accessories Pizza dish Gourmet oven dish The gourmet oven dish can be placed in the oven directly on the shelf runners. It has non-tip safety notches like the universal tray to prevent it being pulled out too far. This circular pan is suitable for cooking It has an anti-stick coating.
- Page 60 The lock is fitted beneath the control panel to prevent the door from being opened. The door can only then be opened by pressing the lever. Original Miele all purpose microfibre cloth Light soiling and fingerprints can be easily removed with the microfibre cloth.
-
Page 61: Electrical Connection
H 05 VV-F or H 05 RR-F with a and the on/off switch should be easily suitable cross-sectional area (CSA) accessible after the appliance has may be used (available from Miele). been built in. If the switch is not accessible after installation (depending on country) an additional means of disconnection must Test marks . -
Page 62: Installing The Oven
Installing the oven The appliance must not be Turn off the mains electricity supply operated until it has been correctly to the isolator. installed in its housing unit. ^ Connect the mains cable from the Otherwise it poses an electric shock oven to the isolator. - Page 64 Alteration rights reserved / 22 / 3113 M.-Nr. 09 284 830 / 01 (H 4412 BP)
Need help?
Do you have a question about the H 4412 BP and is the answer not in the manual?
Questions and answers