
Related Manuals for Miele H 4350


Summary of Contents for Miele H 4350
-
Page 1: Operating And Installation Instructions
Operating and Installation instructions Ovens H 4350, H 4450 To avoid the risk of accidents or damage to the appliance, it is essential to read these instructions before it is installed and used for the first time. M.-Nr. 07 088 030... -
Page 2: Table Of Contents
Contents Description of the appliance ......... 4 Features . - Page 3 Contents Baking ............43 Baking chart .
-
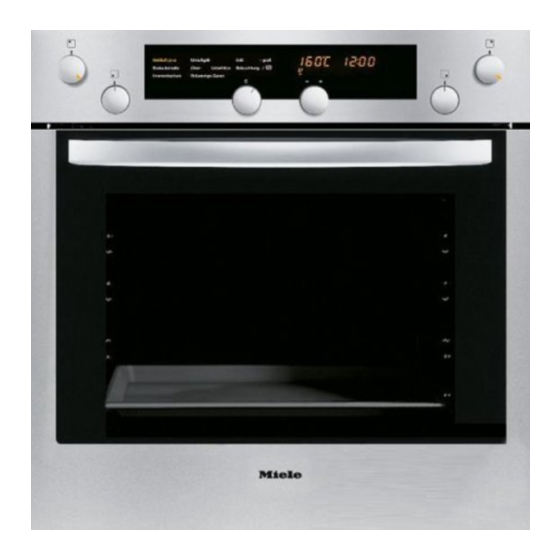
Page 4: Description Of The Appliance
Description of the appliance Control panel * Oven interior a Programme selector, display c Heating element for top heat and b Multi-function (-/+) selector with turn grilling with catalytic enamelled roof and press mechanism, display liner d Air inlet for fan e Catalytic enamelled back panel f Connection socket for the roast probe... -
Page 5: Features
Description of the appliance Features The cooling fan will continue to run for a while after the oven has been switched Electronic controls off to prevent any humidity building up in the oven, on the control panel or on In addition to operating the various the oven housing unit. -
Page 6: Accessories
If the door is opened during operation, These and other accessories are also the door contact switch automatically available to order from the Miele Spare switches off the heating elements, and Parts Department, your Miele Dealer or the fan if a "Fan" setting is being used. - Page 7 Description of the appliance Roasting filter Roast probe The roast probe enables the roasting process to be monitored simply and reliably. See "Roasting with the Roast The roasting filter must be fitted in front probe" for details. of the fan when cooking anything fatty, or where food is likely to splatter, e.g.
- Page 8 Description of the appliance Handle (depending on model) The handle makes it easier to take the baking tray, grill pan and rack out of the oven, or to put them into it. The two prongs at the top go inside the pan, rack or tray and the U-shaped supports underneath.
-
Page 9: Caring For The Environment
Caring for the environment Disposal of the packing Disposal of your old appliance material Electrical and electronic appliances often contain materials which, if The transport and protective packing handled or disposed of incorrectly, has been selected from materials which could be potentially hazardous to are environmentally friendly for disposal human health and to the environment. -
Page 10: Warning And Safety Instructions
Warning and Safety instructions Children should be supervised to This appliance complies with all ensure that they do not play with relevant legal safety requirements. the appliance. Improper use of the appliance can, however, present a risk of both Technical safety personal injury and material damage. - Page 11 If the supply cord is damaged, it particular attention to keeping the must be replaced by a Miele appliance and its surroundings in a approved service technician in order clean condition at all times. Any avoid a hazard.
- Page 12 Cover any food which is left in the hot. Danger of burning. oven to be kept hot. Any moisture Only use the Miele roast probe in the food could lead to corrosion supplied with this appliance. damage in the oven. This also prevents If a replacement is necessary it can be the food from drying out.
-
Page 13: General Notes
Warning and Safety instructions General notes Bake larger frozen products, such as pizzas, on baking paper on the Never leave the appliance rack itself or in the pizza pan (see unattended when cooking with oil "Extra accessories"). or fats, as these are a fire hazard if Placing them on the baking tray or in allowed to overheat. - Page 14 Warning and Safety instructions Disposal of your old appliance When using kitchen appliances connected to sockets near the Before throwing an old appliance oven, ensure that the cable cannot get away it must first be made trapped in a hot oven door, which could unusable.
-
Page 15: Before Using For The First Time
Before using for the first time The oven is supplied with the controls pushed in. They have to be released before the oven can be used. After installation and before using the ^ Press the multi-function selector oven for the first time the clock has to gently. -
Page 16: Cleaning And Heating Up For The First Time
Before using for the first time Cleaning and heating up for the first time Before use, please remove any stickers from the floor of the oven, baking trays, grill pan etc. The recommended temperature 160 °C the protective cork discs from will then appear in the display. -
Page 17: Controls
Controls Display The oven controls consist of: – the Programme selector, for selecting oven functions with, e.g. Lighting H/v, Fan plus Y, Auto f g ) a roast E, ... – the Multi-function selector with The bottom line shows the Symbols of press and turn mechanism for functions where data can be changed. -
Page 18: Multi-Function Selector With Turn And Press Mechanism
Controls Multi-function selector with Whilst triangle V is flashing, use the multi-function selector to make any turn and press mechanism changes: – Turning it clockwise, increases the value shown or engages the function, – Turning it anti-clockwise, reduces the value or switches the function off. The triangle V will flash for approx. -
Page 19: Functions And Symbols In The Display
Functions and symbols in the display Different functions can be called up depending on the position of the programme selector. This chart gives an overview of these settings. Symbol Programme selector setting Light H/v Position "0" Function Changing the time of –... -
Page 20: Operating Sequence
Operating sequence ^ Whilst the triangle V is flashing, use the multi-function selector imme- diately to make any changes. The triangle V will flash for appox. 5 seconds. If this input period has elapsed you will have to re-select the function. ^ Press the multi-function selector gently. -
Page 21: Changing The Time Of Day
Changing the time of day In the following example the time of day is changed from 12:05 to 14:37. ^ Turn the function selector to "0". ^ Turn the multi-function selector until "37" shows in the display. ^ Press the multi-function selector ^ Turn the multi-function selector (right gently. -
Page 22: To Set The Minute Minder
To set the minute minder The minute minder can be used to time At the end of the time set for the any activity in the kitchen, e.g. boiling minute minder eggs. – a buzzer will sound fives times in You can enter a time of up to a succession. -
Page 23: Description Of The Oven Systems
Description of the oven systems Auto roast E Fan plus Y This system works by the circulation of The oven heats initially to a high heated air. temperature (230 °C) which seals the meat to keep it succulent and tasty. A fan situated in the back wall of the As soon as this temperature has been oven draws in the air, heats it over a... - Page 24 Description of the oven systems Gentle bake x Fan grill N Gentle bake uses the grill and the Pre-heat the grill for at least 5 minutes bottom heating elements. with the oven door closed before grilling. It is suitable for bakes and gratins where a crispy finish is required.
-
Page 25: Using The Oven
Using the oven – Intensive bake F A function must first be selected using the programme selector and then, if For recipes which require a moist necessary, the temperature changed. topping and a crisp base, e. g. cheese cake, pizza, Quiche Lorraine The functions on this oven have pre-set and German style open fruit cakes. -
Page 26: Selecting A Temperature
Using the oven Selecting a temperature * Initial temperature approx. 230 °C, then drops to 160 °C for continued roasting Altering the temperature If the temperature recommended by the system is not suitable, it can be altered As soon as a cooking function is according to oven function within the selected, a recommended following range:... -
Page 27: Using The Oven
Using the oven Using the oven Below is an example of setting a simple programme. To bake a cake using Fan plus Y, 150 °C. Once this setting has been accepted ^ Place the cake in the oven and close the door. -
Page 28: Fan Run-On
Using the oven Rapid heat-up Fan run-on The cooling fan will continue to run for a The appliance is supplied with the while after the oven has been switched Rapid heat-up function activated as off to prevent any humidity building up standard (factory default setting). -
Page 29: To Switch "Rapid Heat-Up" Off
Using the oven Pre-heating the oven To switch "Rapid heat-up" off Rapid heat-up should not be used for Most dishes can be placed in a cold some items such as biscuits and small oven. They will then make use of the cakes because they will brown too heat produced during the heating-up quickly from the top. -
Page 30: Entering A Cooking Duration
Entering a cooking duration Start f You can programme cooking durations in this oven. Cooking processes are then controlled so that the oven will switch off, or on and off automatically. f g ) You can set the timing for a cooking function, by selecting one of the symbols and entering a time. -
Page 31: Symbols In The Display
Entering a cooking duration Symbols in the display To switch a programme on and off automatically there are several ways of In addition to the m and p symbols the entering the times: symbols representing the duration, start – enter the duration g and the finish and finish time are also displayed time ) constantly if times have been entered... -
Page 32: Using The Residual Heat-Energy-Save Function
Entering a cooking duration Whilst a programme is running the The oven heating will switch on again if: following show in the display – the required temperature is altered. – the cooking duration is lengthened significantly. At the end of the cooking duration –... -
Page 33: Switching Off Automatically
Entering a cooking duration Switching off automatically To switch a programme off automatically a duration has to be entered. The following example shows the programming for a cake using Fan plus Y at 160 °C for 45 minutes. After entering the data ^ Place the cake in the oven and close –... -
Page 34: Switching On And Off Automatically
Entering a cooking duration Switching on and off Then set the end time: automatically ^ Turn the multi-function selector until triangle V is underneath the ) It is a good idea to set the oven to symbol in the display. switch on and off automatically when roasting. -
Page 35: To Check And Change An Entered Time
Entering a cooking duration To check and change an entered time It is possible to check or change times f g ) entered for a cooking programme at any time by calling up the relevant symbol. The Start time (13:20 - 1:20 = 12:00 h) will show in the display, when you call To delete a set time up the f symbol. -
Page 36: System Lock
System lock This oven is equipped with a System lock. This prevents the oven being switched on unintentionally, by children for example. To activate the system lock ^ Turn the multi-function selector clockwise. The system lock cannot be activated until you have activated P 4. See A key 0-§... -
Page 37: Safety Lock
Safety lock This oven is also equipped with a Safety lock. Activating this lock prevents settings being changed f g ) a during a programme. To activate the safety lock Four horizontal bars will appear in the display. The safety lock cannot be activated until you have activated P 4. - Page 38 Safety lock De-activating the safety lock The cooking programme will stop, if – the programme selector is not turned Temperatures and times cannot be back to the original programme changed during a programme if the setting within 10 seconds. safety lock has been activated. –...
-
Page 39: Altering Oven Settings V
Altering oven settings v Some of the standard oven settings (which are set at the factory) have an alternative which you can select if required. See the chart over for a list of these settings. "S" appears in the display to let you The factory default settings are know that this setting can be altered. - Page 40 Altering oven settings v Oven setting Settings available (* factory default) S 0 * Clock display The clock display is switched off. The time of day display is switched off when the programme selector is turned to the "0" position. The time of day continues to run in the background.
- Page 41 Altering oven settings v Oven setting Settings available (* factory default) P 5 Catalyser The catalyser is switched off, cooking odours (depending are not dissipated. on model) The catalyser is switched on for all cooking functions, cooking odours are dissipated. S 2 * The catalyser is engaged for all functions except for Gentle bake.
- Page 42 Altering oven settings v Oven setting Settings available (* factory default) P 8 Fan run-on S 0 * The cooling fan run-on time is temperature controlled and will not switch off until the oven interior temperature is below 70 °C. The cooling fan run-on time is time controlled to switch off after 25 min.
-
Page 43: Baking
Baking We recommend the following settings 1 tray = 1st shelf level from the for baking: bottom – Fan plus Y 2 trays = 1st and 3rd shelf levels from the bottom – Intensive bake F 3 trays = 1st, 2nd and 4th shelf levels –... -
Page 44: Tips On Baking
Baking Conventional CB Tips on baking Only use dark baking tins with a Refer to the baking chart and the matt finish. cookery book supplied with this Bright, shiny tins will give an uneven oven for suggestions of or pale result, and in some cases the temperatures, shelf levels and times. - Page 45 Baking Frozen food Handling and preparing food When baking frozen products such as correctly is essential for maintaining cakes, pizza and baguettes, use the good health. lowest temperature quoted on the manufacturer’s packaging. Place such Only bake cakes, pizza, chips etc. items on baking parchment directly on until they are golden brown.
-
Page 46: Baking Chart
Baking chart Fan plus Temp. Recommended Time in °C shelf level in mins. Creamed mixture Sponge cake 150 - 170 50 - 70 Ring cake 150 - 170 65 - 80 Foam cake (tray) 150 - 170 25 - 30 Marble, nut cake (tin) 150 - 170 70 - 80... - Page 47 Baking chart Conventional Intensive bake Temp. Recommended Time Temp. Recommended Time in °C shelf level in mins. in °C shelf level in mins. 150 - 170 50 - 60 170 - 190 65 - 80 170 - 190 20 - 25 150 - 170 70 - 80 170 - 190...
-
Page 48: Roasting
When roasting on the rack, place the suitable. rack and anti-splash tray over the grill pan. Miele also offer Gourmet oven dishes with lids which are ideal for roasting and cooking larger quantities of food. Place the roasting pan on the rack into a cold oven. - Page 49 Roasting Older recipes and cookery books Pot roasting New guidelines (German standard Season the meat and place in the pot. DIN 44547 has been replaced by Add some knobs of butter or margarine European standard EN 60350) have led or a little oil or cooking fat. Add about to slight adjustments in oven litre of water when roasting a large, temperature settings.
-
Page 50: Roasting With The Roast Probe
Roasting with the roast probe The roast probe enables the roasting Please note: process to be monitored simply and You can place the meat in a pot or on reliably. the rack in the grill pan with the The tip of the probe is pushed into the anti-splash tray. - Page 51 Roasting with the roast probe ^ Place the food in the oven. If you want to change the suggested core temperature ^ Call up the e symbol, ^ and, whilst the triangle V is flashing underneath the e symbol, use the multi-function selector to set the core temperature you require.
- Page 52 Roasting with the roast probe The time remaining first shown is an – Turn the programme selector to "0". estimate. As the cooking process If the audible tone is not switched off it continues the time remaining is revised will continue to sound at 5 minute continuously, and a more accurate intervals as a reminder that cooking revised figure shown.
-
Page 53: Roasting Chart
Roasting chart Food Recom- Auto Roast Conventional top and mended bottom heat Core shelf temp. Temp. Time Temp. Time level in °C in °C in mins. in °C in mins. Roast beef (approx. 1 kg) 190 – 210 100 – 120 190 - 210 100 –... -
Page 54: Grilling
Grilling Grill - full n Grill with the oven door closed. If you grill with the door open, hot air will escape from the oven instead of being cooled automatically by the cooling fan. The controls will get hot, with a risk of burning. Always use the roasting filter when grilling. -
Page 55: Tips On Grilling
Grilling Clean fish in the normal way. To See the grill chart for more information. enhance the taste, add a little salt or To grill thicker pieces of food more squeeze a little lemon juice over the gradually after an initial high fish. -
Page 56: Grill Chart
Grill chart Pre-heat the grill for at least 5 minutes with the door shut before grilling. Food to be grilled Recom- Grill / Grill - full Fan grill mended Temp. Total Temp. Total shelf level in °C grilling time in °C grilling time in mins. -
Page 57: Defrosting
Defrosting You can also use the oven for Do not refreeze food once it has defrosting. thawed. To defrost select Fan plus Y with a maximum temperature of 50 °C. For defrosting meat and delicate foods, use the lowest possible temperature (30 °C). -
Page 58: Cooking
Cooking Gentle bake We recommend using the following oven settings: The Gentle bake function is ideal for – Fan plus gratins and bakes which require a crispy finish. – Conventional Use the first shelf level from the bottom. Cooking containers made of ovenproof glass, porcelain, china, and Food Temp. -
Page 59: Cleaning And Care
Miele Spare Parts Dept. or via the Internet (depending on country). Glass fronted appliances The appliance front and controls are Appliance front and control susceptible to scratches and abrasion. - Page 60 Stainless steel surfaces – stainless steel cleaning agents, Stainless steel surfaces can be cleaned – oven sprays. using a Miele E-Cloth, or with a proprietary non-abrasive cleaning If you are unsure about a particular agent designed specifically for use on product or need further advice, stainless steel.
-
Page 61: Accessories
Cleaning and care Accessories Oven interior Always remove all accessories, trays Allow the oven to cool down before and racks which are not being used cleaning. when using the oven to get the best Danger of burning! results and to keep cleaning of the trays to a minimum. -
Page 62: Perfectclean
Cleaning and care PerfectClean Normal soiling Clean as soon as possible after each Before using for the first time remove use with a dishcloth, soft sponge or a any stickers from PerfectClean soft nylon brush, and a solution of hot surfaces. - Page 63 Cleaning and care Remove the catalytic back panel, The following cause lasting damage roof liner and side liners (if fitted) to the surface structure and reduce before using oven sprays. The the anti-stick effect and must not be chemicals used in oven sprays will used on PerfectClean surfaces: damage catalytic enamel rendering it ineffective.
-
Page 64: Catalytic Enamel Surfaces
Soiling caused by oil and grease obtained from your Miele dealer or splashes are removed from catalytic the Miele Spare Parts dept. coated surfaces when the oven is heated to a high temperature. -
Page 65: To Remove The Oven Door
Cleaning and care To remove the oven door Do not attempt to take the door off Please note: the oven door is heavy. the hinge guides when it is in a It should be gripped firmly at the horizontal position. The guides will sides when being removed or close, and damage the appliance. -
Page 66: To Dismantle The Oven Door
Cleaning and care To dismantle the oven door Always remove the oven door before The oven door has seals on all sides to dismantling it. protect it from moisture ingress. ^ Place the door on a protective If, however, condensate has worked its surface (e.g. - Page 67 Cleaning and care ^ Clean the glass panes and other parts and then put the oven door back together again. ^ Gently lift the inner pane up and out. ^ Push the middle pane into the frame almost to the end. The material (M-) number printed on the pane must be legible in the bottom right hand corner (see illustration).
-
Page 68: To Refit The Door
Cleaning and care ^ Insert the inner pane with the printed ^ Put the guides back in position, then tighten the screws in the trim. text facing downwards. Be careful that the side seals do not slip and that the pane is pushed in as To refit the door far as possible. -
Page 69: To Remove The Runners
Cleaning and care To remove the runners Make sure that the door goes back on straight. Make sure the oven heating elements are switched off and cool. ^ Open the door fully. Danger of burning. ^ Pull on the fixing knob to release it. ^ Flip both locking clamps back up as far as they will go into a horizontal position. -
Page 70: To Remove The Catalytic Back Panel, Roof Liner And Side Liners (If Fitted)
Cleaning and care To remove the catalytic back – Roof liner panel, roof liner and side liners ^ Remove the runners. (if fitted) Make sure the oven heating elements are switched off and cool. Danger of burning. The catalytic panels and liners can be removed for cleaning if necessary. - Page 71 Cleaning and care When reassembling the catalytic side liners, ensure they sit correctly. ^ Ease the back lug into the opening in the rear wall panel. ^ Lift the front locating hole on to the guide pin behind the collar. ^ Put the runners back into place.
-
Page 72: Problem Solving Guide
Some minor problems can be corrected without contacting the Miele Service Department. What to do if ..the oven does not heat up Check whether, ^ the system lock has been activated. - Page 73 Problem solving guide The glass cover is held in position by Do not touch the surface directly two metal brackets which are secured when changing the lamp as grease to the reflector. particles from your fingers will Do not push the metal brackets to adhere to the surface and damage the sides, as this would damage the lamp.
- Page 74 Problem solving guide . . . a noise can be heard after a cooking process This is not a fault. The cooling fan continues to run for a while after the oven has been switched off to prevent any humidity building up in the oven, on the control panel or on the oven housing unit.
- Page 75 Problem solving guide . . . cakes or biscuits are unevenly . . . there has been a power cut and browned the time of day is flashing in the display. There will always be a slight unevenness. All pre-set times have been deleted because of the power cut.
-
Page 76: After Sales Service
– your Miele Dealer appliance. These are shown on the data plate, – the Miele Service Department visible below the oven interior, with the (see back cover for contact details). door fully open. Please note that telephone calls may be monitored and recorded for training purposes. -
Page 77: Extra Accessories
The following accessories may come Pizza pan are standard with some models. They following accessories are available at extra cost from your Miele Dealer, the Miele Spare Parts Department or via the Internet (depending on country). Telescopic baking carriage This circular pan is suitable for cooking... - Page 78 Extra accessories Gourmet oven dish Catalytic side liners These are fitted behind the runners in the sides of the oven and help keep the oven walls clean. When ordering please state the model number of your oven and whether it is fitted with side runners, telescopic runners or a telescopic carriage.
-
Page 79: Electrical Connection Uk, Irl, Za
Ensure that these match the EARTHED. household mains supply. Please quote these data, and the model and serial number when contacting the Miele Service dept. Connection of this appliance should be made via a suitable isolator, which complies with national and local safety... - Page 80 Electrical connection UK, IRL, ZA The voltage and rated load are given Data relating to electrical connection on the data plate, visible when the oven will be found on the data plate, visible door is open. Please ensure that these when the oven door is open.
-
Page 81: Installing The Oven
Installing the oven The appliance must not be operated Turn off the mains electricity supply until it has been correctly installed in to the isolator. its housing unit. Otherwise it poses ^ Connect the mains cable to the an electric shock hazard. isolator. - Page 84 Alteration rights reserved / 22 / 1607 M.-Nr. 07 088 030 / 00 en - GB (H 4350, H 4450)
Need help?
Do you have a question about the H 4350 and is the answer not in the manual?
Questions and answers