
Related Manuals for Xilinx Spartan 6 FPGA


Summary of Contents for Xilinx Spartan 6 FPGA
- Page 1 Qdesys Sensorless Field Oriented Control Quick Start Guide Qdesys Sensorless Field Oriented Control Quick Start Guide Version 1.0 ™ ® Xilinx Spartan -6 FPGA Motor Control Development Kit © Copyright 2012 Xilinx...
- Page 2 Qdesys Sensorless Field Oriented Control Quick Start Guide Revision History DATE VERSION REVISION 10/31/2012 Initial Release © Copyright 2012 Xilinx...
- Page 3 INDEMNIFICATION. AVNET SHALL NOT BE LIABLE FOR AND CUSTOMER SHALL INDEMNIFY, DEFEND AND HOLD AVNET HARMLESS FROM ANY CLAIMS BASED ON AVNET’S COMPLIANCE WITH CUSTOMER’S DESIGNS, SPECIFICATIONS OR IN¬STRUCTIONS, OR MODIFICATION OF ANY PRODUCT BY PARTIES OTHER THAN AVNET, OR USE IN COMBINATION WITH OTHER PRODUCTS. © Copyright 2012 Xilinx...
- Page 4 OR INCIDENTAL DAMAGES, INCLUDING ANY LOSS OF DATA OR LOST PROFITS, ARISING FROM YOUR USE OF THE DOCUMENTATION © 2012 QDeSys, All rights reserved. QDESYS, the QDeSys logo, are trademarks of QDeSys. All other trademarks are the property of their respective owners. © Copyright 2012 Xilinx...
-
Page 5: Table Of Contents
QDeSys MC Manager GUI Instructions ..........................9 Host PC Network Configuration ............................10 Firewall Settings .................................. 11 Motor Demo Hardware Requirement ............................ 13 Xilinx Software Installation ..............................14 Programming the flash using iMPACT ..........................18 RUNNING THE DEMO ......................19 Using the GUI ..................................19 Setting the Motor Type ................................. -
Page 6: About This Guide
This guide provides detailed information for getting started with the Qdesys Sensorless Field Oriented Control (FOC) demonstration on the Xilinx Spartan-6 FPGA Motor Control Development Kit. Follow the steps outlined in the following sections to install and enable the required software for this kit and run the FOC demonstration. -
Page 7: Qdesys Sfoc Demo Set Up And Instructions
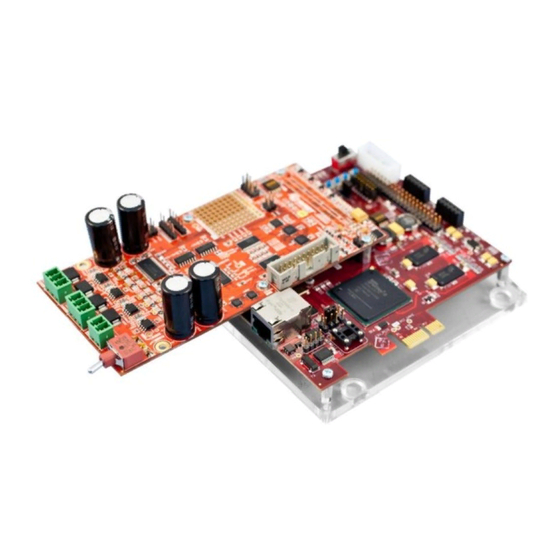
Qdesys Sensorless Field Oriented Control Quick Start Guide Qdesys Sensorless Field Oriented Control Demo Setup & Instructions This guide provides detailed information for getting started with the Xilinx Spartan-6 FPGA Motor Control Development Kit using Qdesys IP for Sensorless Field Oriented Control of DC motors. Introduction The Xilinx Spartan-6 FPGA Motor Control Development Kit was designed by Avnet in collaboration with Xilinx. -
Page 8: Field Oriented Control System Diagram
Before you set up the board, please install the host PC software, including the Qdesys MC Manager GUI and other software and settings needed to demonstrate the QDESYS IP. © Copyright 2012 Xilinx... -
Page 9: Qdesys Mc Manager Gui Instructions
2. Mc_manager.exe will open up the GUI to control the motors 3. The db_motors and db_boards folders contain the motor configuration files and the board configuration files respectively. © Copyright 2012 Xilinx... -
Page 10: Host Pc Network Configuration
IP addresses around it, for example 192.168.1.2 – 192.168.1.99) Network and Sharing LAN Configure and set Link Speed and Click on Control Panel Duplex to Autonegotiation as shown below: © Copyright 2012 Xilinx... -
Page 11: Firewall Settings
1. Start Control Panel Windows Firewall 2. Select the quick link on the left side pane Allow a program or feature through Windows Firewall 3. Click the Change Settings button 4. Click Allow another program © Copyright 2012 Xilinx... - Page 12 Qdesys Sensorless Field Oriented Control Quick Start Guide 5. Select the mc_manager.exe file from the root installation path shown below 6. Once you’ve added the exception for mc_manager.exe, check the boxes as shown below. © Copyright 2012 Xilinx...
-
Page 13: Motor Demo Hardware Requirement
Power up the board by turning the baseboard slider power switch ON. The Qdesys demonstration bitstream must be loaded into the S6LX75T baseboard flash in order to configure the FPGA. That process is covered in the following sections. © Copyright 2012 Xilinx... -
Page 14: Xilinx Software Installation
Qdesys Sensorless Field Oriented Control Quick Start Guide Xilinx Software Installation Follow these instructions for installing the Xilinx Lab Tools software, unless you already have a version of the Xilinx tools installed on your host computer. 1. Run the ISE Design Suite Installer: Option 1: Insert the ISE Design Suite DVD included in this kit into the computer If the Installer does not start automatically, run the “xsetup”... - Page 15 Qdesys Sensorless Field Oriented Control Quick Start Guide Figure 12: ISE End-User License Agreement Figure 13: ISE Third-Party Usage License Agreement © Copyright 2012 Xilinx...
- Page 16 Qdesys Sensorless Field Oriented Control Quick Start Guide Figure 14: Select Edition to Install Figure 15: Select Installation Options © Copyright 2012 Xilinx...
- Page 17 Qdesys Sensorless Field Oriented Control Quick Start Guide Figure 16: Select Destination Directory and Program Folder Figure 17: Installation Summary © Copyright 2012 Xilinx...
-
Page 18: Programming The Flash Using Impact
5. Click ok and select the flash: in the drop down menu. 6. Right click on the FLASH device on top of the green Xilinx device and select program. The flash will be programmed with the .mcs file. You are now ready to run the demo! -
Page 19: Running The Demo
2. When the mc_manager GUI opens, click RUN to initialize the Ethernet connection. Verify that the link connection status illuminates green in the window. Note that it may turn orange for several seconds while negotiating the link. You should get this on the GUI after the connection is complete: © Copyright 2012 Xilinx... -
Page 20: Setting The Motor Type
(i.e. Torque Constant, BEMF Constant, etc.) and the user’s system. Modifying and existing XML file is the best way to get started. This allows for rapid adoption with custom motors not provided in the kit. © Copyright 2012 Xilinx... - Page 21 Qdesys Sensorless Field Oriented Control Quick Start Guide 6. In the M0: Main Panel, ensure that the Portescap 16BHS-3C-P01 motor is displayed as shown below. © Copyright 2012 Xilinx...
-
Page 22: Spinning The Motors
The motor should now be spinning! To run in Speed Mode, toggle the Motor Run switch to OFF and select Mode radio button for Speed. 6. Click the Motor Run toggle switch to enable the motor. © Copyright 2012 Xilinx... - Page 23 Use the Spd Scale +/- button to increase the RPM dial scale to display up to 2000 RPM. Rotate the RPM (speed) dial to ~1000 RPM. The rotor first aligns itself, then ramps current smoothly, and finally engages the speed control loop. The motor should now be spinning! © Copyright 2012 Xilinx...
-
Page 24: Main Panel Description
The PWM Ovf (PWM modulation overflow) changes to Orange to indicate overflow The four square green LEDs refer to internal functionality of FOC motor control IP A red color indicates error or IP time bomb timeout for evaluation versions © Copyright 2012 Xilinx... - Page 25 (a) Check if the right motor type and its associated descriptor file have been connected and the file opened. (b) Remove any blocking elements from the motor shaft (c) Reduce the TRQ (d) Increase the TRQ (the TRQ current might be too low for the load) © Copyright 2012 Xilinx...
-
Page 26: Waveform Display
12. In the Motor 0 Main Panel window top menu, select View Whole Graph 13. This displays a graph of several motor parameters in near-real-time. See below for a brief description. More details can be found in the mc_manager help menu. © Copyright 2012 Xilinx... -
Page 27: Waveform Description
14. In the Motor 0 Main Panel window top menu, select Advanced FOC Control 15. In the FOC Control Panel, change the Current Filter cutoff frequency Fcut_1 to 10kHz as shown below. Be sure to click the Enter button before closing this window. © Copyright 2012 Xilinx... - Page 28 NOTE – the help menu is accessed from the top mc_manager window. It will lead you to the user’s guide for this application which may offer more detail. © Copyright 2012 Xilinx...
-
Page 29: Advanced Demo
Qdesys Sensorless Field Oriented Control Quick Start Guide Advanced Demo Xilinx and Qdesys have a patent-pending method of advanced modulation, called Regenerative Pulse Frequency Modulation (RPFM) that extracts more performance from the motor while simultaneously reducing harmonic noise commonly present in traditional Pulse Width Modulation (PWM) methods. You may demonstrate this mode with a few simple steps. - Page 30 8. Click CAPTURE. You should see something similar to the picture below. Note the presence of large harmonics that are multiples of the PWM switching frequency. These are often undesirable in motor applications. In the next steps you will enable the Xilinx/Qdesys RFPM proprietary algorithm to attenuate these peaks.
- Page 31 Red : space vector; from 86.603% to 100%, Cyan: hexagon saturation zone; from 100% to 110.266%, Green: square wave zone (six steps); from 110.266% and over. The RPFM Pulse Width can be changed according the specific motor electric characteristics. © Copyright 2012 Xilinx...
- Page 32 Congratulations! This completes the introduction to the Qdesys SFOC design, IP and demonstration. Please remember that more details can be found in the MC_Manager help PDF documents, available from the Help menu. © Copyright 2012 Xilinx...
- Page 33 AVNET and the AV logo are registered trademarks of Avnet, Inc. © Copyright 2012 Xilinx...
Need help?
Do you have a question about the Spartan 6 FPGA and is the answer not in the manual?
Questions and answers