Advertisement
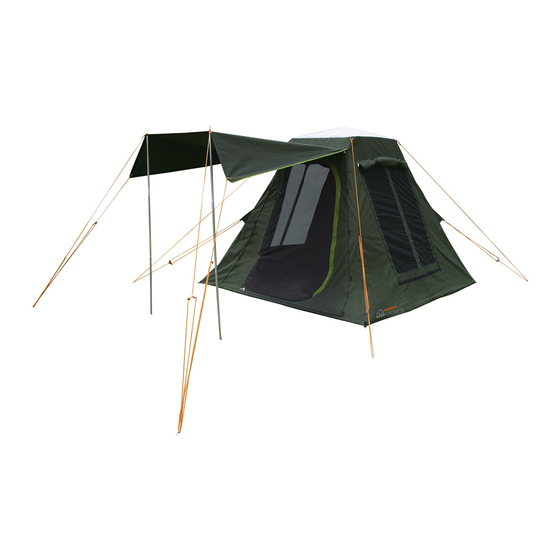
Harrier 4 Tourer Tent
Model No. KC077-032
PITCHING INSTRUCTIONS
Your tent includes:
2 x U-shape poles
1 x elbow pole
2 x adjustable thumbscrew poles
2 x porch poles
8 x guy ropes
20 x pegs
1.
Select a dry, level site and clear any sharp objects
that may puncture the floor. Remove the tent from its
carry bag, untie fabric ties and unroll the tent.
2.
Peg out all four corners, ensure each side is pulled
taut. Then peg out all the remaining pegging points.
3.
Assemble the ROOF FRAME POLES (1 x Elbow +
2 x U-shape poles) by inserting the U-shape poles
into the elbow. Ensure the metal pins lock in to place.
Unzip the front door and secure assembled roof frame
to inner tent roof using the 8 hook and loop tabs.
Roof Frame Poles
1 x elbow + 2 x U-shape poles
2 x porch poles
2 x adjustable thumbscrew poles
4.
Assemble 2 x ADJUSTABLE THUMBSCREW POLES.
If erecting alone, support the roof frame pole by
inserting a porch pole into the central hole. Insert the
adjustable thumbscrew pole tips into holes located
at either side of the roof elbow pole, stand up one at
a time. Adjust the thumbscrews to the appropriate
height so the tent fabric is taut.
5.
Rope out the guy ropes and fine tune the tent so it
remains taut and positioned correctly.
To make sure the tent stays
in place insert the pegs into
the ground at a 45° angle,
not straight down.
6.
Assemble 2 x PORCH POLES. To erect the porch,
insert the pole tip into the eyelets located at the
corners of the porch. Attach the guy ropes to the top
of the pole tip and peg out on a 45° angle. For extra
weather protection, move the porch poles in to the
two central eyelets, attach guy ropes to the two outer
eyelets and peg out with guy ropes.
REVERSE THE PROCEDURE TO LOWER TENT
Advertisement
Table of Contents

Related Manuals for Kiwi Camping Harrier 4 Tourer Tent


Summary of Contents for Kiwi Camping Harrier 4 Tourer Tent
- Page 1 To make sure the tent stays in place insert the pegs into the ground at a 45° angle, not straight down. Harrier 4 Tourer Tent Model No. KC077-032 Roof Frame Poles 1 x elbow + 2 x U-shape poles PITCHING INSTRUCTIONS...
- Page 2 Do not leave your tent up and unattended for extended on the Kiwi Camping website - www.kiwicamping.co.nz. 10. Your tent is ventilated for all normal conditions, however condensation periods of time.
Need help?
Do you have a question about the Harrier 4 Tourer Tent and is the answer not in the manual?
Questions and answers