Table of Contents
Advertisement
Quick Links
- press key A (red LED flashes)
OPERATION
- enter 90
- Enter the code of the relay to be activated.
- press key A (red LED on)
- Press key A to confirm the code. If the code
- enter a 3-digit number "nxx"; n indicates the
is correct, the relay activates (green LED on)
relay associated with the code to be deleted
with the programmed time and operating
(1 or 2); xx indicates the code to be deleted
mode.
(from 01 to 12)
- press key A (red LED flashes)
Notes:
- enter 55
- Press key B to delete an incorrect code
- press key A (red LED off).
before confirming it.
- If you enter an incorrect code and confirm it
Changing the relay activation time and mode
with key A you hear a dissuasion tone (keys
To change the relay activation time and mode:
are deactivated for approx. 3 seconds). This
- enter the programming code
time increases up to a max. of 30 seconds
- press key A (red LED flashes)
each time an incorrect code is entered.
- enter 03
- The numbers entered and not confirmed with
- press key A (red LED on)
key A are deleted automatically 25 seconds
- enter a number from 00 to 99 to programme
after the last key you have pressed.
activation time of relay 1 (enter 00 to deac-
tivate the relay)
BISTABLE OPERATION
- press key A
This function is possible only if the keypad
- enter a number from 00 to 99 to programme
has been programmed properly. See " Chang-
activation time of relay 2 (enter 00 to deac-
ing the relay activation time and mode" .
tivate the relay)
To activate the relays for indefinite time:
- press key A
- enter one of the codes for the relay to be
- enter a number from 00 to 03 to programme
activated
activation mode of relay 1 (for code selec-
- press key A (green LED on). The relay
tion refer to "operating modes and program-
activates for indefinite time.
ming codes")
- enter the code again to deactivate the relay
- press key A
- press key A (green LED off and relay
- enter a number from 00 to 03 to programme
deactivation).
activation mode of relay 2 (for code selec-
tion refer to "operating modes and program-
DIRECT ACTIVATION
ming codes")
Press key A to activate the relays directly
- press key A (red LED flashes)
(this function is possible only if the keypad
- enter 55
has been programmed properly. See "Chang-
- press key A (red LED off)
ing the relay activation time and mode") . Both
the two relays are activated if both of them are
Restoring the default programming
programmed to be directly activated by key A.
To delete all the programmed codes and
restore the keypad default programming (for
DOOR LOCK RELEASE BUTTONS
the codes refer to "default programming" ):
Two buttons can be connected between ter-
- switch off the keypad
minals P1, P2 and ground in order to activate
- switch on the keypad again holding key B
the two relays according to the programmed
pressed until you hear the confirmation
activation time and mode.
tone.
EMERGENCY
Notes:
In case of power failure all the data are
- Write down the programming code and the
recorded in a nonvolatile memory and will not
relay activation codes in the table.
be lost.
- The relay activation codes can only be
changed by knowing the programming code.
- An acoustic signal indicates key pressing.
Red LED.
- If the entered code is not correct, you hear
Indication of program-
a dissuasion tone (keys are deactivated for
ming mode.
2 seconds).
- Press A during programming if you do not
want to change a code. This allows you to
go to the next programming operation with-
out changing the code.
- The programming code and the relay activa-
tion codes must be different.
- Press B to cancel the last number you have
entered.
- 4 -
Table of codes
Master pro-
gramming code
1
st
code
2
nd
code
3
rd
code
th
4
code
5
th
code
r
e
th
6
code
l
a
7
th
code
y
th
8
code
1
9
th
code
th
10
code
11
th
code
th
12
code
Activation time
Activation mode
1
st
code
2
nd
code
3
rd
code
4
th
code
5
th
code
r
6
th
code
e
l
7
th
code
a
y
th
8
code
2
9
th
code
10
th
code
11
th
code
Green LED.
Indication of code
th
12
code
accepted.
Activation time
Key B.
Activation mode
Clear.
Tone table
Key A.
Acknowledge
Enter and direct acti-
0
1
2
3
vation of relays (if pro-
grammed).
Dissuasion
0
1
2
3
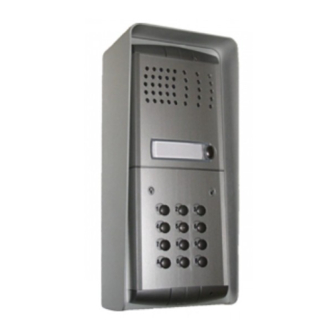
Installation of the push-button panel
Mounting modules.
4
5
4
5
ONE-WAY AUDIO KIT
3
1
Fix lower part to the frame to the
rain shelter and make the elec-
trical connections.
ADJUSTMENTS
2
Fixing of the module frames on the
upper side by the 2 small screws
included in the rain shelter.
ACI srl Farfisa Intercoms
Via E. Vanoni, 3 • 60027 Osimo (AN) • Italy
Tel: +39 071 7202038 (r.a.) • Fax: +39 071 7202037
e-mail: info@acifarfisa.it • www.acifarfisa.it
ACI Farfisa Intercoms reserves the right to modify the products illustrated at any time.
4
Fixing of frame to rain shel-
ter. Align the frame before
tightening the screws.
Dispose of the device in accordance
with environmental regulations.
- 1 -
Advertisement
Table of Contents

Related Manuals for FARFISA INTERCOMS 1PXFED


Summary of Contents for FARFISA INTERCOMS 1PXFED
- Page 1 Via E. Vanoni, 3 • 60027 Osimo (AN) • Italy Dissuasion with environmental regulations. Tel: +39 071 7202038 (r.a.) • Fax: +39 071 7202037 e-mail: info@acifarfisa.it • www.acifarfisa.it - 4 - - 1 - ACI Farfisa Intercoms reserves the right to modify the products illustrated at any time.
- Page 2 INSTALLATION DIAGRAMS Installation of the intercom - enter a number with 1 to 8 digits to pro- INSTALLATION DIAGRAM gramme code 1 (from 0 to 99999999) - press key A - enter a number with 1 to 8 digits to pro- gramme code 2 (from 0 to 99999999) - press key A - enter a number with 1 to 8 digits to pro-...
Need help?
Do you have a question about the 1PXFED and is the answer not in the manual?
Questions and answers