Advertisement
Quick Links
Advertisement

Subscribe to Our Youtube Channel
Related Manuals for Kartell Largo Piero Lissoni


Summary of Contents for Kartell Largo Piero Lissoni
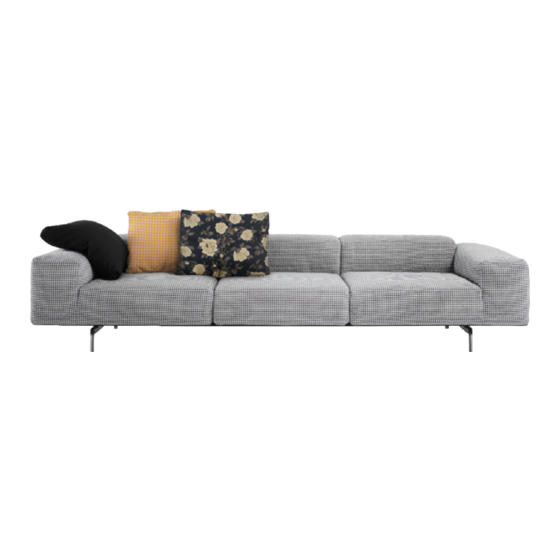
- Page 1 Largo Piero Lissoni...
- Page 2 AVOID THE FOLLOWING IMPROPER USE: stand on the armchair, seat on the back, use the armchair as a ladder. Kartell will accept no liability for any damages caused to property or persons subsequent to incorrect handling of the product. If the assistance of the manufacturer is required to rectify faults arising from incorrect installation or use, this assistance is not covered by the guarantee.
- Page 3 VERMEIDEN SIE DIE FOLGENDEN UNSACHGEMÄSSEN GEBRAUCHSWEISEN: Besteigen der Sitzfläche mit den Füßen, Setzen auf die Rückenlehne, Verwendung des Produktes als Leiter. Kartell lehnt jegliche Haftung für Sach- oder Personenschäden ab, die durch einen unsachgemäßen Gebrauch des Produktes hervorgerufen werden. Die Garantie umfasst keinerlei Hilfsleistung oder Reparatur des Produktes oder seiner Teile, die in Folge eines unsachgemäßen Gebrauchs des...
- Page 4 Kartell décline toute responsabilité pour les dommages causés à des choses ou à des personnes suite à une utilisation non conforme du produit. La garantie ne comprend pas toute forme d’assistance ou de réparation du produit ou de ses éléments endommagés suite à...
- Page 5 EVITAR OS SEGUINTES USOS IMPRÓPRIOS: subir sobre o assento com os pés, sentar-se nas costas, utilizar o produto como se fosse uma escada. A Kartell declina qualquer responsabilidade por prejuízos causados a coisas ou a pessoas decorrentes de um uso não correcto do produto.
- Page 6 소파위로 발을 딛고 올라가거나, 등받이 위에 앉는 것, 제품을 사다리 대신 사용하는 것등의 부적절한 사용은 피하여 주십시오. Kartell은 제품의 부적절한 사용으로 인해 야기된 물건 또는 신체 손상에 대한 책임을 지지 않습니다. 부적절한 사용으로 인해 제품 또는 그 일부가 손상되었을 경우에 대해, 어떤...
- Page 7 ПРИ НАМАЧИВАНИИ ИЛИ СОПРИКОСНОВЕНИИ С ВЛАЖНОЙ ПОВЕРХНОСТЬЮ МОЖЕТ ЛИНЯТЬ. НЕНАДЛЕЖАЩЕЕ ИСПОЛЬЗОВАНИЕ: не следует вставать на сидение, садиться на спинку, использовать изделие в качестве лестницы. Kartell снимает с себя любую ответственность за повреждения, причиненные предмету или человеку, вследствие неправильной эксплуатации изделия. Гарантия...
- Page 8 ISTRUZIONI PER IL MONTAGGIO - DIVANO LINEARE ATTENZIONE per montare il divano sono necessarie minimo 2 persone. Disimballare con cura i singoli elementi. Nel sacchetto della minuteria sono presenti dei feltrini per i piedini è a discrezione del cliente se applicarli sopra il gommino (fig.
- Page 9 安装说明 조립 지침 - 선형 소파 주의: 소파 조립을 위해 최소 2인이 필요합니다. 각각의 포장 요소를 주의해서 제거합니다. 각 부품을 담은 포장지의 받침대 부분은 펠트 패드가 있으며, 고객이 원하면 고리 위에 적용할 수 있습니다. (그림 1) ИНСТРУКЦИИ ПО МОНТАЖУ - ПРЯМОЙ ДИВАН ВНИМАНИЕ...
- Page 10 Assiemare le 2 gambe alla struttura portante utilizzando le viti e i dadi con l’ausilio delle chiavi in dotazione (fig. 2) e serrare a fondo. Ruotare la struttura di 90° assemblare una seduta, con le apposite viti utilizzando la chiave in dotazione (fig. 3). ATTENZIONE NON SERRARE A FONDO LE VITI Attach the 2 legs to the bearing structure using the nuts and screws with the help of the spanner provided (fig.
- Page 11 Соедините две ножки с опорной конструкцией с помощью винтов и гаек, используя гаечные ключи, входящие в комплект поставки (рис. 2), и затяните до упора. Поверните конструкцию на 90°, соберите пуф при помощи специальных винтов и ключа из комплекта поставки (рис. 3). ВНИМАНИЕ: НЕ ЗАТЯГИВАТЬ ВИНТЫ ДО УПОРА (3 قم...
- Page 12 Ripetere l’operazione sulle rimanenti sedute o ottoman (fig 4). Posizionare un bracciolo e fissarlo con le viti (fig 5). ATTENZIONE NON SERRARE A FONDO LE VITI Ripetere quest’ultima operazione per il rimanente bracciolo (fig 6) Repeat the operation on the remaining seats or ottoman (fig 4) Position an arm and secure it with the screws (fig 5).
- Page 13 残りのシートやフッ トスツール (図4) で同じ操作を繰り返します。 アームレストを配置して、 ネジで固定してください (図5) 。 注意、 ネジは固く締め付けないでください。 残りのアームレストについてもこの操作を繰り返してください (図6) 对椅子和座墩余下的部件重复操作 (图4) 。 放置一扶手并用螺丝固定 (图5) 。 小心不要完全拧紧螺栓 对剩余的扶手重复此操作 (图6) 남은 의자 부분이나 오토만(그림 4)에 이 작업을 반복하십시오. 팔걸이를 배치한 다음 나사(그림 5)로 고정하십시오. 주의: 나사를 끝까지 조이지 마십시오. 다른...
- Page 14 Al termine del fissaggio serrare a fondo tutte le viti. Capovolgere e sistemare nella posizione desiderata (fig.7). Once all the elements have been secured, tighten the screws completely. Upturn the sofa and position it where required (fig 7). Sobald alle befestigt sind, alle Schrauben festziehen. Das Sofa umdrehen und in der gewünschten Position aufstellen (Abb.7).
- Page 15 座面の固定作業がすべて完了したら、 ネジを全部最後まで締め付けます。 ソファを普通の方向へ戻 し、 意図する位置へ置きます (図7) 。 고정 작업이 끝나면 모든 나사를 끝까지 조입니다. 뒤집어서 원하는 위치에 놓으십시오. (그림 7) По завершении сборки затяните все винты до упора. Переверните изделие и установите его в желаемое положение (рис.7).
- Page 16 ISTRUZIONI PER IL MONTAGGIO - DIVANO ANGOLARE ATTENZIONE per montare il divano sono necessarie minimo 2 persone. Disimballare con cura i singoli elementi. Nel sacchetto della minuteria sono presenti dei feltrini per i piedini è a discrezione del cliente se applicarli sopra il gommino (fig.
- Page 17 安装说明 조립 지침 - 코너 소파 주의: 소파 조립을 위해 최소 2인이 필요합니다. 각각의 포장 요소를 주의해서 제거합니다. 각 부품을 담은 포장지의 받침대 부분은 펠트 패드가 있으며, 고객이 원하면 고리 위에 적용할 수 있습니다. (그림 1) ИНСТРУКЦИИ ПО МОНТАЖУ - УГЛОВОЙ ДИВАН ВНИМАНИЕ...
- Page 18 Assiemare le 2 gambe alla struttura portante utilizzando le viti e i dadi con l’ausilio delle chiavi in dotazione (fig. 2) e serrare a fondo. Ruotare la struttura di 90° assemblare una seduta, con le apposite viti utilizzando la chiave in dotazione (fig. 3). ATTENZIONE NON SERRARE A FONDO LE VITI Attach the 2 legs to the bearing structure using the nuts and screws with the help of the spanner provided (fig.
- Page 19 Соедините две ножки с опорной конструкцией с помощью винтов и гаек, используя гаечные ключи, входящие в комплект поставки (рис. 2), и затяните до упора. Поверните конструкцию на 90°, соберите пуф при помощи специальных винтов и ключа из комплекта поставки (рис. 3). ВНИМАНИЕ: НЕ ЗАТЯГИВАТЬ ВИНТЫ ДО УПОРА (3 قم...
- Page 20 Ripetere l’operazione sulle rimanenti sedute (fig 4). Posizionare un bracciolo e fissarlo con le viti (fig 5). ATTENZIONE NON SERRARE A FONDO LE VITI Repeat the operation on the remaining seats (fig 4) Position an arm and secure it with the screws (fig 5). WARNING DO NOT TIGHTEN THE SCREWS COMPLETELY.
- Page 21 残りのシートでも同じ操作を繰り返します (図4) アームレストを配置して、 ネジで固定してください (図5) 。 注意、 ネジは固く締め付けないでください。 在其他椅子上重复操作 (图4) 放置一扶手并用螺丝固定 (图5) 。 小心不要完全拧紧螺栓 남은 의자 부분(그림 4)에 이 작업을 반복하십시오. 팔걸이를 배치한 다음 나사(그림 5)로 고정하십시오. 주의: 나사를 끝까지 조이지 마십시오. Проделайте эту операцию с оставшимися пуфами (рис. 4). Установите...
- Page 22 Ripetere la stessa operazione per la seconda struttura. Completare il montaggio delle sedute ad esclusione della zona angolo (fig. 4). Ripetere la stessa operazione montando il bracciolo nel lato opposto rispetto alla prima struttura. ATTENZIONE NON SERRARE A FONDO LE VITI Repeat the same operation for the second structure.
- Page 24 Assiemare il piede alla struttura metallica d’angolo con la minuteria utilizzando le chiavi in dotazione (fig. 5) e serrare a fondo. Capovolgere i divani e posizionarli a “L”, calzare il telaio dell’angolo utilizzando le apposite sedi (fig. 6). Attach the foot to the corner metal structure with the small parts using the spanners provided (fig 5) and tighten thoroughly.
- Page 25 Соедините ножку с угловой металлической конструкцией крепежными деталями, используя гаечные ключи, входящие в комплект поставки (рис. 5), и затяните до упора. Переверните диваны и расположите их в виде буквы “L”, установите каркас угловой вставки в специальные крепежные скобы (рис. 6).
- Page 26 Avvitare le viti di centraggio composte da nr 2 viti autofilettanti in dotazione ed utilizzare un cacciavite punta croce (fig. 7). Montare l’elemento ad angolo e fissarlo con le apposite viti utilizzando le chiavi in dotazione (fig. 8). Al termine serrare a fondo tutte le viti che fissano le parti imbotte. Tighten the centering screws consisting of no.
- Page 27 함께 제공된 2개의 자동 태핑 나사로 구성된 나사 스파이크를 십자 드라이버로 고정합니다. (그림 7) 코너 부품을 조립하고 함께 제공된 키로 해당 나사를 고정합니다. (그림 8) 고정 작업이 끝나면 아래 쪽 부품을 고정하는 모든 나사를 끝까지 조입니다. Затяните центрирующие винты, состоящие из 2-х саморезов, входящих в комплект поставки, используя...
- Page 28 SFODERABILITÀ DIVANO Per maggiore maneggevolezza, si consiglia di smontare la seduta dalla struttura. Sfilare il tessuto staccando il velcro posto sul fondo del divano (fig.1-2). LAVAGGIO TESSUTO Si raccomanda di attenersi scrupolosamente alle istruzioni riportate nelle ultime pagine. REMOVAL OF SOFA SLIPCOVER For greater convenience it is advisable to disassemble the seat from the structure.
- Page 29 RETIRAR O FORRO DO SOFÁ Para um manuseamento mais fácil, recomenda-se desmontar o assento da estrutura. Puxar o tecido removendo o velcro colocado na parte inferior do sofá (figs. 1 - 2). LAVAGEM DO TECIDO Recomenda-se o escrupuloso cumprimento das instruções fornecidas nas últimas páginas ソファのカバーの外し方...
- Page 30 LARGO HOUNDSTOOTH FABRICS LARGO GUBBIO FABRICS LARGO NILO FABRICS LARGO SANDERSON - CHELSEA FABRIC 40° LARGO SANDERSON - PEONY FABRIC LARGO SANDERSON - KEW FABRIC LARGO RETE FABRIC 30°...
- Page 32 Via delle Industrie, 1 • 20082 Noviglio MI • t. +39 02 90012 1 • f. +39 02 9009 1212 kartell@kartell.it • www.kartell.com...
Need help?
Do you have a question about the Largo Piero Lissoni and is the answer not in the manual?
Questions and answers