
Related Manuals for Skope PEGASUS PG100HC-2


Summary of Contents for Skope PEGASUS PG100HC-2
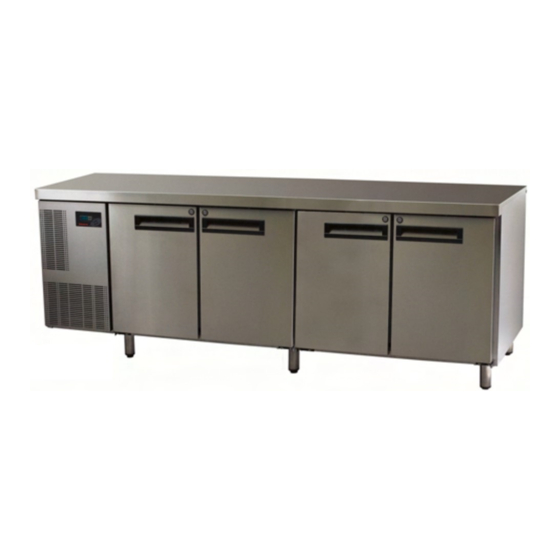
- Page 1 SKOPE PEGASUS PG100/250/400/550HC-2 Horizontal Chiller PG100HC-2 PG250HC-2 PG400HC-2 PG550HC-2...
- Page 2 SKOPE Industries Limited. TRADE MARK INFRINGEMENT The SKOPE trade mark on this product is infringed if the owner, for the time being, does any of the following: • Applies the trade mark to the product after their state, condition, get-up or packaging has been altered in any manner •...
-
Page 3: Table Of Contents
Refrigeration Unit Wiring Diagram ......38 SKOPE Pegasus Horizontal Chiller TABLE OF CONTENTS... - Page 4 Cleaning ..........64 SKOPE Contact Addresses ........65 Warranty.
-
Page 5: Specifications
3 x 15 Watt Door/s Self-closing, hinged, solid foam filled stainless steel door/s, with individual key lock Shelves Two levels of non-tip, adjustable tray slides and/or shelves per door Table 1: Specifications SKOPE Pegasus Horizontal Chiller SPECIFICATIONS - Cabinet and Refrigeration Unit... -
Page 6: Installation
For your own safety, and that of others, ensure this is done. • If the supply cord becomes damaged, it must be replaced by a SKOPE authorised service agent, or similarly qualified person, in order to avoid a hazard. -
Page 7: Fitting The Legs Or Castors
To adjust the height of each leg, turn the black plastic foot at the bottom of the leg counter-clockwise to raise the height or clockwise to lower (see Figure 2 below). Figure 2: Adjustable Leg Figure 1: Castor Mounting Plate SKOPE Pegasus Horizontal Chiller INSTALLATION - Fitting the Legs or Castors... - Page 8 (see Figure 1 on page 7). Castor Lock Nut Castor Mounting Plate Figure 3: Figure 4: Lockable Castor (front) Non-Locking Castor (rear) SKOPE Pegasus Horizontal Chiller INSTALLATION - Fitting the Legs or Castors...
-
Page 9: Positioning The Cabinet
Always ensure that the top of the cabinet is shielded from impact and moisture, with either a SKOPE provided bench top or with a custom or existing bench top. Ventilation For efficient operation of the chiller, it is essential that adequate ventilation be provided around the front of the refrigeration unit. - Page 10 Do NOT overload the power supply. See the rating label inside the cabinet for power supply and current draw. Cabinet Isolating Switch Power Cord Storage Cabinet Rear Compartment Power Cord Unit Supply Isolation Flex Figure 5: Power Cord Figure 6: Isolating Switch SKOPE Pegasus Horizontal Chiller INSTALLATION - Positioning the Cabinet...
-
Page 11: Shelving
3. Fit the shelf support brackets into the corresponding slots in both the front and back support rails. Each shelf requires two support brackets. 4. Slide each shelf into the support brackets. SKOPE Pegasus Horizontal Chiller INSTALLATION - Shelving... - Page 12 Leave an airspace of at least 75mm above product loaded on the top shelf. • Do not exceed a maximum loading of 20kg per shelf. • Remove some product if the shelves are flexing or bending. SKOPE Pegasus Horizontal Chiller INSTALLATION - Shelving...
-
Page 13: Cabinet Operation
62. HACCP If Hazard Analysis Critical Control (HACCP) functions are required, to monitor food storage temperature, please contact SKOPE to arrange for an authorised SKOPE service technician to setup the electronic controller (see pages 24-25). SKOPE Pegasus Horizontal Chiller... -
Page 14: Electronic Controller
CLOCK: n.a. LIGHT: n.a. SERVICE: Flashes in the event of malfunctions. HACCP: On if HACCP function is enabled. Flashes if HACCP alarm has occurred. CONTINUOUS CYCLE: n.a. Table 2: Controller Functions SKOPE Pegasus Horizontal Chiller ELECTRONIC CONTROLLER - Controller Display... -
Page 15: Controller Overview
The chiller temperature setpoint is factory set at 2.0°C. If necessary the standard setting can be adjusted between 1.5°C and 3.5°C. SKOPE do not recommend that the setpoint be changed unless it is absolutely necessary, and then only by small increments at a time. -
Page 16: Controller Reset
Controller Reset To delete programme modifications and reset the controller to SKOPE default programme, a ‘Controller Reset’ must be performed. The electronic controller must never be left in programme mode ‘bn0’, as failure will occur. Warning: The electronic controller must never be left in programme mode ‘bn0’,... -
Page 17: Default Programme Configuration
Default Programme Configuration Factory Default Configuration of the controller is set by SKOPE to a specific SKOPE Product. The factory default cannot be altered in the field. A label on the controller box indicates the default programme configuration number (see page 29). - Page 18 7. Increase or decrease the value using keys respectively. 8. Press the key to temporarily save the new value and return to the display of the parameter code. Table 6: Modifying ‘Type C’ Parameters SKOPE Pegasus Horizontal Chiller ELECTRONIC CONTROLLER - Default Programme Configuration...
- Page 19 16. Press the key for more than five seconds to store the new values of the modified parameters. Table 6: Modifying ‘Type C’ Parameters - continued SKOPE Pegasus Horizontal Chiller ELECTRONIC CONTROLLER - Default Programme Configuration...
-
Page 20: Controller Parameters
Controller Parameters Programme P-470 bn1 Horizontal and Vertical Chiller - Integral and Remote Skope Industries Limited - Electronic Controller Parameter Sheet PRN Number Program Mode No PRN Issued Standard Mode Date Created Date Latest Revision Carel Custom Controller - ELZ3333 Program No. - Page 21 Notes SKOPE Pegasus Horizontal Chiller ELECTRONIC CONTROLLER - Controller Parameters...
-
Page 22: Controller Alarms
Defrost over-time limit Flashing Real-time clock fault Flashing Controller E prom error Flashing Controller E prom error None Start defrost request None End defrost request Flashing Door open alarm Table 8: Controller Alarms SKOPE Pegasus Horizontal Chiller ELECTRONIC CONTROLLER - Controller Alarms... - Page 23 4. If immediate alarm recovery is required - unplug the cabinet from the power supply for 1 minute, then reconnect to power supply. If alarm persists, contact SKOPE. NOTE: The ‘HI’ and ‘LO’ alarms deactivate the cabinet lighting and trim heaters.
-
Page 24: Haccp
HACCP standards on correct food storage. This is a non-standard option and must be set up and supported by a SKOPE authorised Service Agent. The electronic controller is HACCP compliant, due to its ability to record alarm situations when the maximum temperature thresholds for significant periods has been exceeded. - Page 25 To Reset the HACCP Alarm: After viewing the HACCP details (as above): 1. Press and hold both the keys simultaneously for 5 seconds. 2. ‘rES’ will be displayed, indicating that the HACCP alarm has been reset. SKOPE Pegasus Horizontal Chiller ELECTRONIC CONTROLLER - HACCP...
-
Page 26: Hardware Setup
RS485 and programming ‘Cold Key’. Programming ‘Cold Key’ A controller may be field programmed via a Carel ‘Cold Key’. The SKOPE Factory pre-programmed Cold Key has the capability of instantly changing programme configurations. A Cold Key may also be used to introduce a customised program to meet a specific customer requirement. -
Page 27: Diagnostics
Diagnostics If the SKOPE electronic controller has a suspected fault, care must be taken to ensure accurate diagnosis. The controller has various programmable parameters that effect operation such as time delay and defrost modes. Any suspected failure must be double checked. Confirm all wiring and terminations are correct. Check that the probe resistance is correct and replace any faulty components. - Page 28 • Parameter ‘Ac’ (SKOPE default) = 66 (Shutdown = 66°C) • Parameter ‘AE’ (SKOPE default) = 11 (Warning Initiation = Ac minus AE/2 = 60.5°C. Warning Reset = Ac minus AE = 55°C). Note: In low ambient conditions the alarm may not activate due to a blocked condenser.
-
Page 29: Replacing The Controller
1. The electronic controller can NOT be interchanged with a standard Carel ir33 controller. 2. The electronic controller is universal and suitable for all SKOPE applications. Each controller is programmed for a specific product group making it non- interchangeable between product groups. The Carel ir33 controller is being gradually phased in to replace a variety of controllers including obsolete Dixell controllers. -
Page 30: Refrigeration Unit
During Day Mode the evaporator fan will run continuously when the evaporator coil temperature is below 20°C. Condenser Fan Control The condenser fan operates with the compressor. Refer to the condenser over- temperature two stage alarm information. SKOPE Pegasus Horizontal Chiller REFRIGERATION UNIT - Operation... -
Page 31: Servicing And Diagnosis
Perform Frost Test OK with high Perform Frost OK with high n.a. load Test load Extremely Compressor OK with high n.a. n.a. fault? load ventilation Table 14: Quick Touch Guide SKOPE Pegasus Horizontal Chiller REFRIGERATION UNIT - Servicing and Diagnosis... - Page 32 100mm in length. Line tap valves must be removed. Short of Refrigerant SKOPE recommend leak detection using high pressure Dry Nitrogen with utilization of Pressure Testing and Soap bubbles. Ensure all refrigerant is reclaimed from the system prior to the introduction of Nitrogen.
- Page 33 During a refrigerant service always replace filter / dryer. For a refrigerant leak fit a solid core filter / dryer. • Never leave the system open to atmosphere. If extended service time is required then isolate and braze closed pipes to compressor. SKOPE Pegasus Horizontal Chiller REFRIGERATION UNIT - Servicing and Diagnosis...
-
Page 34: Wiring
Single Door Roof Mount Light Assembly (Item 25) 1-Door Portion A Included 2-Door Portions A & D Excluded 3-Door Portions A, B & D Excluded 4-Door Portions A, B, C & D Excluded Figure 8: Cabinet Wiring Diagram SKOPE Pegasus Horizontal Chiller WIRING - Cabinet Wiring Diagram... - Page 35 Wire Colour Key Black Brown Orange For item key see page 36 Green Blue Grey White GNYE Green-Yellow Based upon IEC 757 Standard Figure 8: Cabinet Wiring Diagram - continued SKOPE Pegasus Horizontal Chiller WIRING - Cabinet Wiring Diagram...
- Page 36 * For refrigeration unit wiring details, refer to ‘Refrigeration Wiring Diagram’ on the following pages. ** On remote models the Mains Isolation Box Assembly is part of the refrigeration unit assembly. Table 16: Cabinet Wiring Component Key SKOPE Pegasus Horizontal Chiller WIRING - Cabinet Wiring Diagram...
- Page 37 Notes SKOPE Pegasus Horizontal Chiller WIRING - Cabinet Wiring Diagram...
-
Page 38: Refrigeration Unit Wiring Diagram
Refrigeration Unit Wiring Diagram Models: UE50ACD and UE60ACD Wire Colour Key Black Brown Orange Green Blue Grey White GNYE Green-Yellow Based upon IEC 757 Standard Figure 9: Refrigeration Unit Wiring Diagram SKOPE Pegasus Horizontal Chiller WIRING - Refrigeration Unit Wiring Diagram... - Page 39 * LE denotes the motor rotation direction as viewed from the lead end. ** For refrigeration cabinet wiring details, refer to ‘Cabinet Wiring Diagram’ on the previous pages. Table 17: Refrigeration Unit Wiring Component Key SKOPE Pegasus Horizontal Chiller WIRING - Refrigeration Unit Wiring Diagram...
-
Page 40: Spare Parts
SPARE PARTS Cabinet Assembly All models Figure 10: Cabinet Assembly SKOPE Pegasus Horizontal Chiller SPARE PARTS - Cabinet Assembly... - Page 41 Tray Slides H5100/154-S2 Shelf Support Strip JH2301/150-SS3 Swivel Castor - Rear SXX6181 Swivel Castor - Front (lockable) SXX6182 Castor Mounting Plate SXX6180 Adjustable Leg (6”) SXX5893 Table 18: Cabinet Assembly Item List SKOPE Pegasus Horizontal Chiller SPARE PARTS - Cabinet Assembly...
-
Page 42: Refrigeration Unit Assembly
Refrigeration Unit Refrigeration Unit Assembly Figure 11: Refrigeration Unit Assembly SKOPE Pegasus Horizontal Chiller SPARE PARTS - Refrigeration Unit... - Page 43 V9022/250 Evaporator Box Locating Rail UE50AA/990 UE50AA/990 Evaporator Box Locating Bracket UE50AA/989 UE50AA/989 Unit Clamp Swing Link JH2301/329 JH2301/329 Condensing Unit Assembly UE50AA/R38 UE60AA/R38 Table 19: Refrigeration Unit Assembly Item List SKOPE Pegasus Horizontal Chiller SPARE PARTS - Refrigeration Unit...
- Page 44 Refrigeration Unit Evaporator Unit Assembly Figure 12: Evaporator Unit Assembly SKOPE Pegasus Horizontal Chiller SPARE PARTS - Refrigeration Unit...
- Page 45 Evaporator Fan Blade FAN5043 FAN5043 Evaporator Fan Shroud UE50AA/231 UE50AA/231 Terminal Box Base ELZ0664 ELZ0664 Terminal Box Cover PLM0663 PLM0663 Evaporator Retaining Bracket UE50AA/G27 UE60AA/G27 Table 20: Evaporator Unit Assembly Item List SKOPE Pegasus Horizontal Chiller SPARE PARTS - Refrigeration Unit...
- Page 46 Refrigeration Unit Condensing Unit Assembly Figure 13: Condensing Unit Assembly SKOPE Pegasus Horizontal Chiller SPARE PARTS - Refrigeration Unit...
- Page 47 Condenser Fan Motor UB90AA/404 ELM9917 Condenser Fan Motor Bracket UE50MA/235 UE50MA/235 Condenser Fan Blade (RH - CW) FAN4100 FAN4100 Condenser Fan Shroud UE50AA/232 UE50AA/232 Table 21: Condensing Unit Assembly Item List SKOPE Pegasus Horizontal Chiller SPARE PARTS - Refrigeration Unit...
-
Page 48: Wiring Junction Box Assembly
Wiring Junction Box Assembly All models Figure 14: Wiring Junction Box Assembly SKOPE Pegasus Horizontal Chiller SPARE PARTS - Wiring Junction Box Assembly... - Page 49 ENSTO 4-Pole Socket ELZ0499-4 ENSTO 4-Pole Panel Adaptor PLM0497-4 3A Ceramic Fuse (20mm x 5mm) ELZ9654 Fused Terminal Block ELZ9655 Cord Clamp PLM6526 Table 22: Wiring Junction Box Assembly Item List SKOPE Pegasus Horizontal Chiller SPARE PARTS - Wiring Junction Box Assembly...
-
Page 50: Replacement Procedures
REPLACEMENT PROCEDURES Refrigeration Unit The SKOPE Cyclone ® refrigeration unit is a removable, self-contained refrigeration module which aligns with a port hole in the side of the refrigerator cabinet. For ease of servicing, the refrigeration unit assembly can be removed from the cabinet (see pages 52-54 for instructions on removing the unit). - Page 51 Wiring Junction Box Evaporator Fan Compressor Condenser Fan Condenser Coil Condensate Tray Condensing Unit Assembly Figure 16: Figure 17: Refrigeration Unit - LH Side Refrigeration Unit - RH Side (UE60ACD shown) (UE60ACD shown) SKOPE Pegasus Horizontal Chiller REPLACEMENT PROCEDURES - Refrigeration Unit...
- Page 52 3. Disconnect the cabinet supply plug from underneath the wiring junction box on the front of the refrigeration unit. SKOPE Pegasus Horizontal Chiller REPLACEMENT PROCEDURES - Refrigeration Unit...
- Page 53 (this keeps the mechanism up out of the way). 6. Remove the bottom clamp screw from the front of the refrigeration unit. SKOPE Pegasus Horizontal Chiller REPLACEMENT PROCEDURES - Refrigeration Unit...
- Page 54 IMPORTANT: When refitting the refrigeration unit, refit the bottom clamp screw first before fitting the top clamp screw, and prior to refitting ensure that all seals are in good condition. SKOPE Pegasus Horizontal Chiller REPLACEMENT PROCEDURES - Refrigeration Unit...
- Page 55 4. Undo the two screws from the evaporator fan mounting bracket. 5. Lift the evaporator fan assembly out from the unit and pull the motor flex out from the evaporator box. SKOPE Pegasus Horizontal Chiller REPLACEMENT PROCEDURES - Refrigeration Unit...
- Page 56 4. Undo the two screws from the condenser fan mounting bracket. 5. Lift the condenser fan assembly out from the unit. SKOPE Pegasus Horizontal Chiller REPLACEMENT PROCEDURES - Refrigeration Unit...
- Page 57 Cabinet Ambient Probe: The cabinet ambient temperature probe is attached to a bracket beside the accumulator, inside the evaporator box. SKOPE Pegasus Horizontal Chiller REPLACEMENT PROCEDURES - Refrigeration Unit...
-
Page 58: Wiring Junction Box
2. Undo the three front fixing screws (two at the top and one at the bottom) and remove the junction box cover. Leave the Earth wire attached. See pages 48-49 for spare parts. SKOPE Pegasus Horizontal Chiller REPLACEMENT PROCEDURES - Wiring Junction Box... - Page 59 Electronic Controller Controller Housing Junction Box Base Probes Fan Motor Capacitors Door Feedback Relay Fused Terminal Block Junction Box Cover Earth Wire ENSTO 4-Pole Socket Figure 18: Wiring Junction Box (with cover removed) SKOPE Pegasus Horizontal Chiller REPLACEMENT PROCEDURES -...
-
Page 60: Electronic Controller
Electronic Controller Replacing the Controller The electronic controller must only be replaced with the correct SKOPE pre- programmed replacement controller (see page 29 for important notes on the interchangability of the controller). The controller is located directly behind the unit cover, mounted inside the wiring junction box. - Page 61 When replacing the controller, ensure the wires are connected as per the diagram below. For the full refrigeration unit wiring diagram see page 38. Figure 19: Electronic Controller Termination SKOPE Pegasus Horizontal Chiller REPLACEMENT PROCEDURES - Electronic Controller...
-
Page 62: Lighting
3. Remove the light cover by lifting it out and pulling down until it disengages from the top screw. 4. Unscrew the light bulb and replace with SKOPE part no. ELL2478. SKOPE Pegasus Horizontal Chiller REPLACEMENT PROCEDURES - Lighting... -
Page 63: Troubleshooting
• Poor refrigeration unit ventilation. • Ensure the cabinet is installed with or compressor good ventilation around the operating for long refrigeration unit (see page 9). periods (more than 1 hour): Table 24: Troubleshooting SKOPE Pegasus Horizontal Chiller TROUBLESHOOTING - Cabinet and Refrigeration Unit... -
Page 64: Maintenance
Over time, dust may accumulate within the condenser that cannot be removed with a brush. if this occurs, contact SKOPE to arrange for a SKOPE authorised service agent to clean the condenser with compressed air. The condenser coil is located inside the refrigeration unit compartment and is accessed by opening the unit front cover. -
Page 65: Skope Contact Addresses
To receive a warranty for your purchased cabinet, you MUST register your cabinet within four weeks from the date of invoice either by: • filling out the in-cabinet warranty form and posting or faxing it back to SKOPE • or filling out the online warranty form.
Need help?
Do you have a question about the PEGASUS PG100HC-2 and is the answer not in the manual?
Questions and answers