
Related Manuals for TECO-Westinghouse FLUXMASTER 100 Series


Summary of Contents for TECO-Westinghouse FLUXMASTER 100 Series
- Page 1 FM100 Adjustable Speed Drive Maintenance and Operations Manual FLUXMASTER 100 AC Inverter 230 and 460 Volt .50 - 30 HP 3 Phase...
- Page 2 Maintenance and Operations Manual Table of Contents Foreword......................1 Precautions for Operation ................3 Environmental Precautions ................5 General Information ..................7 Specifications....................9 Wiring......................11 Keypad Operation ..................14 Parameter List....................15 Function Description ..................23 Fault Codes....................53 Maintenance Section…………………………………………………………….. 58 Dimensions…………………………………………………………………………63 Braking Resistors…………….……………………………………………………64...
- Page 3 To fully employ all the functions of this Inverter, and to ensure the safety for its users, please read through this operations manual in detail. Should you have any further questions, please contact your local TECO-Westinghouse distributor or regional sales representative. Please use Precaution with this Product The Inverter is a power electronic device.
- Page 4 Check to see whether any damage occurred to the Inverter during shipment. Do not connect the Inverter to the power supply if there is any sign of damage. Report any damage that may have occurred to the Inverter during shipment to the freight carrier and your local TECO-Westinghouse distributor or regional sales representative.
- Page 5 Precautions for Operation Before Turning ON Power CAUTION Choose the appropriate power source with correct voltage settings for the input voltage specification of the Inverter. WARNING Special care must be taken while wiring the primary circuitry panel. The L1, L2 and L3 terminals must be connected to the input power source and must not be mistakenly connected to T1, T2 or T3 output terminals.
- Page 6 Under Operation WARNING Do not use a separate device to switch the motor ON or OFF during operation. The Inverter may experience an overcurrent failure. WARNING To avoid personal injury caused by electrical shock, do not remove the front cover of the Inverter while the power is ON. When the automatic restart function is enabled, the motor and machinery will restart automatically.
- Page 7 Environmental Precautions Keep away from oil, Keep away from corrosive Avoid direct sunlight grease and gas gases and liquids Keep away from rain Keep away from salty Avoid dusty environments and dripping water environments Avoid high temperature Avoid excessive vibration Avoid excessive direct heat environments Keep away from high...
- Page 8 Hardware Instructions and Installation Operating Conditions The installation site of the Inverter is important. It has a direct relationship on the functionality and life span of your Inverter. Please carefully consider the following requirements when choosing an installation site: Mount the unit vertically. Inverter ambient temperature should be within Environment ambient temperature should be within 14 F ~ 104...
- Page 9 General Information: General The FM100 series is a General Purpose Inverter that incorporates a high efficiency Pulse Width Modulated (PWM) design and advanced IGBT technology. The output closely approximates a sinusoidal current waveform to allow variable speed control for any conventional squirrel cage induction motor.
- Page 10 Installation: Location Choosing the proper installation location for the Inverter is imperative in order to achieve the maximum specified performance and operation from the FM100. The Inverter should always be installed in areas where the following conditions exist: • Good ambient operating temperature: F to 104 F (-10 C to 40...
- Page 11 Basic Specification: 1 / 3 Phase 200 ~ 240 Volts 230 Volts FM100-xxx-N1 Horsepower HP Rated Current A 10.5 17.5 Output KVA 13.3 18.7 24.4 33.2 Input Voltage 1 / 3 Phase* 200 ~ 240 Volts, + / -10% 50 / 60Hz, + / -5% Output Voltage 3 Phase 200 ~ 240 (Proportional to Input Voltage) Weight (lbs.)
- Page 12 Functional Specification: Carrier Frequency 1 - 12KHz Frequency Control Range 0.1 - 400Hz Frequency Accuracy Digital: 0.01%; Analog: 0.4% Control Frequency Resolution Digital Keypad Reference: 0.01Hz (0 - 99.9Hz); 0.1Hz (100 - 400Hz) Character- istics Frequency Setting Signal 0 - 5VDC, 0 - 10VDC, 0 - 20mA, 4 - 20mA Accel / Decel Time 0.1 - 3600 Seconds (Two Independent Accel / Decel or S-Curve Settings) Braking Torque...
- Page 13 Wiring & Remote Operating Functions: External Connections Braking Resistor Inverter Thermal Overload Relay Ο Ο T1 (U) L1 (R) Ο Ο T2 (V) L2 (S) Ο Ο T3 (W) L3 (T) Thermal Relay On Off RS232 / 485 Surge Arrestor CON12 CONNECTOR *1 Ο...
- Page 14 General Wiring Instructions: Note: The FM100 can be completely controlled by the Digital Keypad. If you chose to use the TM2 control terminal strip, please see the following instructions. Common Frequency Meter Reset Fault Speed Pot Multi-Function Input Terminals Forward / Reverse Input Power (T1) (T2) (T3) (L1) (L2) (L3)
- Page 15 Function Description for the Main Circuit Power Terminals (TM1) SYMBOL FUNCTION DESCRIPTION L1 (R) Input Terminals of AC Line Power: 230 or 460 Volt L2 (S) Single Phase: L1 / L2 L3 (T) Three Phases: L1 / L2 / L3 External Braking Resistor Terminals T1 (U) Output Terminals to Motor...
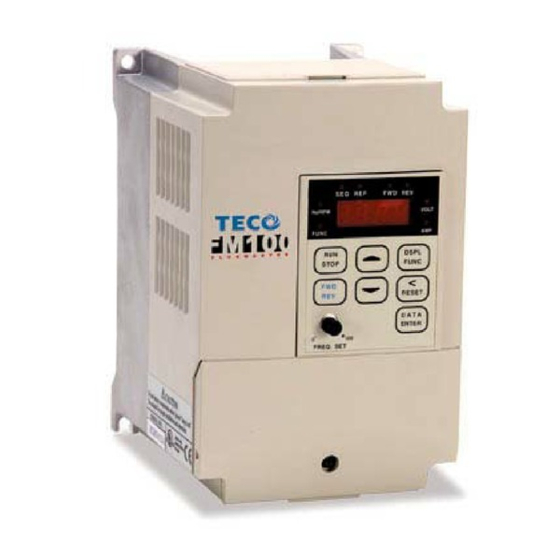
- Page 16 Keypad Operations: Keypad Illustration Freq. Ref. Controlled by TM2 or VR Forward Run (Fn_11 = 1 / 2 / 3) Ο Ο Ο Ο RUN/STOP Signal is on Reverse Run (Fn_10 =1) SEQ FRQ FWD REV Ο Ο DISPLAY Hz or Display Voltage Value Hz/RPM VOLT...
- Page 17 Parameter List Function Description Engineering Range Factory Page Units Setting Drive Capacity Drive Capacity Selection 1 - 18 Accel Time Accel Time 1 0.1 sec 0.1 - 3600 10 sec Decel Time Decel Time 1 0.1 sec 0.1 - 3600 10 sec Stop / Start xx00 : FWD / STOP, REV / STOP...
- Page 18 Function Description Engineering Range Factory Page Units Setting Stall xxx0 : Stall Prevention during Accel enable 0000 Prevention xxx1 : Stall Prevention during Accel disable xx0x : Stall Prevention during Decel enable xx1x : Stall Prevention during Decel disable x0xx : Stall Prevention during Run enable x1xx : Stall Prevention during Run disable 0xxx : Stall Prevention Decel TIme set by Fn_02 1xxx : Stall Prevention Decel Time set by Fn_15...
- Page 19 Function Description Engineering Range Factory Page Units Setting Direction + / - Positive / Negative Direction 0 : Positive 1 : Negative Power Voltage Input Voltage of Power Supply 0.1V 200 - 480V Momentary Momentary Power Loss Ride 0.1 sec .7 - 2 sec 0.5 sec Power Loss...
- Page 20 Function Description Engineering Range Factory Page Units Setting Dynamic xxx0 : Enhanced Braking Capacity 0000 Braking and xxx1 : Standard Braking Capacity Priority of xx0x : STOP Key effective in Remote Control Mode Stopping and xx1x : STOP Key ineffective in Remote Control Mode Speed Search x0xx : Speed Search controlled by Terminals on TM2 &...
- Page 21 Function Description Engineering Range Factory Page Units Setting Skip Setting Prohibited Freq. 1 0.01Hz 0 - 400Hz Frequency Control Setting Prohibited Freq. 2 0.01Hz 0 - 400Hz Setting Prohibited Freq. 3 0.01Hz 0 - 400Hz Bandwidth Setting Prohibited Freq. Range 0.01Hz 0 - 10Hz Electronic xxx0 : Electronic Thermal Motor Protection enable...
- Page 22 Function Description Engineering Range Factory Page Units Setting S-Curve S-Curve Time 1 in the period of 0.1 sec 0 - 4 sec 0.2 sec Accel / Decel Time 1 S-Curve Time 2 in the period of 0.1 sec 0 - 4 sec 0.6 sec Accel / Decel Time 2 Energy...
- Page 23 Function Description Engineering Range Factory Page Units Setting Fault Contact x0xx : Fault Contact is Not energized during 0000 Control External Emergency Stop (Continued) x1xx : Fault Contact is energized during External Emergency Stop 0xxx : Fault Contact is Not energized during External Base Block 1xxx : Fault Contact is energized during External Base Block Fault Contact...
- Page 24 Function Description Engineering Range Factory Page Units Setting 103 For Factory Setting Only 106 Reserved for Future Use 107 Reserved for Future Use 108 Reserved for Future Use 109 Reserved for Future Use 110 Reserved for Future Use 111 Reserved for Future Use 112 Reserved for Future Use 113 Reserved for Future Use 114 Reserved for Future Use...
- Page 25 Function Description Fn_00: Drive Capacity Selection = 1 - 18 FN_00 MODEL NUMBER FN_00 MODEL NUMBER 230 Volt .50HP 460 Volt 1HP 230 Volt 1HP 460 Volt 2HP 230 Volt 2HP 460 Volt 3HP 230 Volt 3HP 460 Volt 5HP 230 Volt 5HP 460 Volt 7.5HP 230 Volt 7.5HP...
- Page 26 Fn_03: START / STOP Control From TM2 Fn-03: START / STOP Control for Remote Operation xxx0: FWD / STOP, REV / STOP xx01: FWD / REV, RUN / STOP xx10: 3-Wire Control x0xx: REV Command enable x1xx: REV Command disable 0xxx: During Fn_11 = 3 (TM2 up / down control).
- Page 27 Fn_04: Parameter Lockout Parameter Lock Select xxx0 Disable (Fn_17-25) xx01: Enable (Fn_17-25) xx0x: Disable (Functions except Fn_17-25) xx1x: Enable (Functions except Fn_17-25) Fn_05: V/Hz Pattern Setting / Custom or Preprogrammed V/F Pattern Selection = 0 - 18 (See Page 24) Fn_30: Voltage of Input Power Supply = 200 - 480 Volts Fn_37: Maximum Frequency = 50 - 400Hz...
- Page 28 Fn_05: = 0 - 17 V/Hz Curves Fn_05 50Hz Fn_05 60Hz 100% 100% General Purpose Hz 0.1 25 50 400 60 400 100% 100% High Starting Torque Hz 0.1 50 400 60 400 100% 100% Variable Torque Operation Hz 0.1 25 50 Hz 0.1 60 400...
- Page 29 Fn_06: Frequency Upper Limit The maximum speed of the motor is adjusted by raising the Frequency Upper Limit at (Fn_06). Fn_07: Frequency Lower Limit The minimum speed for the motor is adjusted by the Frequency Lower Limit at (Fn_07). 100% Internal Fn_06 (Frequency Upper Limit) Frequency...
- Page 30 Fn_10: START / STOP Control This parameter is used to decide if the Start and Stop function will be controlled by the Keypad or by Remote Operation (TM2). 0: Keypad Control 1: Remote Operation (TM2) Note: The STOP Key on the Keypad can still be used for Emergency Stopping even if the START / STOP Control is from TM2 (Fn_10 = 1).
- Page 31 Fn_12: Stall Prevention xxx0: Stall Prevention during Acceleration enable xxx1: Stall Prevention during Acceleration disable xx0x: Stall Prevention during Deceleration enable xx1x: Stall Prevention during Deceleration disable x0xx: Stall Prevention during Running enable x1xx: Stall Prevention during Running disable 0xxx: Stall Prevention Decel Time set in (Fn_02) 1xxx: Stall Prevention Decel Time set in (Fn_15)
- Page 32 Fn_16: Direct Start / Scanning / Reset Options xxx0: Direct Start enable when Remote RUN Command is ON xxx1: Direct Start disable when Remote RUN Command is ON xx0x: Reset effective only if Remote RUN Command is OFF xx1x: Reset effective regardless of the Remote RUN Command condition 00xx: TM2 Terminal will scan 10 times 01xx: TM2 Terminal will scan 5 times 10xx: TM2 Terminal will scan 3 times...
- Page 33 Fn_24: Jog Speed Reference = 0 - 400Hz Fn_25: Master Speed Reference from Keypad = 0 - 400Hz Note: 1. The Inverter will operate under the Jog Speed function at (Fn_24). You can assign either (Fn_56) (Fn_57) or (Fn_58) to handle the Jog function. 2.
- Page 34 Fn_26: Frequency Reference: 0.0 - 400Hz Fn_27: Voltage Reference Offset 0.0 - 100% Fn_28: Voltage Reference Gain 0.0 - 999.9% Fn_29: Positive or Negative Direction 0: Proportional 1: Inverse Percentage Frequency Setting Signal Fn_06 Frequency Upper Limit Fn_06 Frequency Upper Limit Internal Internal Signal...
- Page 35 Fn_30: Input Voltage of Power Supply Selection 200 - 480 Volts Fn_31: Momentary Power Loss Ride Through Time: .7 - 2 sec Fn_32: Power Loss Ride Through xxx0: Disable xxx1: Enable Inverter will stop when the voltage is lower than the low voltage protection level. The Inverter can restart automatically by using the speed search function.
- Page 36 Fn_47 = Meter Display Mode xxx0: Output Voltage Display disable xxx1: Output Voltage Display enable xx0x: Bus Voltage Display disable xx1x: Bus Voltage Display enable x0xx: Output Current disable x1xx: Output Current enable (Meters) Fn_51: Displays Frequency in (Hz); (Preset Frequency) (Operation Frequency) Displays Frequency in (Hz) Displays RPM of Motor;...
- Page 37 Fn_42: Starting Frequency = 0.1 - 10Hz The Inverter can start at 5Hz and still have an operational control range of 0.1 - 60Hz. To accomplish this, (Fn_07) will need to be set at 0Hz and (Fn_42) at 5Hz. Fn_43: Carrier Frequency = 1 - 12KHz Fn_43 Carrier Freq.
- Page 38 Fn_45: Multi-Function Adjustment for Analog Output 0 - 200% (Meters) Fn_46: Multi-Function Analog Output Meter Selection 0 - 3 Meter Scale Factor 0: Output Frequency (Fn_06 Max.) 10VDC / (Fn_06) 1: Set Frequency (Fn_06 Max.) 10VDC / (Fn_06) 2: Output Voltage (VAC) 10VDC / (Fn_30) 3: Bus Voltage...
- Page 39 Fn_48: Dynamic Braking, Priority Stopping, Speed Search and AVR Control xxx0: Enhanced Braking Capacity xxx1: Standard Braking Capacity xx0x: Stop Key effective in Remote Operation Mode xx1x: Stop Key ineffective in Remote Operation Mode x0xx: Speed Search controlled by Terminals on TM2 x1xx: Speed Search effective when Inverter Start 0xxx:...
- Page 40 Fn_53: DC Braking Time 0.1 ~ 0 - 25.5 sec Fn_54: DC Injection Braking Frequency 0.1 ~ 0.1 - 10Hz Fn_55: DC Braking Level 0.1% ~ 0 - 20% Fn_56 - Fn_60: DC Braking Level 0.1% ~ 0 - 20% The application parameters in the Multi-Function Input list are all assignable on TM2.
- Page 41 Note: The Inverter will stop accelerating or decelerating when Accel / Decel Prohibit Signal is activated. When the signal is removed, the Inverter continues accelerating or decelerating. Command Accel / Decel Prohibit Output Time * : When the “Run” Command is OFF, the Accel and Decel Prohibit Command is inactive. External Emergency Stop As soon as an External Emergency Stop signal is received, the Inverter will Decel to a stop.
- Page 42 UP / DOWN Command DOWN Fn_25 Output Frequency To utilize the Up and Down function, (Fn_11) must be set to terminal control. When using this function, set (Fn_03) to the (0xxx) position. The Inverter will accelerate to the Target Frequency set at (Fn_25) after the designated terminal is turned ON. The drive will remain at what ever speed it was at when the contact terminal was released.
- Page 43 Fn_65: Skip Frequency 1 0.01Hz 0 - 400Hz Fn_66: Skip Frequency 2 0.01Hz 0 - 400Hz Fn_67: Skip Frequency 3 0.01Hz 0 - 400Hz Fn_68: Frequency Band Width 0.01Hz 0 - 10Hz Example: When (Fn_65) is set at 10.0Hz, (Fn_66) is set at 20.0Hz, (Fn_67) is at 30.0Hz, (Fn_68) Skip bandwidth at 2.0Hz 10Hz ±...
- Page 44 Constant Torque Loads. When the motors output current exceeds 103% of the motors protective electronic thermal characteristics during the start operation, the Inverters protective (OL1) will allow operation of the drive for 150% of rated current for 60 seconds before shutting the Inverters output off.
- Page 45 During operational conditions where the motor must run at low speeds, it’s important to pay attention to the motors’ capacity to dissipate heat. Most motors are designed to cool themselves at 60Hz and full voltage. Proper setup of the thermal functions should be observed. The motor’s ability to cool itself is dependent of its on board fan.
- Page 46 Fn_71: Torque Boost x0xx: Torque Boost enable x1xx: Torque Boost disable 1xxx: Manual Torque Boost Fn_72: Torque Boost Gain: 0.0 to 10.0% Note: In (Fn_71), when using the setting (x1xx), both Auto and Manual Torque Boost are inactive. When using the setting (0xxx), the Inverter adjusts the Torque Boost by automatically adjusting to the Inverters output current.
- Page 47 Fn_78: Overtorque Detection Level: 30 - 200% Fn_79: Overtorque Detection Time: 0 - 25 sec 100% Torque & Horse- Current Detection Power 100% of Speed 1. An Overtorque condition exists when the output current (rated current is 100%) remains above Overtorque Detection Level (Fn_78) for a period greater than the Overtorque Detection Time (Fn_79).
- Page 48 Fn_80: S-Curve Setup: Time (1) Acceleration & Deceleration: 0 - 4 sec Fn_81: S-Curve Setup: Time (1) or (2) Acceleration & Deceleration: 0 - 4 sec Time at Speed Fn_81 Fn_82 S-Curve Ramp Profile Formula for Calculating Acceleration and Deceleration Time. Preset Frequency Accel Time = (Fn_01) or (Fn_49) X 60 Hz...
- Page 49 Fn_82: Energy Savings xx00: Energy Savings disable xx01: Energy Savings controlled by Multi-Function Input Terminals using Preset Speed functions. Fn_83: Energy Savings Gain: 0 - 100% Torque Horsepower Activation of Energy Circuit 12.5 Percent Speed 1. This function can be applied to Fans or Pumps that have loads with high starting inertias. In these types of applications, where the load is heavy during start-up but tapers off to a variable torque type load at some point in the ramp curve, using function (Fn_83) to adjust the suitable gain (voltage level) at the target speed will reduce the V/Hz ratio saving energy.
- Page 50 Fn_84: Sequence Control xxx0: Process Timer disabled xxx1: Process Timer enabled xx0x: Set Frequency Output after Process Timer ends count xx1x: Zero Speed Output after Process Timer ends count xx1x: Process Sequence Auto Repeat SP1 SP2 SP3 Frequency output OFF OFF OFF Set by external signal or Frequency Digital operator control...
- Page 51 Fn_85: Process Timer: 0.1 sec ~ 0 - 3600 sec Fn_86: Process Timer: 0.1 sec ~ 0 - 3600 sec Fn_87: Process Timer: 0.1 sec ~ 0 - 3600 sec Fn_88: Process Timer: 0.1 sec ~ 0 - 3600 sec Fn_89: Process Timer: 0.1 sec ~...
- Page 52 Fn_97: Fault Control Setup xxx0: Fault Contact is Not energized during Auto Restart Operation xxx1: Fault Contact is energized during Auto Restart Operation xx0x: Fault Contact is Not energized during Momentary Power Loss Detection xx1x: Fault Contact is energized during Momentary Power Loss Detection x0xx: Fault Contact is Not energized after External Emergency Stop signal is received x1xx:...
- Page 53 Fn_102: Communication Parameters xxx0: 1 Stop Bit xx0x: Even Parity x0xx: Without Parity 0xxx: 8 Bits Data xxx1: 2 Stop Bits xx1x: Odd Parity x1xx: With Parity 1xxx: 7 Bits Data Note: To use RS-485, the optional RS-485 Interface Card is required. For one to one control: Using a PC, PLC or some sort of control device to control one drive, set (Fn_100) to (1).
- Page 54 To use RS-232 Communications, the optional RS-232 Interface Card is required. For one to one control: Using a PC, PLC or some sort of control device to control one Inverter, set (Fn_100) to (1). An ASCII CODE is used for FM100 communication. (Fn_10) and (Fn_11) will be ineffective for Inverter operation and frequency control while in the communication mode.
- Page 55 Failure Indication: Faults which cannot be reset by Manual Operation: Fault Code Content Probable Cause Action Item CPU Software 1. Excessive electrical 1. Install RC type suppresser on all Error noise contactor / brake coils EEPROM Error 1. EEPROM is damaged 1.
- Page 56 Faults which can be Auto-Reset by Manual Operation: Fault Code Content Probable Cause Action Item OC-S Overcurrent 1. Motor is short circuited 1. Check and fix motor during Starting 2. Motor has ground fault 2. Remove the grounding point 3. Inverter transistor 3.
- Page 57 LV-C Low Voltage 1. Input voltage is too low 1. Correct input voltage or extend during Constant 2. Input voltage fluctuates Fn_31 Speed excessively 2. Extend Accel Time 3. Select an Inverter with larger HP 4. Install a reactor between power supply and Inverter OH-C Overheat during...
- Page 58 Special Condition Indication Fault Code Content Illustration STP0 Zero Speed Stop 1. Fn_11 = 0 or 3, Fn_07 < 0.1Hz, and setting freq.< 0.1Hz; Fn_11 = 1 or 23, Fn_07 < (Fn_06 / 100), and setting freq. < 0.1Hz STP1 Direct Start 1.
- Page 59 Digital Keypad Operation Failure Indication: Fault Code Content Probable Cause What to do Parameter / Freq. 1. Attempt to change parameter / 1. Set Fn_04 = xxx0 or xx0x / REV Direction freq. When Fn_04 = xxx1 or xx1x 2. Set Fn_03 = x0xx Lock 2.
- Page 60 Err7 Parameter Setting 1. Attempt to change Fn_00 or 1. Refer to 2.3 “Changing control Error Fn_96 boards” 2. The value in Fn_96 is far from the 2. Check PN voltage circuit value of detected voltage Maintenance Section: This Inverter requires few routine checks. It will function efficiently and its normal operational lifetime will be longer if it is kept clean, cool and dry.
- Page 61 NOTE!! Never perform Meg test on control circuit. The insulation resistance of DC-500V tester should be more than 5M ohm. L1 (R) T1 (U) INPUT L2 (S) INVERTER T2 (V) Motor POWER L3 (T) T3 (W) GROUNDING DC-500 V TEST METER COMPATIBILITY (EMC) Filters: All modern PWM variable speed drives use fast switching power devices to achieve high efficiency and to reduce motor noise.
- Page 62 EMI Emission EN 50081-1 1992 EN 50081-2 1993 230 Volt Class .50HP - 3HP are compliant with class B filters 460 Volt Class 1HP - 5HP are compliant with class B filters EMS Immunity and LVD Safety Compliant FILTERING SELECTION MODEL # RATING INVERTER MODEL...
- Page 63 230 / 460 Three Phase Drive Drive Earth Ground ADDITIONAL PRECAUTIONS TO LIMIT EMI AND RFI Grounding Practices For Inverters: The Inverter must be grounded to earth independently. No other equipment should share the earth connection of the Inverter (except the motor). All circuits have to be connected to external earth through copper bars.
- Page 64 For Control Circuit: If the control circuit of Inverter is linked to any control switches, relays or other similar equipment, be sure the screened control line is put to earth ground on only one end. For Shielding System: In order to have very low HF impedance, shielded cable with a metal clamp and special adapters are required.
- Page 65 Dimensions VOLT 230 Volt Series Units = Inches Horsepower Dimensions 4.22x6.38x 5.87x7.25x 7.28x8.46x 7.87x11.81x 9.84x15.75x9.45 (W) (H) (D) 5.51 6.22 6.57 7.83 Mounting Dim. 3.78x5.91 5.43x6.85 6.85x8.07 7.32x11.26 9.29x15.16 ) (H 460 Volt Series Units = Inches Horsepower Dimensions 5.87x7.25x6.22 7.28x8.46x 7.87x11.81x 9.84x15.75x9.45...
- Page 66 Braking Resistor and AC Reactors Built in Built in Braking AC REACTOR Braking MODEL Braking Braking Resistor Torque Resistor Code. No. Transistor CURRENT (A) Inductance(mH) 230 Volt Units ○ Χ FM100-2P5-N1 FM100-2BR1 ○ Χ FM100-201-N1 FM100-2BR1 ○ Χ FM100-202-N1 FN100-2BR2 10.0 ○...
Need help?
Do you have a question about the FLUXMASTER 100 Series and is the answer not in the manual?
Questions and answers