
Related Manuals for TECO-Westinghouse PA7300 Series


Summary of Contents for TECO-Westinghouse PA7300 Series
- Page 1 4H358D0250007 AC Inverter Installation and Operation Manual 230V Class 3Ø 5~125HP 460V Class 3Ø 5~500HP 600V Class 3Ø 5~100HP For Quick Start Guide “See Page iii Of This Instruction Manual”...
- Page 2 PA 7300 INSTRUCTION MANUAL BEFORE INSTALLATION & USE 1 Ensure that the nameplate data corresponds with the application requirements. 2. Ensure that the product is undamaged. WARNING The following safety precautions must be observed: 1. Electrical apparatus and incoming line supply can cause serious or fatal injury if the product is improperly installed, operated, or maintained.
- Page 3 PA 7300 INSTRUCTION MANUAL WARNING • Do not change the wiring while power is applied to the circuit. • After turning OFF the main circuit supply, do not touch circuit components until the CHARGE LED is extinguished. • Never connect power circuit outputs U (T1), V (T2), W (T3) to an AC power supply. •...
-
Page 4: Quick Start Guide
PA 7300 INSTRUCTION MANUAL ATTENTION If your PA7300 does not start properly... 1. Review this Quick Start Guide or the Instruction Manual 2. Visit our website: http://www.tecowestinghouse.com 3. Call for factory support: 1-800-451-8798 (ask for Drive technical support) Quick Start Guide This guide is to assist in installing and running the inverter to verify that the drive and motor are working properly. - Page 5 PA 7300 INSTRUCTION MANUAL Step 2 Apply Power to the Drive • Apply AC power to the Drive and observe Operator. LCD Display Line 1 should read “Freq. Cmd 0.00Hz”. Line 2 should read “TECO”. STOP Key should have RED LED lit. Drive LED and FWD LED’s will be lit. Step 3 Set Drive to Run Mode •...
-
Page 6: Table Of Contents
PA 7300 INSTRUCTION MANUAL CONTENTS PART I INSTALLATION MANUAL ________________________________________ Pages 1. GENERAL 1.1 SAFE OPERATION NOTES _______________________________________________________________________ 1-1 1.2 PRODUCT CHANGES __________________________________________________________________________ 1-1 2. RECEIVING 3. INSTALLATION __________________________________________________________________ 2-1 3.1 MOUNTING SPACE ____________________________________________________________________________ 3-1 3.2 LOCATION __________________________________________________________________________________ 3-2 4. WIRING 4.1 NOTES ON WIRING TO PERIPHERAL UNITS _________________________________________________________ 4-1 4.2 CONNECTION DIAGRAM _______________________________________________________________________ 4-2 4.3 TERMINAL FUNCTION _________________________________________________________________________ 4-3... - Page 7 PA 7300 INSTRUCTION MANUAL PART II OPERATION MANUAL __________________________________________ Pages 1. DESCRIPTION OF THE PA7300 OPERATOR DISPLAYS 1.1 Using the LCD (OR LED) digital operator ___________________________________________________________1-1 1.2 DRIVE mode and PRGM mode displayed contents ___________________________________________________1-3 1.3 Parameter description __________________________________________________________________________1-4 1.4 Example for using the LCD digital operator _____________________________________________________________1-5 2.
- Page 8 PA 7300 INSTRUCTION MANUAL LISTS OF FIGURES FIGURE NO. _________________________________________________________ Pages PART I Installation Manual Fig.1 Mounting Spaces ______________________________________________________________________ 3-1 Fig.2 Standard Connection Diagram ____________________________________________________________ 4-2 Fig.3 Grounding of Multiple PA7300 Drives ______________________________________________________ 4-9 Fig.4 Shielded Wire Termination _______________________________________________________________ 4-9 Fig.5 (a) Voltage Selection Jumper 460V ___________________________________________________________ 5-1 Fig.5 (b)
-
Page 10: Part I Installation Manual
PART I INSTALLATION MANUAL... -
Page 11: General
TECO-Westinghouse reserves the right to discontinue or make modifications to the design of its products without prior notice, and holds no obligation to make modifications to products sold previously. TECO-Westinghouse also holds no liability for losses of any kind which may result from this action. -
Page 12: Receiving
PA 7300 PART I: INSTALLATION MANUAL 2. RECEIVING CAUTION This PA7300 has been put through demanding tests at the factory before shipment. After unpacking, verify the following: • Verify that the received product and the purchase order sheet (invoice) and/or packing is a match •... -
Page 13: Installation
PA 7300 PART I: INSTALLATION MANUAL 3. INSTALLATION CAUTION • Never move, lift, or handle the PA7300 cabinet by the front cover. • Lift the cabinet from the bottom • Do not drop the AC Drive. 3.1 MOUNTING SPACE Install the PA7300 vertically and allow sufficient space for effective cooling as shown in Fig. -
Page 14: Location
PA 7300 PART I: INSTALLATION MANUAL 3.2 LOCATION Location of the equipment is important to achieve proper performance and normal operating life. The PA7300 should be installed in areas where the following conditions exist: • Protection from rain or moisture. •... -
Page 15: Wiring
PA 7300 PART I: INSTALLATION MANUAL 4. WIRING 4.1 NOTES ON WIRING TO PERIPHERAL UNITS • MCCB (molded case circuit breaker) Please refer to Table 3. for MCCB selection. Do not use a circuit breaker for start/stop operation. When a ground fault interrupter is used, select one unaffected by high frequency. -
Page 16: Connection Diagram
PA 7300 PART I: INSTALLATION MANUAL 4.2 CONNECTION DIAGRAM The following diagram shows interconnection of the main and control circuits. When using the digital operator control, the motor can be operated by wiring the main circuit only. (Terminal Symbols: indicates main circuit; indicates control circuit). -
Page 17: Terminal Function
PA 7300 PART I: INSTALLATION MANUAL 4.3 TERMINAL FUNCTION 4.3.1 MAIN CIRCUIT TERMINALS Table 1. Main Circuit Terminals TERMINALS TERMINAL FUNCTION R / L1 S / L2 Main Circuit Input Power Supply T / L3 U / T1 V / T2 AC Drive Output W / T3 B1/P... -
Page 18: Main Circuit Schematic
PA 7300 PART I: INSTALLATION MANUAL 4.3.3 MAIN CIRCUIT SCHEMATIC 1. 230V : 5HP ~ 25HP 2. 230V : 30HP 460V : 5HP ~ 30HP 460V : 40HP, 50HP, 60HP 1. 230V: 5HP~25HP 1. 230V: 5HP~25HP 2. 230V: 30HP 2. 230V: 30HP 1. -
Page 19: Wiring Parts
PA 7300 PART I: INSTALLATION MANUAL 4.4 WIRING PARTS 4.4.1 RECOMMENDED WIRING PRACTICE Be sure to connect MCCBs between the power supply and PA7300 input terminals L1 (R), L2 (S), L3 (T). Recommended MCCBs are listed in Table 3. When a ground fault interrupter is used, select one with no influence on high frequency. The current setting should be 200mA or higher and operating time at 0.1 second or higher to prevent malfunction. - Page 20 PA 7300 PART I: INSTALLATION MANUAL (b) 460V SERIES Max. Applicable Cable Size - mm2 (AWG) Moulded-Case Magnetic Motor Output Circuit Breaker Contactor Power Cable Ground Cable Control Cable HP (KW) [Note 4] [Note 4] [Note 2] E [G] [Note 3] [Note 1] TO-50EC CN-18...
- Page 21 PA 7300 PART I: INSTALLATION MANUAL (c) 600V SERIES Max. Applicable Cable Size - mm2 (AWG) Moulded-Case Magnetic Motor Output Circuit Breaker Contactor HP (KW) Power Cable Ground Cable Control Cable [Note 4] [Note 4] TO-50EC 5(3.7) 2~5.5 3.5~5.5 0.5~2 CN-18 (15A) TO-50EC...
-
Page 22: Cautions For Wiring
PA 7300 PART I: INSTALLATION MANUAL 4.4.2 CAUTIONS FOR WIRING CAUTION The external interconnection wiring must be performed with the following procedures. After completing PA7300 interconnections, be sure to check that connections are correct. Never use control circuit buzzer check. (A) MAIN CIRCUIT INPUT/OUTPUT (1) Phase rotation of input terminals L1 (R), L2 (S), L3 (T) is available in either direction. -
Page 23: Fig.4 Shielded Wire Termination
PA 7300 PART I: INSTALLATION MANUAL (B) GROUNDING (Protective Earth) Ground the PC Drive through ground terminal E (PE). (1) Ground resistance should be 100 ohms or less. (2) Never ground the AC Drive in common with welding machines, motors, other high-current electrical equipment, or a ground pole. -
Page 24: Test Operation
PA 7300 PART I: INSTALLATION MANUAL 5. TEST OPERATION To assure safety, disconnect the coupling or belt which connects the motor with the machine prior to test operation, so that motor operation is isolated. If an operation must be performed while the motor is directly connected to the machine, use great care to avoid any possible hazardous conditions. -
Page 25: Setting The Line Voltage Jumper For 600V
PA 7300 PART I: INSTALLATION MANUAL 5.3 SETTING THE LINE VOLTAGE JUMPER FOR 600V CLASS 30HP (22kW) AND ABOVE The cooling fan line voltage selecting connector shown in Fig. 6 must be set according to the type of main circuit power supply. Insert the connector at the position showing the appropriate line voltage. The unit is preset at the factory to 600V line voltage. -
Page 26: Maintenance
PA 7300 PART I: INSTALLATION MANUAL 6. MAINTENANCE 6.1 PERIODIC INSPECTION The PA7300 requires very few routine checks. It will function longer if it is kept clean, cool, and dry. Observe precautions listed in “Location”, Section 3.2. Check for tightness of electrical connections, discoloration, or other signs of overheating. -
Page 27: Spare Parts
PA 7300 PART I: INSTALLATION MANUAL 6.2 SPARE PARTS As insurance against costly downtime, it is strongly recommended that renewal parts be kept on hand in accordance with the table below. When ordering renewal parts, please specify to your local distributor or TECO representative the following information: Part Name, Part Code No., and Quantity. -
Page 28: Table 6 Spare Parts For 460V Class
PA 7300 PART I: INSTALLATION MANUAL Table 6 Spare Parts for 460V Class INVERTER DRIVE Control PC Main Circuit Main Circuit & PART NAME Power Board Cooling fan Board Transistor Diode SPEC MODEL 7MBP25RA120 7MBP25RA120 CODE 4P101C0070008 4P106C03800A1 277831716 277831716 MODEL 7MBP25RA120 6RI30G-160... -
Page 29: Table 7 Spare Parts For 600V Class
PA 7300 PART I: INSTALLATION MANUAL Table 7 Spare Parts for 600V Class INVERTER DRIVE Control PC Main Circuit Main Circuit & PART NAME Power Board Cooling fan Board Transistor Diode SPEC MODEL 7MBR15SA140 AFB0824SH CODE 3K3Z2079 3K3Z2113 3K3A2834 4H300D0200000 MODEL 7MBBR25SA140 AFB0824SH... -
Page 30: Specifications
PA 7300 PART I: INSTALLATION MANUAL 7. SPECIFICATIONS • Basic Specifications 230V CLASS AC INVERTER (HP) MAX. APPLICABLE MOTOR OUTPUT HP (KW)*1 (3.7) (7.5) (11) (15) (18.5) (22) (30) (37) (45) (55) (75) (90) AC Drive Capacity 12.4 18.6 24.8 27.4 (KVA) Rated Output... - Page 31 PA 7300 PART I: INSTALLATION MANUAL 600V CLASS AC INVERTER (HP) MAX. APPLICABLE MOTOR OUTPUT HP (KW)*1 (3.7) (7.5) (11) (15) (18.5) (22) (30) (37) (45) (55) (75) AC Drive Capacity 10.9 16.9 (KVA) Rated Output Current (A) Max. Output 3-Phase, 500/550/575/600V Frequency (Proportional to input voltage)
- Page 32 PA 7300 PART I: INSTALLATION MANUAL • CHARACTERISTICS Control Method Sine wave PWM Frequency Control Range 0.1 to 180Hz Frequency Accuracy Digital command: 0.01% -10 to 40˚C\ +14 to 104˚F Analog command: 0.1% 25 ± 10˚C\77 ± 18˚F Frequency Setting Resolution Digital operator reference: 0.01Hz, Analog reference: 0.06Hz/60Hz Output Frequency Resolution...
-
Page 33: Dimensions
PA 7300 PART I: INSTALLATION MANUAL 8. DIMENSIONS Table 8 Dimension and Weight Open Chassis Type (IP00) IN. Enclosed Type (NEMA1) IN. Inverter Voltage Weight Weight Referemce ACD/DCL Capacity W1 H1 (LB) W1 H1 (LB) Figure (HP) 8.32 11.81 8.46 7.56 11.26 M6 8.32 11.81 8.46 7.56 11.26 M6 External ACL (option) - Page 34 PA 7300 INSTRUCTION MANUAL (a) 230V : 5 - 25HP 460V : 5HP - 30HP 600V : 5HP - 30HP (b) 230V : 30HP - 125HP 460V : 40HP - 300HP 600V : 30HP - 100HP (Open Chassis Type - IP00) (Wall-mounted Type - NEMA1)
- Page 35 PA 7300 PART I: INSTALLATION MANUAL 460V : 350HP - 500HP R EMOTE D RIVE FW D R EV R EF D R IVE FW D R EV R EMOTE R EF PR GM DSPL PR G M D R IVE DSPL D R IVE D ATA...
-
Page 36: Peripherals And Options
PA 7300 PART I: INSTALLATION MANUAL 9. PERIPHERALS AND OPTIONS 9.1 AC LINE REACTOR • When power capacity is significantly large compared to the AC Drive’s capacity, or when the power factor needs to be improved, externally connect an AC line reactor. •... - Page 37 PA 7300 PART I: INSTALLATION MANUAL Table 9 AC LINE REACTOR AC Drive AC Reactor Voltage Rated current (A) Current (A) Inductance (mH) Code NO. 0.72 Consult Factory 0.72 For Part Numbers 0.61 0.44 0.41 0.31 0.19...
-
Page 38: Noise Filter
PA 7300 PART I: INSTALLATION MANUAL PART Installation Manual • • 9.2 NOISE FILTER 9.2.1 INPUT NOISE FILTER • When the input noise filter is installed as indicated, the PA7300 will comply with the EN61800-3 (2000) noise interference suppression directive. Input Noise Filter Filter MCCB... -
Page 39: Emi Suppression Zero Core
PA 7300 PART I: INSTALLATION MANUAL 9.2.2 EMI SUPPRESSION ZERO CORE • Model: JUNFOC046S - - - - - - - • Code No.: 4H000D0250001 • According to the required power rating and wire size, select the matched ferrite core to suppress the zero sequence EMI filter. -
Page 40: Braking Resistor And Braking Unit
PA 7300 PART I: INSTALLATION MANUAL 9.3 BRAKING RESISTOR AND BRAKING UNIT • The braking transistor of 230V 5~25HP and 460V 5~30HP units is built-in as standard. The braking resistor can be connected to main circuit terminals B2 and D directly. All other models without built- in braking transistors need to connect braking units with braking resistors externally. -
Page 41: Other Options
PA 7300 INSTRUCTION MANUAL 9.4 OTHER OPTIONS 9.4.1 DIGITAL OPERATOR WITH EXTENSION WIRE • Used for the operation of LCD (or LED) digital operator or monitor when removed from the front of the PA7300 unit. DRIVE FWD REV REMOTE DIGITAL OPERATOR JNEP-31 PA7300 PRGM DSPL... -
Page 42: Analog Operator
PA 7300 PART I: INSTALLATION MANUAL 9.4.2 ANALOG OPERATOR All PA7300 Drives have the LCD (or LED) digital operator. In addition, an analog operator, JNEP-17, (shown in fig. 7) is also available and can be connected and wired as a portable operator. The wiring diagram is shown below. -
Page 43: Communication Option Card
PA 7300 PART I: INSTALLATION MANUAL 9.4.5 COMMUNICATION OPTION CARD NAME CODE NO FUNCTION REFERENCE MODBUS protocol communication option card • Communication method: Asynchronous 4H358D0150002 PA-M 4P502C0050006 • Communication speed: 19.2Kbps (max.) • Interface: RS-485, RS-422 PROFIBUS protocol communication option card •... -
Page 44: Part Ii Operation Manual
PART II OPERATION MANUAL... -
Page 45: Description Of The Pa7300 Operator Displays
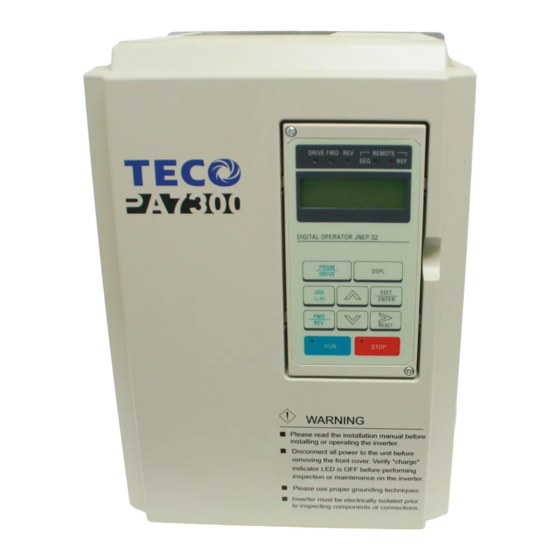
PA 7300 PART II: OPERATION MANUAL 1. DESCRIPTION OF THE PA7300 OPERATOR DISPLAYS 1.1 Using the LCD (or LED) digital operator • All PA7300’s comes standard with the LCD digital operator JNEP-32. In addition, an LED digital operator JNEP-33 is also available. These two digital operators have the same operation functions except for the LCD and 7-segment LED display difference. -
Page 46: Table 12 Keypad Functions
PA 7300 PART II: OPERATION MANUAL Table 12 Keypad Functions NAME FUNCTION PRGM PRGM/DRIVE Switches between operation (PRGM) and operation (DRIVE). DRIVE DSPL Displays operation status DSPL JOG or L/R Enable jog operation from digital operator (DRIVE). L/R (Local/Remote) key function (L/R) set by Sn-05 (See page 2-37). -
Page 47: Drive Mode And Prgm Mode Displayed Contents
PA 7300 PART II: OPERATION MANUAL 1.2 DRIVE mode and PRGM mode displayed contents Power on PRGM DRIVE mode PRGM mode DRIVE DSPL DSPL Frequency reference monito r se t When faults DSPL occurred before DSPL the power supply Output Frequency was turned off monitor set Output Current... -
Page 48: Parameter Description
PA 7300 PART II: OPERATION MANUAL 1.3 Parameter Description The PA7300 The PA7300 has 4 groups of user parameters: Parameters Description Frequency commands Parameter settings that can be changed while the PA 7300 is in RUN mode. System parameter settings (can be changed only after the PA7300 is stopped.) Control parameter settings (can be changed only after the PA7300 is stopped.) The parameter setting for Sn-03 (operation status) will determine if the setting value of the different parameter groups are allowed to be changed or only monitored, as shown below:... -
Page 49: Example For Using The Lcd Digital Operator
PA 7300 PART II: OPERATION MANUAL 1.4 Example for using the LCD digital operator Note: Before operation: Control parameter Cn-01 value must be set to the input AC voltage value. For example, Cn-01=380 if the AC input voltage is 380. This example will explain the operating of PA7300 operation according to the following time chart. - Page 50 PA 7300 PART II: OPERATION MANUAL Digital Operator Description Key Sequence Remarks Display Feq. Cmd. 00.00Hz (continued) TECO Feq. Cmd. .0 Hz • Select DRIVE mode PRGM LED DRIVE FWD JOG DRIVE TECO PRGM PRGM PRGM PRGM DRIVE DSPL DRIVE DRIVE DRIVE •...
-
Page 51: Setting User Constant
PA 7300 PART II: OPERATION MANUAL 2. SETTING USER CONSTANT 2.1 Frequency command (in Multi-speed operation) An- Under the DRIVE mode, the user can monitor the parameters and set their values. Parameter Name LCD Display (English) Setting Range Setting *(1, 2) Factory *(3) Unit... - Page 52 PA 7300 PART II: OPERATION MANUAL 2.2 Parameters That Can Be Changed during Run Bn- In the DRIVE mode, the Parameter group can be monitored and set by the users. Function Parameter Setting Factory Ref. Name LCD Display (English) Range Setting Unit Setting Page...
- Page 53 PA 7300 PART II: OPERATION MANUAL Function Parameter Setting Factory Ref. Name LCD Display (English) Range Setting Unit Setting Page Bn-21 PID Feedback Bn-21=0.000 Display Bias PID Det. DSPL Bias -9.999~+9.999 0.001 0.000 Display PID Feedback Bn-22=0.000 unit Bn-22 Display Gain PID Det.
- Page 54 PA 7300 PART II: OPERATION MANUAL (1) Acceleration Time 1 (Bn-01) • Acceleration time 1 is enabled when the accel/decel time change command of the multi-function terminal is “open”, or the accel/decel time change function is not configured in the multifunction terminals.
-
Page 55: Fig.10 Multi-Function Analog Output Diagram
PA 7300 PART II: OPERATION MANUAL (10) Monitor No. After Turning on Power Supply (Bn-10) • Data to be monitored after turning ON the power supply. These items will be displayed in the same format as shown in the Un- parameters. -
Page 56: Fig.1
PA 7300 PART II: OPERATION MANUAL (16) Differential Time D (Bn-16) • Output D is obtained by multiplying variation by D gain. Variation is defined as the output obtained by multiplying the difference between the prior value of deviation and the current value by a gain of (Bn-16 set value/7msec). - Page 57 PA 7300 PART II: OPERATION MANUAL (19) Sleep/Wake Delay Time (Bn-19) • This parameter is effective only when PID mode is active (Sn-19=09) • This parameter enables the AC drive to stop and start running the motor if the load on the motor is minimal.
- Page 58 PA 7300 PART II: OPERATION MANUAL *1. The PID sleep function is deactivated when the PID control function is disabled (Sn-19≠09) *2. When the timer runs out, the AC drive will stop the motor depending on the stopping method set in Sn-04. *3.
- Page 59 PA 7300 PART II: OPERATION MANUAL (23) Frequency Command Upper-Bound Delay Time (Bn-23) • The 1-8 PID Relay option card application parameter, if the AC drive’s PID output frequency exceeds the frequency command upper bound (the Cn-14 set value), the relay output on 1-8 PID Relay card will activate to increase the number of running pumps when the delay time set by Bn-23 has expired.
-
Page 60: Control Parameters Cn
PA 7300 PART II: OPERATION MANUAL 2.3 Control Parameters Cn- Parameter Setting Factory Reference Function Name LCD Display (English) Setting Range Unit Setting Page Cn-01=220.0V Cn-01 Input Voltage 150 ~ 255.0V* 0.1V 220.0V*2 Input Voltage Max. Output Cn-0=220.0V Cn-02 50.0 ~ 180.0Hz 0.1Hz 60.0Hz* Frequency... - Page 61 PA 7300 PART II: OPERATION MANUAL 2.3 Control Parameters Cn- Parameter Setting Factory Reference Function Name LCD Display (English) Setting Range Unit Setting Page Overtorque Detection Cn-26=160% Cn-26 30 ~ 200% 160% OVER- Level Over Tq. Det Level 2-17 Torque Cn-27=00.1V Overtorque Detection Cn-27...
- Page 62 PA 7300 PART II: OPERATION MANUAL Parameter LCD Display Setting Factory Reference Function Name Setting Range Number (English) Unit Setting Page Cn-49=0.0% Tuning Operation Cn-49 0 ~ 20% Sav. Tuning Voltage Limit V Limit Energy Tuning Operation Cn-50=01.0s Cn-50 0.1 ~ 10.0s 0.1s 1.0s Savings...
- Page 63 PA 7300 PART II: OPERATION MANUAL (1) Input voltage (Cn-01) • Set AC Drive input voltage. (In units of 0.1V). (2) V/f constant (Cn-02 to Cn-08) • Set AC drive output frequency/voltage characteristics (V/f characteristics.) (a) Changing V/f characteristics Sn-02 = 0 to 3 : V/f characteristics are determined by set value. Settings of CN-02 to Cn-08 cannot be changed.
- Page 64 PA 7300 PART II: OPERATION MANUAL (5) DC braking current (Cn-11) • Set DC braking current in units of 1%. AC drive rated current is 100%. (6) DC injection braking time at stop (Cn-12) • Set the duration of DC braking at stop in units of 0.1 second. •...
- Page 65 PA 7300 PART II: OPERATION MANUAL (10) Prohibit frequencies 1 to 3 (Cn-16 to Cn-18) • Sets prohibit frequency in units of 0.1 Hz. A set value of 0.0 Hz disables this function. • If the prohibit frequency ranges overlap, set prohibit frequency 1 to 3 as shown below: Cn-18 ≤...
- Page 66 PA 7300 PART II: OPERATION MANUAL (13) Frequency agree detection level (Cn-21) • Set an agreed frequency point in units of 0.1 Hz. (14) Frequency agree detection width (Cn-22) • Set an agreed frequency detection width in units of 0.1 Hz. The relation with multifunction contact outputs are shown in the four figures below (a), (b), and the frequency detection 1,2 (Cn-32,Cn-33) on page 2-18.
- Page 67 PA 7300 PART II: OPERATION MANUAL (15) Carrier frequency upper/lower limit, proportion gain (Cn-23 to Cn-25) • The relationship between output frequency and carrier frequency is determined as follows from the set values of Cn-23 to Cn-25. (a) For constant carrier frequency (set value of Cn-23): •...
- Page 68 PA 7300 PART II: OPERATION MANUAL OUTPUT FREQUENCY OUTPUT FREQUENCY DECELERATION TIME DECELERATION TIME OUTPUT FREQUENCY DECELERATION TIME HYSTERESIS ACCELERATION HYSTERESIS ACCELERATION TIME TIME DETECTION LEVEL OF HYSTERESIS DETECTION LEVEL OF STALL PREVENTION ACCELERATION STALL PREVENTION DURING RUN TIME DURING RUN DETECTION LEVEL OF RETURN LEVEL STALL PREVENTION...
- Page 69 PA 7300 PART II: OPERATION MANUAL (23) Number of auto restart attempts (Cn-36) • Set the number of auto reset/restart operations. Setting to zero causes no auto reset/restart operation. • Each time any OC, OV, OL1, OL2, OL3, OH, UV1, OC, GF, OV, rr or UV1 fault occurs, the number of auto reset/restart operations is incremented by 1, and auto reset/restart operation is performed according to the following procedure.
- Page 70 PA 7300 PART II: OPERATION MANUAL (25) Speed search detection level (Cn-38) • Upon power recovery, when the AC drive output current is larger than the set value of Cn-38, speed search operation is started. When the AC drive’s output current is smaller than the set value of Cn-38, the frequency is interpreted as a speed synchronization point, and acceleration or deceleration is resumed up to a specified frequency.
- Page 71 PA 7300 PART II: OPERATION MANUAL (30) PID integral upper bound (Cn-43) • The upper limit value of value I can be set by Cn-43. To increase the control capability by integration, increase the value of Cn-43. Reduce the setting of Cn-43 if there is a risk of load damage or of the motor going unstable from the AC drive’s response when the load suddenly changes.
- Page 72 PA 7300 PART II: OPERATION MANUAL (33) Energy-savings tuning operation (Cn-49 to Cn-52) • In the energy-savings mode (Sn-09 = X1XX) the optimum voltage is calculated according to load power and the voltage is supplied to the load. However, since the motor settings differ depending on temperature variation or use of other manufacturers’...
- Page 73 PA 7300 PART II: OPERATION MANUAL (35) Energy-saving coefficient reduction ratio (Cn-59) • In order to prevent over excitation in the low frequency area, this constant reduces output voltage at low frequency. Set the reduction ratio at 6Hz. Output voltage is reduced by the reduction ratio (Cn-59) when output frequency is 6Hz or obtained by linear interpolation between 6 and 15Hz as shown in the figure below.
- Page 74 PA 7300 PART II: OPERATION MANUAL (37) Auto Restart Time Interval (Cn-62) • Set the auto reset / restart operation time interval when the number of auto reset /restart operations is more than 2. • The setting range of Cn-62 is 0~20 sec. The auto restart time interval is minimum baseblock time (Cn-40) when the setting value of Cn-62 is 0.
-
Page 75: System Parameters Sn
PA 7300 PART II: OPERATION MANUAL 2.4 System Parameters Sn- Function Parameter Name LCD Display Description Factory Reference (English) Setting Page Capacity Sn-01 AC Drive Capacity Sn-01=29 AC Drive Capacity Selection 2-30 Setting 460V 25HP 2-31 Sn-02=2 V/f Curve Sn-02 V/f Curve Selection V/f Pattern Selection 2-32... - Page 76 PA 7300 PART II: OPERATION MANUAL Parameter LCD Display Factory Reference Function Name Description (English) Setting Page - - -0: Overtorque detection disabled. - - -1: Overtorque detection enabled Operation mode - -0 -: Enabled only if at agreed frequency 2-40 Selection 4 Sn-07=0000...
- Page 77 PA 7300 PART II: OPERATION MANUAL Parameter LCD Display Factory Reference Function Name Description Number (English) Setting Pages - - -0: External fault input (terminal 3 ): NO-contact input - - -1: External fault input: NC-contact input - -0 -: External fault signal: always detected - -1 -: External fault signal: detected during...
- Page 78 PA 7300 PART II: OPERATION MANUAL Parameter LCD Display Factory Reference Function Name Description (English) Setting Page Inverter Station Sn-23=01 Sn-23 Inverter address can be set betweem 1 and 31 Address Inverter Address - -00: No parity RS-485 - -01: Even parity parity setting Comm.
- Page 79 PA 7300 PART II: OPERATION MANUAL Function Parameter Name LCD Display Description Factory Reference Number (English) Setting Page Sn-31 1-8 PID Relay Card Sn-31=0 Relay 2 Invalid Relay 2 Control Invalid Relay 2 Valid Sn-32 1-8 PID Relay Card Sn-32=0 Relay 3 Invalid Relay 3 Control Invalid...
- Page 80 PA 7300 PART II: OPERATION MANUAL Sn-XX = 1st digit 2nd digit 3rd digit 4th digit (1) AC Drive Capacity Selection (Sn-01) • AC Drive capacity has been preset at the factory. However, if a replacement board is used, reset the AC Drive capacity referring to the table below.
- Page 81 PA 7300 PART II: OPERATION MANUAL Inverter Drive Capacity Selection 460V Class Name Sn-01 Value 24 25 27 28 2C 2D 2E 2F 34 35 36 37 PA7300- 005 007 010 015 020 025 030 040 050 060 075 100 125 150 175 200 250 300 350 400 500 AC Drive rated capacity (KVA) 6.2 9.3 12.4 18.6 24.8 29...
- Page 82 PA 7300 PART II: OPERATION MANUAL (2) V/F Curve Selection (Sn-02) • V/F curve is selected by the setting of Sn-02. When V/F curve is selected, always set input voltage of the AC drive to Cn-01. • Sn-02= 0~3: pre-set V/F curve pattern. Sn-02= 4: V/F pattern is set by the user (see parameters Cn-02~Cn-08).
- Page 83 PA 7300 PART II: OPERATION MANUAL (3) Operation status (Sn-03) • Passwords (Sn-03=0000 or 0101) The ability to set or read the different groups of constants is determined by Sn-03 as shown below. DRIVE mode PRGM mode Sn03 To be set To be monitored To be set To be monitored Only...
- Page 84 PA 7300 PART II: OPERATION MANUAL (4) Operation Mode Select 1 (Sn-04) • 1st digit (frequency reference select) 1st digit = 0: Reference input from the control circuit terminals 15 or 16 is the master speed frequency reference. 1st digit = 1: Frequency reference 1 (An-01) is the master speed frequency reference. Note: For combination of multi-step speed operations, refer to pages 2-48 and 2-49.
- Page 85 PA 7300 PART II: OPERATION MANUAL *1 Valid only when the AC drive stops. (FWD run command, REV run command, and DC injection braking command are “open”.) *2 FWD/REV run command is not accepted. *3 When the STOP key is depressed, outcomes differ as follows, depending on the setting of-the 1st digit of Sn-05.
- Page 86 PA 7300 PART II: OPERATION MANUAL 3. Sn-04=10 XX Full-range DC injection braking stop • DC injection braking time differs by the output frequency when the stop command is asserted as shown below. CLOSED RUN COMMAND OPEN OUTPUT FREQUENCY DC INJECTION BRAKING TIME CUT OFF OF AC DRIVE...
- Page 87 PA 7300 PART II: OPERATION MANUAL (5) Operation Mode Select 2 (Sn-05) • 1st digit Select processing to be performed when the keypad STOP key is pressed during run via control circuit terminals. 1st digit = 0: During run via control circuit terminals, the keypad STOP key is accepted. If the STOP key is depressed, the AC drive stops according to the setting of the 3rd and 4th digits of Sn-04 while the STOP LED indicator blinks.
- Page 88 PA 7300 PART II: OPERATION MANUAL (6) Operation Mode Select 3 (Sn-06) • 1st digit, 2nd digit (s-curve selection of the soft starter) The S-curve characteristics of the the soft starter depend on the setting of the 1st and 2nd digits as follows: 2nd Digit 1st Digit Contents...
- Page 89 PA 7300 PART II: OPERATION MANUAL (b) FWD/REV run changes without S-curve characteristics FWD RUN The figure below shows the time chart at FWD/REV run change during deceleration and stop. COMMAND REV RUN FWD RUN COMMAND COMMAND ACCELERATION DC INJECTION DECELERATION* REV RUN BRAKING TIME...
- Page 90 PA 7300 PART II: OPERATION MANUAL • 4th digit (operation select upon loss of frequency reference) 4th digit = 0: Normal operation (varies with change of reference) 4th digit = 1: Operation continues at 80% of last known frequency. When the 4th digit = 1, the current master speed frequency reference is continuously compared with the reading that occurred 0.4 seconds prior.
- Page 91 PA 7300 PART II: OPERATION MANUAL • 2nd digit 2nd digit = 0: Overtorque is detected only during agreed frequency. 2nd digit = 1: Overtorque is detected during stop or run except for DB. • 3rd digit 3rd digit = 0: When overtorque is detected, “Over Torque OL3”...
- Page 92 PA 7300 PART II: OPERATION MANUAL • 3rd, 4th digit (RS-485 stopping method after communication error) 3rd digit 4th digit Contents Ramp stop by Bn-02, when RS-485 has communication error. Coast to stop, when RS-485 has communication error. Ramp stop by Bn-04, when RS-485 has communication error. Operation to continue (will stop if the key stop is pressed) Please Refer to Appendix C for a detailed discussion of Serial Communications.
- Page 93 PA 7300 PART II: OPERATION MANUAL When the 2nd digit of Sn-10 is 1, the output frequency decreases at the rate determined by the deceleration time. For positioning applications, specify “stall prevention during deceleration not provided” (2nd digit = 1) in order to obtain stopping accuracy. With large load inertia, use a braking resistor (For 460V: 5HP~30HP and 230V: 5HP~25HP and 600V: 5~25HP) or braking transistor with braking resistor to prevent overvoltage.
- Page 94 PA 7300 PART II: OPERATION MANUAL • 3rd digit (operation continued at momentary power loss) 3rd digit = 0: When momentary power loss is detected, under-voltage fault (UV1) occurs and the AC drive output is shut off. 3rd digit = 1: If momentary power loss time is within momentary power loss ride-thru time (Cn-37), the operation continues after the momentary power loss.
- Page 95 PA 7300 PART II: OPERATION MANUAL 1st digit = 0: Input Phase Loss protection function ineffective. 1st digit = 1: Input Phase Loss protection function effective. • 2nd digit (Output Phase Loss Protection, OPL) The output phase loss protection function is disabled while the AC drive is stopped, during DC injection braking, or when AC drive output current ≤...
- Page 96 PA 7300 PART II: OPERATION MANUAL (15) Multi-Function Contact Input Selection (Sn-15~Sn-18) • Select the set values shown below for Sn-15 to -18. Terminal No Terminal 5 Terminal 6 Terminal 7 Terminal 8 Set Value Function LCD display (English) Description FWD / REV RUN select 3-wire RUN 3-wire sequence mode...
- Page 97 PA 7300 PART II: OPERATION MANUAL Function LCD display (English) Description Value 0C to OF Not Used Reserved UP Command UP Command Closed: Output frequency increment DOWN Command DOWN Command Closed: Output frequency decrement FJOG Command Forward Jog Closed: Foreward Jog run FWD LED lights.
-
Page 98: Fig.12 3-Wire Sequence
PA 7300 PART II: OPERATION MANUAL 1 FWD/REV run select (set value = 00) • When 0 is set in Sn-15, the mode becomes 3-wire sequence mode. STOP PA7300 RUN COMMAND (RUNS WHEN "CLOSED") STOP COMMAND (STOPS WHEN "OPEN") FWD/REV RUN SELECT 24VG "OPEN": FWD RUN "CLOSED": REV RUN... - Page 99 PA 7300 PART II: OPERATION MANUAL Multi-Step Reference Frequency Frequency Reference Select Master speed frequency reference* Auxillary analog reference Frequency reference 3 (An-03) Frequency reference 4 (An-04) Frequency reference 4 (An-05) Frequency reference 4 (An-06) Frequency reference 4 (An-07) Frequency reference 4 (An-08) Job frequency reference 4 (An-09) In the operator mode (1st digit of Sn-04 is 1), frequency reference 1 (An-01) is enabled.
- Page 100 PA 7300 PART II: OPERATION MANUAL 7 External baseblock (set value = 09) • Baseblock is active when “open”. All other operations are the same as when set value = 8. 8 Accel/decel speed prohibit command (set value = 0A) •...
- Page 101 PA 7300 PART II: OPERATION MANUAL • The following shows the time chart when the UP/DOWN commands are used. FWD RUN COMMAND DOWN COMMAND UPPER LIMIT SPEED LOWER LIMIT SPEED OUTPUT FREQUENCY D1 H U D D1 H U U1 H D D1 HOLD (CONSTANT SPEED)
- Page 102 PA 7300 PART II: OPERATION MANUAL 11 FJOG command, RJOG command (set value = 12, 13) • Forward and reverse jog frequency operation is enabled. Set value = 12 FJOG command: Forward run by the jog frequency reference (An-09) when closed. Set value = 13 RJOG command: Reverse run by the jog frequency reference (An-09) when closed.
- Page 103 PA 7300 PART II: OPERATION MANUAL Set value= 24 H 0 1 0 0 NO-contact input Always detected. Coast to a stop External fault 5 is input from terminal 5 The AC drive operates differently as described below when experiencing major faults as compared to minor faults.
- Page 104 PA 7300 PART II: OPERATION MANUAL 13 DC injection braking command (set value = 60) • When DC braking command is asserted while the AC drive stops, DC braking operation is performed. When operation signal or jog operation command is asserted, the DC braking operation is stopped and the run or jog operation is started.
- Page 105 PA 7300 PART II: OPERATION MANUAL The following shows the time chart where the speed search command is asserted. FWD (REV) RUN FWD (REV) RUN COMMAND COMMAND SEARCH SEARCH COMMAND COMMAND AGREED SPEED MAX. FREQUENCY OR AGREED SPEED MAX. FREQUENCY OR DETECTION FREQUENCY REF.
- Page 106 PA 7300 PART II: OPERATION MANUAL (16) Multi-Function Analog Input Selection (Sn-19) • The settings and functions for the multi-function analog input (terminal AUX) are listed as below. FUNCTION LCD DISPLAY (ENGLISH) REMARKS VALUE AUX frequency reference* Auxiliary Freq. Cmd. Used for MASTER/AUX frequency reference selection Frequency reference gain (F GAIN)
- Page 107 PA 7300 PART II: OPERATION MANUAL REDUCTION COEFFICIENT 2-57...
- Page 108 PA 7300 PART II: OPERATION MANUAL 17). Multi-Function Contact Output Selection (Sn-20~Sn-22) Select the set values shown below for Sn-20 to -22. Contact output for 0.1 sec. while detecting signal. TERMINAL NO SN- Control circuit terminal R2A-R2C (Contact output) Sn-20 Control circuit terminal D01-DCOM (Open collector output) Sn-21 Control circuit terminal R1A-R1C (Open collector output)
- Page 109 PA 7300 PART II: OPERATION MANUAL Drive in “Run” mode (set value=0) • The operation contact is “closed” when FWD or REV run command is inputed, or the AC Drive outputs voltage. Zero-speed (set value=1) • The zero-speed contact is “closed” when AC Drive output frequency is less than the minimum output frequency.
- Page 110 PA 7300 PART II: OPERATION MANUAL Frequency detection (set value=4) • This contact is “closed” when output frequency is equal to or less than Cn-32, as shown in the figure below. Cn-22 Cn-32 OUTPUT FREQUENCY CLOSED FREQUENCY Cn-22 Cn-32 DETECTION SIGNAL OUTPUT FREQUENCY CLOSED FREQUENCY...
- Page 111 PA 7300 PART II: OPERATION MANUAL Control command (set value=A) • This contact is “closed” when the control command from the keyboard is selected. Overtorque detection (set value=B) • This contact remains “closed” as long as the AC drive is detecting overtorque. Set overtorque detection level in Cn-26 and set overtorque detection time in Cn-27.
- Page 112 PA 7300 PART II: OPERATION MANUAL 18. AC drive station address (Sn-23) 19. RS-485 Communication protocol setting (Sn-24) • The PA7300 AC drive has three RS-485 communication option card’s: PA-C (METASYS/MODBUS protocol), PA-L (LONWORKS protocol), and PA-P (PROFIBUS protocol). These option cards can be used for monitoring AC drive status, reading the parameter setting, and changing the parameter setting to control the AC drive operation.
- Page 113 PA 7300 PART II: OPERATION MANUAL 20. LCD Language displayed selection (Sn-25) • Sn-25 = 0 : English Sn-25 = 1 : Chinese 21. Multi-Function Analog Output A01 Function Selection (Sn-26) 22. Multi-Function Analog Output A02 Function Selection (Sn-27) • The multi-function analog output A01 and A02 can be set to monitor the following 11 status items as shown below: SN-26, SN-27 MONITORED CONTENTS...
-
Page 114: Fig.13 Pump Operation Mode
PA 7300 PART II: OPERATION MANUAL 25. Pump Operation Mode Selection (Sn-30) • The 1-8 PID Relay option card application parameter. Set PA-PID card ineffective (Sn-30=0) when the 1-8 PID Relay card is not installed. Please refer to “PA-PID instruction manual”. •... - Page 115 PA 7300 PART II: OPERATION MANUAL 29. 1-8 PID Relay Card Relay 5 Control (Sn-34) 30. 1-8 PID Relay Card Relay 6 Control (Sn-35) 31. 1-8 PID Relay Card Relay 7 Control (Sn-36) 32. 1-8 PID Relay Card Relay 8 Control (Sn-37) •...
-
Page 116: Monitoring Parameters Un
PA 7300 PART II: OPERATION MANUAL 2.5 Monitoring Peramiters UN- 2-66... - Page 117 PA 7300 PART II: OPERATION MANUAL 2-67...
-
Page 118: Monitoring Parameters Hn
PA 7300 PART II: OPERATION MANUAL 2.6 Monitoring Parameters Hn- • The AC Drive input/output interface status can be monitored under the PRGM mode by parameters. • parameters will toggle display with low voltage protection alarm (UV) if the UV alarm occurred. - Page 119 PA 7300 PART II: OPERATION MANUAL PARAMETER LCD DISPLAY NAME UNIT DESCRIPTIONS (ENGLISH) Hn-09 External Analog Hn-09=10.00V Command VIN Voltage ~ Input 0.01V Range:0.00V ~ 10.00V Hn-10 External Analog Hn-10=20.0mA Command AIN Current ~ Input 0.1mA Range:0.0 ~ 20.0mA Hn-11 Multi-Function Analog Hn-11=10.00V Input Command AUX...
-
Page 120: Order Parameters On
PA 7300 PART II: OPERATION MANUAL 2.7 Order Parameters On- • Order parameters are already set to their optimum value as initial values. Therefore, adjustment is not normally needed. Error is D controlled Feedback is D controlled PID normal output PID inverse output PID output only Frequency command plus PID output... - Page 121 PA 7300 PART II: OPERATION MANUAL 2.7 Order Parameters On- • Order parameters are already set to their optimum value as initial values. Therefore, adjustment is not normally needed. 2-71...
- Page 122 PA 7300 PART II: OPERATION MANUAL Factory settings differ depending on AC Drive capacity (Sn-01 set value). This example shows a TECO standard motor 460V, 60Hz, 25HP (18.5KW). 2 For 230V Class, x2 for 460V, x2.5 for 600V. • Setting can be made only when Cn-60=FFH. When the value is changed, K2 (Energy-savings Coefficient K2) is calculated and the calculated value is set to Cn-58.
-
Page 123: Fault Display And Troubleshooting
PA 7300 PART II: OPERATION MANUAL 3. FAULT DISPLAY AND TROUBLESHOOTING The PA7300 has protection function and warning self-diagnosis function. If a fault a occurs, the protection functions operate to shut off the AC Drive output and the motor coasts to a stop. At the same time, the fault contact signal (terminal R3A-R3C, R3B-R3C). - Page 124 PA 7300 PART II: OPERATION MANUAL The warning and self-diagnosis functions do not operate fault contact outputs (except OH1 warning function) and return to the former operation status automatically when the condition is removed. The fault display and troubleshooting are provided as shown in the table below. FAULT CONTACT ERROR CAUSES ACTION TO BE TAKEN...
- Page 125 PA 7300 PART II: OPERATION MANUAL EXPLANATION PROTECTION FUNCTION LCD DISPLAY (ENGLISH)) Parameter Setting Error Parameter Setting Error Fault (Err)* Parameter Input Phase Loss Fault DC bus voltage ripple ∆V ≥input phase loss detection level (Cn - 61), the Fault (IPL)* motor coasts to stop Input phase loss Output Phase Loss Fault...
- Page 126 PA 7300 PART II: OPERATION MANUAL FAULT CONTACT ERROR CAUSES ACTION TO BE TAKEN OUTPUT Operation Parameter setting error • One of the AC Drive input phases are lost • 3 phase power source is unbalanced. • Check the AC Drive input power supply wiring. Operation •...
- Page 127 PA 7300 PART II: OPERATION MANUAL B.) Warning and Self-Diagnosis Functions PROTECTION FUNCTION LCD DISPLAY EXPLANATION (ENGLISH) Low-voltage protection Monitor display appears if low voltage protection conditions such as a drop (blinking) main circuit voltage in main circuit voltage or momentary power loss occur while the AC Drive Alarm (UV)* insufficient output is off.
- Page 128 PA 7300 PART II: OPERATION MANUAL FAULT CONTACT ERROR CAUSES ACTION TO BE TAKEN OUTPUT Non Operation • Input voltage drop Check the main circuit DC voltage in Un-xx. If the voltage is low, adjust the input voltage. Non Operation •...
- Page 129 PA 7300 PART II: OPERATION MANUAL LCD DISPLAY PROTECTION FUNCTION EXPLANATION (ENGLISH) External baseblock signal input (Minor failure) When an external base block signal is inputed, the motor coasts to a stop. (blinking) main circuit transistor When the external base block signal is removed, the AC Drive output is Alarm (bb)* instantanous shut-off...
- Page 130 PA 7300 PART II: OPERATION MANUAL FAULT CONTACT ERROR CAUSES ACTION TO BE TAKEN OUTPUT Non Operation – – • AC Drive KVA setting (Sn-01) error • Parameter setting range error • Multi-function contact input setting error • Review the parameter setting range and Non Operation (Sn-15 ~ Sn-18) and conditions...
-
Page 131: Appendix
PA 7300 APPENDIX APPENDIX A. Energy-savings CONTROL a. Constants related to Energy-savings Mode The table below shows the constants used in the Energy-savings mode. LCD DISPLAY FACTORY PARAMETER NAME AND DESCRIPTION UNIT SETTING RANGE FUNCTION (ENGLISH) SETTING Operation -0- -: Energy Saving function Mode Sn-09 ineffective (V/F) - Page 132 PA 7300 APPENDIX b. Energy-Savings operation procedures (1) Enter the Energy-savings mode by setting the third digit of the operation mode selection 5 (Sn-09) to 1. (The Energy-savings mode is already set prior to shipping.) (2) Set Cn-60 to the motor code (refer to page App-1) which is determined by the motor capacity and voltage.
-
Page 133: Pid Control
PA 7300 APPENDIX B. PID CONTROL a. Constants related to PID Control Mode The table below shows the constants used in the PID control mode. CONSTANTS USED IN PID CONTROL MODE LCD DISPLAY FACTORY PARAMETER NAME AND DESCRIPTION UNIT SETTING RANGE FUNCTION (ENGLISH) SETTING... - Page 134 PA 7300 APPENDIX b. How to input PID control signals For the set points, the multi-function analog input (control terminal AUX) or the Constant An-01 ~ 04 can be selected. The feedback value can be inputed from control terminal VIN (0 ~ 10V voltage signal) or the control terminal AIN. (4 ~ 20mA current signal), as shown below. PA7300 +15V (+15V Power Supply) AUX Set Point (0 to 10V)
-
Page 135: Fig.14 Pid Control Operations
PA 7300 APPENDIX c. How to adjust The PID control function is a control system that matches a feedback value to the set point. Combining P (Proportional, Bn-14), I (Integral, Bn-15), and D (Derivative, Bn-16) makes control possible even for a mechanical system with dead time. The PID control function, using different detected sensors, can be used for speed, pressure, flow, or temperature etc. - Page 136 PA 7300 APPENDIX (2) Adjusting PID content Refer to page 2-6, the block diagram of PID control selection, using the following procedure to activate the PID control and then adjust it while monitoring the response. ( I ) Enable the PID control function (Setting Sn-19 = 09, and if any constant Sn-15 ~ 18 setting value is 66, then none of control terminals 5 ~ 8 can be closed).
- Page 137 PA 7300 APPENDIX • Reducing Long-cycle Oscillation If oscillation occurs with a longer cycle than the integral time I (Bn-15) setting, thus means that integral operation is dominant. The oscillation will be reduced as the integral time I is lengthened. Response Before adjustment Response...
-
Page 138: Communication Connection Diagram
PA 7300 APPENDIX C. RS-485 COMMUNICATION CONNECTION DIAGRAM The PA7300 provide PA-C (METASYS/MODBUS protocol) and PA-P (PROFIBUS-DP protocol) option card for RS-485 communication interface. The wiring diagrams of PA-C and PA-P are as below. (a) PA-C METASYS/MODBUS protocol communication The PA-C option card supports the METASYS/MODBUS protocol can be placed at the upper side of the control board. -
Page 139: Fig.16 Wiring For Profibus Protocol Communication
PA 7300 APPENDIX (b) PA-P PROFIBUS protocol communication The PA-P PROFIBUS option supports the PROFIBUS protocol. The PA-P option card can be mounted at the control board directly. PA7300 (PA-P) PROFIBUS-DP Controller 220 (Terminator Resistor) shield PA7300 (PA-P) shield PA7300 (PA-P) shield Fig. -
Page 140: Sink/Source Typical Connection Diagram
PA 7300 APPENDIX D. SINK/SOURCE TYPICAL CONNECTION DIAGRAM • The terminals 1 ~ 8 can be connected as SINK or SOURCE type input interface by changing connections of terminals 24VG, SC and 24V. a. SINK MODE 1 Internal power supply (Sinking Mode) 2 External power supply (Sinking Mode) 24VG 24VG... - Page 141 PA 7300 APPENDIX b. SOURCE MODE • 1 Internal power supply (Sourcing Mode) 2 External power supply (Sourcing Mode) 24VG 24VG +24V IP24(+24V) IP24(+24V) External +24V <Note 2> PNP sensor (Source) used for operation signal 24VG IP24(+24V) App-11...
-
Page 142: Rs-232C Serial Communications Connection Diagram
PA 7300 APPENDIX E. RS-232C SERIAL COMMUNICATIONS CONNECTION DIAGRAM The Digital operator uses the RS-232C serial communication through connector CN1 to communicate with the control board. Using the CN1 port on the control board, parameters can be monitored and updated by a suitable PC programming tool. The CN1 port is an un-isolated RS-232C with a bad rate of 2400 bps. -
Page 143: Notes On Application Of Motors
Check the load torque characteristics of the machine to be connected. • Vibrations Because of the high carrier modulation technique for PWM control, the PA7300 series reduces motor vibration to a level equal to running with a commercial power supply. Larger vibrations may occur off of the following conditions: (1) Response at resonant frequency of the mechanical system. -
Page 144: Peripheral Unit Notes
PA 7300 APPENDIX G. PERIPHERAL UNIT NOTES • Installation and selection of molded-case circuit breaker On the input power side, a molded case circuit breaker (MCCB) to protect the AC Drive’s primary wiring should be installed. The drive’s power factor (depending on power voltage, output frequency, and load) must be taken into account for selecting the MCCB. -
Page 145: H. Circuit Protection And Environmental Rating Notes
PA 7300 APPENDIX H. CIRCUIT PROTECTION AND ENVIRONMENTAL RATINGS NOTES • Circuit Protection The maximum rms symmetrical amperes and voltage of the PA7300 series are listed as follows DEVICE RATING SHORT CIRCUIT MAXIMUM VOLTAGE RATING(A) VOLTAGE (V) 1.5 ~ 50... - Page 146 PA 7300 APPENDIX (b) 460V class AC DRIVE CABLE SIZE TIGHTENING CIRCUIT TERMINALS MARK CABLE SIZE TERMINALS RATING (HP) (AWG) TORQUE (IN.-LBS.) , L1, L2, L3, T1, T2, T3, B2, R, P, – 15.6 5~20 – – – L1, L2, L3, T1, T2, T3, B2, + , – L1, L2, L3, T1, T2, T3, B2, + , –...
-
Page 147: Ac Drive Heat Dissipation
PA 7300 APPENDIX I. AC Drive HEAT DISSIPATION • 230V CLASS AC DRIVE (HP) AC DRIVE CAPACITY (KVA) 12.4 18.6 24.8 27.4 RATED OUTPUT CURRENT (A) SWITCHING FREQUENCY (KHZ) FIN COOLINg Fan cooled TOTAL POWER LOSS (W) 1086 1468 1924 2151 2452 •... -
Page 148: Drive Input Fuses
PA 7300 APPENDIX J. DRIVE INPUT FUSES • Drive input fuses are provided to disconnect the drive from power in the event that a component fails in the drive’s power circuitry. The drive’s electronic protection circuitry is designed to clear drive output short circuits and ground faults without blowing the drive input fuses. -
Page 149: Certifications For The Ac Drive
PA 7300 APPENDIX K. CERTIFICATIONS FOR THE AC DRIVE • CE Mark • The PA7300 drives conform to the European Union Electromagnetic Compatibility Directive, when installed according to the recommendations described in the “EMC Installation Guideline” manual. • The tests were made in accordance with the following basic standards: EN55011 (2000-05) : Conducted Emission and Radiated Emission. - Page 150 PA 7300 INSTRUCTION MANUAL...
- Page 151 PA 7300 INSTRUCTION MANUAL...
- Page 152 PA 7300 INSTRUCTION MANUAL...
- Page 153 PA 7300 INSTRUCTION MANUAL...
- Page 154 5100 N. IH-35 Round Rock, Texas 78681, USA 1-800-279-4007 www.tecowestinghouse.com...
Need help?
Do you have a question about the PA7300 Series and is the answer not in the manual?
Questions and answers