Advertisement
Available languages
Available languages
Quick Links
XAC77 ... PX
Elenco sezioni
1 - Norme di sicurezza
2 - Identificazione
3 - Istruzioni di montaggio
4 - Connessioni elettriche
5 - Quick reference (STEP7 di Siemens)
6 - Interfaccia Profibus®
1
Norme di sicurezza
• Durante l'installazione e l'utilizzo del dispositivo osservare le norme di
prevenzione e sicurezza sul lavoro previste nel proprio paese;
• l'installazione e le operazioni di manutenzione devono essere eseguite da
personale qualificato, in assenza di tensione e parti meccaniche in
movimento;
• utilizzare il dispositivo esclusivamente per la funzione per cui è stato
costruito: ogni altro utilizzo potrebbe risultare pericoloso per l'utilizzatore;
• alte correnti, tensioni e parti in movimento possono causare lesioni serie o
fatali;
• non utilizzare in ambienti esplosivi o infiammabili;
• il mancato rispetto delle norme di sicurezza o delle avvertenze specificate in
questo manuale è considerato una violazione delle norme di sicurezza
standard previste dal costruttore o richieste dall'uso per cui lo strumento è
destinato;
• Lika Electronic s.r.l. non si assume alcuna responsabilità per eventuali danni
o lesioni derivanti dall'inosservanza delle norme di sicurezza da parte
dell'utilizzatore.
MAN XAC77 PX I_E 1.0.odt
®
XAC77 Profibus-DP
Manuale d'uso
Profibus-DP Profile for Encoders
Sicurezza
1
Norme di sicurezza
Advertisement

Related Manuals for Lika XAC77 PX Series


Summary of Contents for Lika XAC77 PX Series
- Page 1 è considerato una violazione delle norme di sicurezza standard previste dal costruttore o richieste dall'uso per cui lo strumento è destinato; • Lika Electronic s.r.l. non si assume alcuna responsabilità per eventuali danni o lesioni derivanti dall'inosservanza delle norme di sicurezza da parte dell'utilizzatore.
- Page 2 ® XAC77 Profibus-DP Avvertenze elettriche • Effettuare le connessioni elettriche esclusivamente in assenza di tensione; • rispettare le connessioni riportate nella sezione “4 - Connessioni elettriche”; • in conformità alla normativa 2004/108/CE sulla compatibilità elettromagnetica rispettare le seguenti precauzioni: - prima di maneggiare e installare il dispositivo eliminare la presenza di carica elettrostatica dal proprio corpo e dagli utensili che verranno in contatto con il dispositivo;...
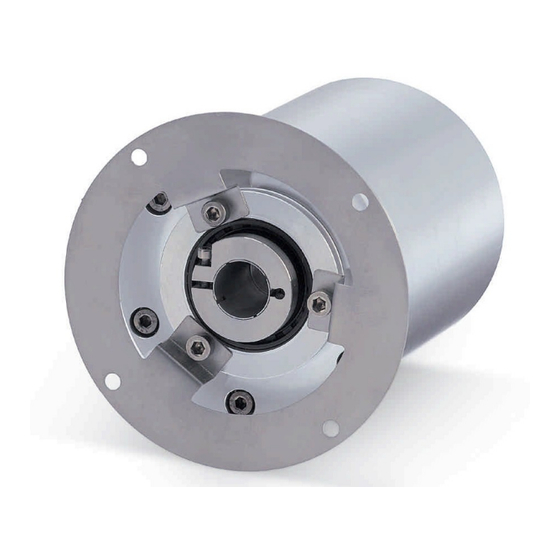
- Page 3 ® XAC77 Profibus-DP Istruzioni di montaggio ATTENZIONE L’installazione deve essere eseguita da personale qualificato, in assenza di tensione e parti meccaniche in movimento. • Fissare la molla di fissaggio sull'encoder utilizzando le viti fornite assieme al dispositivo; • inserire l'encoder sull'albero del motore utilizzando la boccola di riduzione (se fornita);...
- Page 4 ® XAC77 Profibus-DP Connessioni elettriche 4.1 Coperchio encoder ATTENZIONE Non rimuovere o connettere il coperchio dell’encoder con tensione di alimentazione inserita. Alcuni componenti interni potrebbero danneggiarsi. Il coperchio dell'encoder ospita i morsetti per il collegamento dell'alimentazione e degli ingressi e uscite bus, nonché i dip-switch di impostazione del baud rate e attivazione della resistenza di terminazione.
- Page 5 ® XAC77 Profibus-DP 4.3 Collegamento con pressacavi Figura 1 - Vista interna del coperchio Il coperchio dispone di tre pressacavi PG9, per l’ingresso bus, uscita bus e alimentazione. Ciascun cavo si viene a trovare allineato con i relativi morsetti. Per il collegamento del bus si raccomanda di usare l’appropriato cavo certificato Profibus-DP con sezione massima: Ø...
- Page 6 ® XAC77 Profibus-DP 4.3.1 Collegamento della calza Districare la calza 1 e tagliarla alla giusta misura; quindi piegarla sul particolare 2; infine posizionare la ghiera 3 assicurandosi che la calza 1 e la ghiera 3 siano adeguatamente in contatto. 4.4 Resistenza di terminazione: RT (Figura 1) Nel coperchio Profibus è...
- Page 7 ® XAC77 Profibus-DP 4.6 Indirizzo nodo: DIP A (Figura 1) ATTENZIONE Questa impostazione deve essere effettuata con dispositivo spento! L’indirizzo nodo deve essere impostato in modo hardware. L’indirizzo deve avere un valore compreso tra 0 e 125. Il valore di default è 1. DIP A: Impostare il valore binario dell’indirizzo del nodo considerando ON=1, OFF=0 usato...
- Page 8 Gli encoder Profibus sono forniti con un proprio file GSD XAC77V1.GSD (si veda il supporto informatico fornito con l'apparecchiatura oppure all'indirizzo www.lika.it > PRODOTTI > ROTACOD > ENCODER OTTICI ASSOLUTI > XAC77 FB). Nella finestra Configurazione HW selezionare Installa nuovo file GSD… nel menù...
- Page 9 XAC77 Profibus-DP Aggiungere il nodo al progetto Nella finestra Configurazione HW, selezionare tramite l'albero a sinistra il modulo LIKA XAC77-PX disponibile in Catalogo\PROFIBUS-DP\Ulteriori apparecchiature da campo\Encoder; trascinare il modulo nella finestra a sinistra in alto e collegarlo al “BUS”. Trascinare poi il sottomodulo desiderato -Classe 1, Classe2 o Classe2(+VEL)- nella tabella dedicata alle variabili (in basso a sinistra);...
- Page 10 ® XAC77 Profibus-DP Parametri di configurazione encoder Per accedere alla finestra di impostazione parametri encoder, nella finestra Configurazione HW selezionare il dispositivo nella tabella dedicata alle variabili (in basso a sinistra), premere il tasto destro del mouse aprendo un menù a tendina, infine selezionare il comando Proprietà...
- Page 11 ® XAC77 Profibus-DP Pagina Parametrizza per dispositivo Classe2(+VEL) Dopo avere impostato i parametri, premere il pulsante OK per chiudere la finestra Proprietà slave DP, quindi premere il pulsante Download nella barra degli strumenti della finestra Configurazione HW per scaricare i dati.
- Page 12 ® XAC77 Profibus-DP Per visualizzare i dati relativi alla diagnostica premere il pulsante Esadecimale nella pagina Diagnostica slave DP: Diagnostica a 16 byte: NOTA Il significato di ciascun byte è specificato nella sezione “6.7 DDLM_Slave_Diag”. MAN XAC77 PX I_E 1.0.odt 12 Quick reference (STEP7 di Siemens)
- Page 13 ® XAC77 Profibus-DP 5.3 Impostazione Preset Esempio In questo esempio l’encoder con indirizzo 1 trasmette al master la posizione sulla variabile all’indirizzo ED 100…103 (4 byte), la velocità sulla variabile all’indirizzo ED 104…107 (4 byte) e riceve il Valore di preset tramite la variabile AD 100…103 (4 byte).
- Page 14 ® XAC77 Profibus-DP Ora l’encoder trasmette la posizione 500hex. Per concludere la procedura di preset, riportare a 0 il bit 31 della stessa variabile e premere nuovamente il pulsante Comanda variabile. NOTA Qualora si presentassero in STEP7 anomalie di funzionamento delle variabili di Ingresso e Uscita con indice maggiore di 127 o con dati superiori a 4 byte, si consiglia di usare variabili di appoggio "MD"...
- Page 15 XAC77 Profibus-DP Interfaccia Profibus® Gli encoder Lika sono dispositivi slave e sono conformi al “PROFIBUS-DP Profile for Encoders”; possono essere programmati come dispositivi di Classe 1, di Classe 2 o di Classe 2 (+VEL), si veda la sezione “6.2 Classe del dispositivo”.
- Page 16 ® XAC77 Profibus-DP 6.3 Funzionamento a stati I dispositivi Profibus prevedono un funzionamento a stati. Lo schema è il seguente: Power-ON Init_OK Set_Prm_FAIL Chk_Cfg_FAIL Wait_Prm Set_Prm_OK Wait_Cfg Chk_Cfg_OK Data_Exchange NOTA Tutti i parametri sono trasmessi in fase Set_Prm a eccezione del Valore di preset, che viene trasmesso solamente durante lo stato Data_Exchange.
- Page 17 ® XAC77 Profibus-DP 6.4 DDLM_Set_Prm Quando il sistema viene attivato, i dati di configurazione impostati dall'utilizzatore sono trasferiti dal controllore all'encoder assoluto. I parametri definiti dall'utilizzatore sono trasferiti all'encoder in base alla versione scelta (parametrizzazione). Generalmente il trasferimento dei parametri avviene automaticamente e i dati sono inseriti attraverso un'interfaccia utente presente nel software del dispositivo di controllo (es.
- Page 18 ® XAC77 Profibus-DP DDLM_Set_Prm con Classe 2 (+VEL) Byte Parametro 0…9 Riservati rete Profibus Parametri operativi bit 0 Direzione conteggio bit 1 Funzionalità di Classe 2 bit 2 Riservato bit 3 Funzioni di scala bit 4 … 6 Riservati bit 7 Dati di scambio 11…14 Informazioni per giro programmate...
- Page 19 ® XAC77 Profibus-DP Dati di scambio = il dispositivo trasmette solo la posizione (Classe 1 e Classe 2). Pos + vel = il dispositivo trasmette la posizione e la velocità (Classe 2 (+VEL)). 6.4.2 Byte 11…14 Informazioni per giro programmate Questi byte definiscono il numero di informazioni per giro desiderate.
- Page 20 ® XAC77 Profibus-DP Esempio “XAC7716/16384PX-xx”: • “Informazioni per giro fisiche” = 16 bit/giro (2 = 65536 cpr) • “Numero di giri fisici” = 16384 giri) = 14 bit (2 • “Risoluzione totale fisica” = 30 bit (65536 ∗ 16384 = 2 = 1073741824) Esempio Si supponga di disporre del seguente encoder: “XAC77 16/16384 PX-14”.
- Page 21 ® XAC77 Profibus-DP 6.5 DDLM_Chk_Cfg Questa configurazione definisce il numero di byte utilizzati in ingresso e uscita nello stato Data_Exchange dal punto di vista del Master. Struttura messaggio Chk_Cfg (1 byte): bit 7 = Consistency (=”1”) bit 6 = Word format (“0”=byte,“1”=word=4byte) bit 5…4 = In/out data (“01”=Input, ”10”=output) bit 3…0 = Length code Esempio...
- Page 22 ® XAC77 Profibus-DP Valore di preset con tutte le classi (Master Encoder) Byte 31-24 23-16 15-8 Dato da 2 da 2 da 2 da 2 Con la funzione di preset è possibile assegnare un certo valore a una definita posizione angolare dell’albero encoder.
- Page 23 ® XAC77 Profibus-DP 6.7 DDLM_Slave_Diag Il Master può richiedere la diagnostica all’encoder in qualsiasi momento. Questo dispositivo prevede una diagnostica a 16 byte. Essa consiste di una informazione diagnostica standard (byte 0 … 5) e di una informazione diagnostica estesa (byte 6 … 15). L'informazione diagnostica standard è definita nella “Profibus specification”...
- Page 24 ® XAC77 Profibus-DP Station_Status_2 Byte 1. I primi 5 byte sono definiti nella “Profibus specification” in accordo con lo standard europeo EN 50170 parte 2. Per maggiori informazioni sul significato dei singoli bit del byte Station_Status_2 riferirsi alla “Profibus specification”. Station_Status_3 Byte 2.
- Page 25 ® XAC77 Profibus-DP bit 0 = 0: Direzione conteggio = oraria bit 1 = 1: Funzionalità di Classe 2 = abilitate bit 2 = non utilizzato bit 3 = 1: Funzioni di scala = abilitate bit 4 … 6 = non utilizzati bit 7 = 1: Dati di scambio = invio posizione + velocità...
- Page 26 ® XAC77 Profibus-DP 6.8 "Zona rossa" La caratteristica della cosiddetta “zona rossa” si verifica se: “risoluzio totale programmat a” “Numero di giri programmato” “informazi giro programmat e” non è un numero potenza di 2. Il dispositivo lavora in “zona rossa” nell’insieme di posizioni relative ai giri encoder rimanenti per completare la differenza tra “Risoluzione totale fisica”...
- Page 27 Versione documento Descrizione Prima release LIKA Electronic Via S. Lorenzo, 25 - 36010 Carrè (VI) - Italy Tel. +39 0445 806600 Fax +39 0445 806699 Italy: eMail info@lika.it - www.lika.it World: eMail info@lika.biz - www.lika.biz...
-
Page 28: Table Of Contents
• failure to comply with these precautions or with specific warnings elsewhere in this manual violates safety standards of design, manufacture, and intended use of the equipment; • Lika Electronic s.r.l. assumes no liability for the customer's failure to comply with these requirements. MAN XAC77 PX I_E 1.0.odt... -
Page 29: Identification
® XAC77 Profibus-DP Electrical safety • Turn off power supply before connecting the device; • connect according to explanation in section “4 - Electrical connections”; • in compliance with the 2004/108/EC norm on electromagnetic compatibility, following precautions must be taken: - before handling and installing, discharge electrical charge from your body and tools which may come in touch with the device;... -
Page 30: Mounting Instructions
® XAC77 Profibus-DP Mounting instructions WARNING Installation has to be carried out by qualified personnel only, with power supply disconnected and mechanical parts compulsorily in stop. • Fasten the fixing plate to the encoder using the screws provided with the device;... -
Page 31: Electrical Connections
® XAC77 Profibus-DP Electrical connections 4.1 Connection cap WARNING Do not remove or mount the connection cap with power supply switched ON. Damage may be caused to internal components. The terminal connector for connecting the power supply and the BUS IN and BUS OUT cables as well as the dip-switches meant to set the baud rate and activate the termination resistance are located inside the encoder connection cap. - Page 32 ® XAC77 Profibus-DP 4.3 Connecting the cables Figure 1 - Connection cap The connection cap is fitted with three PG9 cable glands for bus-IN and bus- OUT connections and power supply connection. The bus cables can be connected directly to the terminal connectors located in front of each cable gland. We recommend Profibus-DP certificated cables to be used.
- Page 33 ® XAC77 Profibus-DP 4.3.1 Connection of the shield Disentangle and shorten the shielding 1 and then bend it over the part 2; finally place the ring nut 3 of the connector. Be sure that the shielding 1 is in tight contact with the ring nut 3.
- Page 34 ® XAC77 Profibus-DP 4.6 Node number: DIP A (Figure 1) WARNING Power supply must be turned off before performing this operation! The node number must be set via hardware using DIP A dip-switches. Allowed addresses are from 0 to 125. The default value is 1. DIP A: Turn the power supply off and set the node number in binary value;...
-
Page 35: Quick Reference
Importing GSD file Profibus encoders are supplied with their own GSD file XAC77V1.GSD (see enclosed documentation or click www.lika.biz > PRODUCTS > ROTACOD > ABSOLUTE OPTICAL ENCODERS > XAC77 FB). In the menu bar of the HW Config window, press Options and then Install New GSD…... - Page 36 Adding a node to the project In the left pane of the HW Config window, open the directory tree and select Catalog\PROFIBUS_DP\Additional Field Devices\Encoders; drag the “LIKA XAC77-PX” module to the window on the left and drop it on “BUS”.
- Page 37 ® XAC77 Profibus-DP Encoder configuration parameters To enter the Encoder configuration parameters window, select the device in the bottom right of the HW Config window and right-click to open the menu; then choose the Object Properties… command. Properties – DP slave window will appear; in the Parameter Assignment page the list of all encoder parameters is available.
- Page 38 ® XAC77 Profibus-DP Class 2(+VEL) example After having set new parameter values, press the OK button to close the Properties – DP slave window and then the Download button (see icon on the left) in the toolbar of the HW Config window to download set parameters.
- Page 39 ® XAC77 Profibus-DP Click the Hex. Format… button to display diagnostic information: 16-byte Diagnostic: NOTE Refer to section “6.7 DDLM_Slave_Diag” for a complete list and meaning of each diagnostic byte. MAN XAC77 PX I_E 1.0.odt Quick reference...
- Page 40 ® XAC77 Profibus-DP 5.3 Setting the Preset value Example The encoder having device address 1 transmits the position value to the Master. Position value is loaded into variables ED 100…103 (4 bytes). Speed value is loaded into variables ED 104…107 (4 bytes). Preset value is sent to the encoder using variables AD 100…103 (4 bytes).
- Page 41 ® XAC77 Profibus-DP Finally click Command variables button in the Toolbar (see right icon). Now the position of the encoder is 0000 0500hex. To close the “Preset” procedure set bit 31 of variable 100 back to ”0” and then click the "Command variables" button again. NOTE It may occur that data variables having index higher than 127 or data greater than 4 bytes are not treated properly in STEP7 software.
-
Page 42: Profibus® Interface
® XAC77 Profibus-DP Profibus® interface Lika units are slave devices and comply with “Profibus-DP Profile for Encoders”; they can be set as Class 1, Class 2 or Class 2(+VEL) devices (see section “6.2 Classes of the Device profile“). For any omitted information refer to the official Profibus website www.profibus.com. - Page 43 ® XAC77 Profibus-DP 6.3 Modes of operation Profibus-DP devices allow operation using different communication modes (see Figure below): Power-ON Init_OK Set_Prm_FAIL Chk_Cfg_FAIL Wait_Prm Set_Prm_OK Wait_Cfg Chk_Cfg_OK Data_Exchange NOTE All parameters -except for the Preset value- are transmitted in Set_Prm mode. Preset value is transmitted only in Data_Exchange mode.
- Page 44 ® XAC77 Profibus-DP 6.4 DDLM_Set_Prm When system is turned on, configuration data set by the operator is sent to the absolute encoder by the controller. Parameters transmission depends on the configuration chosen by the operator. Customarily data is sent automatically while data setting is carried out through a user's interface available in the controller's software (for instance, STEP7, see section “5.1 STEP7 configuration“).
- Page 45 ® XAC77 Profibus-DP DDLM_Set_Prm with Class 2 (+VEL) Byte Parameter 0…9 Reserved for PROFIBUS Operating parameters bit 0 Code sequence bit 1 Class 2 functionality bit 2 Reserved bit 3 Scaling function control bits 4 ... 6 Reserved bit 7 Exchange type 11…14 Counts per revolution...
- Page 46 ® XAC77 Profibus-DP Exchange type Pos = device transmits only position value (Class 1 and Class 2). Pos + vel = device transmits both position and velocity values (Class 2(+VEL)). 6.4.2 Bytes 11…14 Counts per revolution Counts per revolution parameter can be used to program a user specific resolution each turn (single turn resolution).
- Page 47 ® XAC77 Profibus-DP Example “XAC7716/16384PX-xx”: • “Hardware counts per revolution” = 16 bit/turn (2 = 65536 cpr) • “Hardware number of turns” = 14 bit (16384 turn) • “Total hardware resolution” = 30 bit (65536 ∗ 16384 = 2 1073741824) Example “XAC7716/16384PX-14”...
- Page 48 ® XAC77 Profibus-DP 6.5 DDLM_Chk_Cfg Configuration function allows the Master to send configuration data to the Slave for any check operation. The main purpose of this function is to set the number of bytes used for the Data_Exchange as viewed from Master side. Chk_Cfg message structure (1 byte): bit 7 = Consistency (=”1”)
- Page 49 ® XAC77 Profibus-DP Preset value when any Class is set (Master Slave) Byte 31-24 23-16 15-8 Data to 2 to 2 to 2 to 2 Preset value is the process current value, that is: a value is set for a physical position of the encoder shaft.
- Page 50 ® XAC77 Profibus-DP 6.7 DDLM_Slave_Diag The Master device can send a request for diagnostic information at any time to the Slave device. This encoder provides 16-byte diagnostic information. Diagnostic information consists of two parts: a standard diagnostic information (bytes 0 … 5) and an extended diagnostic information (bytes 6 …...
- Page 51 ® XAC77 Profibus-DP Station_Status_2 Byte 1. The first 5 bytes are defined in the “Profibus specification” document in compliance with the European Standard EN 50170 volume 2. For any information on the meaning of the individual bits in the Station_Status_2 byte refer to the “Profibus specification”...
- Page 52 ® XAC77 Profibus-DP Operating status Byte 8. This byte is intended to give information on the Encoder internal parameters, in other words it informs on the statues of DDLM_Set_Prm byte 10 Operating parameters (refer to section “6.4.1 Byte 10 - Operating parameters”). In the example of Figure 2: 8A hex = 10001010 bin, that is: bit 0 = 0: Code sequence...
- Page 53 ® XAC77 Profibus-DP 6.8 "Dead Zone" The so-called "Dead Zone" occurs when: “total resolution ” Number of revolutions is not a power of 2. “counts revolution ” Device operates in "Dead Zone" for the remaining positions needful to complete the difference between “Total hardware resolution” and Total resolution when the result of the difference is lower than...
- Page 54 Document release Description 1st issue LIKA Electronic Via S. Lorenzo, 25 - 36010 Carrè (VI) - Italy Tel. +39 0445 806600 Fax +39 0445 806699 Italy: eMail info@lika.it - www.lika.it World: eMail info@lika.biz - www.lika.biz...
Need help?
Do you have a question about the XAC77 PX Series and is the answer not in the manual?
Questions and answers