Advertisement
Installation Instructions - SW3-338
A.
Introduction
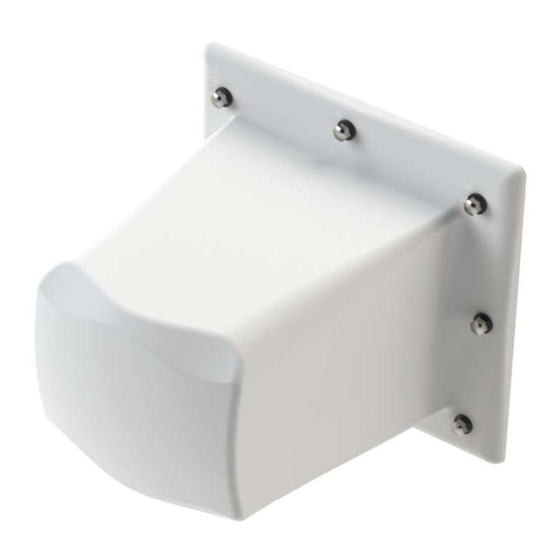
This document is a guideline for installation of WMM[X]9G range of directional MiMo antennas onto a mast or rail. This document should
be utilised as advice in the context of a well-planned installation. The WMM[X]9G comes in a variety of confi gurations and consists of
both horizontally and vertically polarised elements. Note that the polarisation of these elements is refenced to a standard pole mounting
confi guration and will change if the antenna is mounted in an alternate mounting confi guration. The label on the rear of the antennas
denotes the elements by position as A, B,C and D. In a standard orientation where element A is topmost then elements A and C are
horizontally polarised and elements B and D are vertically polarised. The antenna has a nominal E and H-Plane beamwidth of 60 degrees.
The antenna is supplied with a clamp bracket cable of adjustment and suitable for fi tment to a pole or rail between 25-50mm (1 - 2")
diameter.
B.
Mounting requirements and selecting location
Select a suitable mounting location for the antenna ensuring that it can be safely accessed with the equipment available. The antenna must
not be installed near to powerlines. If mounted externally in a very elevated location or above the roofl ine it may be prudent to consider
fi tting surge protectors to the coaxial cables ensuring that they are properly earthed in accordance with the manufacturers instructions.
When selecting a mounting location care should be taken to ensure that at least 0.3m (1') of separation is maintained between the antenna
and nearby metal objects and surfaces. Ensure that the selected location will enable the coaxial cable to be easily routed to the equipment
while respecting the bend radius of any coaxial cable used.
The antenna should be mounted to a suitable pole or rail (25-50mm (1 - 2") diameter) positioned to allow the antenna to cover the desired
area. The antenna bracket allows approx 30 degrees of adjustment from the centre line in either the horizontal or vertical axis depending on
how it is mounted
C.
Antenna mounting
Check that you have the required mounting hardware and equipment available. The antenna bracket can be mounted to the antenna and
the antenna mounted to the mounting rail / pole in a number of orientations. Select the correct orientation for the installation and fi t the
angle bracket to the antenna using the supplied M6x1 screws and washers.The U-bolt mounting assembly can then be fi tted to the angle
bracket and tightened onto the mounting pole / rail. Once almost tight the antenna can be orientated to face in the desired direction and
the u-bolt assembly fully tightened. Do not overtighten the assembly,
D.
Routing and terminating coaxial cable(s)
Fit the extension cable to the antenna. Route the coaxial cables to the radio equipment, taking care to observe applicable bend radii and
avoiding running them adjacent to any existing wiring or fouling any moving components. If exposed it is good practice to waterproof the RF
connector joint with a weatherproof electrical tape (self amalgamating type is recommended) allowing a signifi cant overlap of each turn and
ensuring that the overlap is in the opposite direction to predicted water fall. If required the coaxial cables should be fi tted with properly earthed
in line surge arrestors before connecting the antenna to the radio equipment.
E.
Commission and test
Check the comms cables:
•
Carry out VSWR check, the VSWR should measure <2.5:1 in transmit bands.
F.
Important notices
DO NOT
• operate the transmitter when someone is within 1m (3'3") of the antenna.
• operate the equipment in an explosive atmosphere.
• attempt to install the antennas without the proper safe equipment to access the install location.
• install the antenna near power lines.
• chew parts or put them in mouth, keep away from unsupervised children.
• install the antenna in such a way that it may fall and cause injury.
European Waste Electronic Equipment Directive 2002/96/EC
Waste electrical products should not be disposed of with household waste. All electronic products with the WEEE
logo must be collected and sent to approved operators for safe disposal or recycling. Please recycle where facil-
ities exist. Many electrical/electronic equipment retailers facilitate "Distributor Take-Back scheme"for household
WEEE. Check with your Local Authority or electronic retailers for designated collection facilities where WEEE can
be disposed of for free.
Waiver: This document represents information compiled to the best of our present knowledge. It is not intended as a representation or warranty of fi tness of the products
described for any particular purpose. This document details guidelines for general information purposes only. Always seek specialist advice when planning installations and
ensure that antennas are always installed by a properly qualifi ed installer in compliance with local laws and regulations..
Advertisement
Table of Contents

Summary of Contents for Panorama Antennas WMM 9G Series
- Page 1 Installation Instructions - SW3-338 Introduction This document is a guideline for installation of WMM[X]9G range of directional MiMo antennas onto a mast or rail. This document should be utilised as advice in the context of a well-planned installation. The WMM[X]9G comes in a variety of confi gurations and consists of both horizontally and vertically polarised elements.
- Page 2 Installation Instruction - SW3-338 Directive 2011/65/EU (RoHS 2) RoHS 2 compliance is declared per Directive 2011/65/EU and its subsequent amendments with exemption 6.c applied. REACH (Registration, Evaluation, Authorisation and Restriction of Chemicals, EC 1907/2006) This product contains Lead (CAS No. 7439-92-1) which is classifi ed as an SVHC (Substance of Very High Con- cern) as being toxic to reproduction under Article 57c.


Need help?
Do you have a question about the WMM 9G Series and is the answer not in the manual?
Questions and answers