
Related Manuals for CAME TS4.3


Summary of Contents for CAME TS4.3
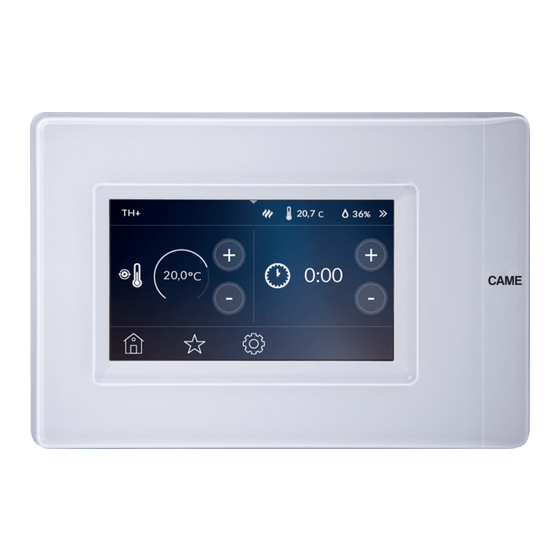
- Page 1 FA0 0 5 4 6M 0 4 Luci Scenari Carichi Aperture Esterno Sicurezza Italiano English Français MANUALE UTENTE TS4.3 Русский...
-
Page 2: Manutenzione
Descrizione Terminale touch screen con display da 4,3” per il controllo del sistema domotico CAME. Il menu semplice e intuitivo permette: - il controllo dell’illuminazione (ON/OFF oppure dimmerazione); - il controllo delle automazioni per cancelli, porte garage, tapparelle; - la termoregolazione;... - Page 3 Schermata Home Page Clima Esterno a TEMPERATURA E UMIDITÀ ESTERNA. Permette di visualizzare lo storico della temperatura esterna (solo se presente una sonda esterna e se il terminale è acceso e funzionante da almeno 24 h).
- Page 4 Menù Domotico Toccando l'icona si accede al Menù domotico. Carichi Luci Scenari Aperture Temporiz Sicurezza Scenari Carichi Relè Temporiz Sicurezza a APERTURE Permette il controllo delle automazioni per cancelli, porte garage, tapparelle LUCI Permette il controllo dell'illuminazione (ON/OFF oppure dimmerazione) ...
-
Page 5: Impostazione Data E Ora
Programmazione Impostazione Data e Ora A per accedere al Dalla Home Page toccare l’icona menù e scegliere l’icona Clima Esterno Impostare l’ora e i minuti agendo sui pulsanti (+) e (–) e sce- ImpostazionI gliere la modalità di visualizzazione (12 h o 24 h) C. Tenendo premuti i pulsanti i valori aumentano/diminuiscono Impostazione Termica Display... - Page 6 Blocco/Sblocco Display Dalla Home Page, nel menù a scomparsa posto in alto A è possibile bloccare il display cliccando sull'icona Nella Home Page in basso a destra appare l'icona del blocco Clima display. NOTA. È possibile bloccare il display anche dalla scher- Esterno mata di visualizzazione dello stato delle zone dal menù...
- Page 7 Luci A. Appare la schermata Dalla Home Page toccare l'icona Clima Esterno Toccando l'icona vengono visualizzate le luci (max. 40) in elenco che possono essere accese, spente o dimmerabili. Le luci possono essere accese o spente semplicemente toc- Luci Scenari Carichi cando l'icona corrispondente sullo schermo: luce spenta...
- Page 8 Aperture Toccare l'icona per accedere all'elenco delle aperture (max 40) A. Luci Scenari Carichi e scegliere l'apertura su cui agire B. Toccare l'icona Le aperture possono assumere i seguenti significati: Aperture Temporiz Sicurezza in chiusura; in apertura; nessuna azione in corso. Aperture Apertura 1 Apertura 3...
- Page 9 Scenari Toccare l'icona per accedere all'elenco degli scenari (max 40) A. Luci Scenari Carichi B e scegliere quale scenario attivare/ Toccare l'icona disattivare. Mantendo premuto, invece, su uno degli scenari in elenco, sarà possibile accedere al menù di dettaglio dello scenario. Aperture Temporiz Sicurezza...
- Page 10 Programmare le fasce orarie cliccando l'icona Temporizzatore 1 Toccare su una delle fasce orarie D per impostare l'orario di inizio e quello di fine, utilizzando i tasti + – E. Cliccando sull'icona uscirà il POPUP per poter salvare o meno le impostazioni appena effettuate. La fascia cambia di stato e verrà...
- Page 11 Carichi Per ogni modulo gestione energia elettrica OH/GEN è possibile controllare fino a 8 carichi elettrici (il sistema collega e scol- lega le utenze in modo che l’assorbimento totale non superi i limiti del contratto di fornitura). Luci Scenari Carichi Toccare l'icona per accedere all'elenco dei carichi (max 40) B.
- Page 12 Sicurezza Toccare l'icona per accedere all'elenco degli scenari sicurezza (max 32) B. Con un semplice tocco è possibile, inserendo il codice asso- Luci Scenari Carichi ciato alla centrale C, attivare lo scenario. Mantendo premuto, invece, su uno degli scenari sicurezza in elenco, sarà...
- Page 13 Relè Toccare l'icona per accedere all'elenco dei relè (max 40) B. Da questa funzione è possibile monitorare lo stato dei relè Scenari Carichi Relè presenti nell'impianto. I relè possono essere: aperti Temporiz Sicurezza chiusi. Con un semplice tocco è possibile aprire o chiudere un relè, oppure mantendo premuto su uno dei relè...
- Page 14 Impostazione Termica Dalla Home Page toccare sull'icona e successivamente Impostazioni per scegliere la modalità di funzionamento dell'intero impianto. Il controllo sull’impianto di termoregolazione viene TOTAL- Impostazione Termica Display MENTE disabilitato B. Pone l'impianto in modalità Raffrescamento. C Eventi Impostazione Data o Ora Pone l'impianto in modalità...
- Page 15 Eventi Toccare sull'icona per visualizzare l'elenco degli eventi. Impostazioni Il significato degli eventi possibili visualizzabili sono: Impostazione Termica Display Contatto aperto Contatto chiuso Eventi Impostazione Data o Ora Superamento soglia superiore di temperatura Superamento soglia inferiore di temperatura Contatto finestra Superamento soglia superiore di umidità...
-
Page 16: Unità Di Misura
Unità di Misura Toccare sull'icona per modificare l'unità di misura della Impostazioni temperatura. Audio Lingue Password Unità di misura Lingua e Info Dispositivo Toccare sull'icona per cambiare la lingua dell'interfaccia. Impostazioni Toccare sull'icona per verificare la versione del software Lingue Info Dispositivo installata. - Page 17 Consumi Toccare l'icona per visualizzare la lista dei misuratori (max 10) presenti nell'impianto. Clima NOTA. Nel caso nell'impianto sia presente e configurato, almeno un misuratore di consumi nella Home Page sarà Esterno indicato il consumo del misuratore principale A. Scegliere il misuratore B per visualizzare l'andamento dei consumi C.
- Page 18 Controllo Zone Termiche Dalla Home Page toccare l'icona per visualizzare le zone termiche. Clima Con le frecce è possibile visualizzare le varie zone ter- Esterno miche. Ad ogni zona sono stati associati termostati, sonde di temperatura o terminali di zona. Da questa schermata menù...
- Page 19 Proprietà Zona Termica Ciascun dispositivo di zona può essere ‘tarato’ per rilevare Setup Zona Termica e regolare la temperatura nel modo più corretto possibile, tenendo conto delle caratteristiche ambientali del luogo in cui è installato, delle esigenze dell’utente e delle caratteristiche Proprietà...
- Page 20 Cliccando sull'icona uscirà il POPUP per poter salvare o Proprietà Salotto meno le impostazioni appena effettuate. Soglia umidità inferiore Cliccando su F e F è possibile stabilire delle soglie di umidità, minime (soglia umidità inferiore) e massime (soglia Soglia umidità...
- Page 21 PARAMETRI TERMICI Proprietà Da questo menù è possibile scegliere tra due tipi di controllo della temperatura: Parametri termici - Controllo con Proporzionale Integrale (PI) M. - Controllo con Differenziale Termico (Diff) L. Scostamento temperatura Scostamento umidità Per scegliere uno dei due tipi di controllo toccare J. Controllo con Proporzionale Integrale (PI) L Questa tipologia di regolazione permette al dispositivo di ridurre i tempi di accensione dell'impianto man mano che la...
- Page 22 CONTROLLO CON DIFFERENZIALE TERMICO L Parametri termici Salotto Questo sistema di regolazione è consigliato in impianti parti- colarmente difficili da controllare con variazioni estreme della temperatura esterna. Il differenziale termico è regolabile fra 0.0 °C e 2.0 °C. Diff Nel caso in cui abbiamo impostato un differenziale termico pari a 0.2 °C e una temperatura di 20 °C, l’impianto si accenderà...
-
Page 23: Blocco Tastiera
CONTROLLO UMIDITÀ Proprietà Salotto Se nella zona è installato un deumidificatore è possibile im- postare un valore di umidità. Controllo umidità Superata la soglia di umidità impostata il deumidificatore entrerà in funzione, se precedente programmato. Intervallo temperatura automatica/manuale Blocco tastiera ... - Page 24 Storico Temperatura Salotto A per visualizzare lo storico fatto Toccare sull'icona Setup Zona Termica nell'arco delle 24 ore. Storico benessere Per avere a disposizione questi menù è necessario Proprietà che il dispositivo abbia almeno 24 ore di vita. Nel caso si tenti di visualizzare i valori prima di questo arco tempo- raneo verrà...
- Page 25 Storico Temperatura Storico Umidità disagio debole disagio moderato o intenso. Questo menù sarà visibile solo sulle zone in cui viene rilevata anche l'umidità (THPLUS, TS4.3 e OH/SRI). A per visualizzare l'indice di benes- Toccare sull'icona Storico benessere Salotto sere delle ultime 24 ore B.
- Page 26 Statistiche A per contabilizzare il tempo di funzionamento Toccare Salotto Setup Zona Termica dell'impianto in raffrescamento e riscaldamento B. Statistiche Storico benessere Storico benessere Statistiche Salotto Tempo di attivazione giornaliero 1h 28min mensile 52h 30min Impostazione e Modifica Programma Automatico Selezionare la zona, toccare sul segmento in alto della scher- mata e selezionare Toccare su un punto qualsiasi del grafico della temperatura...
- Page 27 Per visualizzare le zone successive toccare Il grafico cambia aspetto C ed è possibile aumentare o diminuire il valore della temperatura trascinando il segmento relativo all'ora indicata. In questa schermata è possibile sce- gliere anche il giorno in cui variare il profilo di temperatura. Per affinare la regolazione a quarti d'ora, scegliere il giorno, per visualizzare la schermata D.
- Page 28 Copia di un diagramma della temperatura in altri giorni della settimana Selezionare il giorno della settimana del quale si vuole copiare il diagramma della temperatura A e toccare sul segmento posto in alto e selezionare Salotto Scegliere il giorno su cui si vuole incollare il programma premendo sull'icona Cliccando sull'icona uscirà...
- Page 29 Con i tasti + – impostare il tempo desiderato C. Il dispositivo Salotto inizia un conteggio alla rovescia, al cui termine l'apparecchio passa dal funzionamento Manuale a quello Automatico se- guendo il programma impostato. Nella schermata di visualizzazione delle zone termiche l'icona sarà...
- Page 30 Preferiti È possibile impostare come preferiti: zone, luci, scenari, aper- Preferiti ture, temporizzazioni, scenari sicuezza e carichi. Salotto Terrazzo Per inserire l'elemento tra i preferiti, nelle varie schermate di dettaglio dei singoli elementi, toccare l'icona posta in alto a sinistra della schermata, vicino al nome del dispositivo. Salotto Timer 2 Il simbolo diventerà...
- Page 31 Il prodotto è conforme alle direttive di riferimento vigenti. Dismissione e smaltimento. Non disperdere nell’ambiente l’imballaggio e il dispositivo alla fine del ciclo di vita, ma smaltirli seguen- do le norme vigenti nel paese di utilizzo del prodotto. I componenti riciclabili riportano simbolo e sigla del materiale. I DATI E LE INFORMAZIONI INDICATE IN QUESTO MANUALE SONO DA RITENERSI SUSCETTIBILI DI MODIFICA IN QUALSIASI MOMENTO E SENZA OBBLIGO DI PREAVVISO.
- Page 32 CAME S.p.A. Via Martiri Della Libertà, 15 Via Cornia, 1/b - 1/c 31030 Dosson di Casier 33079 Sesto al Reghena Treviso - Italy Pordenone - Italy (+39) 0422 4940 (+39) 0434 698111 (+39) 0422 4941 (+39) 0434 698434 www. came.com...
- Page 33 FA00 5 4 6 -EN Lights Scenarios Loads Openings External Safety USER MANUAL TS4.3 English...
-
Page 34: Maintenance
Description Touchscreen terminal with 4.3” display, to control the CAME home automation system The simple, intuitive menu allows: - lighting control (ON/OFF or dimming); - control of operators for gates, garage doors, shutters; - temperature control; - activation of scenarios;... - Page 35 Home Page Climate External a OUTSIDE TEMPERATURE AND HUMIDITY This allows you to view the outside temperature log (only if an outside sensor is present and the terminal is on and has been running for at least 24 h).
- Page 36 Home Automation Menu to access the home automation menu. Loads Lights Scenarios Openings Timers Safety Scenarios Loads Relays Timers Safety a OPENINGS This enables you to control operators for gates, garage doors, shutters LIGHTS This enables lighting control (ON/OFF or dimming) ...
-
Page 37: Date And Time Setting
Programming Date and Time Setting A to access the menu and From the Home Page, tap choose Climate External Set the hour and the minutes using the (+) and (–) buttons Setup and choose the display mode (12 h or 24 h) C. Hold down the buttons to increase/decrease the values quick- Thermal Setup Display... - Page 38 Locking/Unlocking the Display From the Home Page, in the drop down menu at the top A you can lock the display by tapping The lock display icon appears on the Home Page in the bot- Climate tom right-hand corner. N.B. You can also lock the display from the screen for External viewing the status of the zones from the drop down menu at the top.
- Page 39 Lights A. The screen appears as shown From the Home Page tap in B. Tapping displays the lights (max. 40) in a list that can be Climate on, off or dimmed. External The lights can be switched on or off by simply tapping the corresponding icon on the screen: light off Lights...
- Page 40 Openings to access the list of openings (max 40) A. Lights Scenarios Loads and choose the opening to modify B. The openings may have the following meanings: closing; Openings Timers Safety opening; no action pending. Openings Opening 1 Opening 3 Opening 2 Opening 4 buttons C.
- Page 41 Scenarios to access the list of scenarios (max 40) A. B and choose which scenario to enable/disable. Lights Scenarios Loads Tapping and holding one of the scenarios listed, on the other hand, you can access the detailed scenario menu. Tap the button to enable/disable the scenario C. Openings Timers Safety...
- Page 42 Program the time slots by tapping Timer 1 Tap one of the time slots D to set the start time and end time, using the + – E keys. When you tap , the POPUP will appear so you can choose whether or not to save the settings.
- Page 43 Loads For each OH/GEN electricity management module, you can control up to 8 electrical loads (the system connects and disconnects the loads so that the total current draw does not exceed the limits of the supply contract). Lights Scenarios Loads to access the list of loads (max 40) B.
- Page 44 Safety to access the list of safety scenarios (max 32) B. With just one tap, by entering the code associated with the control unit C, you can activate the scenario. Lights Scenarios Loads Tapping and holding one of the safety scenarios listed, on the other hand, you can access the detailed scenario menu D.
- Page 45 Relays to access the list of relays (max 40) B. You can use this function to monitor the status of the relays present in the system. Scenarios Loads Relays The relays can be: open Timers Safety closed. With one tap, you can open or close a relay, or by holding down one of the relays in the list, you can access the detailed load menu C.
- Page 46 Thermal Setup From the Home Page, tap and then to choose the Setup operating mode for the whole system. Control over the temperature control system is TOTALLY Thermal Setup Display disabled B. Sets the system in Cooling mode C. Events Date and Time Setting Sets the system in Heating mode D.
- Page 47 Events to display the events list. Setup The meaning of the possible events that can be displayed is Thermal Setup Display as follows: Contact open Events Date and Time Setting Contact closed Upper temperature threshold exceeded Lower temperature threshold exceeded Window contact Upper humidity threshold exceeded Lower humidity threshold exceeded...
-
Page 48: Unit Of Measurement
Unit of Measurement to change the unit of measurement for the tem- Setup perature. Audio Languages Password Unit of measurement Language and Device Info to change the interface language. Setup to check the software version installed. Languages Info Device Password Change User Password Setup to access the screen that allows you to change the... - Page 49 Energy to view the list of the meters (max 10) in the system. N.B. If at least one consumption meter is present and Climate configured in the system, the Home Page will show the consumption of the main meter A. External Choose the meter B to view the progress of consumption C.
- Page 50 Thermal Zone Control From the Home Page, tap to display the thermal zones. Climate Use the arrows to view the various thermal zones. Each zone has thermostats, temperature sensors or zone terminals External associated with it. From this menu screen, for each zone, you can view the operating mode, the temperature and the humidity detected if the area is equipped with a humidity sensor B.
- Page 51 Thermal Zone Properties Each zone device can be ‘calibrated’ to detect and adjust Thermal Zone Setup the temperature as correctly as possible, taking into account the environmental characteristics of the place in which it is installed, the user’s needs and the technical characteristics Properties Comfort Log of the system.
- Page 52 When you tap , the POPUP will appear so you can choose Properties Living room whether or not to save the settings. Lower humidity threshold Tap F and F to set the minimum (lower humidity threshold) and maximum (upper humidity threshold) humid- Upper humidity threshold ity thresholds.
- Page 53 THERMAL PARAMETERS Properties From this menu, you can choose between two types of tem- perature control: Thermal parameters - Proportional Integral Control (PI) M. - Differential Thermal Control (Diff) L . Temperature offset Humidity offset To choose one of the two types, tap J . PROPORTIONAL INTEGRAL CONTROL (PI) L This type of control enables the device to reduce system power on times as the ambient temperature approaches the...
-
Page 54: Temperature Offset
DIFFERENTIAL THERMAL CONTROL (DIFF) L Thermal parameters Living room This control system is recommended in systems that are particularly difficult to control with extreme variations of the external temperature. The thermal differential is adjustable between 0.0 °C and Diff 2.0 °C. If we set a thermal differential of 0.2 °C and a temperature of 20 °C, the system will turn on when the thermostat detects a temperature of 19.8 °C and will shut off on reaching a... -
Page 55: Humidity Control
HUMIDITY CONTROL Properties Living room If a dehumidifier is installed in the zone, you can set a hu- midity value. Humidity control Once the humidity threshold has been exceeded, the dehu- midifier will go into operation, if programmed in advance. Auto/manual temp interval ... -
Page 56: Temperature Log
Temperature Log Living room A to view the log for the previous 24 hours. Thermal Zone Setup m In order for these menus to be available, the device must have been running for at least 24 hours. If you try Comfort Log Properties to display the values before this time frame, a POPUP will... - Page 57 This menu will only be visible on the zones where humidity is also detected (THPLUS, TS4.3 and OH/SRI). Comfort Log Living room A to view the comfort index for the previous 24 hours B.
- Page 58 Statistics A to record the system operating time in cooling Living room Thermal Zone Setup and heating mode B. Statistics Comfort Log Comfort Log Statistics Living room Activation time daily 1h 28min monthly 52h 30min Automatic Program Setup and Changes Select the zone, tap the segment at the top of the screen and select Tap anywhere on the temperature graph B and confirm in...
- Page 59 The graph changes appearance C and you can increase or decrease the temperature value by dragging the segment relative to the indicated time. On this screen, you can also choose the day on which to change the temperature profile. To fine tune the control in fifteen-minute intervals, choose the to view the screen D.
- Page 60 Copying a diagram of the temperature on other days of the week Select the day of the week whose temperature diagram you wish to copy A and tap the segment at the top and select Living room Choose the day on which you want to paste the program by tapping When you tap , the POPUP will appear so you can choose whether or not to save the settings.
- Page 61 starts a countdown, at the end of which the device moves Living room from Manual operation to Automatic operation, following the set program. The icon on screen showing the thermal zones will be Wildcard Program Setup The Wildcard program can be activated in the event that a variant of the usual programming becomes necessary and remains active until midnight on the current day;...
- Page 62 Favourites You can set the following as favourites: zones, lights, scenari- Favourites os, openings, timers, safety scenarios and loads. Living room Terrace To add items as favourites, on the various detailed screens for the individual items, tap the icon in the top left-hand corner of the screen, next to the device name.
- Page 64 CAME S.p.A. Via Martiri Della Libertà, 15 Via Cornia, 1/b - 1/c 31030 Dosson di Casier 33079 Sesto al Reghena Treviso - Italy Pordenone - Italy (+39) 0422 4940 (+39) 0434 698111 (+39) 0422 4941 (+39) 0434 698434 www. came.com...
-
Page 65: Manuel Utilisateur
FA0 0 5 46 - FR Éclairage Scénarios Charges Ouvertures Extérieur Sécurité MANUEL UTILISATEUR TS4.3 Français... -
Page 66: Entretien
Description Terminal à écran tactile avec afficheur de 4,3” pour le contrôle du système domotique CAME. Le menu simple et intuitif permet : - le contrôle de l'éclairage (ON/OFF ou réglage de l'intensité) ; - le contrôle des automatismes pour portails, portes de garage, volets roulants ;... -
Page 67: Page D'accueil
Page d'accueil Climat Extérieur a TEMPÉRATURE ET HUMIDITÉ EXTÉRIEURES. Permet de visualiser l'historique de la température extérieure (uniquement en présence d'une sonde externe et à condition que le terminal soit allumé et qu'il fonctionne depuis au moins 24 h). ... - Page 68 Menu Domotique Toucher l'icône pour accéder au Menu domotique. Charges Éclairage Scénarios Ouvertures Minuter. Sécurité Scénarios Charges Relais Minuter. Sécurité a OUVERTURES Permet le contrôle des automatismes pour portails, portes de garage, volets roulants ...
-
Page 69: Configuration Date Et Heure
Programmation Configuration date et heure A dans la page d'accueil pour accéder Toucher l'icône au menu et choisir l'icône Climat Extérieur Configurer l'heure et les minutes au moyen des boutons (+) Configurations et (–) puis choisir la modalité d'affichage (12 h ou 24 h) C. Si les boutons restent enfoncés, les valeurs augmentent/dimi- Configuration thermique Afficheur... - Page 70 Verrouillage/Déverrouillage affichage Depuis la page d'accueil, dans le menu contextuel en haut de l'écran A, il est possible de verrouiller l'affichage en cliquant sur l'icône Climat L'icône de verrouillage de l'affichage apparaît en bas de l'écran dans la page d'accueil. Extérieur REMARQUE : il est également possible de verrouiller l'affi- chage depuis la page de visualisation de l'état des zones...
- Page 71 Éclairage A dans la page d'accueil pour ouvrir la Toucher l'icône page B. Climat Extérieur Toucher l'icône pour visualiser la liste des lumières (max. 40) pouvant être allumées, éteintes ou réglables. Pour éteindre ou allumer les lumières, toucher l'icône corres- Éclairage Scénarios Charges...
- Page 72 Ouvertures Toucher l'icône pour accéder à la liste des ouvertures (max. 40) A. Éclairage Scénarios Charges Toucher l'icône et choisir l'ouverture sur laquelle inter- venir B. Les ouvertures peuvent prendre les significations suivantes : Ouvertures Minuter. Sécurité en phase de fermeture ; en phase d'ouverture ;...
- Page 73 Scénarios Toucher l'icône pour accéder à la liste des scénarios (max. 40) A. Éclairage Scénarios Charges B et choisir le scénario à activer/ Toucher l'icône désactiver. En maintenant l'un des scénarios de la liste enfoncé, il sera possible d'accéder au menu détaillé correspondant. Ouvertures Minuter.
- Page 74 Appuyer sur l'une des plages horaires D pour configurer Minuterie 1 l'heure de début et l'heure de fin au moyen des touches + – E. Cliquer sur l'icône pour ouvrir la fenêtre contextuelle per- mettant de sauvegarder ou non les dernières configurations. La plage horaire change d'état et l'écran affichera l'intervalle Minuterie 1 d'activation.
- Page 75 Charges Il est possible, pour chaque module de gestion de l'énergie électrique OH/GEN, de contrôler jusqu'à 8 charges électriques (le système connecte et déconnecte les circuits de manière à ce que l'absorption totale ne dépasse pas les limites du Éclairage Scénarios Charges contrat de fourniture).
- Page 76 Sécurité Toucher l'icône pour accéder à la liste des scénarios de sécurité (max. 32) B. Il est possible du bout des doigts, en entrant le code associé Éclairage Scénarios Charges à la centrale C, d'activer le scénario. En maintenant l'un des scénarios de sécurité de la liste enfoncé, il sera possible d'accéder au menu détaillé...
- Page 77 Relais Toucher l'icône pour accéder à la liste des relais (max. 40) B. Cette fonction permet de contrôler l'état des relais de l'ins- Scénarios Charges Relais tallation. Les relais peuvent être : ouverts Minuter. Sécurité fermés. Il est possible du bout des doigts d'ouvrir ou de fermer un relais ou d'accéder, en maintenant enfoncé...
- Page 78 Configuration thermique Depuis la page d'accueil, toucher l'icône puis pour Configurations choisir la modalité de fonctionnement de toute l'installation. Configuration thermique Afficheur Le contrôle sur l'installation de thermorégulation est COMPLÈTEMENT désactivé B. Configuration Date et Événements Permet de mettre l'installation en mode Rafraîchisse- Heure ment C.
- Page 79 Événements Toucher sur l'icône pour visualiser la liste des événe- Configurations ments. Configuration thermique Afficheur Les événements potentiels peuvent prendre les significations suivantes : Contact ouvert Configuration Date Événements Contact fermé et Heure Dépassement du seuil de température supérieur Dépassement du seuil de température inférieur Contact fenêtre Dépassement du seuil d'humidité...
-
Page 80: Unité De Mesure
Unité de mesure Toucher l'icône pour modifier l'unité de mesure de la Configurations température. Audio Langues Unité de mesure Langue et Info dispositif Toucher l'icône pour changer la langue de l'interface. Configurations Toucher l'icône pour contrôler la version du logiciel Langues Info dispositif installée. - Page 81 Consommations Toucher l'icône pour visualiser la liste des mesureurs (max. 10) présents sur l'installation. REMARQUE : en cas de configuration d'au moins un Climat mesureur de consommations dans l'installation, la page d'accueil indiquera la consommation du mesureur prin- Extérieur cipal A. Choisir le mesureur B pour visualiser l'évolution des consommations C.
- Page 82 Contrôle des zones thermiques Depuis la page d'accueil, toucher l'icône pour visualiser les zones thermiques. Climat Les flèches permettent de visualiser les différentes zones Extérieur thermiques. À chaque zone sont associés des thermostats, des sondes de température ou des terminaux de zone. Cette page-écran permet de visualiser, pour chaque zone, la modalité...
- Page 83 Propriétés Zone Thermique Chaque dispositif de zone peut être programmé de manière à Configuration zone thermique détecter et à régler la température de façon précise en tenant compte des caractéristiques ambiantes de l'endroit où il est installé, des exigences de l'utilisateur et des caractéristiques Propriétés Historique confort techniques de l'installation.
- Page 84 Cliquer sur l'icône pour sauvegarder ou non ces dernières Propriétés Salon configurations dans la fenêtre contextuelle qui apparaîtra. Seuil humidité inférieur Cliquer sur F et F pour programmer des seuils d'hu- midité, minimum (seuil humidité inférieur) et maximum (seuil ...
- Page 85 PARAMÈTRES THERMIQUES Propriétés Ce menu permet de choisir entre deux types de contrôle de la température : Paramètres thermiques - Contrôle avec Proportionnelle Intégrale (PI) M. - Contrôle avec Différentiel Thermique (Diff) L. Écart température Écart humidité Pour choisir un des deux types de contrôle appuyer sur J.
- Page 86 CONTRÔLE AVEC DIFFÉRENTIEL THERMIQUE L Paramètres thermiques Salon Ce système de réglage est conseillé sur des installations particulièrement difficiles à contrôler avec des variations extrêmes de la température extérieure. Le différentiel thermique peut être réglé entre 0,0°C et 2,0°C. Diff En cas de configuration d'un différentiel thermique égal à...
-
Page 87: Verrouillage Clavier
CONTRÔLE HUMIDITÉ Propriétés Salon L'installation d'un déshumidificateur dans la zone permet de configurer une valeur d'humidité. Contrôle humidité Au dépassement du seuil d'humidité configuré, le déshumi- dificateur précédemment programmé se mettra en marche. Plage temp. automat./man. Verrouillage clavier ... - Page 88 Historique température Salon A pour visualiser l'historique élaboré Toucher l'icône Configuration zone thermique dans les 24 heures. Historique confort Propriétés Pour disposer de ces menus, le dispositif doit avoir au moins 24 heures de vie. En cas de tentative de visua- lisation des valeurs avant écoulement de ce délai, l'écran affichera la fenêtre contextuelle.
- Page 89 Historique humidité confort inconfort léger inconfort modéré ou intense. Ce menu n'apparaîtra que sur les zones comprenant égale- ment la détection de l'humidité (THPLUS, TS4.3 et OH/SRI). Historique confort Salon A pour visualiser l'indice de confort des Toucher l'icône 24 dernières heures B.
- Page 90 Statistiques A pour calculer le temps de fonctionne- Appuyer sur Salon Configuration zone thermique ment de l'installation en mode rafraîchissement et en mode chauffage B. Statistiques Historique confort Historique confort Statistiques Salon Temps d'activation journalier 1 h 28 min mensuel 52 h 30 min Configuration et Modification Programme Automatique Sélectionner la zone, toucher le segment en haut de la page et sélectionner...
- Page 91 Le graphique change d'aspect C et il est possible d'aug- menter ou de diminuer la valeur de la température en faisant glisser le segment correspondant à l'heure indiquée. Cette page permet également de choisir le jour au cours duquel modifier le profil de température. Pour configurer un réglage par quarts d'heure, choisir le jour pour visualiser la page-écran D.
- Page 92 Copier un diagramme de la température dans d'autres jours de la semaine Sélectionner le jour de la semaine duquel copier le diagramme de la température A, toucher le segment positionné en haut et sélectionner Salon Choisir le jour sur lequel coller le programme en appuyant sur l'icône Cliquer sur l'icône pour sauvegarder ou non ces dernières...
- Page 93 Le dispositif lance un compte à rebours au terme duquel l'ap- Salon pareil passe du fonctionnement Manuel au fonctionnement Automatique en suivant le programme configuré. La page de visualisation des zones thermiques présentera l'icône Configuration du programme Jolly Le programme Jolly peut être activé en cas de nécessité d'une variante de la programmation habituelle.
- Page 94 Favoris Il est possible de configurer comme favoris : zones, éclai- Favoris rage, scénarios, ouvertures, minuteries, scénarios, sécurité et charges. Salon Terrasse Pour ajouter l'élément aux favoris, dans les différentes pages détaillées de chaque élément, toucher l'icône position- Salon Minuterie 2 née en haut à...
- Page 96 CAME S.p.A. Via Martiri Della Libertà, 15 Via Cornia, 1/b - 1/c 31030 Dosson di Casier 33079 Sesto al Reghena Treviso - Italy Pordenone - Italy (+39) 0422 4940 (+39) 0434 698111 (+39) 0422 4941 (+39) 0434 698434 www. came.com...
-
Page 97: Руководство Пользователя
FA00 5 46 -R U Светильники Сценарии Электроприборы Ограждения Внеш. показатели Охранные сигнализации РУКОВОДСТВО ПОЛЬЗОВАТЕЛЯ TS4.3 Русский... -
Page 98: Техническое Обслуживание
Описание Сенсорная контрольная панель с дисплеем 4,3”, предназначенная для управления "умным домом" CAME. Простое и понятное меню позволяет: - управлять освещением (ВКЛ/ВЫКЛ, диммированием); - управлять автоматикой для въездных и гаражных ворот, рольставен; - регулировать температуру в помещении; - активировать сценарии;... -
Page 99: Дата И Время
Вид главной страницы Климат Внеш. показатели a ТЕМПЕРАТУРА И ВЛАЖНОСТЬ НА УЛИЦЕ Эта функция позволяет отображать отчет об изменении температуры на улице (только если установлен уличный датчик температуры и контрольная панель включена и работает не менее 24 часов). ... - Page 100 Меню "Умный дом" Касанием иконки можно включить меню "умного дома". Нагрузка Свет Сценарии Окна Таймеры Безопасн. Сценарии Нагрузка Реле Таймеры Безопасн. a ОКНА Эта иконка позволяет управлять автоматическими ограждениями, например, въездными и гаражными воротами, рольставнями.
-
Page 101: Установка Даты И Времени
Программирование Установка даты и времени A для досту- На главной странице коснитесь иконки па к меню и выберите иконку Климат Внеш. показатели Установите часы и минуты с помощью кнопок (+) и (–), Настройки выберите вариант отображения (12 ч или 24 ч) C. При... - Page 102 Блокировка/разблокировка экрана Можно заблокировать экран с главной страницы, открыв расположенное вверху всплывающее меню A и нажав иконку Климат В нижней части главной страницы появится иконка бло- кировки экрана. Внеш. показатели ПРИМЕЧАНИЕ: экран можно заблокировать, находясь на странице просмотра состояния зон, с помощью расположенного...
- Page 103 Свет A. На экране На главной странице коснитесь иконки появится B. Климат Внеш. показатели При нажатии иконки появится список светильников (макс. 40), которые можно включить, выключить или отрегулировать по яркости. Свет Сценарии Нагрузка Включить или выключить светильник можно с помощью простого...
- Page 104 Окна Выберите иконку для доступа к списку автоматиче- ских систем в доме (макс. 40) A. Свет Сценарии Нагрузка Выберите иконку и интересующую автоматическую систему B. Подвижные элементы систем могут иметь следующий Окна Таймеры Безопасн. вид и значение: при закрывании; при открывании; Окна...
- Page 105 Сценарии Выберите иконку для доступа к списку сценариев (макс. 40) A. Свет Сценарии Нагрузка B и сценарий, который хотите Выберите иконку активировать/отключить. Нажав и удерживая один из сценариев в списке, можно получить доступ к меню с подробной информацией о нем. Нажмите кнопку для Окна...
- Page 106 Для программирования интервалов времени выберите Таймеры 1 иконку Выберите один из интервалов D для установки времени начала и времени окончания действия с помощью кнопок + – E. При нажатии иконки появится сообщение с вопросом, Вс. Пн. Вт. Ср. Чт. Пт Сб.
- Page 107 Нагрузка Каждый модуль управления энергопотреблением OH/ GEN может контролировать работу до 8 электроприборов (система подключает и отключает электроприборы таким образом, чтобы общее потребление не превышало значе- Свет Сценарии Нагрузка ний, предусмотренных договором). Выберите иконку для доступа к списку подключен- Окна Таймеры...
- Page 108 Охранная сигнализация Выберите иконку для доступа к списку сценариев охранных устройств (макс. 32) B. Одним касанием, с помощью присвоенного контрольной Свет Сценарии Нагрузка панели кода C, можно активировать сценарий. Нажав и удерживая один из охранных сценариев в списке, можно получить доступ к меню с подробной информацией о...
- Page 109 Реле Выберите иконку для доступа к списку реле (макс. 40) B. С помощью этой функции можно отслеживать состояние Сценарии Нагрузка Реле реле в системе. Реле могут быть: открыты; Таймеры Безопасн. закрыты. Одним касанием можно разомкнуть или замкнуть реле, а при продолжительном нажатии на одно из реле в списке появится...
- Page 110 Температурные настройки На главной странице нажмите иконку , затем ля Настройки выбора режима работы всей системы. Настройки Система управления климатом в помещении ПОЛНО- Дисплей термической зоны СТЬЮ отключается B. Переключение системы в режим охлаждения C. Установка События времени и даты Переключение...
- Page 111 События Выберите иконку для отображения списка событий. Настройки Возможны следующие события: Настройки термической Дисплей зоны Контакты разомкнуты Контакты замкнуты Установка События Превышение верхнего температурного порога времени и даты Превышение нижнего температурного порога Датчик окна Превышение верхнего порога влажности Превышение нижнего порога влажности Системная...
- Page 112 Единица измерения Нажмите иконку для изменения единицы измерения Настройки температуры. Звук Языки Пароль Единица измерения Языки и информация об устройстве Нажмите иконку для изменения языка интерфейса. Настройки Нажмите иконку для проверки версии установленного Информация устрой- Языки ства программного обеспечения. Пароль Изменение...
- Page 113 Потребление энергии Нажмите иконку для просмотра списка счетчиков (макс. 10), установленных в системе. Климат ПРИМЕЧАНИЕ: если в системе установлен и настроен хотя бы один счетчик электроэнергии, на главной Внеш. показатели странице будут приведены показания главного счет- чика A. Выберите счетчик B для отслеживания потребления C. При...
- Page 114 Управление температурными зонами На главной странице выберите иконку для отображения температурных зон. Климат С помощью стрелок можно просматривать различ- Внеш. показатели ные температурные зоны. За каждой зоной закреплены термостаты, температурные датчики или локальные кон- трольные панели. На этой странице можно вывести по каждой зоне сле- дующую...
- Page 115 Свойства температурной зоны Каждое устройство температурной зоны может быть Настройки термической зоны настроено для измерения и контроля температуры в помещении с учетом характеристик окружающей среды в месте установки, потребностей пользователя и техниче- Свойства Архив комфорта ских характеристик системы. В зависимости от характеристик устройства некото- рые...
- Page 116 При нажатии иконки появится сообщение с вопросом, Свойства Гостиная сохранять изменения в настройках или нет. Нижний порог влажности При нажатии на F и F можно установить мини- мальные (нижний порог влажности) и максимальные Верхний порог влажности (верхний порог влажности) пороговые значения влаж- ности, при...
- Page 117 В этом меню можно выбрать один из двух типов темпе- Свойства ратурного контроля: - пропорционально-интегральное управление (PI) M; Температурные параметры - управление с температурным дифференциалом (Дифф.) Отклонение температуры Отклонение влажности Для выбора одного из двух возможных типов управления нажмите...
- Page 118 Управление температурным дифференциалом L Температурные параметры Гостиная Этот тип регулирования рекомендуется к применению в системах с большим перепадом температур окружающе- го воздуха и сложностями в регулировании. Температурный дифференциал регулируется в диапазоне Дифф. от 0,0°C до 2,0 °C. Если температурный дифференциал установлен на 0,2°C, а...
- Page 119 Контроль влажности Свойства Гостиная Если в рассматриваемой зоне предусмотрен осушитель воздуха, можно установить контрольное значение влаж- Контроль влажности ности. При превышении заданного значения включится осуши- Авт./Ручн. настройка температурного диапазона тель воздуха, если это действие было предварительно Блокировка клавиатуры запрограммировано.
- Page 120 Журнал значений температуры Гостиная A для просмотра показаний темпе- Нажмите иконку Настройки температурной зоны ратуры за последние 24 часа. m Для доступа к этой функции необходимо, чтобы Журнал комфорта Свойства устройство было включено и работало не менее 24 часов. При попытке просмотреть архив показаний до истечения...
- Page 121 Журнал влажности комфорт легкий дискомфорт умеренный или сильный дискомфорт. Это меню будет видно только в тех зонах, где ведется измерение влажности (THPLUS, TS4.3 и OH/SRI). Журнал комфорта Гостиная A для отображения индекса ком- Нажмите иконку фортности за последние 24 часа B.
- Page 122 Статистика A для подсчета времени работы системы Нажмите Гостиная Настройки температурной зоны при охлаждении и отоплении помещения B. Статистика Архив комфорта Архив комфорта Статистика Гостиная Время включения каждый день 1h 28min каждый месяц 52h 30min Автоматическая настройка и изменение программы Выберите...
- Page 123 Внешний вид графика меняется C, и можно увеличить или уменьшить значение температуры, переместив со- ответствующий сегмент на указанное время. На этой странице можно выбрать в том числе день изменения температурного профиля. Для регулировки температуры с точностью до четверти часа выберите день, нажмите иконку для...
- Page 124 Копирование графика температуры для других дней недели Выберите день недели, температурный график которого A нужно скопировать, коснитесь сегмента в верхней части экрана и выберите Вс. Пн. Вт. Ср. Чт. Пт Сб. Гостиная Выберите день, в который вы хотите вставить копируе- мый...
- Page 125 С помощью кнопок + – можно установить желаемое вре- Гостиная мя C. Устройство начинает обратный отсчет, по заверше- нии которого оно переходит из ручного режима управле- ния в автоматический, следуя заданной программе. На экране просмотра температурных зон будет изобра- жена иконка Установка...
- Page 126 Избранное В избранное можно добавить: зоны, светильники, сцена- Избранное рии, автоматические системы, таймеры, охранные сцена- рии и электроприборы. Гостиная Терраса Для добавления объекта в избранное необходимо нажать иконку в верхнем левом углу страницы, рядом с Гостиная Таймеры 2 названием устройства, на страницах с подробной инфор- мацией...
- Page 128 CAME S.p.A. Via Martiri Della Libertà, 15 Via Cornia, 1/b - 1/c 31030 Dosson di Casier 33079 Sesto al Reghena Treviso - Italy Pordenone - Italy (+39) 0422 4940 (+39) 0434 698111 (+39) 0422 4941 (+39) 0434 698434 www. came.com...
Need help?
Do you have a question about the TS4.3 and is the answer not in the manual?
Questions and answers