
Related Manuals for Kruger AIRSEC 3000


Summary of Contents for Kruger AIRSEC 3000
- Page 1 AIRSEC Bedienungsanleitung Deutsch Seite entfeuchten Français Page heizen Italiano Pagina kühlen English Page sanieren...
- Page 2 Hygrostatknopf Gerät ausgeschaltet Bouton de l’hygrostat Appareil arrêté Selettore igrostato Apparecchio spento Hygrostat dial Machine switched o Betriebslampe Normalbetrieb Lampe-témoin Operation normale Spia d’esercizio Funzionamento normale Normal operation Pilot light Anzeige Wasserbehälter Dauerbetrieb Lampe-témoin bac à eau Service continu Spia di controllo secchiello Funzionamento continuo Water container indicator light Permanent operation...
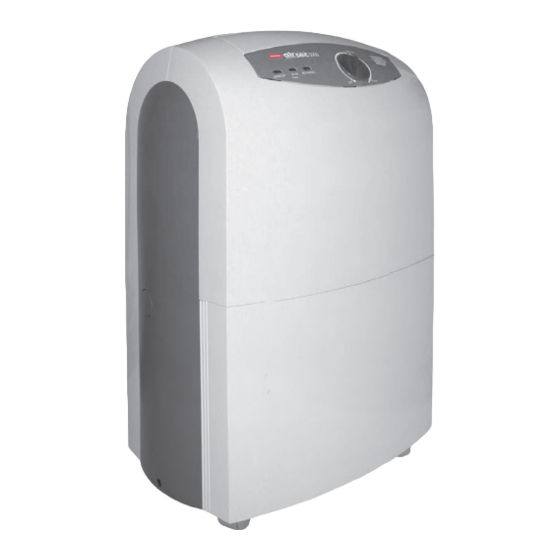
- Page 3 Luftfilter-Rahmen Grille d’aspiration Griglia d’aspirazione Air filter frame Luftfilter Filtre à air Filtro dell’aria Air filter Wasserbehälter Bac à eau Secchiello Water container Traggri Poignée Maniglia Carrying handle Luft-Austrittsklappe Volet de sortie d’air Deflettore d’emissione dell’aria Air outlet flap...
- Page 4 Vor dem Benutzen Verlängerungskabel nur dann verwenden, Bitte lesen Sie alle in dieser Gebrauchsanwei- wenn Sie sich zuvor von dessen einwand- sung aufgeführten Informationen aufmerk- freiem Zustand überzeugt haben. Bei sam durch. Sie geben Ihnen wichtige Hinwei- einer Kabelrolle ist das gesamte Kabel von se für den Gebrauch, die Sicherheit und den der Rolle zu ziehen.
- Page 5 fer-Schlangen und tropft als Wasser in das Korrekte Platzierung des Wasser eimers ( ) Sammelgefäss ab. Vor dem Austritt wird die kontrollieren. Luft durch den Kondensator wieder auf die Hygrostatrad ( ) auf gewünschten Wert Eingangstemperatur erwärmt. einstellen (in der Regel Position «B»). Anleitung Das Gerät arbeitet automatisch, d.h.
- Page 6 Gehäuse mit einem weichen trocke nen Tuch abwischen, bei starker Verschmut- zung ein feuchtes Tuch mit einem milden Reinigungsmittel verwenden. Luftfilter-Rahmen ( ) an der Einkerbung fassen und herausziehen. Weisses Filternetz mit einer Bürste oder Staubsauger entstauben (alle bis Wochen). Filterrahmen mit Filter ins Gerät einschieben.
- Page 7 B. Gerät läuft ununterbrochen Ist das Hygrostatrad auf die Position «B» eingestellt? Sind die Türen und Fenster geschlossen? Ist die Geräteleistung ausreichend für die Raumgrösse (max. m )? C. Das Gerät entfeuchtet nur ungenügend Ist die Luftzirkulation im Raum gewährlei- stet? Sind die Ansaug- und Ausblas-Ö...
- Page 8 Avant la premiere utilisation Le câble ne doit pas être en contact avec Lisez attentivement ce mode d’emploi, il des arêtes vives ou être écrasé. contient toutes les informations im portantes Seules des rallonges en parfait état sur l’utilisation, la sécurité et l’entretien de doivent être employées.
-
Page 9: Transport / Entreposage
Fonctionnement Ouvrir le clapet de sortie d’air sur la partie L’air humide ambiant est amené sur une bat- supérieure de l’appareil – ATTENTION: Il terie froide (évaporateur) au moyen d’un ven- est interdit de faire fonctionner l’appareil tilateur. L’humidité se condense sur les ser- avec le clapet fermé. - Page 10 Retirer la fiche d’alimentation. Essuyer le caisson avec un chi on doux; en cas de fort encrassement, utiliser un chi on imbibé d’un détergent doux. Saisir la grille d’aspiration ( ) aux encoches et la retirer. Dépoussiérer le filtre en fibres blanches à...
- Page 11 B. L’appareil fonctionne sans interrup- tion Est-ce que le bouton de l’hygrostat est réglé sur position «B»? Est-ce que les portes et les fenêtres sont fermées? Est-ce que la puissance de l’appareil est en rapport avec le volume du local (au max. m )? C.
-
Page 12: Avvertenze Di Sicurezza
Prima della messa in esercizio Il cavo d’alimentazione non va mai incas- Prima della messa in esercizio, vi invitia mo trato o fatto passare su spigoli taglienti. a leggere attentamente queste istru zio ni. Utilizzare eventuali prolunghe solo dopo Esse vi informano sull’uso, la sicu rezza e la averne appurato il perfetto stato. -
Page 13: Installazione
sulle serpentine dell’e va poratore e gocciola mettere in esercizio l’apparecchio a deflet- sotto forma di vapore acqueo nella bacinella tore chiuso! di rac col ta. Prima della reimmissione nel loca- Controllare il corretto posizionamento del le, l’aria viene riportata alla temperatura am- secchiello d’acqua ( ). - Page 14 zione permanente, cosicché non necessitano di manu ten zio ne. Togliere la spina dalla presa. Pulire il mobile con un panno morbido asciutto; in caso di sporco tenace utilizza- re un panno umido con un detergente non aggressivo. Estrarre la griglia d’aspirazione ( ) a errandola alle tacche.
- Page 15 B. L’apparecchio funziona ininterrotta- mente Il selettore dell’igrostato è posizionato su «B»? Le porte e finestre sono chiuse? La potenza dell’apparecchio è su ciente per la grandezza del locale (mass. m )? C. La deumidificazione è insu ciente È assicurata la circolazione dell’aria nel locale? Le aperture di aspirazione e di emissione sono libere?
-
Page 16: Safety Information
Before first use prior inspection has shown it to be in a Please read carefully through all the in- satisfactory condition. If use of a cable formation in these operating instruc tions. reel is planned, all the cable must be re- They contain important explanations con - moved from the reel before the cable can cerning usage, safety and main ten ance of... -
Page 17: Installation
System description appliance – IMPORTANT: The appliance A fan is used to draw the moist room air must not be operated with a closed flap. across the refrigeratory attached to the Check to see whether the water collecting cooling unit. The moisture condenses on the bucket ( ) is correctly positioned. - Page 18 Remove the mains plug from the wall socket. Wipe the housing with a soft, dry cloth. In the case of light soiling use a damp cloth with a mild cleaning agent. Grip the air filter frame ( ) at the indent and pull out.
- Page 19 B. The appliance operates continuously Is the hygrostat dial set to the «B» posi- tion? Are the doors and windows shut? Is the machine capacity su cient for the room size (max. m )? C. The appliance always dehumidifies insu ciently Is the air in the room free to circulate? Are the inlet and outlet vents unob- structed?
- Page 20 Krüger + Co. AG Winterhaldenstrasse Degersheim info@krueger.ch www.krueger.ch entfeuchten heizen kühlen Hotline 0848 370 370 sanieren...
Need help?
Do you have a question about the AIRSEC 3000 and is the answer not in the manual?
Questions and answers