Advertisement
Available languages
Available languages
Quick Links
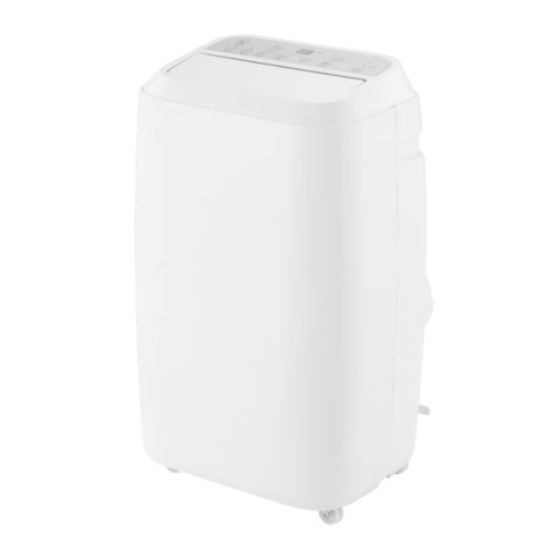
FR Climatiseur Mobile 12000 BTU
EN Portable Air Conditioner
NL Draagbare Airconditioner
A010A-12C
Modèle/Model :
REF 001967
Photo non contractuelle
Non-contractual photo
Foto is niet bindend
Importé par / Imported by / Ingevoerd door :
Euro-tech Distribution
37A rue César Loridan
59 910 Bondues
FRANCE
Advertisement

Related Manuals for Saneo A010A-12C


Summary of Contents for Saneo A010A-12C
- Page 1 FR Climatiseur Mobile 12000 BTU EN Portable Air Conditioner NL Draagbare Airconditioner A010A-12C Modèle/Model : REF 001967 Photo non contractuelle Non-contractual photo Foto is niet bindend Importé par / Imported by / Ingevoerd door : Euro-tech Distribution 37A rue César Loridan...
- Page 2 CONSIGNES DE SÉCURITÉ Lisez attentivement cette notice avant la première utilisation appareil conservez-la pour tout usage ultérieur. AVERTISSEMENT Ne pas utiliser de moyens pour accélérer le processus de dégivrage ou pour nettoyer, autres que ceux recommandés par le fabricant. L’appareil doit être stocké dans un local ne contenant pas de sources d’inflammation fonctionnant en permanence (par exemple : feux...
- Page 3 Cet appareil peut être utilisé par des enfants âgés d'au moins 8 ans et par des personnes ayant des capacités physiques, sensorielles ou mentales réduites ou dénuées d’expérience ou connaissance, s’ils elles) sont correctement surveillé(e)s instructions relatives à l’utilisation de l'appareil en toute sécurité...
- Page 4 En ce qui concerne l'installation correcte de l'appareil, référez-vous chapitre correspondant de la notice. Avant de brancher l’appareil, vérifiez que la tension du réseau électrique correspond à celle mentionnée sur la plaque signalétique de celui-ci. Ne jamais immerger l’appareil, le cordon d’alimentation ou la prise dans l’eau ou dans tout autre liquide.
- Page 5 ne peut être réparé que par un réparateur qualifié. Ne jamais brancher l’appareil avec des mains mouillées ou humides car vous risquez un choc électrique. Toujours bien éteindre et débrancher l’appareil avant de le déplacer ou avant d’entreprendre toute action de nettoyage ou de vidange. Cet appareil ne peut pas être branché...
- Page 6 Assurez-vous que les entrées et sorties d’air ne sont pas obstruées ou couvertes par des rideaux ou des vêtements suspendus. Le tuyau de drainage ne doit pas être installé à l’extérieur. Pour éviter de renverser de l’eau, videz la cuve d’eau avant de déplacer l’appareil.
- Page 7 Ne laissez jamais l’appareil sans surveillance à portée enfants, qu’il soit fonctionnement ou à l’arrêt. Débranchez toujours votre appareil après utilisation avant nettoyer. débranchez jamais l’appareil en tirant sur le cordon d’alimentation. Débranchez l'appareil lors de la vidange et du nettoyage.
- Page 8 Ne pas rester en contact direct avec l'air froid émis par l’appareil pendant une longue période. Cela peut détériorer vos conditions physiques et vous causer des problèmes de santé. Ne bloquez pas l'entrée d'air ou la sortie d'air, sinon la capacité de refroidissement sera affaiblie, même si le système s'arrête de fonctionner.
- Page 9 Ne pas mettre les doigts ou tout autre objet à l’intérieur des grilles d’entrée ou de sortie d’air. Le ventilateur tourne rapidement et pourrait vous blesser. Ne pas éclabousser our immerger l’appareil dans du liquide quelqu’il soit cela causerait des dommages irréversible à...
- Page 10 Il convient que toute personne appelée à travailler sur un circuit de fluides frigorigènes soit titulaire d’un certificat, valable et à jour, émanant d’une autorité d’évaluation accréditée par le secteur industriel et reconnaissant sa compétence pour manipuler en toute sécurité les fluides frigorigènes, conformément à...
- Page 11 Consignes de sécurité IMPORTANT ! Lisez attentivement cette notice avant l’installation et l’utilisation de cet appareil et conservez-la pour tout usage ultérieur. ATTENTION: - Ce climatiseur contient 210 g (voir le rating label au dos de l’appareil) de gaz réfrigérant R290. - Le gaz réfrigérant R290 respecte les normes européenes environnementales.
- Page 12 1. Le climatiseur est pour un usage d’intérieur. 2. Ne branchez jamais l’appareil sur une prise qui n’est pas installée correctement. 3. Ne jamais utiliser le climatiseur : a. Près d’une source de chaleur. b. Près d’un endroit sujet aux éclaboussures de l’huile.
- Page 13 7. Avant déplacer climatiseur, débranchez-le toujours et déplacez-le avec soin. 8. Afin d’éviter tout risque de feu, ne jamais couvrir l’appareil. 9. Avant le branchement du climatiseur, vérifiez que les prises sont aux normes nationales. 10. Ne laissez jamais l’appareil sans surveillance à...
- Page 14 climatiseur peut entraîner choc électrique. 16. Merci de respecter la réglementation de gaz du pays. 17. Ne bloquez pas l'entrée d'air ou la sortie d'air. 18. Ne jamais faire fonctionner l’appareil en branchant ou débranchant la prise principale, cela peut provoquer un choc électrique ou feu. 19.
- Page 15 Le câble doit être connecté à une prise de terre. Fig.1 1. Panneau arrière 2. Panneau de contrôle 3. Entrée d’air 4. Cordon d’alimentation 5. Roulettes...
- Page 16 ACCESSOIRES Fig.2...
- Page 17 Panneau de commande Télécommande...
- Page 18 1. POWER – Bouton Marche/Arrêt 2. MODE – Bouton fonction 3. TIMER - Minuteur 4. SPEED – Vitesse du ventilateur 5. TEMP+ - - Augmentation de température 6. TEMP- - Diminution de température 7. SLEEP – Mise en veille 8. SWING – Oscillation INSTALLATION Il est important que les consignes d’installation ci-dessous soient respectées pour réussir l’installation de ce climatiseur local portatif.Si vous éprouvez des difficultés ou avez des questions...
- Page 19 Fig.6 Vérifiez que le tuyau d’échappement est installé correctement. Précautions à prendre: Lors de l’utilisation des fonctions refroidissement et déshumidification, garder un intervalle d’au moins 3 minutes entre chaque fonction. La prise est bien adaptée pour l’utilisation de ce climatiseur. Ne branchez pas plusieurs appareils sur la même prise.
- Page 20 Tr<23 ℃ 23℃≤Tr < Tr ≥26℃ Rooom 26℃ Temperature (Tr) Mode Heating Dehumidify Cooling Set Temperature 21℃ 23℃ 25℃ 2. Fonction refroidissement Appuyez sur le bouton ‘Mode’ (fonction) jusqu’à l’apparition de l’icône ‘Cool’. Appuyez sur le bouton “DOWN” ou “UP” afin de sélectionner la température désirée.
- Page 21 7. Circulation d’air Allumez l’appareil et appuyez sur le bouton “SWING” afin d’activer cette fonction. Réappuyez sur le même bouton afin de l’arrêter. 8. Fonction veille Quand le climatiseur est en mode refroidissement, appuyez sur le bouton “SLEEP” afin de sélectionner la température. La température monte d’un degré...
- Page 22 Fig.8 Installation temporaire 1. Tordez les 2 bouts du tuyau d’évacuation afin de les mettre dans les pinces ‘carré’ et ‘plate’. 2. Insérez la pince carré dans l’ouverture au dos de l’appareil (voir Fig.8). 3. Placez l’autre bout du tuyau d’évacuation à la fenêtre.
- Page 23 Installation du support fenêtre Comme illustré ci-dessous, vérifiez la taille minimum et maximum de la fenêtre. ENTRETIEN 1. Avant nettoyage, débranchez l’appareil. 2. N’utilisez pas de produits chimiques pour nettoyer l’appareil. 3. Nettoyez jamais l’appareil directement sous eau ou tout autre liquide. 4.
- Page 24 1. Filtre à air - Le filtre doit être nettoyé toutes les 2 semaines afin d’enlever les poussières et saletés: a. Ouvrez la grille de l’entrée de l’air et retirez le filtre. b. Nettoyez le filtre avec du détergent dans de l’eau tiède et laissez secher.
- Page 25 DIAGNOSTIC DES PANNES Problème Possibles Causes Solutions 1. L’appareil ne s’allume Le voyant ‘pleine d’eau’ Videz le réservoir clignote et le réservoir est plein La température de la pièce Réinitialisez la température supérieure à température réglée (Mode chauffage) La température de la pièce Réinitialisez la température inférieure à...
- Page 26 bruit provient Ceci est normal l’écoulement du réfrigérant à l’intérieur de l’appareil 5. Code E0 Le capteur de température Remplacez capteur (l’appareil peut fonctionner ne fonctionne pas sans le capteur) 6. Code E2/E4 Le réservoir est plein Videz le réservoir 6.
- Page 27 titulaire d’un certificat, valable et à jour, émanant d’une autorité d’évaluation accréditée par le secteur industriel et reconnaissant sa compétence pour manipuler en toute sécurité les fluides frigorigènes, conformément à la spécification d’évaluation reconnue dans le secteur industriel concerné. Les opérations de service ne doivent être réalisées que dans le respect des recommandations du fabricant des équipements.
- Page 28 Absence de sources d'inflammation Aucune personne réalisant des travaux liés à un système de réfrigération impliquant l'exposition de tuyaux qui contiennent ou ont contenu des fluides frigorigènes inflammables ne doit utiliser des sources d'inflammation d'une manière qui peut conduire à un risque d'incendie ou d'explosion.
- Page 29 Vérifications des dispositifs électriques Les opérations de réparation et d'entretien des composants électriques doivent inclure des vérifications de sécurité initiales et des procédures de contrôle des composants. En présence d'un défaut pouvant compromettre la sécurité, aucune alimentation électrique ne doit être connectée au circuit avant que le défaut n'ait été...
- Page 30 peuvent entraîner l'inflammation du fluide frigorigène dans l'atmosphère à la suite d'une fuite. Câblage Vérifier que le câblage ne sera pas soumis à l'usure, la corrosion, une pression excessive, des vibrations, des bords tranchants ou tout autre effet environnemental défavorable. La vérification doit aussi tenir compte des effets du vieillissement ou des vibrations continues des sources comme les compresseurs ou les ventilateurs.
- Page 31 La charge de fluide frigorigène doit être recueillie dans des bouteilles de récupération correctes. Le système doit être vidangé avec de l'azote exempt d'oxygène pour rendre l'élément sûr. Ce processus peut devoir être répété plusieurs fois. Ne pas utiliser d'air comprimé ou d'oxygène pour cette tâche.
- Page 32 le processus de récupération est supervisé à tout moment par une personne compétente; l'équipement de récupération et les bouteilles sont conformes aux normes appropriées. d. Pomper le système de fluide frigorigène, si possible. e. Si un vide n'est pas possible, un collecteur est réalisé pour récupérer le fluide frigorigène à partir de différentes parties du système.
- Page 33 Le fluide frigorigène récupéré doit être renvoyé à son fournisseur dans la bouteille de récupération correcte et la note correspondante de transfert de déchet doit être établie. Ne pas mélanger les fluides frigorigènes dans les unités de récupération et en particulier dans les bouteilles.
- Page 34 IMPORTANT SAFETY INSTRUCTIONS Please carefully read this instruction manual before using the appliance and keep it in a safe place for future reference. WARNING Do not use any means to accelerate the defrosting process or to clean, other than those recommended by the manufacturer.
- Page 35 reduced physical, sensory or mental capabilities or lack of experience and knowledge if they have been given supervision or instruction concerning the use of the appliance in a safe way and understand the hazards involved. Children must not play with the appliance. Cleaning and user maintenance must not be carried out by children without supervision.
- Page 36 appliance's rating label. Never immerse the unit, power cord or plug in water or any other liquid. Place the appliance on a stable, level and clear surface to avoid possible vibrations and unpleasant noises. Never use the appliance: - if the cable or plug is damaged, - if you notice any malfunction, - if the appliance has fallen or been damaged.
- Page 37 This appliance is intended for domestic use in your home only, excluding any industrial or commercial use. Do not place this appliance near a heat source or use it in the presence of explosive or flammable vapours. Do not cover the device with fabric or place any objects on the unit.
- Page 38 If you smell smoke when you turn the appliance on or see smoke, unplug the unit immediately from the outlet. The unit must be installed at a distance of 50 cm from a wall or any other object. Never leave the appliance unattended within reach of children, whether it is in use or not.
- Page 39 period of time. This can worsen your physical conditions and cause health problems. Do not block the air inlet or outlet, otherwise the cooling capacity will be reduced, even if the system stops working. Close windows and doors, otherwise the cooling capacity will be reduced.
- Page 40 Do not splash or immerse the appliance in any liquid as this will cause irreversible damage to its operation. Service operations may only be carried out in accordance with the recommendations in this manual. appliance must stored well-ventilated area where the floor area corresponds to the floor area indicated on the product rating label.
-
Page 41: Safety Instructions
accordance with the assessment specification recognised in the industry sector concerned. Service operations must only be carried out in accordance with the recommendations of the equipment manufacturer. Maintenance and repair operations requiring the assistance of other qualified persons must be carried out under the supervision of the person competent for the use of flammable refrigerants. - Page 42 - If the appliance is installed, used or stored in a non-ventilated room, the room must be designed to prevent the accumulation of refrigerant leaks that can cause a risk of fire or explosion if the refrigerant is exposed to electric heating, gas or other heat sources.
- Page 43 5. Always keep unit upright during transport and storage. 6. Always unplug the unit before cleaning it. 7. Before moving the air conditioner, always disconnect it and move it carefully. 8. To avoid any risk of fire, never cover the unit.
-
Page 44: Important Points
15. Do not pull or make any changes to the cable or immerse it in water. Improper use of the cable can cause damage to the air conditioner and may result in electric shock. 16. Please comply with national regulations 17. - Page 45 - The cable must be connected to a grounded outlet. Fig.1 6. Rear panel 7. Control panel 8. Air inlet 9. Power cord 10. Wheels...
- Page 46 PARTS Fig.2...
- Page 47 Control Panel Remote Control...
- Page 48 1. POWER – On/Off switch 2. MODE – Mode selector 3. TIMER – Hourly programming 4. SPEED – Fan speed selector 5. TEMP+ - Temperature selector up 6. TEMP- -Temperature selector down 7. SLEEP – Standby mode 8. SWING – Oscillation INSTALLATION It is important that the installation instructions below are carefully followed to successfully install this portable air conditioner.
- Page 49 Fig.6 Check that the exhaust pipe is installed correctly. Precautions to be taken: - When using the cooling and dehumidifying functions, keep an interval of at least 3 minutes between each function. - The plug is well adapted for use with this air conditioner. - Do not connect several devices to the same outlet.
- Page 50 11. Cooling function Press the 'Mode' button (function) until the 'Cool' icon appears. Press the “DOWN” or “UP” button to select the desired temperature. Press the ‘Wind’ button to select the wind speed. 12. Dehumidifiying function - Press the 'Mode' button (function) until the 'Dehumidify' icon appears. -The temperature is automatically set 2 degrees lower than the room temperature.
- Page 51 Continuous evacuation When the unit is not in use for a period of time, remove the rubber part from the exhaust outlet underneath the unit and connect the exhaust hose to the clamp on the bottom of the air conditioner. The water from the tank drains out.
- Page 52 Fig.8 Temporary installation Twist the 2 ends of the exhaust pipe to put them in the "square" and "flat" clamps. Insert the square clamp into the opening on the back of the unit (see Fig. 8). Place the other end of the exhaust pipe at the window.
-
Page 53: Maintenance
Window Kit Installation As shown below, check the minimum and maximum size of the window. MAINTENANCE 1. Before cleaning, unplug the unit. 2. Do not use chemicals to clean the unit. 3. Never clean the unit directly under water or any other liquid. -
Page 54: Troubleshooting
1. Air filter The filter must be cleaned every 2 weeks in order to remove dust and dirt : d. Open the air inlet grill and remove the filter. e. Clean the filter with detergent in luke warm water and leave it to dry. f. - Page 55 2. The room does not cool Doors and windows are not Close doors and windows. down enough. closed. There are sources of heat in Remove or switch off the the room. sources of heat. The exhaust pipe is not Connect the exhaust pipe or connected or is blocked.
- Page 56 The images are not contractual. SELECTIVE COLLECTION OF ELECTRICAL AND ELECTRONIC WASTE Electrical products should not be disposed of with household products. According to the European Directive 2012/19/EU for the disposal of electrical and electronic equipment and its implementation in national law, used electrical products must be collected separately and disposed of at the collection points provided for this purpose.
- Page 57 - General work area All maintenance personnel and other persons working in the local area must be informed of the nature of the work performed. Any work in confined spaces must be avoided. The area surrounding the workspace must be divided into sections. Ensure that conditions within the area have been made safe by controlling flammable materials.
- Page 58 presence of refrigerant; - the marking of the equipment continues to be visible and legible. Marks and symbols that are illegible must be corrected; - the refrigeration pipe or components are installed in a position where they are not likely to be exposed to a substance that may corrode elements containing refrigerants, unless these elements are constructed with materials that are inherently resistant to corrosion or that are adequately protected against corrosion.
- Page 59 Intrinsically safe components are the only types that can be worked on when they are energised in a flammable atmosphere. The test equipment must have the correct rated characteristics. Replace components only with parts specified by the manufacturer. Other parts can cause the refrigerant to ignite in the atmosphere as a result of a leak.
- Page 60 The refrigerant charge must be collected in correct recovery bottles. The system must be drained with oxygen-free nitrogen to make the element safe. This process may have to be repeated several times. Do not use compressed air or oxygen for this task. Drainage must be achieved by cutting the vacuum in the system with oxygen-free nitrogen and continuing to fill until the operating pressure is reached, then venting into the atmosphere and finally creating the vacuum.
- Page 61 instructions. h. Do not allow the bottles to overflow. (Not more than 80% of liquid charge by volume). i. Do not exceed the maximum working pressure of the cylinder, even temporarily. j. When the cylinders have been properly filled and the process is complete, ensure that the cylinders and equipment are removed from the site quickly and that all equipment isolation valves are closed.
- Page 62 VEILIGHEIDSINSTRUCTIES Lees deze handleiding zorgvuldig door voordat u dit product voor de eerste keer gebruikt en bewaar het voor toekomstig gebruik. WAARSCHUWING Gebruik geen andere middelen ontdooiproces te versnellen of te reinigen dan welke door fabrikant worden aanbevolen. Het apparaat moet worden opgeslagen in een ruimte geen permanent...
- Page 63 Het toestel moet geïnstalleerd, gebruikt en opgeslagen worden in een ruimte met een vloeroppervlakte van meer dan 10.1 m². Deze apparatuur mag worden gebruikt door kinderen van 8 jaar en ouder en door personen verminderde fysieke, zintuiglijke mentale vermogens of zonder ervaring of kennis, indien zij naar behoren worden begeleid of indien hen instructies voor het veilig gebruik van de apparatuur zijn gegeven en de...
- Page 64 serviceafdeling personen vergelijkbare kwalificatie gevaar voorkomen. Voor de juiste installatie van het apparaat, zie het betreffende hoofdstuk van de handleiding. Controleer voor het aansluiten van het toestel of de spanning van de voeding overeenkomt met de spanning die op het typeplaatje van het toestel staat aangegeven.
- Page 65 gerepareerd door gekwalificeerde servicetechnicus. Sluit het apparaat nooit aan met natte of vochtige handen, omdat dit een elektrische schok kan veroorzaken. Schakel het apparaat altijd uit en ontkoppel het voordat u het verplaatst of voordat u reinigings- of afvoerwerkzaamheden uitvoert. Dit apparaat kan niet worden aangesloten op een stekkerdoos met andere apparaten of met een verlengsnoer.
- Page 66 Zorg ervoor dat de luchtinlaten en -uitlaten niet worden geblokkeerd of afgedekt door gordijnen of hangende kleding. De afvoerbuis mag niet buitenshuis worden geïnstalleerd. Om te voorkomen dat er water wordt gemorst, moet u het waterreservoir legen voordat u het apparaat verplaatst.
- Page 67 Laat het toestel nooit onbeheerd achter binnen het bereik van kinderen, of het nu in werking is of niet. Trek altijd de stekker van het apparaat uit het stopcontact na gebruik en voor het reinigen. Haal nooit de stekker uit het stopcontact door aan het netsnoer te trekken.
- Page 68 uitgestoten. Dit kan uw lichamelijke conditie verergeren gezondheidsproblemen veroorzaken. Blokkeer de luchtinlaat of -uitlaat niet, anders wordt de koelcapaciteit verminderd, zelfs als het systeem stopt met werken. Sluit ramen en deuren, anders wordt de koelcapaciteit verminderd. luchtfilter vuil koelcapaciteit afnemen. Reinig het luchtfilter regelmatig.
- Page 69 Plaats geen vingers of andere voorwerpen in de luchtaanzuig- uitblaasroosters. ventilator draait snel en kan u pijn doen. Dompel het apparaat niet onder in vloeistof van welke aard dan ook, omdat dit onomkeerbare schade aan de werking van het apparaat veroorzaakt.
- Page 70 ontvlambare koudemiddel zouden kunnen vrijkomen. Elke persoon die aan een koelmiddelcircuit moet werken, moet in het bezit zijn van een geldig en actueel certificaat van een door de industrie geaccrediteerde keuringsinstantie die zijn bekwaamheid erkent om veilig met koelmiddelen om te gaan, in overeenstemming met de in de betrokken industriesector erkende beoordelingsspecificatie.
- Page 71 Veiligheidsinstructies BELANGRIJK! Lees deze handleiding zorgvuldig door voordat u dit apparaat installeert en gebruikt en bewaar deze voor toekomstig gebruik. LET OP: - Deze airconditioner bevat 210 g (zie typeplaatje op de achterkant van de unit) koudemiddelgas R290. - Het koudemiddel R290 voldoet aan de Europese milieunormen.
- Page 72 - Het apparaat moet met zorg worden opgeslagen voorkomen airconditioner uitvalt. 1. De airconditioner is alleen voor gebruik binnenshuis. 2. Sluit de unit nooit aan op een stopcontact dat niet correct is geïnstalleerd. 3. Gebruik nooit de airconditioner: a. In de buurt van een warmtebron. b.
- Page 73 20. Trek altijd eerst de stekker uit het stopcontact voordat apparaat schoonmaakt. 21. Voordat u de airconditioner verplaatst, moet u deze altijd eerst loskoppelen en voorzichtig verplaatsen. 8. Om brandgevaar te voorkomen, mag u het apparaat nooit afdekken. 9. Voordat u de airconditioner aansluit, moet u controleren uitgangen overeenstemming...
- Page 74 13.GWP: R290:3 14. Deze unit mag alleen worden gerepareerd door een gekwalificeerde reparateur. 15. Trek of wijzig de kabel niet aan de kabel en dompel hem niet onder in water. Onjuist gebruik van de kabel kan schade aan de airconditioner veroorzaken en kan leiden tot elektrische schokken.
- Page 75 Belangrijke punten: Schakel geval schade airconditioner uit, trek de stekker uit het stopcontact en neem contact op met een geautoriseerde servicetechnicus. - De kabel moet worden aangesloten op een geaard stopcontact.
- Page 76 Fig.1 1. Achterpaneel 2. Bedieningspaneel 3. Luchtinlaat 4. Stroomkabel 5. Wielen Toebehoren 1. Hoofd airconditioner 2. Hetelucht-uitlaatslang 3. Slangconnector (einde raam) 4. Slangconnector (einde airconditioner) 5. Venster kit 6. Afstandsbediening...
- Page 77 Bedieningspaneel Afstandsbediening...
- Page 78 1. POWER – Vermogen 2. MODE – Modus 3. TIMER - Timer 4. SPEED – Snelheid 5. TEMP+ - - Temperatuurstijging 6. TEMP- - Temperatuurverlaging 7. SLEEP – Reservemodus 8. SWING – Oscillatie INSTALLATIE Het is belangrijk dat de onderstaande installatie-instructies worden opgevolgd om deze draagbare lokale airconditioner met succes te installeren.
- Page 79 Fig.6 Controleer of de uitlaatpijp correct is geïnstalleerd. Te nemen voorzorgsmaatregelen: Houd bij gebruik van de koel- en ontvochtigingsfuncties een interval van minstens 3 minuten tussen elke functie aan. De stekker is zeer geschikt voor gebruik met deze airconditioner. Sluit niet meerdere apparaten op dezelfde uitgang aan. Stroomvoorziening: AC220-240V, 50HZ Automatische functie - Selecteer afhankelijk van de kamertemperatuur de gewenste functie:...
- Page 80 2. Koelfunctie - Druk op de knop 'Modus' (functie) tot het pictogram 'Koelen' verschijnt. - Druk op de knop "DOWN" of "UP" om de gewenste temperatuur te selecteren. - Druk op de knop 'Wind' om de windsnelheid te selecteren. 3. Ontvochtigingsfunctie - Druk op de knop 'Modus' (functie) tot het pictogram 'Ontvochtigen' verschijnt.
- Page 81 9. Evacuatie De tank is uitgerust met een controlelampje dat oplicht wanneer het waterniveau het maximale niveau overschrijdt. (Als de waterpomp beschadigd is, verwijder dan de rubberen punt onder het apparaat om het water af te voeren). Continue evacuatie Wanneer het apparaat gedurende een bepaalde tijd niet wordt gebruikt, verwijdert u de rubberen punt uit de uitlaatopening onder het apparaat en sluit u de uitlaatslang aan op de klem aan de onderkant van de airconditioner.
- Page 82 Fig.8 Tijdelijke installatie 1. Draai de 2 uiteinden van de uitlaatpijp om ze in de "vierkante" en "platte" klemmen te plaatsen. 2. Steek de vierkante klem in de opening aan de achterkant van het apparaat (zie Fig. 8). 3. Plaats het andere uiteinde van de uitlaatpijp bij het raam.
- Page 83 De venstersteun installeren Zoals hieronder getoond, controleer de minimale en maximale grootte van het venster. ONDERHOUD 1. Trek de stekker van het apparaat uit het stopcontact voordat u het reinigt. 2. Gebruik geen chemicaliën om het apparaat schoon te maken. 3.
- Page 84 1.Luchtfilter - Het filter moet om de 2 weken worden gereinigd om stof en vuil te verwijderen: g. Open het luchtinlaatrooster en verwijder het filter. h. Reinig het filter met afwasmiddel in warm water en laat het drogen. i. Als het filter eenmaal droog is, plaats het terug in het rooster.
- Page 85 STORINGSDIAGNOSE Probleem Mogelijke oorzaken Oplossingen 1. Het apparaat wordt niet indicatorlampje "vol Leeg de tank ingeschakeld water" knippert en de tank is Stel temperatuur kamertemperatuur opnieuw in hoger dan de ingestelde temperatuur (verwarmingsmodus) kamertemperatuur Stel temperatuur lager dan de ingestelde opnieuw in temperatuur (koelmodus) 2.
- Page 86 4. Geluiden Het apparaat is geplaatst op Plaats het apparaat op een een oppervlak dat niet vlak vlakke ondergrond Het geluid komt van de Dit is normaal koelmiddelstroom in de unit 5. Code E0 temperatuursensor Vervang de sensor (het werkt niet apparaat kan zonder sensor werken) 6.
- Page 87 SERVICEWERKZAAMHEDEN Dit document beschrijft de voorzorgsmaatregelen voor het gebruik door personeel dat verantwoordelijk is voor de onderhoudswerkzaamheden. Elke persoon die aan een koelmiddelcircuit moet werken, moet in het bezit zijn van een geldig en actueel certificaat van een door de industrie geaccrediteerde keuringsinstantie die zijn bekwaamheid erkent om veilig met koelmiddelen om te gaan, in overeenstemming met de in de betrokken industriesector erkende beoordelingsspecificatie.
- Page 88 Aanwezigheid van brandblussers Indien werkzaamheden die warmte veroorzaken aan koelapparatuur of de bijbehorende onderdelen ervan moeten worden uitgevoerd, moeten geschikte brandbeveiligingsapparatuur binnen handbereik beschikbaar zijn. Een droog poeder of CO2-blusser moet in de buurt van de laadplaats worden geplaatst. Afwezigheid van ontstekingsbronnen Personen die werkzaamheden in verband met een koelsysteem uitvoeren waarbij leidingen die ontvlambare koelmiddelen bevatten of hebben bevat, mogen geen ontstekingsbronnen gebruiken op een wijze die tot brand of explosiegevaar kan leiden.
- Page 89 deze elementen zijn vervaardigd van materialen die inherent bestand zijn tegen corrosie of die voldoende beschermd zijn tegen corrosie. Verificaties van elektrische apparaten Reparatie- en onderhoudswerkzaamheden aan elektrische componenten moeten de eerste veiligheidscontroles en inspectieprocedures voor componenten omvatten. In geval van een storing die de veiligheid in gevaar kan brengen, mag er geen stroomtoevoer op het circuit worden aangesloten totdat de storing naar tevredenheid is verholpen.
- Page 90 Intrinsiek veilige componenten zijn de enige types die kunnen worden bewerkt wanneer ze onder spanning staan in een brandbare atmosfeer. De testapparatuur moet de juiste nominale eigenschappen hebben. Vervang componenten alleen door onderdelen die door de fabrikant zijn gespecificeerd. Andere onderdelen kunnen ervoor zorgen dat het koudemiddel in de atmosfeer ontbrandt als gevolg van een lek.
- Page 91 gevolgd: Verwijder het koelmiddel; spoel het circuit met een inert gas; ga verder met de evacuatie; opnieuw zuiveren met een inert gas; open het circuit door te knippen of te solderen. De koelmiddelvulling moet in de juiste terugwinningsflessen worden opgevangen. Het systeem moet worden afgevoerd met zuurstofvrije stikstof om het element veilig te maken.
- Page 92 b. Elektrisch isoleren van het systeem. c. Voordat u met de procedure begint, dient u zich ervan te vergewissen dat het volgende in orde mechanische behandelingsapparatuur is beschikbaar, indien nodig, voor de behandeling van koelvloeistofflessen; alle persoonlijke beschermingsmiddelen beschikbaar zijn en correct worden gebruikt; het herstelproces staat te allen tijde onder toezicht van een bevoegd persoon;...
- Page 93 elektrische componenten zijn afgedicht om ontsteking te voorkomen in het geval van het vrijkomen van koelmiddel. Raadpleeg in geval van twijfel de fabrikant. Het teruggewonnen koelmiddel moet in de juiste terugwinningsfles aan de leverancier worden teruggegeven en het bijbehorende afvaltransportnota moet worden opgesteld. Meng geen koelmiddelen in terugwinningsinstallaties en in het bijzonder niet in flessen.
Need help?
Do you have a question about the A010A-12C and is the answer not in the manual?
Questions and answers