Advertisement
Advertisement
Table of Contents

Related Manuals for ABI Attachments ABI Arena Rascal Pro


Summary of Contents for ABI Attachments ABI Arena Rascal Pro
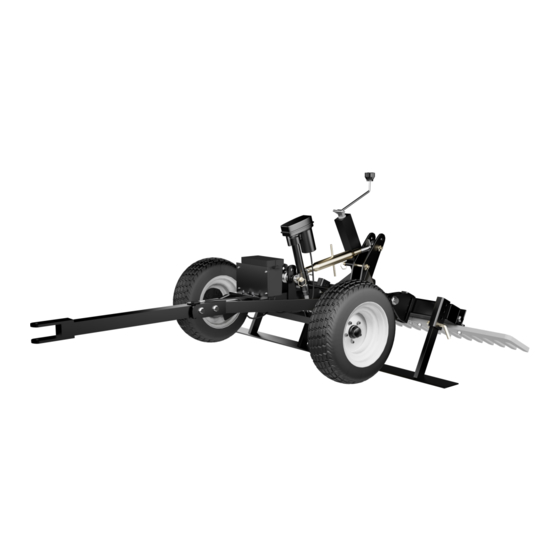
- Page 1 Rev A | 11-2-2020 Setup Guide ABI Arena Rascal Pro...
- Page 2 Welcome To The Family! On behalf of the ABI family we would like to thank you for your recent purchase of your ABI Arena Rascal Pro. Our Company’s goal is to provide you, our customer; with innovative, quality tools as well as first rate customer service.
-
Page 3: Safety Precautions
Serious injury or even death could result from falling off the tractor. • Operate the ABI Arena Rascal Pro in the daylight or under good artificial light. Operator should always be able to clearly see where they are going. -
Page 4: Operation Safety
Operation Safety • The use of this equipment is subject to certain hazards which cannot be prevented by mechanical means or product design. All operators of this equipment must read and under stand this manual, paying particular attention to safety and operating instructions, prior to using. -
Page 5: Initial Setup
Initial Setup Step 1: Step 3: Remove the plastic wrap from your Rascal. The best way to Next you will cut the banding that straps the Rascal to the do this is by using a utility knife and to cut around the base pallet. - Page 6 Step 5: Step 7: Locate the pin securing the gold top link to the tower Use the rear jack to adjust the finish rake turning it on the rear of the Rascal (refer to the Figure 1). Remove clockwise, lowering the finish rake. This will lower the gold pin that is holding the top link in place to keep the hitch down to help match the height of your tow the tool in the upright position during shipping.
- Page 7 Components Scarifying Teeth The scarifying teeth loosen the ground to eliminate hard spots and easily penetrate compacted arena footing and gravel driveway material. They are primarily used in arena renovation and gravel driveway work to break up compaction. Bolt On Scarifier Tips The Rascal has replaceable bolt on tips on the scarifying teeth.
- Page 8 Finish Rake The rear rake pulverizes and breaks up clumps of material and leaves a beautiful signature finish behind in the arena. By adjusting the rear manual jack, the Arena Rascal Pro’s 1/2” thick hardened-steel-rake, can pivot up to 90° into a variety of finishing and grading positions.
- Page 9 Setting up for use with profile blades On a flat surface, raise the wheels of the Rascal off the ground. It may be helpful to rest the wheels on some blocks for this adjustment, otherwise you can rest the blades on the ground. You can then lower the blade to the depth you want it to run in the arena.
- Page 10 Attaching the Rascal to a tow vehicle Back up the tow vehicle within close range of the Rascal tongue. Put the tow vehicle in park or block up the wheels and turn off the tow vehicle. Move the Rascal as needed to allow the tongue of the Rascal to sit closer to the pin hitch receiver on the tow vehicle. Raise or lower the wheels of the Rascal, using the square hand jack located on the front of the Rascal;...
-
Page 11: Optional Attachments
Optional Attachments Electric Actuator The optional electric acuator replaces the manual square hand jack to raise and lower the wheel system on the Rascal. This allows the operator to raise and the unit from the seat of the tow vehicle using a switch secured to the handlebars or a wireless remote. -
Page 12: Maintenance
Maintenance Wheels and Hubs Make sure to check the pressure in the tires to ensure they are properly inflated. If the tires look to be low on air, fill them until they reach the manufacturer’s suggested PSI. The proper PSI for the tire can be located on the side wall of the tire. - Page 13 Scarifier Tips and Shanks Guide The tip on the left is worn and the tip on the right is new. The while line shows the maximum wear point before there is damage to the shank. Going much higher than the white line will mean that the shank will need to be replaced.
- Page 14 Contact Information Customer Support ABI Attachments, Inc Email: support@abiattachments.com 520 S. Byrkit Ave. Phone: 877-788-7253 Mishawaka, IN 46544 Website: www.abisupport.com To order parts or to speak to one of ABI’s Customer Service Representatives contact us Monday to Friday 9am to 5pm EST.
Need help?
Do you have a question about the ABI Arena Rascal Pro and is the answer not in the manual?
Questions and answers