Table of Contents
Advertisement
Quick Links
Item #589 776
Model #GFS00470C
USE AND CARE GUIDE
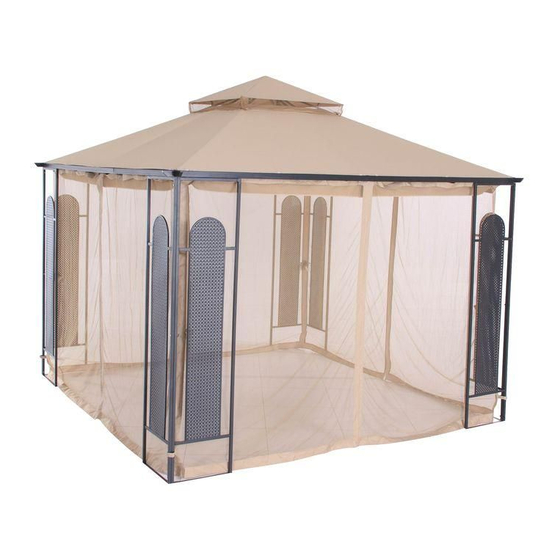
CHRISTY GAZEBO
Questions, problems, missing parts? Before returning to the store,
call Hampton Bay Customer Service.
8 a.m. - 7 p.m., EST, Monday - Friday, 9 a.m. - 6 p.m., EST, Saturday
1-855-HD-HAMPTON
HAMPTONBAY.COM
THANK YOU
We appreciate the trust and confidence you have placed in Hampton Bay through the purchase of this gazebo. We strive to continually create
quality products designed to enhance your home. Visit us online to see our full line of products available for your home improvement needs.
Thank you for choosing Hampton Bay!
Advertisement
Table of Contents

Related Manuals for HAMPTON BAY CHRISTY GFS00470C


Summary of Contents for HAMPTON BAY CHRISTY GFS00470C
- Page 1 THANK YOU We appreciate the trust and confidence you have placed in Hampton Bay through the purchase of this gazebo. We strive to continually create quality products designed to enhance your home. Visit us online to see our full line of products available for your home improvement needs.
-
Page 2: Table Of Contents
Table of Contents Table of Contents ............2 Pre-Assembly ..............3 Warranty ................. 2 Planning Assembly ..............3 What is Covered ...............2 Hardware Included ..............3 What is Not Covered ..............2 Package Contents ..............4 Safety Information ............2 Assembly ............... 5 Care and Cleaning ............18 Warranty 1 YEAR FRAME AND FABRIC WARRANTY WHAT IS COVERED... -
Page 3: Pre-Assembly
Pre-Assembly PLANNING ASSEMBLY Read all instructions before assembly. To avoid damaging this product, assemble it on a soft, non- abrasive surface such as carpet or cardboard. NOTE: More than one person may be required to assemble this product. HARDWARE INCLUDED NOTE: Hardware not shown to actual size. -
Page 4: Package Contents
Pre-Assembly (continued) PACKAGE CONTENTS Part Description Quantity Short top cross bar Long top cross bar Lower long canopy spoke Canopy frame Upper canopy spoke Flat tube Fabric hanger Corner fitting Lower short canopy spoke Side panel J Side panel K Lower canopy hub Upper canopy hub Small fabric cover... -
Page 5: Assembly
Assembly Assembling the top cross bar Attach the short top cross bar (A) to the long top cross bar (B) using M6x15 bolts and washers (AA). Repeat for second short top cross bar (A) and long top cross bar (B). - Page 6 Assembly (continued) Attaching the corner fitting to the top cross bar Insert the corner fitting (H) into top cross bars (A and B).
- Page 7 Assembly (continued) Attaching the fabric hangers Attach the fabric hangers (G) to the top cross bars (A and B) using M6x40 bolts and washers (CC) with M6 plastic washers (JJ). A&B...
- Page 8 Assembly (continued) Assembling the upper canopy Insert the four upper canopy spokes (E) into the upper canopy hub (M).
- Page 9 Assembly (continued) Assembling the lower canopy Insert the four lower long canopy spokes (C) into the four long tubes of the lower canopy hub (L). Insert the four canopy frames (D) into the four short tubes of the lower canopy hub (L). Insert the four lower short canopy spokes (I) into the four long tubes of the lower long canopy spokes (C).
- Page 10 Assembly (continued) Attaching the upper canopy to the lower canopy Insert the upper canopy spokes (E) into the lower long canopy spokes (C).
- Page 11 Assembly (continued) Attaching the canopy frame to the top cross bars Attach the canopy frame (D) to the top cross bars (A&B) using M6x15 bolts and washers (AA). Repeat for the remaining canopy frames (D). Attach the lower short canopy spoke (I) to the top cross bar (A&B) and corner fitting (H) using M6x15 bolts and washers(AA). Repeat for the remaining lower short canopy spokes (I).
- Page 12 Assembly (continued) Insert the flat tubes (F) into the large fabric cover (O).
- Page 13 Assembly (continued) Attaching the fabric cover Insert the upper canopy spoke (E) into the small fabric cover (N). Attach the large fabric cover (O) to the top cross bars (A&B) by inserting M6x15 bolts and washers (AA) throught the large fabric cover(O), the flat tube(F), and into the top cross bars(A&B) Stick the netting of the small fabric cover (N) to the edges of the large fabric cover (O).
- Page 14 Assembly (continued) Assembling the side panels Connect the side panels (K&J) by lining up the labels near the top, middle, and bottom of the panels and connecting them with M6x48 bolts and washers (DD) with M6 nuts (EE). Repeat for the remaining sets of the side panels (K&J).
- Page 15 Assembly (continued) Attaching the top cross bar to the side panels Attach the short top cross bar (A) to the side panel (J), and the long connector bar (B) to the side panel (K) using M6x32 bolts and washers (BB). Repeat for the remaining sets of the side panels (K&J).
- Page 16 Assembly (continued) Hanging the netting Put the nettings (P) onto the top cross bars (A&B) using the plastic rings (Q).
- Page 17 Assembly (continued) Grounding the gazebo Pound the ground spikes(FF&GG) through the holes on the flat bars on the bottom of panels(K&J)
-
Page 18: Care And Cleaning
Questions, problems, missing parts? Before returning to the store, call Hampton Bay Customer Service. 8 a.m. - 7 p.m., EST, Monday - Friday, 9 a.m. - 6 p.m., EST, Saturday 1-855-HD-HAMPTON HAMPTONBAY.COM Retain this manual for future use.
Need help?
Do you have a question about the CHRISTY GFS00470C and is the answer not in the manual?
Questions and answers