Table of Contents
Advertisement
Quick Links
Advertisement
Table of Contents

Subscribe to Our Youtube Channel
Related Manuals for Martin Rush Multibeam 2


Summary of Contents for Martin Rush Multibeam 2
- Page 1 Multibeam 2 User Manual...
- Page 2 The Martin logo, the RUSH logo, the RUSH name, the Martin name and all other trademarks in this document pertaining to services or products by Martin Professional ApS or its affiliates and subsidiaries are trademarks owned or licensed by Martin Professional ApS or its affiliates or subsidiaries.
-
Page 3: Table Of Contents
Table of contents Safety information ..................... 4 Introduction ....................... 9 Before using the product for the first time ............. 9 Physical installation ..................10 Fastening the fixture to a flat surface ............10 Mounting the fixture on a truss ..............10 Securing with a safety cable ............... -
Page 4: Safety Information
If you have any questions about how to install, operate or service the fixture safely, please contact your Martin™ distributor (see www.martin.com/distributors for details) or call the Martin™ 24-hour service hotline on +45 8740 0000, or in the USA on 1- 888-tech-180. - Page 5 Keep this manual for future use. For the latest user documentation and other information about this and all Martin™ products, please visit the Martin website at http://www.martin.com Protection from electric shock Do not expose the fixture to rain or moisture.
- Page 6 MAINS OUT throughput socket to MAINS IN input socket, but do not link more than: • seven (7) RUSH Multibeam 2 fixtures in total at 100-120 V, • twelve (12) RUSH Multibeam 2 fixtures in total at 200-240 V.
- Page 7 If shields, lenses or ultraviolet screens have become visibly damaged to such an extent that their effectiveness is impaired, for example by cracks or deep scratches, return the fixture to an authorized Martin™ service agent for replacement. RUSH Multibeam 2 User Manual...
- Page 8 In the event of an operating problem, stop using the fixture immediately and disconnect it from power. Do not attempt to use a fixture that is obviously damaged. Do not modify the fixture or install other than genuine RUSH by Martin™ parts. RUSH Multibeam 2 User Manual...
-
Page 9: Introduction
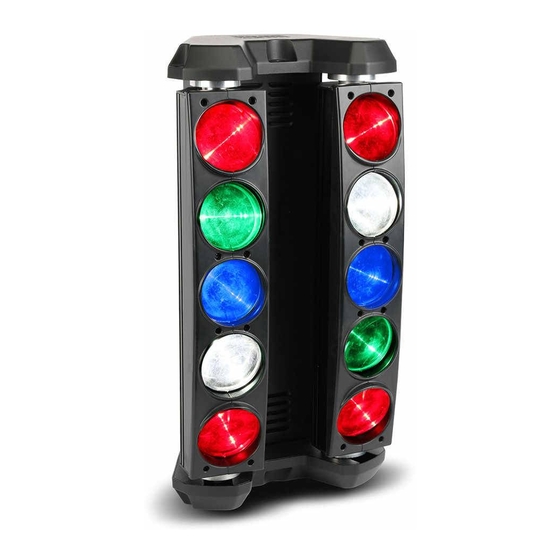
Introduction The RUSH Multibeam 2™ is a versatile effect featuring two moveable LED bars, each with 5 individually controllable narrow beams for powerful mid-air effects. It punches out 10 intense and narrow long-throw beams and features electronic dimming and strobe effects. -
Page 10: Physical Installation
Martin™ can supply safety cables and rigging clamps that are suitable for use with the fixture (see ‘Accessories’ on page 30). Fastening the fixture to a flat surface The fixture can be fastened to a hard, fixed, flat surface that is oriented at any angle. -
Page 11: Securing With A Safety Cable
Loop the safety cable through the eyebolt in the side of the fixture (see 9 in illustration on page 13) and around a secure anchoring point. RUSH Multibeam 2 User Manual... -
Page 12: Ac Power
EU system The fixture has an auto-ranging power supply that accepts AC mains power at 100-240 V at 50/60 Hz. Do not apply AC mains power at any other voltage or frequency to the fixture. RUSH Multibeam 2 User Manual... -
Page 13: Linking Fixtures To Power In A Chain
Using 14 AWG or 1.5mm cables from Martin™, you can link: • Maximum seven (7) RUSH Multibeam 2 fixtures in total to power in a chain at 100-120 V, or • Maximum twelve (12) RUSH Multibeam 2 fixtures in total to power in a chain at 200-240 V. - Page 14 The T 6.3A fixture fuse is located in a fuse holder next to the power input/output connectors. 9 - Safety cable attachment Eyebolt for securing the fixture with a secondary attachment such as a safety cable. RUSH Multibeam 2 User Manual...
-
Page 15: Control Data Link
Standard pin-out is pin 4 = data 2 cold (-) and pin 5 = data 2 hot (+). To split the link into branches, use a splitter such as the Martin 4-Channel Opto-Isolated RS-485 Splitter/Amplifier. Terminate the link by installing a DMX termination plug in the output socket of the last fixture. -
Page 16: Fixture Setup
If you give the same DMX address to two fixtures of the same type, they will behave identically. This can be useful for diagnostic purposes and for symmetrical control, particularly when combined with the inverse pan and tilt options. RUSH Multibeam 2 User Manual... -
Page 17: Standalone And Master/Client Standalone Mode
Master – fixture runs a standalone show (sound-activated or pre- programmed ) and sends synchronizing information to connected client fixtures, or Client 1 – fixture receives synchronizing information and runs the • same show as the master fixture, or RUSH Multibeam 2 User Manual... -
Page 18: Show Mode (Show Selection)
Master Client – fixture behaves as Master or Client depending on • what has been set in the CLIENT MODE menu. If set to Master in the CLIENT MODE menu, it runs a standalone show (sound-activated or pre-programmed ) and sends synchronizing RUSH Multibeam 2 User Manual... -
Page 19: Display Backlight Sleep Mode
1. Select TILT 2 INVERSE and press ENTER to confirm. 2. Use the DOWN and UP buttons to select Yes (LED bar 2 inversion) or No (normal). 3. Press ENTER to confirm (or press MENU to exit without making a change). RUSH Multibeam 2 User Manual... -
Page 20: Fixture Test
2. Press MENU to exit. Software version To see what software version is installed in the fixture: 1. Select SOFTWARE VERSION and press ENTER. The firmware version will be shown. 2. Press MENU to exit. RUSH Multibeam 2 User Manual... -
Page 21: Reset Functions And Settings
The overall intensity of all the beams can be adjusted 0-100 %. Individual RGBW color control Individual control of red, green, blue and white intensity in each of the 10 LED beams is available. Individual pixels are controlled via DMX in the order shown below: RUSH Multibeam 2 User Manual... -
Page 22: Maintenance
The user may carry out the service operations described in this manual. All other service operations must be carried out by an authorized Martin™ service technician. Do not try to repair the fixture yourself, as you may create a safety risk or cause damage that is not covered by the product warranty. -
Page 23: Fuse Replacement
If in doubt, consult your RUSH by Martin dealer about a suitable maintenance schedule. Use gentle pressure only when cleaning, and work in a clean, well-lit area. Do not use any product that contains solvents or abrasives, as these can cause surface damage. -
Page 24: Dmx Protocol
Red LED 2 - 0-100% 0-255 Green LED 2 - 0-100% 0-255 Blue LED 2 - 0-100% 0-255 White LED 2 - 0-100% 0-255 Red LED 3 - 0-100% 0-255 Green LED 3 - 0-100% RUSH Multibeam 2 User Manual... - Page 25 Blue LED 9 - 0-100% 0-255 White LED 9 - 0-100% 0-255 Red LED 10 - 0-100% 0-255 Green LED 10 - 0-100% 0-255 Blue LED 10 - 0-100% 0-255 White LED 10 - 0-100% RUSH Multibeam 2 User Manual...
-
Page 26: Control Menus
Invert tilt direction, LED bar 2 Reverse Yes/No Reverse LED sequence Auto Test Automatic test of all functions Display fixture’s current Temp temperature Display fixture operating hour Fixture Hours counter Display currently installed Software Version firmware version RUSH Multibeam 2 User Manual... -
Page 27: Troubleshooting
DMX setup or DMX link See next section. channels is fault. unresponsive or only Damaged step motor or Contact your RUSH by responds cable connection Martin authorized intermittently. between LED bars and distributor for assistance. body. RUSH Multibeam 2 User Manual... - Page 28 Check that all devices on DMX link use standard DMX polarity. Attempt to control the fixture with another DMX control device. Move or shield link if it is very close to an unshielded high-voltage installation. RUSH Multibeam 2 User Manual...
-
Page 29: Specifications
Light source ..........10 x 10 W RGBW Cree XM L-LEDs Minimum LED lifetime ..... 50 000 hours (to >70% luminous output)* Beam angle ....................8° *Figure obtained under manufacturer´s test conditions Construction Color ......................Black Housing .......... High-impact flame-retardant thermoplastic RUSH Multibeam 2 User Manual... - Page 30 US EMC ................FCC Part 15 Class A Australia/NZ ................C-TICK N4241 Included Items Power cable, 6 A, 18 AWG, 0.75 mm , UL- listed, H05VV-F, 1.5 m, without mains plug Omega-type mounting bracket for rigging clamp attachment RUSH Multibeam 2 User Manual...
- Page 31 RUSH Software Uploader 1™ ........... P/N 91611399 Ordering Information RUSH Multibeam 2™ in cardboard box, EU model ....P/N 90480030 RUSH Multibeam 2™ in cardboard box, US model ....P/N 90480035 Specifications are subject to change without notice. For latest product specifications, see www.martin.com...
- Page 32 RISK GROUP 2 CAUTION. Possibly hazardous radiation emitted from this product. Do not stare at operating lamp. May be harmful to the eyes. RUSH Multibeam 2 User Manual...
Need help?
Do you have a question about the Rush Multibeam 2 and is the answer not in the manual?
Questions and answers