Table of Contents
Advertisement
Advertisement
Table of Contents

Related Manuals for Gear4music DP-12


Summary of Contents for Gear4music DP-12
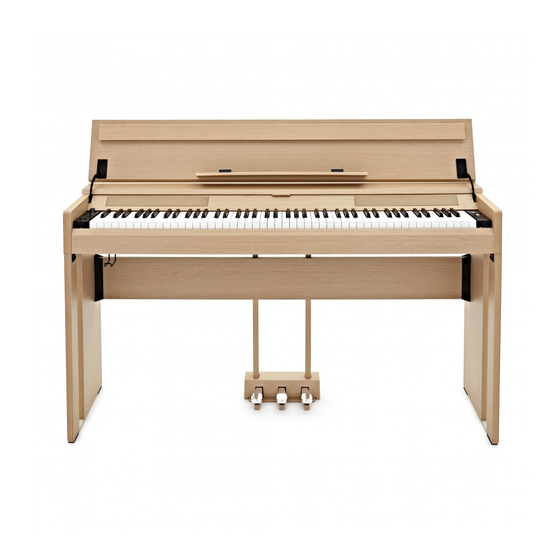
- Page 1 DIGITAL PIANO DP-12 USER MANUAL...
- Page 2 WARNING! WARNUNG! Do not open cover. No user-serviceable parts inside. Refer servicing to qualified Öffnen Sie nicht das Gehäuse. Im Inneren befinden sich keine vom Benutzer zu service personnel wartenden Teile. Überlassen Sie Wartungsarbeiten qualifiziertem Fachpersonal. Do not place the product in a location near a heat source such as a radiator, or in an Stellen Sie das Produkt nicht an einen Ort in der Nähe einer Wärmequelle wie etwa area subject to direct sunlight, excessive dust, mechanical vibration or shock eines Heizkörpers oder in einem Bereich mit direktem Sonnenlicht, übermäßigem...
- Page 3 VÝSTRAHA! Neotvárajte kryt. Vo vnútri nie sú žiadne súčasti, ktoré sú opraviteľné užívateľom. S požiadavkou na servis sa obráťte na kvalifikované servisné stredisko. Nevystavujte produkt do blízkosti akéhokoľvek tepelného zdroja ako napr. radiátora, alebo do kontaktu so slnečným žiarením, nadmerným prašným prostredím, mechanickým vibráciám alebo šokom.
-
Page 4: Table Of Contents
CONTENTS INTRODUCTION ......5 MIDI FUNCTIONS ......21 FACTORY RESET . -
Page 5: Introduction
INTRODUCTION Thank you for purchasing the DP-12 Digital Piano by Gear4music. To get the most out of your product, please read this manual carefully. CONTENTS • DP-12 Digital Piano • Power Supply Unit (PSU) • Set Up Guide & User Manual FEATURES •... -
Page 6: Front Panel
FRONT PANEL 1. STANDBY/ON 2. MASTER VOLUME 3. LED DISPLAY 4. METRONOME/LEFT BUTTON 5. FUNCTION/RIGHT BUTTON 6. RECORD BUTTON 7. DEMO/LEARN BUTTON 8. DATA CONTROL WHEEL REAR PANEL 9. PEDAL INPUT Note: Headphone outputs situated under the left- hand side of the piano. 10. -
Page 7: Pedal Set Up
PEDAL SET UP After following the DP-12 assembly guide, and before powering on the piano, please ensure that the foot pedal unit is connected to the pedal input jack on the rear connection panel. POWER Safely connect the included power supply firstly to the piano and then the mains, before turning on the piano by pressing the [STANDBY/ON] button. -
Page 8: Foot Pedals
FOOT PEDALS The DP-12 features a three-pedal unit, providing the same pedal configuration as a grand piano. DAMPER/SUSTAIN PEDAL (RIGHT) SUSTAIN When the sustain pedal is pressed down, the sound SUSTAIN of all notes played will sustain, even after releasing your fingers from the keys. -
Page 9: Connections
(not included) from the piano to the MIDI INPUT of a compatible external device. USING USB MIDI The DP-12 allows the transfer of MIDI via USB to a compatible computer or audio interface. Use the computer or audio interface to then control the... -
Page 10: Function Mode
FUNCTION MODE The function mode is used for selecting and editing the piano’s advanced functions. To enter this mode, press the [FUNCTION/RIGHT] button, select the required function with the corresponding piano key, and then use the data control wheel to set the parameter value as desired. Please refer to the advanced functions keyboard chart for the full list of functions and corresponding keys on page 24. -
Page 11: Voice Select
VOICE SELECT The 32 different voices can be either be selected using the data control wheel, or via the function menu. The number of the selected voice will be shown on the display. To select voices via the function menu, press the [FUNCTION/RIGHT] button, followed by the corresponding piano key as show in the table below:... -
Page 12: Split Mode
SPLIT MODE The piano keys can be “split” into two sections, allowing different voices to be played in the left and right hands. To enter this mode, press the [FUNCTION/RIGHT] button followed by piano key Bb-1. The display will show “on.” The desired left-hand voice can now be selected by pressing the [FUNCTION/RIGHT] button, followed by the corresponding voice key (as shown in the... -
Page 13: Layer Mode
LAYER MODE Layer mode allows two of the piano’s voices to be played simultaneously. To select the two sounds to be layered, first press the [FUNCTION/RIGHT] button to enter edit mode. Using the voices list (see page 11) for reference, press and hold down the piano key that corresponds to the required main voice. -
Page 14: Twin Mode
TWIN MODE The piano keys can be divided into two sections that both play the same notes, voice, octave, and volume. This provides an ideal teaching function, allowing two people to play the same notes simultaneously. Press the [FUNCTION/RIGHT] button to enter edit mode. -
Page 15: Pitch Adjustment
PITCH ADJUSTMENTS The pitch of the piano keys can be adjusted by either changing the octave, transposing in semitone increments, or by fine tuning. OCTAVE To adjust the octave settings, press the [FUNCTION/RIGHT] button to enter edit mode, then press piano key Ab1. The display will momentarily show 000 and the data control wheel can now be used to raise or lower the pitch in octaves, from -2 to +2. -
Page 16: Touch
The display will show the selected sensitivity setting. REVERB & CHORUS EFFECTS The DP-12 has 10 reverb and 13 chorus built-in effects, to add extra depth and expression to your performances. REVERB... -
Page 17: Eq Adjustment
CHORUS To select the chorus type, press the [FUNCTION/ RIGHT] button to enter edit mode, followed by piano key Ab2. The data control wheel can now be used to choose the desired chorus type from the list below: DISPLAY NUMBER REVERB TYPE No Chorus Chorus 1... -
Page 18: Metronome
METRONOME The DP-12 has an in-built metronome, a great feature for practising and a solid rhythm guide when recording. The metronome can be turned on and off by pressing the [METRONOME/LEFT] button, as required. To change the volume of the metronome, press the [FUNCTION/RIGHT] button to enter edit mode, followed by piano key C#1. -
Page 19: Recording
RECORDING The DP-12 features an in-built 2 track recorder, allowing you to record, playback and overdub one part on top of another, using the same or a different voice. Before recording, set the desired voice, tempo, reverb level and metronome functions. -
Page 20: Clearing Recorded Tracks
The piano will automatically return to performance mode, with the display showing the selected voice number. LEARNING FUNCTION The DP-12 features in-built demo songs, each with separate left and right-hand parts that can be turned off/on as required, providing a great learning function. -
Page 21: Midi Functions
“off.” Other MIDI devices (or virtual instrument software running on a computer) can now be controlled by the DP-12, without it playing the piano’s internal sounds. To do this, press the [FUNCTION/RIGHT] button to enter function mode. -
Page 22: Midi Implementation Chart
MIDI IMPLEMENTATION CHART FUNCTION TRANSMITTED RECOGNIZED REMARKS Basic Default 1-16 1-16 Channel Changed 1-16 1-16 Mode Default Mode 3 Mode 3 Messages Altered ******** Note True voice 0~127 0~127 Number ******** Velocity Note After Keys Touch Touch Channel Pitch Bend Control Change 0~127 0,1,5,6,7,10,11,... -
Page 23: Default Settings Table
DEFAULT SETTINGS TABLE The table below shows the piano factory default settings and whether or not user changes to these settings are retained after a power-cycle (turning the device off and on): PARAMETER FACTORY DEFAULT RETAINED ON POWER-DOWN Program Number & Voice Selected 000 - Grand Piano 0 Octave Shift Transpose... -
Page 24: Advanced Functions
ADVANCED FUNCTIONS KEYBOARD CHART... -
Page 25: Specifications
SPECIFICATIONS Keys ....88 Hammer Action Keys with synthetic ebony and ivory keytops Voices ....32 Polyphony . - Page 28 METALLVÄGEN 45A | 195 72 ROSERSBERG | STOCKHOLM | SVERIGE LAHNSTRAßE 27 | 45478 MÜLHEIM AN DER RUHR | DEUTSCHLAND If you have any more questions about this product, please do not hesitate to contact the Gear4music Customer Service Team on: +44 (0) 330 365 4444 or info@gear4music.com...
Need help?
Do you have a question about the DP-12 and is the answer not in the manual?
Questions and answers