Table of Contents
Advertisement
Advertisement
Table of Contents

Related Manuals for Gear4music DP-50


Summary of Contents for Gear4music DP-50
- Page 1 DP-50 DIGITAL PIANO User's Manual Owner s Manual...
- Page 2 Precaution Thank you for purchasing this digital instrument. For correct use, please read the manual carefully and keep it for future reference. please read the manual carefully and keep it for future reference. Safety Precautions CAUTION RISK OF ELECTRIC SHOCK DO NOT OPEN The lightning flash with arrowhead symbol within an equilateral triangle is intended to alert the user to the presence of uninsulated “dangerous voltage”...
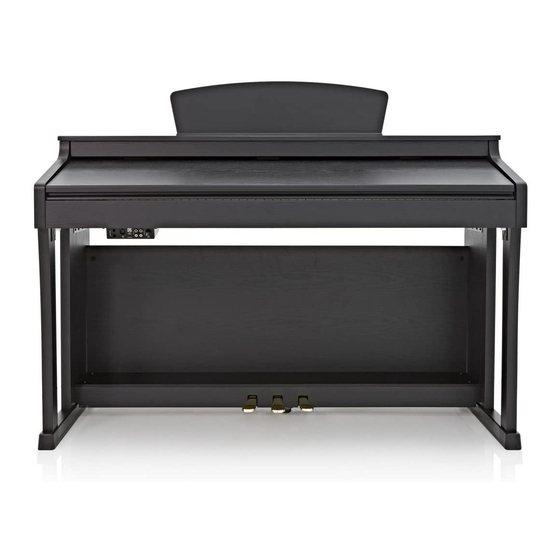
- Page 3 Thank you for choosing the Digital Piano Your piano is a high quality digital piano featuring an 88 note hammer action, touch sensitive keyboard and the most advanced PCM tone generation technology that combined will provide you with a rich performing and playing experience. You can also record your own performances to play along to.
-
Page 4: Table Of Contents
Contents .................... Panel Control ......................Setup ..................Basic Operation ....................Standby/On .................... AutoStandby ............Deactivate Auto standby Function ..................Master Volume ..................... Piano Pedals ....................Piano Reset ................Playing Demo Songs .................. The Connector Box ..................... Headphones ....................MIDI Out .................... - Page 5 ..................USB Play Speed ....................Play Mode ..................... Grading ......................Bank ......................Store ......................Load ....................Blue Tooth ..................Auto Power Off ....................Resetmem ................Registration Memory ......................Store ......................Load ........... Saving The Registration Data To USB Disk ............Use Regitration Data From USB ...............
-
Page 7: Panel Control
Panel Control Top Panel 17. [FUNCTION] Button STANDBY/ON 18. [ENTER] Button MASTER VOLUME 19. [DATA CONTROL] Knob SONG VOLUME 20. VOICE SELECT Button BASS VOLUME [BANK] Button TREBLE VOLUME 21. [PIANO RESET] Button LCD DISPLAY 22. [USB MEMORY ] Button [REVERB] Button 23. -
Page 8: Setup
SETUP You are no doubt eager to play your new piano instrument, but first please make sure you have completed the following basic setup steps: 1) Follow the assembly instructions as outlined on page 57 in the appendix of this manual. 2) Once the piano is securely assembled, connect the plug of the foot pedal unit to the pedal jack on the rear panel. -
Page 9: Basic Operation
Basic Operation Standby/On Press the [STANDBY/ON] button to turn on the power and the LCD display will light. STANDBY/ON Auto Standby Your piano will switch off automatically in 30 minutes after no any operation on it. In this case, press the [STANDBY/ON] button again to turn on the power. -
Page 10: Piano Reset
Sostenuto Pedal (Center) The sostenuto pedal also allows you to sustain notes, but it works a little different from the damper pedal. If you play a note or chord on the keyboard and press the sostenuto pedal while the notes are held, those notes will be sustained as long as the pedal is held. -
Page 11: Playing Demo Songs
Playing Demo Songs There are 116 preset piano songs that you can play individually. Here's how you can select and play the demo songs. Listening to the Demo Song Press the [DEMO] button to enter Demo Play Mode and the button will flash. -
Page 12: The Connector Box
The Connector Box Headphones The piano is equipped with two sets of standard stereo headphone jacks to accommodate private practice or late-night playing. The internal speaker system is automatically shut off when a pair of headphones is plugged into the 1. Headphone jack. to Host Bluetooth MIDI OUT... -
Page 13: Using Usb Midi/Usb Audio
to Host Bluetooth Using USB MIDI/USB Audio This product allows the transfer of MIDI information over USB to a computer. As complicated this might sound, it's actually pretty straight forward. Because your piano is USB Class Compliant, there is no need to install a driver to enable it to work with compute. -
Page 14: Bluetooth
to Host Bluetooth Bluetooth The piano can support Bluetooth with the connection of the bluetooth, reference: Bluetooth. to Host Bluetooth... -
Page 15: Voice
Voice Select a Voice Your piano has 128 GM standard voices. You can use the voice button on the panel or use the [DATA CONTROL] knob to select voice. To selec a vioce, press the appropriate voice select button on the right side of the front panel. -
Page 16: Split Mode
Select Dual Voice Press the [DUAL] button and its indicator will flash. Use the [DATA CONTROL] knob to select the second voice. If you don' t choose the second voice within 4 seconds, the LCD will return to display the Main voice. DUAL DUAL Set Dual Voice Volume... -
Page 17: Kb.vol Button
SPLIT/TWIN Set Split Voice Volume Reference: "Split Voice Volume" in KB.VOL " " function .(P.16). Change the Split piont Hold the [SPLIT/TWIN] button for about 2 seconds, then use the [DATA CONTROL] knob to select the split point. SPLIT/TWIN Exit Split Mode Repeatedly press the [SPLIT/TWIN] button until its indicator will be unlighted. -
Page 18: Twin Mode
Dual Voice Volume: In Dual Voice Mode, the [DUAL] button indicator is flashing, press [KB. VOL] button, the [DATA CONTROL] knob to adjust the Dual Voice Volume. KB.VOL Split Voice Volume: In Split Voice Mode, the [SPLIT/TWIN] button indicator is flashing, press [KB. VOL] button, [DATA CONTROL] knob to adjust the Split Voice Volume. -
Page 19: Effect
Effect This function allows you to perform the overall sound in a realistic style. Reverb Press [REVERB] button can turn off or turn on the reverb effect. Press [REVERB] button repeatedly until the LCD display "Hall 2 ", then the [DATA CONTROL] knob to select reverb type. The reverb types in the list below can be selected from the reverb display. -
Page 20: Transpose
Chorus1Chorus2Chorus3 Chorus4FeedbackFlanger1ShrtDelyShrtDlFbFlanger2Flanger3 Celeste1Celeste2 Celeste3 Transpose The Transpose function allows you to change the pitch of the instrument in semitone steps, up to a maximum setting of 12 semitones (a maximum of one octave up or down). Press [TRANSPOSE+/-] button to enter the transpose setting mode, then you can use the [TRANSPOSE+/-] buttons or the [DATA CONTROL] knob to change the transpose value. -
Page 21: Octave
Octave You can set the Main Voice Octave, the Dual Voice Octave and the Split Voice Octave by pressing [OCTAVE] button. Range: -02~02 Main Voice Octave: In Main Voice Mode, press [OCTAVE] button, the [DATA CONTROL] knob to adjust the Main Voice Octave. Dual Voice Octave: In Dual Voice Mode, the [DUAL] button indicator is flashing, press [OCTAVE] button,... -
Page 22: Metronome
Metronome Metronome is a convenient feature for practice, and it can also provide a solid rhythmic guide when recording. The metronome sound is alternately turned on and turned off by pressing [METRONOME] button. Hold the [METRONOME] button to enter the page for selecting the time signature. -
Page 23: Function
FUNCTION Repeatedly press the [function] button, then press the [ENTER] button to select the option to be set. Turn the [DATA CONTROL] knob to set the parameter. The option and the parameters are as the follows: Function Type LCD display Range Default Main Voice Pan... - Page 24 Function Type LCD Display Range Default Pd1-Null,Pd1-Soft, Pd1-sost,Pd1-Tap, Pedal 1 Pedal 1? Pd1-Soft Pd1-MemoryUp, Pd1-Play, Pedal Assign? Pd2-Null,Pd2-Soft, Pd2-sost,Pd2-Tap, Pedal 2 Pedal 2? Pd2-sost Pd2-MemoryUp, Pd2-Play USB Play Speed USBSpeed? 50~200 Usb Function? Single,Chain, PlayMode PlayMode? Single Random Learn? Grading Grading? ON/OFF Reg.Bank:01...
-
Page 25: Man Voice Pan
Main Voice Pan This function allows you to adjust the main voice pan value. Press the [FUNCTION] button and the LCD will display "Performance?" FUNCTION ENTER Press the [ENTER] button to confirm and the LCD will display " Main.Pan . ?"... -
Page 26: Dual Voice Pan
FUNCTION ENTER Press the [ENTER] button to confirm and use the [DATA CONTROL] knob to set the split voice pan value: -64 to 63. DATA CONTROL Dual Voice Pan This function allows you to adjust the dual voice pan value. Press the [FUNCTION] button repeatedly and the LCD will display "Performance?"... -
Page 27: Arpeggio
Arpeggio Press the [FUNCTION] button repeatedly and the LCD will display "Performance?" FUNCTION ENTER Press the [ENTER] button to confirm and use the [DATA CONTROL] knob select "Arpeggio " FUNCTION ENTER Press the [ENTER] button to confirmand use the [DATA CONTROL] knob to select "OFF", "01", "02". -
Page 28: Main Voice Reverb Level
FUNCTION ENTER Press the [ENTER] button to confirm and use the [DATA CONTROL] knob to select 10 reverb types: Hall1, Hall2, Room1, Room2, Room3, Stage1, Stage2, Plate, Delay, Echo. DATA CONTROL Main Voice Reverb Level Press the [FUNCTION] button repeatedly and the LCD will display "... -
Page 29: Split Voice Reverb Level
Split Voice Reverb Level Press the [FUNCTION] button repeatedly and the LCD will display " Effect . ?" FUNCTION ENTER Press the [ENTER] button to confirm and use the [DATA CONTROL] knob to select S " .RevVol?" FUNCTION ENTER Press the [ENTER] button to confirm and use the [DATA CONTROL] knob to set the Split voice reverb type value: 00~127. -
Page 30: Chorus Type
Press the [ENTER] button to confirm and use the [DATA CONTROL] knob select D " .RevVol?" FUNCTION ENTER Press the [ENTER] button to confirm and use the [DATA CONTROL] knob to set the Dual voice reverb value: 00~127. DATA CONTROL Chorus Type Press the [FUNCTION] button repeatedly and the LCD will display "... -
Page 31: Main Voice Chorus Level
Main Voice Chorus Level Press the [FUNCTION] button repeatedly and the LCD will display " Effect . ?" FUNCTION ENTER Press the [ENTER] button to confirm and use the [DATA CONTROL] knob to select "M.ChrVol?" FUNCTION ENTER Press the [ENTER] button to confirm and use the [DATA CONTROL] knob to set the main voice chorus level value: 00~127. -
Page 32: Dual Voice Chorus Level
FUNCTION ENTER Press the [ENTER] button to confirm and use the [DATA CONTROL] knob to set the split voice chorus value: 00~127. DATA CONTROL Dual Voice Chorus Level Press the [FUNCTION] button repeatedly and the LCD will display " Effect . ?"... -
Page 33: Pedal1 Control
Pedal1 Control Press the [FUNCTION] button repeatedly, LCD will display "Pedal Assign?" FUNCTION ENTER Press the [ENTER] button to confirm and the LCD will display " Pedal 1? " FUNCTION ENTER Press the [ENTER] button to confirm. Use the [DATA CONTROL] knob to select "Pd1-Null", "Pd1-Soft", "Pd1-sost", "Pd1-Tap", "Pd1-MemoryUp", "Pd1-Play". -
Page 34: Pedal2 Control
Pedal2 Control Press the [FUNCTION] button repeatedly and the LCD will display "Pedal Assign?" FUNCTION ENTER Press the [ENTER] button to confirm and use the [DATA CONTROL] knob to select Pedal 2? " " FUNCTION ENTER Press the [ENTER] button to confirm and use [+] and [-] buttons or the [DATA CONTROL] knob to select "Pd2-Soft", "Pd2-sost", "Pd2-Tap", "Pd2-MemoryUp", "Pd2-Play","Pd2-Null". -
Page 35: Usb Play Speed
USB Play Speed Press the [FUNCTION] button repeatedly and the LCD will display "Usb Function?" FUNCTION ENTER Press the [ENTER] button to confirm and the LCD will display " USBSpeed? " FUNCTION ENTER Press the[ENTER] button to confirm and use the [DATA CONTROL] knob to select USB speed:50%~200%. -
Page 36: Bank
Press the [ENTER] button to confirm and use the [DATA CONTROL] knob to select the play mode: Single, Chain, Random DATA CONTROL Single------ Single play Chain------Order play Random------Random play Grading This function is in the song learning mode, when playing songs, it will automatically score based on your performance: 00~100. -
Page 37: Store
Press the [ENTER] button to confirm and the LCD will display " Reg.Bank? " FUNCTION ENTER Press the [ENTER] button to confirm and the LCD will display " Mem.Bank:01 " FUNCTION ENTER the [DATA CONTROL] knob to select the bank "Mem.Bank:01~Mem.Bank:04"... -
Page 38: Load
DATA CONTROL Press the [ENTER] button to confirm. FUNCTION ENTER Load Press the [FUNCTION] button repeatedly and the LCD will display " Memory? . " FUNCTION ENTER Press the [ENTER] button to confirm and use the [DATA CONTROL] knob to select "Reg.LoadMem?". -
Page 39: Blue Tooth
Blue Tooth Press the [FUNCTION] button repeatedly and the LCD will display "Other Func?" FUNCTION ENTER Press the [ENTER] button to confirm and the LCD will display "BlueTooth?" FUNCTION ENTER Press the [ENTER] button to confirm and use the [DATA CONTROL] knob to select On or Off. -
Page 40: Resetmem
FUNCTION ENTER Press the [ENTER] button to confirm and use the [DATA CONTROL] knob to select the auto close time: 20Min,30Min, 40Min, 50Min, 60Min and OFF. DATA CONTROL Resetmem Press the [FUNCTION] button repeatedly and the LCD will display "Other Func?" FUNCTION ENTER Press the [ENTER] button to confirm and use... -
Page 41: Registration Memory
Registration Memory Your instrument registration memory can be used to store 24 sets of voice settings that can be recalled during you playing by pressing the [FUNCTION] button, see page 35. Store Please refer to [FUNCTION] menu function, see page 35. Load Please refer to [FUNCTION] menu function, see page 36. -
Page 42: Delete Reg File From Usb
Delete REG File From USB Insert the USB Disk into the USB terminal. Use the [DATA CONTROL] knob to select REG file you want to delete, then hold down [PLAY] button and press the [RECORD] button . LCD shows: RECORD PLAY DELETE Press... -
Page 43: Song Recording
Song Recording This digital piano lets you record your performances and Registration settings to a USB Disk. Each user song lets you record up to sixteen independent tracks. It provides two different ways to record: USB Recording and Melody Track Recording. Melody Track Recording, which can save into local memory. -
Page 44: Multi Track Recording
Multi Track Recording Multi track recording provides two ways to record: A. Use Auto Track Assignment. B. Select Tracks by yourself. 2.1. Use Auto Track Assignment. 2.1.1 Insert the USB Disk Into the USB Terminal 2.1.2 Press the [RECORD] button to start recording. (The first one measures are tempo prompt only.) RECORD 2.1.3 Press [RECORD] button again to stop recording. - Page 45 2.2. Select Tracks by Yourself 2.2.1 Insert the USB disk Into the USB terminal. 2.2.2 Press the [RECORD] button to start recording. (The first one measures are tempo prompt only. ) RECORD 2.2.3 Press [RECORD] button again to stop recording. Recording stops and your performance is written to the song.
-
Page 46: Mutetrack
USB MEMORY RECORD TRACK MULTI RECORD PLAY RECORD DELETE 2.2.6. Use the same operation as Step 4 and Step 5 to record more tracks. The name of the new file will be saved in sequence. Mutetrack Use this function you can turn on or turn off any tracks before song playing or recording. -
Page 47: Saving The Recording To Usb Disk
Melody Track2 Recording Hold down the [RECORD] button, and then press the [TRACK2/RIGHT] button, the [TRACK2/RIGHT]and the [RECORD] indicator flashes to indicate ready to record. The first one measures are tempo prompt only. You can start recording simply by playing the key board. -
Page 48: Load The Midi File To Local Track
Load The MIDI File To Local Track Insert the USB Disk into the USB terminal. Press the [SAVE TO] button r epeatedly to select: Load MIDI File, then press [transpose +] button, display shows Load OK! SAVE TO Delete Song Insert the USB Disk into the USB terminal. - Page 49 Adjusting Song's Volume Adjust the Song's Volume of USB Sticker Use the [SONG VOLUME] fader to adjust the Song's volume of USB sticker to your desired level. MASTER SONG BASS TREBLE VOLUME VOLUME...
-
Page 50: Play Along Songs
Play Along Songs There are 55 songs built into this Piano for your musical enjoyment. These songs have separate left and right-hand parts that can be turned on and off as required so you can practice the corresponding part on the piano. Selecting a Song Turn on the song mode by pressing both the [TRACK 1/LEFT] and [TRACK 2/RIGHT] buttons simultaneously. -
Page 51: Practicing The Right Hand Of The Selected Song
Practicing the Right Hand of the Selected Song 1). With the play along song mode engaged, press the [TRACK 2/RIGHT] button to mute the right hand part. The right indicator is off. TRACK 1/LEFT TRACK 2/RIGHT LEARN 2). Press the [PLAY] button, You will then hear the left-hand part. 3). -
Page 52: Bluetooth
Bluetooth Bluetooth Connection Plug this tiny unit into the allotted slot on the connector panel and stream high-quality audio from Bluetooth devices like your smartphone, tablet or computer. Now you will be able to listen to music files and music apps from your Bluetooth - enabled devices on your piano. SPECIFICATIONS Compliant with Bluetooth 2.1+EDR specs 4dBm output max power... - Page 53 FUNCTION ENTER Press the [ENTER] button to confirm and use the [DATA CONTROL] knob to select On or Off. DATA CONTROL On------ Turn on Bluetooth function. Off------ Turn off Bluetooth function. 4). You will find the receiver as an option on your Bluetooth device s settings, select the bluetooth form your device to connect.
- Page 54 NOTE Bluetooth devices should be placed near and in direct view of the Bluetooth receiver when initially set up. The distance and strength of the signal will depend on environmental conditions. Please make sure the volume of the piano and the Bluetooth device is turned up. If you are unable to connect to your Bluetooth device, please make sure that any other previously connected device has been disconnected.
-
Page 55: Midi Functions
MIDI Functions If you are an advanced MIDI user, this section will help you to access the MIDI controller capabilities of the piano. If you already know that you need this specialized functionality, then this section is for you. However, this information is not necessary in order to enjoy playing the piano. -
Page 56: Midi Split Track
MIDI Split Track Press the [MIDI] button r epeatedly to select: MidiSplitTrk:02,then use the [DATA CONTROL] knob to select:01-16 tracks. MIDI MIDI MIDI Dual Track Press the [MIDI] button r epeatedly to select: MidiDualTrk:03,then use the [DATA CONTROL] knob to select:01-16 tracks. MIDI MIDI MIDI Out... -
Page 57: Factory Set
Factory Set 1. Turn off the power. STANDBY/ON 2. Hold [TRANSPOSE +] and [TRANSPOSE -] buttons, then turn the power on. It can restore all internal settings to factory set. TRANSPOSE STANDBY/ON... -
Page 58: Appendix
Appendix Voice List PROGRAM CHANGE BANK VOICE NAME PROGRAM CHANGE BANK VOICE NAME PROGRAM CHANGE BANK VOICE NAME P i a n o Synth Strings 1 Fx 6 (Goblins) Acoustic Grand Piano Synth Strings 2 Fx 7 (Echoes) Brigh Acoustict Piano Choir Aahs Fx 8 (Sci-Fi) E t h n i c... - Page 59 MIDI Implementation Chart F u n c t i o n T r a n s m i t t e d R e c o g n i z e d R e m a r k s Basic Default 1-16CH (*1)
-
Page 60: Troubleshooting Hints
Troubleshooting Hints When the instrument is turned on or off, a This is normal and indicates that the instrument Popping sound is temporarily produced. is receiving electrical power. When using a mobile phone, noise is produced. To prevent this, turn off the mobile phone or use Using a mobile phone in close proximity to the it further away from the instrument. -
Page 61: Specifications
Specifications Specifications Keyboards Keyboards 88 Graded Hammer Keys with Touch Response 88 Graded Hammer Keys with Touch Response Display Display LCD display LCD display Polyphony Polyphony 64 Note Polyphonic 64 Note Polyphonic Voices Voices Voice Control Voice Control Volume, Transpose, Pan, Octave, Arpeggio, Dual, Split, Twin Volume, Transpose, Pan, Octave, Arpeggio, Dual, Split, Twin Sustain Pedal, Sustain Pedal,... -
Page 62: Assembly Instructions
Assembly Instructions M6X16 X4 M6X25 M4X16 ST3.9X20 M6X55 X2 ST2.9X12 Turn the adjustable Pedal Board support,until it is in firm contact with the floor. Before moving the piano to a new location, always remember to raise the level of the Pedal Board support so that it is not touching the floor. - Page 64 Kettlestring Lane, Clifton Moor, York, YO30 4XF, UK RoHS...
Need help?
Do you have a question about the DP-50 and is the answer not in the manual?
Questions and answers