
Related Manuals for HIKVISION EKI-K41B44W


Summary of Contents for HIKVISION EKI-K41B44W
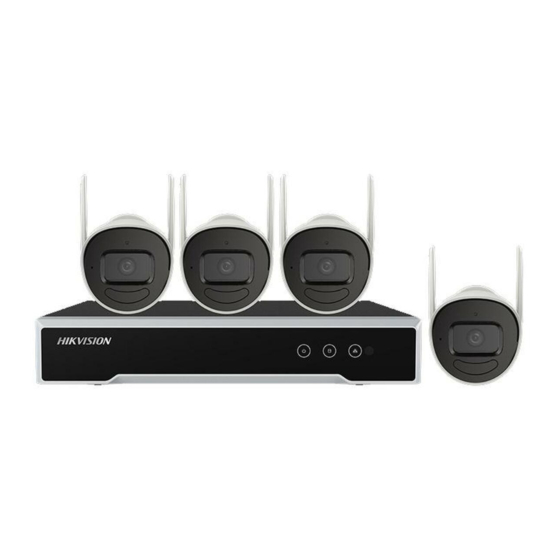
- Page 1 EKI-K41B44W Wi-Fi Kit NVR: DS-7104NI-K1/W/M NVR Cameras: DS-2CV1041G1-IDW Quick Start Guide...
- Page 2 INTERRUPTION, OR LOSS OF DATA, CORRUPTION OF SYSTEMS, OR LOSS OF DOCUMENTATION, WHETHER BASED ON BREACH OF CONTRACT, TORT (INCLUDING NEGLIGENCE), PRODUCT LIABILITY, OR OTHERWISE, IN CONNECTION WITH THE USE OF THE PRODUCT, EVEN IF HIKVISION HAS BEEN ADVISED OF THE POSSIBILITY OF SUCH DAMAGES OR LOSS.
- Page 3 The battery is marked with this symbol, which may include lettering to indicate cadmium (Cd), lead (Pb), or mercury (Hg). For proper recycling, return the battery to your supplier or to a designated collection point. For more information, see: www.recyclethis.info. QSG EKI-K41B44W Kit 110520NA...
- Page 4 Cautions: Injury or equipment damage may occur if any of the cautions are neglected. Warnings Cautions Follow these safeguards to prevent Follow these precautions to prevent serious injury or death. potential injury or material damage. Warnings QSG EKI-K41B44W Kit 110520NA...
- Page 5 If the PoE ports of device do not comply with Limited Power Source, the additional equipment ● connected to PoE ports shall have fire enclosure. The USB interface of the /P devices can be connected with the mouse and USB flash disk storage ● device only. QSG EKI-K41B44W Kit 110520NA...
- Page 6 ATTENTION: IL Y A RISQUE D'EXPLOSION SI LA BATTERIE EST REMPLACÉE PAR UNE BATTERIE DE TYPE INCORRECT. METTRE AU REBUT LES BATTERIES USAGÉES CONFORMÉMENT AUX INSTRUCTIONS Improper replacement of the battery with an incorrect type may defeat a safeguard (for example, in the ● case of some lithium battery types). QSG EKI-K41B44W Kit 110520NA...
- Page 7 MOSO POWER SUPPLY TECHNOLOGY CO.,LTD European ADS-26FSG-12 12024EPG SHENZHEN HONOR ELECTRONIC CO.,LTD MSA-C2000IC12.0- 24P-GB MOSO POWER SUPPLY TECHNOLOGY CO.,LTD British ADS-26FSG-12 12024EPB SHENZHEN HONOR ELECTRONIC CO.,LTD U.S. 101700626 Adapter MSA-C2000IC12.0-24P-US US-PLUG, AC100-240V, 12V 2A, 24W, Φ2.1x5.5x10 QSG EKI-K41B44W Kit 110520NA...
-
Page 8: Table Of Contents
4.1 Startup and Shutdown ..........................17 4.2 Activate Your NVR ............................. 18 4.3 Use the Setup Wizard ..........................18 4.4 Add IP Cameras ............................18 4.4.1 Wi-Fi Kit Cameras ........................18 4.4.2 Other Cameras .......................... 21 4.5 Hik-Connect Setup ........................... 21 QSG EKI-K41B44W Kit 110520NA... -
Page 9: Introduction
1.2.1 Front Panel Figure 2, Front Panel Description No. Icon Description Indicator turns red when NVR is powered up. Indicator lights in red when there is data transmission. Indicator blinks blue when network connection is functioning properly. QSG EKI-K41B44W Kit 110520NA... -
Page 10: Rear Panel
Ground (needs to be connected when device starts up) Camera Appearance Figure 4, Camera Legend Description Description Description Bracket Microphone Back Cover IR LED Main Body Power Interface Front Cover Network Interface IR LED Cover RESET Button Status Indicator Memory Card Slot Lens Antenna QSG EKI-K41B44W Kit 110520NA... -
Page 11: Nvr Installation
1. Remove the cover from the device by unfastening the screws on the panels. Figure 5, Remove Cover 2. Connect the data cable and power cable. a) Connect one end of data cable to the device motherboard. b) Connect the other end of data cable to HDD. QSG EKI-K41B44W Kit 110520NA... -
Page 12: Camera Installation
Before You Start Make sure the device in the package is in good condition and all the assembly parts are included. ● The standard power supply is 12 VDC. Make sure your power supply matches your camera. ● QSG EKI-K41B44W Kit 110520NA... -
Page 13: Ceiling Mounting
2. If you need to route cables through the wall or ceiling, drill a cable hole according to the drill template. Skip this step if you want to route the cables on the surface of the wall or ceiling. 3. Route the camera cables. 4. Install the camera to the wall or ceiling with screws. QSG EKI-K41B44W Kit 110520NA... -
Page 14: Mounting With A Junction Box
Figure 10, View Angle Adjustment Mounting with a Junction Box Before You Start Both wall mounting and ceiling mounting are suitable for the bullet camera. Wall mounting will be taken as an example in this section. QSG EKI-K41B44W Kit 110520NA... - Page 15 4. Fix the camera on the junction box’s cover with screws. Figure 12, Attach the Camera to Junction Box’s Cover 5. Secure the junction box’s body to the wall with three supplied screws. Figure 13, Mount the Junction Box on the Wall QSG EKI-K41B44W Kit 110520NA...
-
Page 16: Waterproof Measures
3. Place ⑤ onto the end of ⑥, and plug the RJ-45 male connector into RJ-45 female connector. 4. Screw ③ to ⑥ clockwise. 5. Push ② into ③. 6. Secure ① with the ③ in clockwise direction. QSG EKI-K41B44W Kit 110520NA... -
Page 17: Waterproof Other Cables
After the device starts up, the wizard will guide you through the initial settings, including modifying password, date and time settings, network settings, HDD initializing, and recording. To shut down the NVR: 1. Enter the Shutdown menu. Go to Menu > Shutdown. 2. Select Shutdown. 3. Click Yes. QSG EKI-K41B44W Kit 110520NA... -
Page 18: Activate Your Nvr
2. Connect cameras 01, 02, 03, and 04 to the NVR. The cameras connect to the NVR’s Wi-Fi automatically. Make sure the distance between camera 01, 02, 03, 04, and the NVR is no more than 49 ft (15 m). QSG EKI-K41B44W Kit 110520NA... - Page 19 3. (Optional) If you want to install a camera beyond the NVR’s Wi-Fi distance, you can enable the NVR’s repeater function. The repeater function allows a camera with the repeater function to serve as a range extender for another camera beyond the reach of the NVR’s Wi-Fi. Figure 18, Wi-Fi Repeater Function QSG EKI-K41B44W Kit 110520NA...
- Page 20 To disable a camera’s repeater function, click the Repeater switch so that it toggles to the left (the background will no longer be green). To disable the NVR’s repeater function, click the Disable Repeater button . QSG EKI-K41B44W Kit 110520NA...
-
Page 21: Other Cameras
5. Set wireless network parameters, including Network Bridging, SSID, Security Mode, and Key. 6. Access the Web of the camera. 7. Go to Configuration > Network > Advanced Settings > Wi-Fi to set the Wi-Fi parameters. Network Camera User Manual For detailed information, see the Hik-Connect Setup QSG EKI-K41B44W Kit 110520NA... - Page 22 • Visit the official site of our company. Then go to Support > Tools > Hikvision App Store. • Scan the QR code below to download the application. If errors such as “Unknown app” occur during the installation, solve the problem in two ways: •...
- Page 23 QSG EKI-K41B44W Kit 110520NA...
Need help?
Do you have a question about the EKI-K41B44W and is the answer not in the manual?
Questions and answers