Rangemaster Professional+ FXP 90 Dual Fuel User's Manual & Installation Instructions
Hide thumbs
Also See for Professional+ FXP 90 Dual Fuel:
- User's manual & installation instructions (40 pages) ,
- User's manual & installation instructions (48 pages)

Related Manuals for Rangemaster Professional+ FXP 90 Dual Fuel


Summary of Contents for Rangemaster Professional+ FXP 90 Dual Fuel
- Page 1 USER GUIDE & INSTALLATION INSTRUCTIONS Professional+ FXP 90 Dual Fuel U111280 - 02...
- Page 2 Terms & Conditions 1. This is my Rangemaster is open to residents of UK mainland only, aged 18 years & over. 2. All entries should be submitted to the advertised e-mail address, or Rangemaster UK Facebook, Instagram or Twitter page using the advertised hashtag &...
-
Page 3: Table Of Contents
Contents Before you start... Installation Personal safety Positioning the cooker Electrical connection safety Moving the cooker If you smell gas Levelling Peculiar smells Fitting the stability bracket or chain Cooling fan Repositioning the cooker following connection Ventilation Electrical connection Maintenance Oven care Final checks and fittings Cooker care... -
Page 4: Before You Start
Before you start... Your cooker should give you many years of stopped cooking. Care should be taken to trouble-free cooking if installed and operated avoid touching heating elements. correctly. It is important that you read this CAUTION : A long term cooking process •... - Page 5 The electrical installation must be installed in Fig. 1.1 accordance with all relevant British Standards/ Codes of Practice, BS 7671. Or with the relevant national and local regulations and with the local gas and electricity supply companies’ requirements. All installations must be in accordance with the 10 mm²...
-
Page 6: If You Smell Gas
The appliance must be installed in This cooker must be installed in accordance • with: accordance with the regulations in force and only in a well ventilated space. British Standards/Codes of Practice, BS • 5440 Part 2 Failure to install the appliance correctly •... -
Page 7: Cooling Fan
NEVER heat unopened food containers. Cooling fan • Pressure build up may make the containers This appliance has a cooling fan. When the grill burst and cause injury. or oven is in operation the fan will run to cool the fascia and control knobs. DO NOT use unstable saucepans. -
Page 8: Oven Care
DO NOT use water on grease fires and • Fig. 1.3 never pick up a flaming pan. Turn the controls off and then smother a flaming pan on a surface unit by covering the pan completely with a well fitting lid or baking tray. -
Page 9: Cooker Care
DO NOT use aluminium foil to cover Cleaning • shelves, linings or the oven roof. WARNING : Using the self-cleaning • When the oven is on, DO NOT leave the • function results in higher temperatures oven door open for longer than necessary, than those for normal cooking. - Page 10 Before you remove any of the grill parts for • cleaning, make sure that they are cool or use oven gloves. DO NOT use any abrasive substances on • the grill and grill parts. DO NOT put the side runners in a •...
-
Page 11: Before You Start
Before you start... Your cooker should give you many years of and will retain heat even after you have trouble-free cooking if installed and operated stopped cooking. Care should be taken to correctly. It is important that you read this avoid touching heating elements. - Page 12 national and local regulations and with the Fig. 1.1 local gas and electricity supply companies’ requirements. All installations must be in accordance with the relevant instructions in this booklet. WARNING: THE APPLIANCE MUST 10 mm² max BE EARTHED. Note: The cooker must be connected to the correct electrical supply as stated on the 6 mm²...
-
Page 13: If You Smell Gas
Check the appliance is gas sound after Peculiar smells completion. When you first use your cooker it may give off an odour. This should stop after use. Make sure that the gas supply is turned • on and that the cooker is wired in and Before using for the first time, make sure that switched on. - Page 14 NEVER operate the cooker with wet hands. especially a deep fat fryer. Wait until the • fat is cool. Filling the pan too full of fat can DO NOT use a towel or other bulky cloth • cause spill over when food is added. If you in place of a glove –...
- Page 15 The inside door face is constructed with • Fig. 1.3 toughened safety glass. Take care NOT to scratch the surface when cleaning the glass panel. Accidental damage may cause the door • glass panel to fracture. Keep oven vent ducts unobstructed. •...
-
Page 16: Cooker Care
All parts of the cooker can be cleaned with Cooker care • hot soapy water. As steam can condense to water droplets on the cool outer trim of the oven, it may be Take care that no water seeps into the •... -
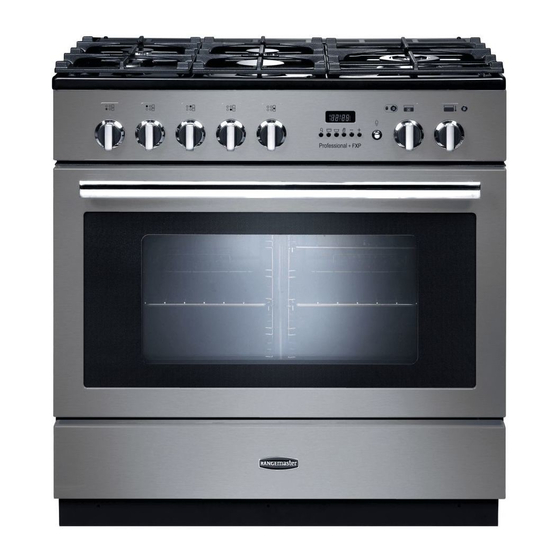
Page 17: Overview
Overview Fig. 2.1 ArtNo.273-0001 - 90 Pro+ FXP annotated The dual fuel single cavity cooker (Fig. 2.1) has the following ArtNo.270-0001 Fig. 2.2 features: Proplus control to high 5 hotplate burners including a wok burner Control panel incorporating a timer Multifunction oven Storage drawer Hotplate burners... -
Page 18: Wok Burner
If, when you let go of the control knob, the burner goes out, Fig. 2.3 ArtNo.270-0003 then the FSD has not been bypassed. Turn the control knob Proplus control to low to the OFF position and wait for one minute before you try again, this time making sure to hold in the control knob for slightly longer. -
Page 19: Griddle
Griddle Fig. 2.10 The griddle fits the left-hand well, front to back (Fig. 2.11). It is designed for cooking food on directly. DO NOT use pans of any kind on it. The griddle surface is non-stick and metal cooking utensils (e.g. spatulas) will damage the surface. Use heat resistant plastic or wooden utensils. -
Page 20: Multifunction Oven
Multifunction oven Fig. 2.12 The oven is a multifunction oven (Fig. 2.12). In addition to convection elements around the fans, it is fitted with extra heating elements, in the top of the oven and under the oven base. Take care to avoid touching the top elements when placing or removing items from the oven. - Page 21 Fanned grilling Fig. 2.13 This function operates the fan while the top element is on. It produces a more even, less fierce heat than a conventional grill. For best results place the food to be grilled on the pan provided. Thick pieces of meat or fish are ideal for cooking in this way, as the circulated air reduces the fierceness of the heat from the grill.
-
Page 22: Energy Saving Panel
The Browning and Base Heat functions are useful additions Fig. 2.14 to your oven, giving you flexibility to finish off items to perfection. With use, you will soon realize how these functions can combine to extend your cooking skills. Self-cleaning The oven has a self-cleaning function. -
Page 23: Accessories
Accessories Fig. 2.18 Fig. 2.19 Each oven is supplied with: • Two full capacity shelves (Fig. 2.20) • Grill pan tray support (Fig. 2.23) ArtNo.270-0030 Pro+ FXP oven ArtNo.270-0028 • Two grill pans with trivets (Fig. 2.21) Proplus MF temp control set to conventional indicator light •... -
Page 24: 3. 6 Button Clock
3. 6 Button clock Automatic dimming Fig. 3.1 Providing there are no automatic programs set, and the minute minder is not active, your clock will automatically dim during the hours between 22:00 and 06:00. ArtNo.302-0002 - 6BC annotated Minute Minder Step. - Page 25 Setting a cook duration To start and stop the ovens (main oven only) automatically You have set the required temperature and function mode (main oven only) and you would like the oven to automatically stop. You have set the required temperature and function mode and you would like the oven to automatically stop.
-
Page 26: Cooking Tips
Cooking tips Cooking with a multifunction oven General oven tips Remember: not all modes are suitable for all food types. The The wire shelves should always be pushed firmly to the back oven cooking times given are intended for a guide only. of the oven. -
Page 27: Cleaning Your Cooker
Cleaning your cooker Isolate the electricity supply before carrying out any major Fig. 5.1 cleaning. Allow the cooker to cool. NEVER use paint solvents, washing soda, caustic cleaners, biological powders, bleach, chlorine based bleach cleaners, coarse abrasives or salt. DO NOT mix different cleaning products – they may react together with hazardous results. - Page 28 Wok Burner Fig. 5.2 When reassembling the wok burner (Fig. 5.2) turn over the large base ring and find the ‘D’ shaped area (Fig. 5.3). Turn the head until the ‘D’ matches the one on the burner base. Flip the burner over once again and place it on the burner base.
- Page 29 Self-clean oven Fig. 5.6 WARNING: Remove all cookware, shelves, and the shelf supports from the oven before using ArtNo.272-0007 the self-clean function. If the shelves and supports Prof+ pyro US - MF oven - are left in the oven they will discolour and become Self clean setting rough.
- Page 30 NOTE: Because of the high temperatures generated Fig. 5.10 during the self-cleaning, the door will remain locked for a period after the cleaning cycle has finished. When the oven temperature has fallen sufficiently the interlock neon will go ArtNo.302-0005 - out and the door will unlock.
- Page 31 Cleaning table Cleaners listed are available from supermarkets or electrical retailers as stated (Table 5.3). For enamelled surfaces use a cleaner that is approved for use on vitreous enamel. Regular cleaning is recommended. For easier cleaning, wipe up any spillages immediately. Hotplate Part Finish...
-
Page 32: Troubleshooting
Troubleshooting Hotplate/Cooktop ignition or hotplate burners faulty Food is cooking too slowly, too quickly, or burning Is the power on? Is the clock illuminated? Cooking times may differ from your previous oven. If not, there maybe something wrong with the power supply. Check that you are using the recommended temperatures and shelf positions –... - Page 33 Oven light is not working Fig. 6.1 Fig. 6.2 The bulb has probably burnt out. You can buy a replacement bulb (which is not covered under the warranty) from a good electrical shop. Ask for a 40 W – 230 V halogen lamp (G9) (Fig.
-
Page 34: Installation
INSTALLATION Check the appliance is electrically safe and gas sound when you have finished. Installation Dear Installer In the UK the cooker must be installed in accordance with: Before you start your installation, please complete the details • All relevant British Standards / Codes of Practice, in below, so that, if your customer has a problem relating to particular BS 5440 Part 2. - Page 35 INSTALLATION Check the appliance is electrically safe and gas sound when you have finished. Location of cooker 11. Screws for fitting stability bracket 12. 13 mm spanner or socket wrench The cooker may be installed in a kitchen/kitchen diner but NOT in a room containing a bath or shower.
-
Page 36: Positioning The Cooker
INSTALLATION Check the appliance is electrically safe and gas sound when you have finished. Positioning the cooker Fig. 7.1 ArtNo.092-0003 - 90SC cooker min spacings Fig. 7.1 and Fig. 7.2 show the minimum recommended distance from the cooker to nearby surfaces. 75 mm 75 mm 650 mm... -
Page 37: Moving The Cooker
INSTALLATION Check the appliance is electrically safe and gas sound when you have finished. Moving the cooker Fig. 7.3 On no account try and move the cooker while it is plugged into the electricity supply. The cooker is very heavy, so take extra care. We recommend that two people manoeuvre the cooker. -
Page 38: Fitting The Stability Bracket Or Chain
INSTALLATION Check the appliance is electrically safe and gas sound when you have finished. Fitting the stability bracket or Fig. 7.6 chain Stability chain WARNING: To prevent tipping of the appliance, this stabilising means must be installed. Refer to the instructions for installation. - Page 39 INSTALLATION Check the appliance is electrically safe and gas sound when you have finished. Gas Connection Fig. 7.9 This must be in accordance with the relevant standards. The flexible hose (not supplied with the cooker) must be in accordance with the relevant standards. Hoses may be purchased at most builders’...
-
Page 40: Electrical Connection
INSTALLATION Check the appliance is electrically safe and gas sound when you have finished. Electrical connection Current Operated Earth Leakage Breakers The combined use of your cooker and other domestic The cooker must be installed by a qualified electrician, in accordance with all relevant British Standards/Codes of appliances may cause nuisance tripping, so we recommend Practice (in particular BS 7671), or with the relevant national... -
Page 41: Final Checks And Fittings
INSTALLATION Check the appliance is electrically safe and gas sound when you have finished. Final checks and fittings Hotplate check Fig. 8.1 Check each burner in turn. There is a flame supervision device (FSD) that stops the flow of gas to the burner if the flame goes out. -
Page 42: Fitting The Drawer
INSTALLATION Check the appliance is electrically safe and gas sound when you have finished. Fitting the drawer Removing the drawer... -
Page 43: Circuit Diagram
Circuit diagram A2/B1 B2 Code Description Code Description Code Colour Multi-function oven master switch Oven protect thermostat Blue Multi-function oven drone switch Oven neon Brown Oven thermostat Oven light Black Oven front switch Oven light switch Orange Right-hand oven base element Door lock neon Right-hand oven top outer element Ignition spark generator... -
Page 44: 10. Technical Data
29 mbar 230/400 V 50 Hz Propane 37 mbar See the appliance badge for test pressures. Dimensions Model Professional+ FXP 90 Dual Fuel Overall height minimum 905 mm maximum 930 mm Overall width 900 mm Overall depth 608 mm excluding handles, 650 mm including handles... - Page 45 Hotplate efficiency Brand Rangemaster Model Identification Professional+ FXP Size 90 Single Cavity Type Dual Fuel Type of Hob Number of gas burners Auxiliary / Small Burner (EE gas burner) Semi Rapide / Medium Burner (EE gas burner) Semi Rapide / Medium Burner (EE gas burner)
- Page 46 Oven data Brand Rangemaster Model identification Professional+ FXP Type of oven Electric Mass Number of cavities Single Cavity Efficiency Fuel type Electric Cavity type Multifunction* *Drop Down Door Power - conventional 2.75 Power - forced air convection Volume Litres Energy consumption (electricity) - conventional kWh / cycle 1.22...
- Page 47 • Has not been repaired by persons or organisations other than those authorised to act on behalf of AGA Rangemaster. Date of Purchase Exceptions: • Items not included under the free 1 year guarantee Installer’s Name &...
- Page 48 Registered Office: c/o Aga Rangemaster, Meadow Lane, Long Eaton, Nottingham, NG10 2GD Rangemaster continuously seeks improvements in specification, design and production of products and thus, alterations take place periodically. Whilst every effort is made to produce up-to-date literature, this brochure should not be regarded as...
Need help?
Do you have a question about the Professional+ FXP 90 Dual Fuel and is the answer not in the manual?
Questions and answers