Rangemaster Professional+ FXP 90 Dual Fuel User's Manual & Installation Instructions
Range cooker
Hide thumbs
Also See for Professional+ FXP 90 Dual Fuel:
- User's manual & installation instructions (48 pages) ,
- User's manual & installation instructions (48 pages)

Subscribe to Our Youtube Channel
Related Manuals for Rangemaster Professional+ FXP 90 Dual Fuel


Summary of Contents for Rangemaster Professional+ FXP 90 Dual Fuel
-
Page 1: Installation Instructions
Britain’s No.1 Range Cooker USER GUIDE & INSTALLATION INSTRUCTIONS Professional+ FXP 90 Dual Fuel... - Page 2 We offer cookware to work perfectly with all fuel types manufactured by Rangemaster, including induction hobs. You can be assured of functionality with style, as well as the quality and meticulous attention to detail you expect from the pioneers of range cooking.
-
Page 3: Table Of Contents
Contents Before You Start... Troubleshooting Installation and Maintenance Installation Peculiar Smells Dear Installer If You Smell Gas Safety Requirements and Regulations Ventilation Provision of Ventilation Personal Safety Location of Cooker Cooker Care Conversion Cleaning Positioning the Cooker Overview Moving the Cooker Hotplate Burners Levelling Wok Burner... -
Page 5: Before You Start
1. Before You Start... If You Smell Gas Thank you for buying this cooker. It should give you many years of trouble-free cooking if installed and operated • DO NOT turn electric switches on or off correctly. It is important that you read this section before DO NOT smoke •... -
Page 6: Cooker Care
DO NOT use a steam cleaner on your cooker. WARNING! Unattended cooking on a hob with fat or oil can be Always be certain that the controls are in the OFF position dangerous and may result in fire. when the oven is not in use, and before attempting to clean the cooker. -
Page 7: Overview
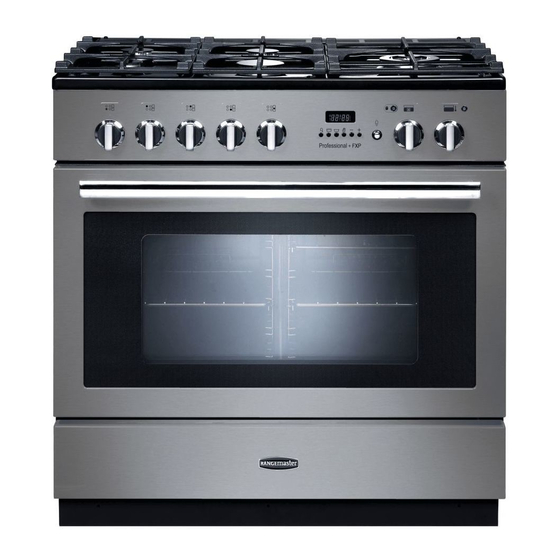
2. Overview Fig. 2.1 ArtNo.273-0001 - 90 Pro+ FXP annotated The dual fuel single cavity cooker (Fig. 2.1) has the following ArtNo.270-0001 Fig. 2.2 features: Proplus control to high 5 hotplate burners including a wok burner Control panel incorporating a timer Multifunction oven Storage drawer Hotplate Burners... -
Page 8: Wok Burner
If, when you let go of the control knob, the burner goes out, Fig. 2.3 then the FSD has not been bypassed. Turn the control knob ArtNo.270-0003 Proplus control to low to the OFF position and wait for one minute before you try again, this time making sure to hold in the control knob for slightly longer. -
Page 9: The Griddle
The Griddle Fig. 2.10 The griddle fits the left-hand well, front to back (Fig. 2.11). It is designed for cooking food on directly. DO NOT use pans of any kind on it. The griddle surface is non-stick and metal cooking utensils (e.g. spatulas) will damage the surface. Use heat resistant plastic or wooden utensils. -
Page 10: The Multifunction Oven
The Multifunction Oven Fig. 2.12 The oven is a multifunction oven (Fig. 2.12). In addition to convection elements around the fans, it is fitted with extra heating elements, in the top of the oven and under the oven base. Take care to avoid touching the top elements when placing or removing items from the oven. - Page 11 door should be kept closed while cooking is in progress, so Fig. 2.13 saving energy. You will also find that the food needs to be watched and turned less than for normal grilling. Preheat this function before cooking. Note: When grilling full width, to allow sufficient access for tending foods we recommend placing the grill pan tray support on the second from top level.
-
Page 12: Energy Saving Panel
Self-Cleaning Fig. 2.14 The oven has a self-cleaning function. The oven will run at a high temperature cycle to burn any cooking residue to ash that is easily cleaned away with a damp cloth. For safety, the oven will lock during the cleaning cycle. See the ‘Cleaning’... -
Page 13: The Clock
The Clock Fig. 2.18 Fig. 2.19 You can use the 6-button timer (Fig. 2.20) to turn the oven on and off. The clock must be set to the time of day before the oven will work. To Set the Time of Day ArtNo.270-0030 Press and hold both the [C] and [D] buttons as shown in Pro+ FXP oven... -
Page 14: Key Lock
AUTO is Showing, But You Want to Reset to Fig. 2.28 Fig. 2.29 Manual Cooking When cancelling an automatic setting, any cooking time already set must be returned to ( 0.00 ) before you can return ArtNo.302-0005 - ArtNo.302-0005a - to manual, by pressing the [B] button. -
Page 15: Accessories
Accessories Fig. 2.35 Fig. 2.36 Each oven is supplied with: • Two full capacity shelves (Fig. 2.35) Grill pan tray support (Fig. 2.36) ArtNo.326-0013 - Full capacity shelf ArtNo.326-0004 - Cradle shelf • (Falcon) Two grill pans with trivets (Fig. 2.37) •... -
Page 16: Storage
Storage Fig. 2.44 The bottom drawer is for storing oven trays and other cooking utensils. It can get very warm, so do not store anything in it that may melt or catch fire. Never store flammable materials in the drawer. This includes paper, plastic and cloth items, such as cookbooks, plastic ware and towels, as well as flammable liquids. -
Page 17: Cooking Tips
3. Cooking Tips Cooking with a Multifunction Oven General Oven Tips Remember: not all modes are suitable for all food types. The The wire shelves should always be pushed firmly to the back oven cooking times given are intended for a guide only. of the oven. -
Page 18: Cooking Table
4. Cooking Table DocNo.031-0004 - Cooking table - electric & fan single cavity The oven control settings and cooking times given in the table below are intended to be used Top (T) AS A GUIDE ONLY. Individual tastes may require the temperature to be altered to provide a ArtNo.050-0007 preferred result. -
Page 19: Cleaning Your Cooker
5. Cleaning Your Cooker Isolate the electricity supply before carrying out any major Fig. 5.1 cleaning. Allow the cooker to cool. NEVER use paint solvents, washing soda, caustic cleaners, biological powders, bleach, chlorine based bleach cleaners, coarse abrasives or salt. DO NOT mix different cleaning products –... -
Page 20: Griddle
The Wok Burner Fig. 5.2 ArtNo.311-0014 Wok burner details When reassembling the wok burner (Fig. 5.2) turn over the large base ring and find the ‘D’ shaped area (Fig. 5.3). Turn the head until the ‘D’ matches the one on the burner base. Flip the burner over once again and place it on the burner base. -
Page 21: Self-Clean Oven
Self-Clean Oven Fig. 5.6 WARNING! Remove all cookware, shelves, and the shelf supports from the oven before using the self-clean ArtNo.272-0007 function. If the shelves and supports are left in the Prof+ pyro US - MF oven - oven they will discolour and become rough. Self clean setting WARNING! Using the self-cleaning function results in higher... - Page 22 When the door has unlocked turn the oven function control Fig. 5.10 back to OFF. When the door has unlocked and the oven has cooled, use a damp cloth the clean the debris and ash. ArtNo.302-0005 - 6BC Stopping the oven 1 To Cancel the Self-Cleaning Cycle To cancel the self-clean function, hold down the [D] button and then press the [–] button to set the timer back to ( 0.00 ).
-
Page 23: Cleaning Table
Cleaning Table Cleaners listed are available from supermarkets or electrical retailers as stated (Table 5.2). For enamelled surfaces use a cleaner that is approved for use on vitreous enamel. Regular cleaning is recommended. For easier cleaning, wipe up any spillages immediately. Hotplate Part Finish... -
Page 24: Troubleshooting
6. Troubleshooting Cooktop ignition or cooktop burners faulty The knobs get hot when I use the oven, can I avoid this? Is the power on? Yes, this is caused by heat rising from the oven, and heating them up. Do not leave the oven door open. Are the sparker (ignition electrode) or burner holes blocked by debris? If there is an installation problem and I don’t get my... - Page 25 The timed oven is not coming on when turned on Fig. 6.1 manually Is the power on? Is the clock illuminated? If not, there may be something wrong with the power ArtNo.324-0005 Oven light bulb supply. Is the cooker supply on at the isolator switch? Has the time of day been set? Is the key symbol [F] showing in the display to signify that the oven is locked? See the ‘Clock’...
-
Page 26: Installation
INSTALLATION Check the appliance is electrically safe and gas sound when you have finished. 7. Installation Dear Installer In the UK: The regulations and standards are as follows: Before you start your installation, please complete the details below, so that, if your customer has a problem relating to In your own interest and that of safety, it is law that all your installation, they will be able to contact you easily. -
Page 27: Location Of Cooker
INSTALLATION Check the appliance is electrically safe and gas sound when you have finished. Location of Cooker Checking the Parts: The cooker may be installed in a kitchen/kitchen diner but Pan supports Griddle NOT in a room containing a bath or shower. This appliance is designed for domestic cooking only. -
Page 28: Positioning The Cooker
INSTALLATION Check the appliance is electrically safe and gas sound when you have finished. Positioning the Cooker ArtNo.092-0003 - 90SC cooker min spacings Fig. 7.1 The diagrams show the minimum recommended distance from the cooker to nearby surfaces (Fig. 7.1 and Fig. 7.2). 75 mm 75 mm 650 mm... -
Page 29: Levelling
INSTALLATION Check the appliance is electrically safe and gas sound when you have finished. Removing the Oven Door Fig. 7.4 To remove the oven door, open the door fully. Swivel the locking ‘U’ clips forward to the locking position (Fig. 7.4). Grip the sides of the door, lift upwards and then slide the door forwards (Fig. -
Page 30: Fitting The Stability Bracket Or Chain
INSTALLATION Check the appliance is electrically safe and gas sound when you have finished. Fitting the Stability Bracket or Chain Fig. 7.8 Unless otherwise stated, a cooker using a flexible gas connector must be secured with a suitable stability device. Stability chain Suitable stability devices are shown in Fig. -
Page 31: Electrical Connection
INSTALLATION Check the appliance is electrically safe and gas sound when you have finished. Electrical Connection Fig. 7.12 This appliance must be installed by a qualified electrician to comply with the relevant Institute of Electrical Engineers (I.E.E.) regulations, and also the local electricity supply company requirements. -
Page 32: Final Fitting
INSTALLATION Check the appliance is electrically safe and gas sound when you have finished. Final Fitting Fig. 7.15 Fitting the Plinth Remove the 3 screws for the plinth mounts along the front bottom edge of the range (Fig. 7.15). Fasten the plinth using these screws (alternative colour screws can be found in the loose parts pack). -
Page 33: Conversion To Lp Gas
WARNING – SERVICING TO BE CARRIED OUT ONLY BY AN AUTHORISED PERSON Disconnect from electricity and gas before servicing. Check appliance is safe when you have finished. 8. Conversion to LP Gas Check in the ‘Technical Data’ section at the back of these Fig. -
Page 34: Stick On Label
WARNING – SERVICING TO BE CARRIED OUT ONLY BY AN AUTHORISED PERSON Disconnect from electricity and gas before servicing. Check appliance is safe when you have finished. Stick on Label Stick the LP gas label over the natural gas part of the appliance data label. -
Page 35: Circuit Diagram
8. Circuit Diagram A2/B1 B2 Code Description Code Description Code Colour Multi-function oven master switch Oven protect thermostat Blue Multi-function oven drone switch Oven neon Brown Oven thermostat Oven light Black Oven front switch Oven light switch Orange Right-hand oven base element Door lock neon Right-hand oven top outer element Ignition spark generator... -
Page 36: Technical Data
29 mbar 230/400 V 50 Hz Propane 37 mbar See the appliance badge for test pressures. Dimensions Model Professional+ FXP 90 Dual Fuel Overall height minimum 905 mm maximum 930 mm Overall width 900 mm Overall depth 608 mm excluding handles, 650 mm including handles... -
Page 37: Hotplate Efficiency
Hotplate Efficiency Brand Rangemaster Model Identification Professional+ FXP Size Type Dual Fuel Type of Hob Number of gas burners Auxiliary / Small Burner (EE gas burner) Semi Rapide / Medium Burner (EE gas burner) Semi Rapide / Medium Burner (EE gas burner) -
Page 38: Oven Data
Oven Data Brand Rangemaster Model identification Professional+ FXP Type of oven Electric Mass Number of cavities Left-hand Efficiency Fuel type Cavity type Power - conventional Power - forced air convection Volume Litres Energy consumption (electricity) - conventional kWh / cycle... - Page 39 0800 804 6261 or depending on your mobile network tariff you can For a competitive quote and to arrange for a Rangemaster approved call free on 0370 789 5107. engineer to attend, call Consumer Services on: 0800 804 6261 or...
- Page 40 Registered in England and Wales. Registration No. 354715 Registered Office: Juno Drive, Leamington Spa, Warwickshire, CV31 3RG Rangemaster continuously seeks improvements in specification, design and production of products and thus, alterations take place peri- odically. Whilst every effort is made to produce up-to-date literature, this booklet should not be regarded as an infallible guide to current...
Need help?
Do you have a question about the Professional+ FXP 90 Dual Fuel and is the answer not in the manual?
Questions and answers