Advertisement
Before using your air conditioner, please read
Before using your air conditioner, please read
Before using your air conditioner, please read
Before using your air conditioner, please read
Before using your air conditioner, please read
Before using your air conditioner, please read
Before using your air conditioner, please read
Before using your air conditioner, please read
Before using your air conditioner, please read
Before using your air conditioner, please read
Before using your air conditioner, please read
Before using your air conditioner, please read
this manual carefully and keep it for future reference.
this manual carefully and keep it for future reference.
this manual carefully and keep it for future reference.
this manual carefully and keep it for future reference.
this manual carefully and keep it for future reference.
this manual carefully and keep it for future reference.
this manual carefully and keep it for future reference.
this manual carefully and keep it for future reference.
this manual carefully and keep it for future reference.
this manual carefully and keep it for future reference.
this manual carefully and keep it for future reference.
this manual carefully and keep it for future reference.
WINDOW/WALL TYPE
WINDOW/WALL TYPE
WINDOW/WALL TYPE
WINDOW/WALL TYPE
WINDOW/WALL TYPE
WINDOW/WALL TYPE
WINDOW/WALL TYPE
WINDOW/WALL TYPE
WINDOW/WALL TYPE
WINDOW/WALL TYPE
WINDOW/WALL TYPE
WINDOW/WALL TYPE
USER MANUAL
ROOM AIR CONDITIONER
ROOM AIR CONDITIONER
ROOM AIR CONDITIONER
ROOM AIR CONDITIONER
ROOM AIR CONDITIONER
ROOM AIR CONDITIONER
ROOM AIR CONDITIONER
ROOM AIR CONDITIONER
ROOM AIR CONDITIONER
ROOM AIR CONDITIONER
ROOM AIR CONDITIONER
ROOM AIR CONDITIONER
WINDOW TYPE AIR CONDITIONER
Before using your air conditioner, please read this manual
carefully and keep it for future reference.
Prior to installation this air-conditioning unit must be
submitted for approval by the utility service which provides
electricity.
-
-
-
-
-
-
-
-
-
-
-
-
KAM-75BMC
KAM-95BMC
www.kolinphil.com.ph
Advertisement

Related Manuals for Kolin KAM-75BMC


Summary of Contents for Kolin KAM-75BMC
- Page 1 ROOM AIR CONDITIONER ROOM AIR CONDITIONER ROOM AIR CONDITIONER ROOM AIR CONDITIONER WINDOW TYPE AIR CONDITIONER KAM-75BMC KAM-95BMC Before using your air conditioner, please read this manual carefully and keep it for future reference. Prior to installation this air-conditioning unit must be submitted for approval by the utility service which provides electricity.
- Page 2 SOCIABLE REMARK The following contents apply only the countries of Europe. DISPOSAL: Do not dispose this product as unsorted municipal waste. Collection of such waste separately for special treatment is necessary. It is prohibited to dispose of this appliance in domestic household waste. For disposal, there are several possibilities: A) The municipality has established collection systems, where electronic waste can be disposed of at least free of charge to the user.
- Page 3 Read This Manual Inside you will find many helpful hints on how to use and maintain your air conditioner properly. Just a little preventive care on your part can save you a great deal of time and money over the life of your air conditioner. You'll find many answers to common problems in the chart of troubleshooting tips.
-
Page 4: Table Of Contents
CONTENTS 1.SAFETY PRECAUTIONS..............1 2. UNIT PARTS IDENTIFICATION ..............4 3. OPERATING INSTRUCTIONS..............5 4. INSTALLATION INSTRUCTIONS.............9 5. TROUBLESHOOTING TIPS..............13 6. SPECIFICATIONS ................14... -
Page 5: Safety Precautions
SAFETY PRECAUTIONS To prevent injury to the user or other people and property damage, the following instructions must be followed. Incorrect operation due to ignoring of instructions may cause harm or damage. The seriousness is classified by the following indications. WARNING This symbol indicates the possibility of death or serious injury. - Page 6 ! CAUTION Do not clean the air Ventilate the room well when When the air filter is to be removed, do not touch the conditioner with water. used together with a stove, metal parts of the unit. etc. It may cause an injury. Water may enter the unit and An oxygen shortage may occur.
- Page 7 SAFETY PRECAUTIONS(prior to operation) Preparing for operation 1. Contact an installation specialist for installation. 2. Plug in the power plug properly. 3. Do not use a damaged or non-standard power cord. 4. Do not share the same outlet with other appliances. 5.
-
Page 8: Unit Parts Identification
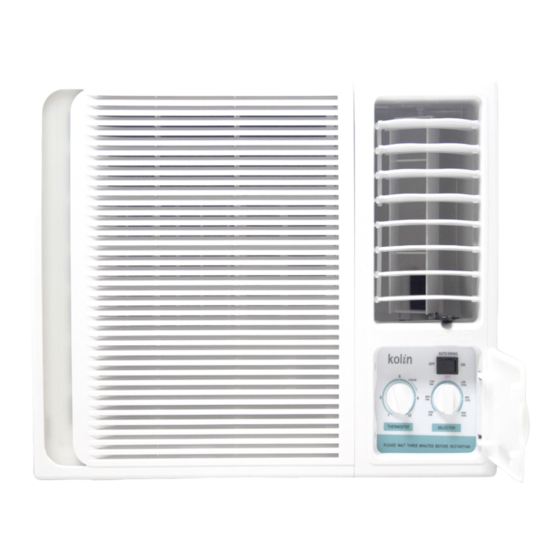
UNIT PARTS IDENTIFICATION 1. Front panel 2. Air filter 3. Frame 4. Cabinet 5. Air inlet grille (outdoor side) 6. Air outlet grille 7. Operation knob 8. Power supply cord 1. Power cord conductors are distinguished according to color as follows (see Fig.a) 2. -
Page 9: Operating Instructions
OPERATING INSTRUCTIONS AUTO SWING SELECTOR THERMOSTAT HIGH HIGH COOL POWER COOL COOLER COOL WAIT THREE MINUTES WAIT THREE MINUTES BEFORE RESTARTING BEFORE RESTARTING AUTO SWING SELECTOR SELECTOR THERMOSTAT THERMOSTAT HIGH HIGH COOL HIGH POWER COOLER COOL COOLER HIGH COOL COOL COOL WAIT THREE MINUTES WAIT THREE MINUTES... - Page 10 Fan Mode Rotate the knob to the left to select your choice of fan speeds for air circulation. Note: When selecting a fan speed, the compressor will not run. Note When turning the SELECTOR knob from "LOW COOL" to "HIGH COOL", keep your speed slow as far as possible.
- Page 11 Vertical air flow adjustment (manually) To adjust vertical air flow direction, adjust any one of the horizontal louver blades. When turning up or down the horizontal louver blades, always keep horizontality the top or bottom blades. This can effectively prevent water drops condensed on the front panel of the unit.
- Page 12 Drainage To meet different requirement of different type of air conditioner,t herea re threek inds o f m ethods for your choice to treat the condensed water. When cooling or heating,you can choose bottom drainage , See the following procedures to perform bottom drainage: 1.
-
Page 13: Installation Instructions
INSTALLATION INSTRUCTIONS Select the best location AWNING AWNING FENCE FENCE About 3~4 About 3~4 Over 50cm Over 50cm 1. To avoid vibration and noise, make sure the unit is installed securely and firmly. 2. Install the unit where the sunlight does not shine directly on the unit. If the unit receives direct sunlight, build an awning to shade the cabinet. - Page 14 Installation of the unit into the Housing 1. Slide the unit into the housing until it is firmly against the FLASH OR SEAL AROUND EXTERNAL WALL FRAME OR ARCHITRAVE rear of the housing. Care is required to ensure the foam sealing strips on the housing remain in position.
- Page 15 Installation Steps Step 1. Remove the front panel and the air filter 1. Hold the slot under the front panel, then uplift it outwards, and remove the front panel (See Fig.1). 2. Pinch the handle under the air filter and make the air filter arched, remove it from the slot from underside to upside (See Fig.2).
-
Page 16: Troubleshooting Tips
Fig.5 Fig.6 Fig.7 Step 3. Installation. 1. Grasp the handle on the chassis and carefully slide the air conditioner out of the cabinet (See Fig.5). 2. Remove shipping pad from around compressor before operation and make sure the discharge points to the drain pan are aligned before the chassis is pushed into the cabinet (See Fig.6). - Page 17 Problem Solution Turn selector to a higher COOL position. Air from unit does Thermostat set too warm. Set thermostat to colder temperature. not feel cold Room temperature below 18 C(64 F). Cooling may not occur until room temperature enough rises above 18 C(64 F). Temperature sensing tube touching cold coil, located behind air filter.
-
Page 18: Specifications
SPECIFICATIONS Unit dimensions: MODEL BODY DIMENSION(mm) (Btu/h) (W X H X D) 445X320X415 5000~6000 450X346X535 450X346X535 7000~9000 450X346X585 560X400X640 9000~12000 600X380X560 660X434X620 15000~16000 660X428X680 15000~24000 660X428X780 NOTE:Value of D is only referenced. Minimum norminal cross-sectional area of conductors: Rated current of appliance Nominal cross-sectional area (mm ) 3 and... - Page 19 The design and specifications are subject to change without prior notice for product improvement. Consult with the sales agency or manufacturer for details. KPII20190423...
Need help?
Do you have a question about the KAM-75BMC and is the answer not in the manual?
Questions and answers