Table of Contents
Advertisement
Quick Links
works
for
years
air conditioner
User Manual
Model:
KLG-IF70-2C1M
Thank you for choosing these Air Conditioners, please read this owner's manual carefully
before operation and retain it for future reference.
KOLIN reserves the right to interpret this manual which will be subject to any change due to
product improvement without further notice.
KOLIN Philippines International, Inc. reserves the final right to interpret this manual.
Advertisement
Table of Contents

Related Manuals for Kolin KLG-IF70-2C1M


Summary of Contents for Kolin KLG-IF70-2C1M
- Page 1 Thank you for choosing these Air Conditioners, please read this owner’s manual carefully before operation and retain it for future reference. KOLIN reserves the right to interpret this manual which will be subject to any change due to product improvement without further notice.
-
Page 2: Table Of Contents
Contents 1 Safety Precautions · · · · · · · · · · · · · · · · · · · · · · · · · · · · · · · · · · · · · · · · · · · · · · · · · · · · · · · · · · · · · · · · · · · · · · · 1 2 Outline of the Unit and Main Parts ·... -
Page 3: Safety Precautions
1 Safety Precautions This mark indicates procedures which, if improperly performed, might lead to the WARNING! death or serious injury of the user. This mark indicates procedures which, if improperly performed, might possibly CAUTION! result in personal harm to the user, or damage to property. WARNING! (1). -
Page 4: Outline Of The Unit And Main Parts
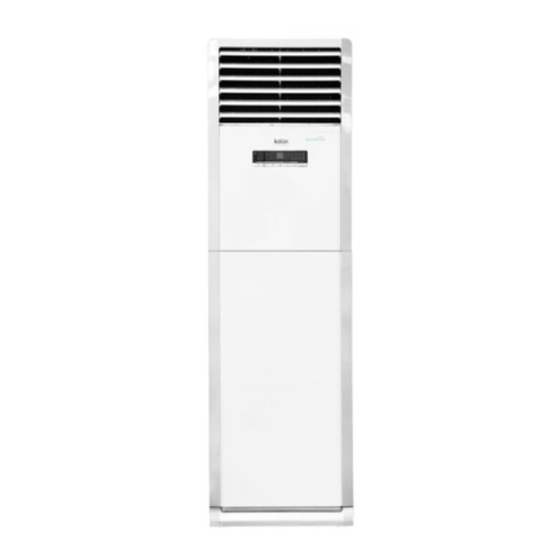
2 Outline of the Unit and Main Parts Fig. 2.1 Notes: The connection pipe for this unit should be prepared by the user. -
Page 5: Preparative For Installation
3 Preparative for Installation 3.1 Standard Accessory Parts The standard accessory parts listed below are furnished and should be used as required. Table 3.1 Indoor Unit Accessories Name Appearance Q'ty Usage Wireless Controller + To control the indoor unit Battery Insulation To insulate the gas pipe Insulation... -
Page 6: Selection Of The Installation Location
3.2 Selection of the Installation Location WARNING! The unit must be installed where strong enough to withstand the weight of the unit and fixed securely, otherwise the unit would topple or fall off. CAUTION! ①. Do not install where there is a danger of combustible gas leakage. ②. - Page 7 Unit: mm Fig. 3.1 3.2.2 Outdoor Unit WARNING! ①. Install the unit where it will not be tilted by more than 5° . ②. During installation, if the outdoor unit has to be exposed to strong wind, it must be fixed securely. If possible, do not install the unit where it will be exposed to direct sunlight.
-
Page 8: Connection Pipe Requirement
Length (m) Indoor Unit and Model thickness) (mm) Liquid Outdoor Unit (m) KLG-IF70-2C1M φ17×1.75 Note: ①. The connecting pipe should be thermally insulated properly. ②. The pipe wall thickness shall be 0.5-1.0 mm and the pipe wall shall be able to withstand the pressure of 6.0 MPa. -
Page 9: Electrical Requirement
K L G - I F 7 0 - 2 C 1 M 2 3 0 V ~ 6 0 H z 2 3 0 V ~ 6 0 H z 6 . 0 K L G - I F 7 0 - 2 C 1 M... -
Page 10: Installation Of The Unit
4 Installation of the Unit 4.1 Installation of the Indoor Unit WARNING ! ①. The unit installation work must be done by qualified personnel according to the local rules and this manual. ②. When removing the unit to the other place, please firstly contact with the local maintenance center. - Page 11 4.1.2 Preparation for Installing the Indoor Unit It’s required to disassemble the air intake panel before conducting piping and wiring work. (1). Dismantle the screw-shielding cover from both sides of the panel. (2). Remove the screws distributed on the panel by a screwdriver. (See Fig.4.2) (3).
-
Page 12: Installation Of The Outdoor Unit
Fig. 4.6 Table 4.2 Unit: mm Item Model KLG-IF70-2C1M 1365 1085 4.2.2 Condensate Drainage of the Outdoor Unit(Only for the heat pump unit) (Fig. 4.7) (1). It is required to install a drain pipe for the outdoor unit to drain out the condensate water during heating operation. -
Page 13: Installation Of The Connection Pipe
pump unit) (3). Installation Method: Insert the pipe joint into the hole φ25 located at the base plate of the unit and then connect the drain pipe to the pipe joint. Fig. 4.7 4.3 Installation of the Connection Pipe 4.3.1 Flare Processing (1). - Page 14 (3). When pipes are repeatedly bent or stretched, the material will harden, making it difficult to bend or stretch them any more. Do not bend or stretch the pipes more than three times. (4). When bending the pipe, do not bend it as is. The pipe will be collapsed. In this case, cut the heat insulating pipe with a sharp cutter as shown in Fig.
- Page 15 Fig. 4.11 Table 4.3 Flare nut tightening torque Pipe Diameter Tightening Torque 1/4〞(Inch) 15-30 (N· m) 3/8〞(Inch) 35-40 (N· m) 5/8〞(Inch) 60-65 (N· m) 1/2〞(Inch) 45-50 (N· m) 3/4〞(Inch) 70-75 (N· m) 7/8〞(Inch) 80-85 (N· m) CAUTION! Firstly connect the connection pipe to indoor unit, then to outdoor unit; pay attention to the piping bending, do not damage the connection pipe;...
- Page 16 4.3.5 Checking the Pipe Connections for Gas Leaking For both indoor and outdoor unit side, check the joints for gas leaking by the use of a gas leakage detector without fail when the pipes are connected. 4.3.6 Heat Insulation on the Pipe Joints (Indoor Side Only) Stick coupler heat insulation (large and small) to the place where connecting pipes.
-
Page 17: Vacuum And Gas Leakage Inspection
(2). If the outdoor unit is installed higher than the indoor unit 1). Taping should be done from lower to the upper part. 2). All pipes are bound and taped together and also should be trapped to prevent water from returning to the room (See Fig. - Page 18 For the additional amount, see Table 4.4. Table 4.4 Item Additional Refrigerant Amount for Extra Pipe Model KLG-IF70-2C1M 60g/m When the height difference between the indoor unit and outdoor unit is larger than 10 meters, an oil bend should be employed for every 6 meters.
-
Page 19: Installation Of The Drain Pipe
Fig. 4.17 4.5 Installation of the Drain Pipe 4.5.1 Precautions When Doing the Piping Work (1). Keep piping as short as possible and slope it downwards at a gradient of at least 1/100 so that air may not remain trapped inside the pipe. (2). - Page 20 4.5.2 Installing the Drain Pipes (1). Insert the drain hose into the drain socket up to the base, and tighten the clamp securely with the tape. (2). Insert the drain hose into the drain outlet, and tighten the clamp securely with tape.
-
Page 21: Electrical Wiring
4.6 Electrical Wiring 4.6.1 Wiring Precautions WARNING! ①. Before obtaining access to terminals, all supply circuits must be disconnected. ②. The rated voltage of the unit is as shown as Table 3.4 and Table 3.5 ③. Before turning on, verify that the voltage is within the 198~264V range(for single phrase unit). ④. - Page 22 insulation about 10 mm (3/8") . 2). Using a screwdriver, remove the terminal screw (s) on the terminal board. 3). Using a round terminal fastener or pliers, securely clamp a round terminal to each stripped wire end. 4). Position the round terminal wire, and replace and tighten the terminal screw with a screwdriver.(Fig.
- Page 23 (4). Electric wiring between the indoor and outdoor units Single-phase unit (KLG-IF70-2C1M) KLG-IF70-2C1M-Outdoor-Indoor 1.Power cord 3×6.0mm (H07RN-F) 2.Power cord 3G0.75mm (H05VV-F) 3.Communication cords 2×0.75mm (H05RN-F) Fig. 4.23 (5). Electric wiring of indoor unit side Open the glass panel and the electric box cover then insert the end of the communication cord and the power cable into the terminal board.
-
Page 24: Installation Of Controllers
⑤. Tighten the indoor/outdoor connection cord and power cord respectively on the terminal boards with screws. Faulty connection may cause a fire. ⑥. If the indoor unit connection cord (to the outdoor unit) and power supply are wired incorrectly, the air conditioner may be damaged. -
Page 25: Test Running
6 Test Running 6.1 Trial Operation and Testing (1). The meaning of error codes as shown below: Table 6.1 Number Error code Error Remarks Compressor high pressure protection Indoor anti-freeze protection Compressor low pressure protection, refrigerant lack protection and refrigerant colleting mode Compressor high discharge temperature protection Communication error Indoor fan motor error... - Page 26 Communication error between main control and drive Drive module sensor error Drive module over temperature protection Zero passage protection AC current protection Drive current error Sensor connecting protection Temperature drift protection Bus low voltage protection Bus high voltage protection Charge loop error Input voltage abnormality Drive memory chip error Outdoor unit capacity code error...
- Page 27 Buttons on the control panel : ON/OFF, Mode, AMB, ▲and▼,Function, Speed 1). ON/OFF ①. Press this button to turn on or turn off the air conditioner. ②. After the unit is started up. “ ” is in green (Display color may be different for different unit, please refer to the actual product).
- Page 28 user changes the set temperature, set speed or up & down swing, air conditioner will run according to user’s setting. Next time when unit is turned on, up & down swing and left & right swing will maintain the previous status while temperature and fan speed adopt default settings.
- Page 29 code in turn and the buzzer gives sound. The unit will stop operation after 5min or if the unit received the OFF signal within 5s, the unit will turn to standby status.(Energization for the first time: it indicates the first energization after installing the unit) 5).
- Page 30 function can startup TIMER OFF. Cancel Timer OFF: Under timer function, press this button to select timer function and the corresponding icon flashes. Meanwhile, press ▲and▼ button to adjust timer setting to no display, wait for 5s or press this button to select next function can cancel TIMER OFF. b.
- Page 31 (3). Instruction to Display Fig.6.2 Table 6.2 Icons Introduction Display setting temperature. TEMP Indicate temperature of indoor circumstances. TURBO Indicates setting the super strong function. Indicate mode of energy saving. Indicate mode of living room. Indicate mode of office/meeting. Indicate mode of restaurant. Indicate common mode.
-
Page 32: Working Temperature Range
6. 2 Working Temperature Range Table 6.3 Indoor Side Outdoor Side Test Condition DB(℃) WB(℃) DB(℃) WB(℃) Nominal Cooling — Nominal Heating — Rated Cooling — Low Temp. Cooling - Rated Heating — Low Temp. Heating Note: ①. The design of this unit conforms to the requirements of ISO5151 standard. ②. - Page 33 Kolin. Only ask professional serviceman to check and repair the unit.
-
Page 34: Routine Maintenance
7.2 Routine Maintenance WARNING! ①. Do turn off the unit and cut off the main power supply when cleaning the air conditioner, otherwise electric shock may happen. ②. Do not make the air conditioner wet or electric shock may be lead; Ensure that the air conditioner will not be cleaned by water rinsing under any circumstance. - Page 35 (2). At the Start of the Seasonal Use 1). Check if there is blockage at the inlet or outlet vent of air conditioner. 2). Check if the earth wire has been attached reliably by the skilled serviceman. 3). Check if the exhausted batteries of the wireless controller have been replaced. 4).
- Page 36 KPII 20160919 66160000202...
Need help?
Do you have a question about the KLG-IF70-2C1M and is the answer not in the manual?
Questions and answers