
Related Manuals for Rockwell Automation Allen-Bradley 856T-B24LC


Summary of Contents for Rockwell Automation Allen-Bradley 856T-B24LC
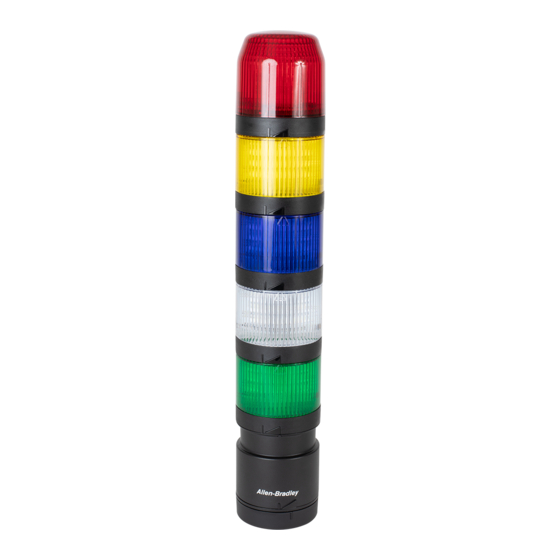
- Page 1 Control Tower IO-Link Class B Light and Sound Module Controller Catalog Number 856T-B24LC User Manual Original Instructions...
- Page 2 If this equipment is used in a manner not specified by the manufacturer, the protection provided by the equipment may be impaired. In no event will Rockwell Automation, Inc. be responsible or liable for indirect or consequential damages resulting from the use or application of this equipment.
-
Page 3: Table Of Contents
Assign Device Parameters ........17 Rockwell Automation Publication 856T-UM001B-EN-P - April 2021... - Page 4 Service Code........... . 51 Source Length: From Data Structure Tables ....52 Rockwell Automation Publication 856T-UM001B-EN-P - April 2021...
- Page 5 Index ............77 Rockwell Automation Publication 856T-UM001B-EN-P - April 2021...
- Page 6 Table of Contents Notes: Rockwell Automation Publication 856T-UM001B-EN-P - April 2021...
-
Page 7: Preface
IO-Link module power on self test Download Firmware, AOP, Download firmware, associated files (such as AOP, EDS, and DTM), and access EDS, and Other Files product release notes from the Product Compatibility and Download Center at rok.auto/pcdc. Rockwell Automation Publication 856T-UM001B-EN-P - April 2021... -
Page 8: Additional Resources
Bulletin 856T Control Tower Installation Instructions, publication 856T-IN013 Provides information to install and wire the 856T IO-Link module. Provides guidelines for how to use Rockwell Automation products to improve the security of System Security Design Guidelines, publication SECURE-RM001 your Industrial Automation system. -
Page 9: Product Overview
• Premier integration design that enables configuration via the Rockwell Automation® IO-Link master Add-on Profile. • Automatic Device Configuration that helps you replace the device quicker, if necessary. Rockwell Automation Publication 856T-UM001B-EN-P - April 2021... -
Page 10: Installation
856T-B24LC module to help prevent unwanted access when a distributed control architecture is used. When the device is installed on top of a control panel, the panel enclosure must provide protection against unwanted accessibility to the cabling. Rockwell Automation Publication 856T-UM001B-EN-P - April 2021... - Page 11 In addition, this status indicator also displays if the device is communicating with the IO-Link Master. For more information on these results, see Power On Self Test (POST) on page Figure 3 - Status Indicator Location on IO-Link Module Status Indicator Rockwell Automation Publication 856T-UM001B-EN-P - April 2021...
-
Page 12: Wiring
Ch 1 Black Chas Chas Ch 2 Ch 3 N24 Gray Blue Device Power Supply P24 White Brown IMPORTANT Use an 889D-F5AC-* cordset to connect the 856T-B24LC module to the 1734 IO-Link master. Rockwell Automation Publication 856T-UM001B-EN-P - April 2021... -
Page 13: Io-Link Overview
Seamless Integration • Forward and backward compatible • No special cables required • Connectivity options remain the same • Access IO-Link functionality by simply connecting an IO-Link enabled device to an IO-Link master Rockwell Automation Publication 856T-UM001B-EN-P - April 2021... -
Page 14: Real-Time Diagnostics And Trending
Figure 5 - Typical IO-Link Wiring Signal Remark Depends on sensor Ground Communication/ switching signal IMPORTANT It is possible that the response time of an IO-Link system is not fast enough for high-speed applications. Rockwell Automation Publication 856T-UM001B-EN-P - April 2021... -
Page 15: Transmission Rates
Depending on the device, 0...32 bytes of process data are possible (for each input and output). The consistency width of the transmission is not fixed and is thus dependent on the master. Rockwell Automation Publication 856T-UM001B-EN-P - April 2021... -
Page 16: Value Status
If the master receives a reply, the communication begins. Next, it exchanges the communication parameters. If necessary, parameters that are saved in the system are transmitted to the device. Then, the cyclic exchange of the process data and value status begins. Rockwell Automation Publication 856T-UM001B-EN-P - April 2021... -
Page 17: Assign Device Parameters
(portable network graphics). These files adhere to the IO-Link open standard, which means that they can be used with any IO-Link masters. IODD files are assigned using Studio 5000® and the 1734-4IOL Add-on Profile (AOP). (a) When using the 1734-4IOL IO-Link master module. Rockwell Automation Publication 856T-UM001B-EN-P - April 2021... - Page 18 Chapter 2 IO-Link Overview Notes: Rockwell Automation Publication 856T-UM001B-EN-P - April 2021...
-
Page 19: Products Required
CompactLogix controller via EtherNet/IP. Figure 6 - IO-Link Hardware and Software Required CompactLogix Controller 1734 IO-Link Master 856T Control Tower™ Stack Light with IO-Link Module (856T-B24LC) 1606 Auxiliary 889D Cordset Power Computer with Studio 5000 Rockwell Automation Publication 856T-UM001B-EN-P - April 2021... -
Page 20: Aop Installation
Configure the 856T-B24LC IO-Link Module AOP Installation Add-on Profiles are files that you add to your Rockwell Automation library. These files contain the pertinent information for configuring a device that is added to the Rockwell Automation network. The Add-on Profile simplifies the setup of devices because it presents the necessary fields in an organized fashion. -
Page 21: Add Controller
1. To program the controller, select the controller that is used, name the project, and click Next. Depending on Studio 5000 version, you may be required to configure additional parameters. Configure as needed and click Finish. Rockwell Automation Publication 856T-UM001B-EN-P - April 2021... -
Page 22: Add Point I/O Ethernet Adapter
2. In the controller organizer tree, find Ethernet under I/O Configuration and right-click to select New Module... 3. The module window opens and shows the available modules. Use the filter to select 1734-AENTR adapter and click Create. Rockwell Automation Publication 856T-UM001B-EN-P - April 2021... -
Page 23: Add Io-Link Master
Now, the IO-Link Master module must be added. Make sure that the controller is Offline before you start configuration. 1. In the Controller Organizer tree, find Ethernet under I/O Configuration. Right-click the 1734-AENTR adapter and select New Module. Rockwell Automation Publication 856T-UM001B-EN-P - April 2021... -
Page 24: Register The 856T-B24Lc Module Iodd File
The IODD file for the 856T-B24LC module can be downloaded from rok.auto/pcdc and loaded manually to Studio 5000. • The 856T-B24LC module IODD is available in the IODD finder section of the IO-Link.com website. Rockwell Automation Publication 856T-UM001B-EN-P - April 2021... -
Page 25: Embedded Iodd File
Chapter 3 Configure the 856T-B24LC IO-Link Module Embedded IODD File IMPORTANT Rockwell Automation IO-Link masters with AOP and firmware revisions newer than the following, have the device discovery functionality that is required to extract the embedded IODD from the 856T-B24LC module. - Page 26 6. On the Device Discovery window, check the Register IODD and Use checkboxes. Click OK. 7. The IODD begins to download and the Register IODD Files window appears. The Register IODD Files window closes once the download is complete. Rockwell Automation Publication 856T-UM001B-EN-P - April 2021...
-
Page 27: Download Iodd File
IMPORTANT Once the IODD is registered, there is no need to register the IODD again unless it is manually deleted from the Master Tree. 1. Click the 1734-4IOL in the Controller Organizer tree in the Ethernet section The Properties window opens. Rockwell Automation Publication 856T-UM001B-EN-P - April 2021... - Page 28 IMPORTANT If there is no proper IODD file on the list, then click Register IODD and select folder and file that was previously downloaded to your computer. Selected IODD is shown on the list. 5. The IODD registration is completed. Rockwell Automation Publication 856T-UM001B-EN-P - April 2021...
-
Page 29: Connect The 856T-B24Lc Module To The Io-Link Master
2. On Change Channel Configuration window, click “…”. 3. Select the appropriate device and click Create. IMPORTANT Once you click Create, you may have to wait for the configuration update to complete. During this time, Studio 5000 does not respond. Rockwell Automation Publication 856T-UM001B-EN-P - April 2021... -
Page 30: Download The Project To The Plc
You are almost ready to go Online to download the project to controller. Before you go Online, you must configure the communication path. 1. Setup controller communication path. Click the Communication menu and select Who Active. Rockwell Automation Publication 856T-UM001B-EN-P - April 2021... - Page 31 Set Project Path and then Go online to start communication. 3. Download the project to controller. Click Download and then confirm downloading on the next window. 4. Project is loaded to the controller. Rockwell Automation Publication 856T-UM001B-EN-P - April 2021...
- Page 32 Chapter 3 Configure the 856T-B24LC IO-Link Module Notes: Rockwell Automation Publication 856T-UM001B-EN-P - April 2021...
-
Page 33: Display Parameters
1. In the Controller Organizer tree, find Ethernet under I/O Configuration and click the IO-Link Master). 2. The Properties window opens. Click IO-Link on the left side of the window on IO-Link description. Rockwell Automation Publication 856T-UM001B-EN-P - April 2021... -
Page 34: Io-Link Tabs
Displays and allows you to configure the stack light by changing the device parameters. (page Diagnosis Displays the diagnostics parameters. This tab shows information about Device Access Lock, (page results of the power on self test, service functions, and operation information. Rockwell Automation Publication 856T-UM001B-EN-P - April 2021... -
Page 35: Common Tab
Information whether the device supports the SIO (Standard Input and Output). Displays information about the IODD version that has been used to configure the IO-Link Document Version device Date of Creation This field displays date when the IODD file has been CRC stamped Rockwell Automation Publication 856T-UM001B-EN-P - April 2021... -
Page 36: Identification Tab
You can customize this read/write field. Revision Information Hardware Version Hardware version of the 856T-B24LC module that is provided as alphanumeric value Firmware Version Firmware revision of the 856T-B24LC module that is provided as numeric value. Rockwell Automation Publication 856T-UM001B-EN-P - April 2021... -
Page 37: Observation Tab
FALSE= Event did not occur Indicates if a fault either recoverable or unrecoverable has been detected during the IO-Link TRUE= Event triggering alarm occurred . Power on Self-Test Failure module self-test FALSE= Event did not occur Rockwell Automation Publication 856T-UM001B-EN-P - April 2021... - Page 38 The maximum vibration value for Y-axis since inception. This value is not resettable. Time .Z-axis - Maximum - Life The maximum vibration value for Z-axis since inception. This value is not resettable. Time IMPORTANT Power cycle does not reset the statistical data. Rockwell Automation Publication 856T-UM001B-EN-P - April 2021...
-
Page 39: Parameter Tab
The IO-Link device resets the circuit counter (1…7) when the system command (0xA0…0xA6) is received Standard Command- Reset via the IO-link protocol. It also allows you to reset the counter that is associated with this circuit by Counter clicking Reset Counter in this tab of the AOP. Rockwell Automation Publication 856T-UM001B-EN-P - April 2021... - Page 40 (0xA8) via the IO-Link protocol or by clicking Cancel Calibration in this AOP tab. If the Cancel Calibration IO-Link module was previously calibrated, after cancellation, the status goes to calibration complete and uses the previous threshold values. It helps protect against unwanted or accidental Start Calibration commands. Rockwell Automation Publication 856T-UM001B-EN-P - April 2021...
-
Page 41: Diagnosis Tab
This field verifies if the configuration of the light or sound module in the stack light is valid. This Invalid Configuration field is read-only type. • TRUE= Invalid Light /sound module configuration. Rockwell Automation Publication 856T-UM001B-EN-P - April 2021... - Page 42 This parameter gives the actual cycle duration that is used by the Master to address the IO-Link Cycle Time device. This value is read/write. Direct Parameters 1.IO-Link Displays the standard version applicable to Master-IO-link device communication Version ID Rockwell Automation Publication 856T-UM001B-EN-P - April 2021...
-
Page 43: Hardware Fault Conditions
Critical • Severe Non-recoverable A non-recoverable fault means that MCU flash and/or RAM is corrupted and the device cannot work anymore, however, the result code may be communicated using the device status indicator. Rockwell Automation Publication 856T-UM001B-EN-P - April 2021... -
Page 44: Critical
) is 750 ms, and the maximum ON time during activity is 1250 ms. Each ) period begins in the OFF state. Figure 8 - Status Indicator Timing Status Indicator Status Indicator Status Indicator On Status Indicator On Status Indicator On Rockwell Automation Publication 856T-UM001B-EN-P - April 2021... -
Page 45: Patchcord
Table 11 on page 54 the 856T light and sound module electrical specifications where operating current consumption is indicated. The current consumption for the IO-Link module is shown in Table 9 on page Rockwell Automation Publication 856T-UM001B-EN-P - April 2021... -
Page 46: Inrush Current Calculation
Under a dead short condition, it is possible that the ArmorBlock master port could be damaged. Therefore, it is recommended to use a 24V DC power supply that is limited to a maximum current of 5 A. Rockwell Automation Publication 856T-UM001B-EN-P - April 2021... -
Page 47: Configure A Message Instruction
To complete the dialog box, the Service Code and Source Length must be provided. Service Code on page 51 shows the different Read and Write Service Codes and their associated Source Lengths. Rockwell Automation Publication 856T-UM001B-EN-P - April 2021... - Page 48 This box contains the number of bytes of service data to be sent or received in 1 byte message. Defined in Data Structure Tables. Destination Element Read_ Assembly [0] First element of the destination Array. Rockwell Automation Publication 856T-UM001B-EN-P - April 2021...
-
Page 49: Read Data From The Io-Link Module
The source element Array is Write_Assembly, byte 0 is the channel followed by the data to be written. The Message Configuration dialog box that shows the information that is required to Write to the Application-Specific Name Parameter in the 856T- B24LC module. Rockwell Automation Publication 856T-UM001B-EN-P - April 2021... - Page 50 The name of the first tag of the data array to be Write_Assembly[0] written. Source Length The number of bytes of service data to be sent or 5 bytes received in a message. Defined in Data Structure Tables. Destination Element — — Rockwell Automation Publication 856T-UM001B-EN-P - April 2021...
-
Page 51: Validation Of Write
Required Read Index within an index) from the IO-Link device (uses subindex 0) Writes an entire index (all parameters — Required Write Index within an index) from the IO-Link device (uses subindex 0) Rockwell Automation Publication 856T-UM001B-EN-P - April 2021... -
Page 52: Source Length: From Data Structure Tables
Write Index (4E) Message Data Format: Byte 0 Byte 1 Byte 2 Byte 3 Channel Number Data 0 Data 1 Data 3 Source Length= 1 byte + Number of bytes of data being written Rockwell Automation Publication 856T-UM001B-EN-P - April 2021... -
Page 53: Io-Link Module Specifications
Vibration, Peak [G] Surface mount base (seven modules stacked) Surface mount base (five modules stacked, max) Vertical mount base 10 cm pole/tube base 25 cm pole/tube base 40 cm pole base 60 cm pole base Rockwell Automation Publication 856T-UM001B-EN-P - April 2021... -
Page 54: Approximate Dimensions
856T-BMB 200 mA 30,000 hr 2.46 A AC 856T-BB9 (magenta) Approximate Dimensions Figure 10 shows the dimensions of the IO-Link module. Figure 10 - 856T-B24LC Module [mm (in.)] 70 (2.81) (3.03) 65.1 (2.56) Rockwell Automation Publication 856T-UM001B-EN-P - April 2021... -
Page 55: Light And Sound Module Operation Mode
Alternating tones Piezo Electric In-line Sound Module Continuous tones Single-circuit device. Customer can Pulsing tones ON or OFF select up to eight different tones via Sweeping tones DIP switch inside the sounder. Alternating tones Rockwell Automation Publication 856T-UM001B-EN-P - April 2021... - Page 56 IMPORTANT Although it is allowed, we do not recommend using strobe or flashing light modules or sound modules with the 856T-B24LC module slow or fast flash operating modes. Rockwell Automation Publication 856T-UM001B-EN-P - April 2021...
-
Page 57: Identification Tab
= 48) UIntegerT .Module (Circuit 2) 0x0133/307 0x0002/2 Read-only 0…7 (bit length = 8, bit offset = 40) UIntegerT .Module (Circuit 3) 0x0133/307 0x0003/3 Read-only 0…7 (bit length = 8, bit offset = 32) Rockwell Automation Publication 856T-UM001B-EN-P - April 2021... - Page 58 Bit 5= Circuit 6 (TRUE/FALSE) BOOL FALSE=0 TRUE=1 (bit length = 1, FALSE=0 bit offset = 5) Bit 6= Circuit 7 (TRUE/FALSE) BOOL FALSE=0 TRUE=1 (bit length = 1, FALSE=0 bit offset = 6) Rockwell Automation Publication 856T-UM001B-EN-P - April 2021...
- Page 59 Cycle counter-Life time 0X014B/331 0x0004/4 Read-only 0…4,294,967,296 (bit length = 32, (Circuit 4) bit offset = 96) UIntegerT Cycle counter-Life time 0X014B/331 0x0005/5 Read-only 0…4,294,967,296 (bit length = 32, (Circuit 5) bit offset = 64) Rockwell Automation Publication 856T-UM001B-EN-P - April 2021...
- Page 60 (bit length = 8) 0- Not calibrated UIntegerT Calibration status 0x0134/308 — Read-only 1- Calibration in progress (bit length = 2) 2-Calibration complete RecordT Average vibration 0x0142/322 — Read-only — 0…16,000 (bit length = 48) Rockwell Automation Publication 856T-UM001B-EN-P - April 2021...
-
Page 61: Parameter Tab
. Module 2 Type 0x0138/312 0x0002/2 Read/write (bit length = 8, 6=856T Strobe beacon bit offset = 40) 7=856T Rotating beacon 8=856T Multi-color beacon 9=856T Piezo Electric Sounder 10=856T Transducer Sounder 11=856T Recordable Sound Module Rockwell Automation Publication 856T-UM001B-EN-P - April 2021... - Page 62 . Module 7 Type 0x0138/312 0x0007/7 Read/write (bit length = 8, 6=856T Strobe beacon bit offset = 0) 7=856T Rotating beacon 8=856T Multi-color beacon 9=856T Piezo Electric Sounder 10=856T Transducer Sounder 11=856T Recordable Sound Module Rockwell Automation Publication 856T-UM001B-EN-P - April 2021...
- Page 63 (bit length = 1, ON=1 / OFF=0 bit offset = 10) BOOL Bit 11- Power On Self-Test Failure 0x014E/334 — Read/write ON=1 (bit length = 1, ON=1 / OFF=0 bit offset = 11) Rockwell Automation Publication 856T-UM001B-EN-P - April 2021...
-
Page 64: Diagnostics Tab
(bit length = 1) Operation Information Operating Hours since UIntegerT 0x0151/337 — Read-only 0…4,294,967,296 inception (bit length = 32) Operating Hours since UIntegerT 0x005B/91 — Read-only 0…4,294,967,296 power up (bit length = 32) Rockwell Automation Publication 856T-UM001B-EN-P - April 2021... -
Page 65: Io- Link System Commands
Erases all user configuration and diagnostic data. Data written UIntegerT during manufacture, and (bit length = 8) operating hours and module on/ off counters are preserved. Rockwell Automation Publication 856T-UM001B-EN-P - April 2021... -
Page 66: Process Data Input
Alarm Status Circuit Status Internal Temperature Class A Voltage Class B Voltage Table 14 on page 57 for a detailed view of the bits for each of the fields in the Process Data Input. Rockwell Automation Publication 856T-UM001B-EN-P - April 2021... -
Page 67: Process Data Output
Configuration Tables Table 20 - Multi-color Light Modules — Behavior ON Steady Binary [bit 7…0] Color 000…001 001…001 — Reserved 010…001 Yellow 011…001 Green 100…001 Blue 101…001 Cyan (Turquoise) 110…001 Magenta 111…001 White Rockwell Automation Publication 856T-UM001B-EN-P - April 2021... - Page 68 Table 23 - Transducer and Recordable Sound Modules — Behavior ON Steady Binary [bit 7…0] Sound 000…001 Sound 1 001…001 Sound 2 010…001 Sound 3 011…001 Sound 4 100…001 Sound 5 101…001 Sound 6 110…001 Sound 7 111…001 — Reserved Rockwell Automation Publication 856T-UM001B-EN-P - April 2021...
-
Page 69: Operational State
PHY communication test POST failure upon PHY communication test failed Accelerometer POST failure upon Accelerometer communication communication test test failed Serial flash integrity test POST failure upon serial flash integrity test failed Rockwell Automation Publication 856T-UM001B-EN-P - April 2021... -
Page 70: Short Circuit
(hot swap), the situation may cause a temporary short circuit condition that is indicated in the alarm status word. You must clear the alarm bit to be in operational mode again. Rockwell Automation Publication 856T-UM001B-EN-P - April 2021... -
Page 71: Events
0x7710 Short Circuit - Check installation 4 - Failure Error IMPORTANT The short circuit event code 0X7710 is issued only when a short circuit condition is detected on the IO-Link cordset or patchcord. Rockwell Automation Publication 856T-UM001B-EN-P - April 2021... - Page 72 Appendix D Device Status Notes: Rockwell Automation Publication 856T-UM001B-EN-P - April 2021...
-
Page 73: Reset To Factory Settings - Variables
1734-4IOL IO-link master, you must perform the task manually for each one of these parameters. In some cases (such as Circuit Cycle Counter), a given ISDU may include several subindexes that must be reset individually. Rockwell Automation Publication 856T-UM001B-EN-P - April 2021... -
Page 74: Reset All Statistics -Variables
Non-volatile 4294967296 Counter Max Temperature 0x0146/326 Read-only IntegerT Volatile — since power up Min Temperature 0x0147/327 Read-only IntegerT Volatile — since power up Max Vibration 0x0145/325 Read-only RecordT Volatile 16000 since power up Rockwell Automation Publication 856T-UM001B-EN-P - April 2021... -
Page 75: Error Resolution
Check voltage that is supplied to the master and the 856T-B24LC module. blinking) accepted limit levels No Class B power is applied to 856T-B24LC module. If the 856T-B24LC module is used with a Rockwell Automation Class A master, verify that you are using the recommended patchcord. See Patchcord on page 45 for more details. - Page 76 Appendix F Troubleshooting Notes: Rockwell Automation Publication 856T-UM001B-EN-P - April 2021...
-
Page 77: Index
Class A IO-Link master 45 controller hardware fault add 21 critical 44 create non-recoverable 43 severe 44 project 20 critical 44 IO-Link 14 current inrush calculation 46 current consumption 54 cyclic data 16 Rockwell Automation Publication 856T-UM001B-EN-P - April 2021... - Page 78 IO-Link module 49 message instruction read message configure 47 example format 47 mode register 24 operation 9 856T-B24LC module IODD file 24 required product 19 reset non-recoverable 43 factory 73 response time 15 Rockwell Automation Publication 856T-UM001B-EN-P - April 2021...
- Page 79 IO-Link status indicator 44 transmission quality 15 rate 15 troubleshooting 75 validation write 51 value status 16 variables factory reset 73 what IO-Link 13 IO-Link 13 wiring 12 write validation 51 write message example format 49 Rockwell Automation Publication 856T-UM001B-EN-P - April 2021...
- Page 80 Index Notes: Rockwell Automation Publication 856T-UM001B-EN-P - April 2021...
- Page 81 Control Tower IO-Link Class B Light and Sound Module Controller User Manual Rockwell Automation Publication 856T-UM001B-EN-P - April 2021...
- Page 82 At the end of life, this equipment should be collected separately from any unsorted municipal waste. Rockwell Automation maintains current product environmental information on its website at rok.auto/pec. Allen-Bradley, ArmorBlock, CompactLogix, ControlLogix, Control Tower, expanding human possibility, POINT I/O, Rockwell Automation, and Studio 5000 are trademarks of Rockwell Automation, Inc.
Need help?
Do you have a question about the Allen-Bradley 856T-B24LC and is the answer not in the manual?
Questions and answers