
Related Manuals for Baxi POWER HT+ Series


Summary of Contents for Baxi POWER HT+ Series
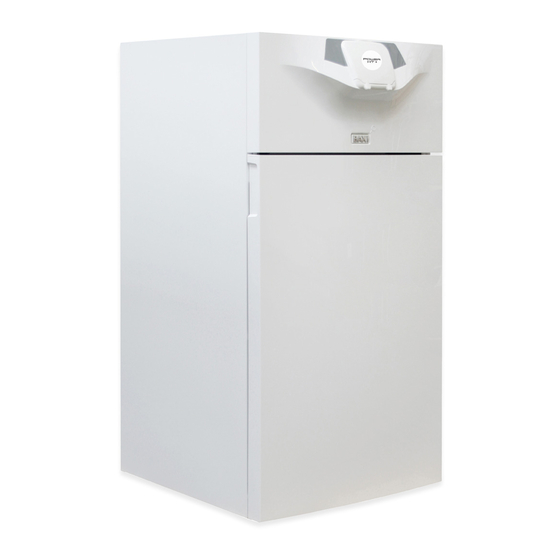
- Page 1 Australia - New Zealand e e n Installation and service manual Gas fired floor-standing condensing boiler POWER HT+ 1.50 POWER HT+ 1.70 POWER HT+ 1.90 POWER HT+ 1.110...
- Page 2 Dear customer, Thank you for purchasing this appliance. Please read this manual carefully before using the product and keep it in a safe place for future reference. In order to ensure continued safe and efficient operation we recommend that the product is regularly maintained. Our Service and After Sales organization can assist with this.
-
Page 3: Table Of Contents
Contents Contents 1 1 Safety ................6 1.1 General safety instructions . - Page 4 Contents 6.2.1 Accessing the internal boiler components ........... 37 Water connections .
- Page 5 Contents 9.1.3 List of user parameters ..............72 9.1.4 List of installer parameters .
-
Page 6: 1 Safety
1 Safety 1 Safety 1 1 .1 General safety instructions Danger If you smell gas: 1. Do not use a naked flame, do not smoke, do not operate electrical contacts or switches (doorbell, light, motor, lift, etc.). 2. Shut off the gas supply. 3. - Page 7 1 Safety C C aution The appliance should be on Summer or Antifreeze mode rather than switched off to guarantee the follow ing functions: Anti-blocking of pumps Frost Protection Caution If the home is unoccupied for a long period and there is a risk of frost, drain the boiler and the heating sys...
-
Page 8: Liabilities
1 Safety N N ote Regularly check the presence of water and pressure in the heating installation. Caution Maintenance work must be carried out by a qualified professional. Caution Only a qualified professional is authorised to clean the inside of the boiler. Caution Only genuine spare parts may be used. -
Page 9: Manufacturer's Liability
1 Safety 1 1 .3.2 Manufacturer's liability Our products are manufactured in compliance with the re quirements of the various Directives applicable. They are therefore delivered with the marking and any documents necessary. In the interests of the quality of our products, we strive constantly to improve them. -
Page 10: About This Manual
2 About this manual About this manual 2 2 .1 General This manual is intended for the installer of a POWER HT + boiler. Symbols used 2.2.1 Symbols used in the manual This manual uses various danger levels to draw attention to special in structions. -
Page 11: Technical Specifications
3 Technical specifications Technical specifications 3 3 .1 Homologations 3.1.1 Directives This product has been manufactured and put into circulation in accord ance with the requirements and standards of the following European Di rectives: Gas Directive 2009/142/EC Pressure Equipment Directive 97/23/EC, Article 3, paragraph 3 Electromagnetic Compatibility Directive 2004/108/EC Generic standards: EN 61000-6-3, EN 61000-6-1 Standard referred to: EN 55014... - Page 12 3 Technical specifications POWER POWER POWER POWER HT Boiler speed Unit HT+ 1.50 HT+ 1.70 HT+ 1.90 + 1.110 Heating flow rate - Hs Minimum 10.7 12.9 Heating mode Heating flow rate - Hs Maximum 51.4 74.2 97.0 116.4 Heating mode Efficiency at 80/60 °C - Hi Maximum 97.4...
-
Page 13: Sensor Characteristics
3 Technical specifications Unit POWER HT+ POWER HT+ POWER HT+ POWER HT+ 1.50 1.70 1.90 1.110 Maximum absorbed power - Stand-by Tab.5 Other characteristics Unit POWER HT+ POWER HT+ POWER HT+ POWER HT+ 1.50 1.70 1.90 1.110 Electrical protection class IP21 IP21 IP21... - Page 14 3 Technical specifications Fig.3 Dimensions and connections POWER HT+ 1.90 and POWER HT+ 1.110 1127 1222 MW-3000002 1 1 Heating circuit return (G1-1/2") 4 Condensate discharge (DN18) 2 Heating circuit flow (G1-1/2") (1) Adjustable feet 3 Gas inlet (G1") 7609474 - v02 - 04092014...
-
Page 15: Electrical Diagram
3 Technical specifications 3 3 .4 Electrical diagram Fig.4 Electrical diagram POWER HT+ 1.50 – POWER HT+ 1.70 MW-3000003-01 A Power supply 230V 50Hz O Room temperature sensor 3 B Power supply auxiliary circuit 1 P Boiler pump modulation (PWM) C Power supply auxiliary circuit 2 1 Flow temperature sensor D Room thermostat... - Page 16 3 Technical specifications Fig.5 Electrical diagram POWER HT+ 1.90 – POWER HT+ 1.110 MW-3000004-01 A A Power supply 230V 50Hz P Boiler pump modulation (PWM) B Power supply auxiliary circuit 1 1 Flow temperature sensor C Power supply auxiliary circuit 2 2 Return sensor D Room thermostat 3 Hydraulic pressure sensor...
-
Page 17: Description Of The Product
4 Description of the product Description of the product 4 4 .1 General description POWER HT + floor-standing condensing gas boilers have the following characteristics: Low pollutant emissions High efficiency heating Electronic control panel Flue gas discharge by a forced flue, chimney or bi-flow type connection. Perfectly suitable for cascade systems with several boilers. -
Page 18: System In Cascade
4 Description of the product Fig.6 Boiler equipped with the low-loss Fig.7 Functional diagram of a boiler with a low-loss header header kit MW-3000144-01 MW-1000021-02 1 1 Low-loss header (accessory) 6 Heating circuit flow 2 Air vent 7 Heating circuit return 3 Safety valve 8 Boiler 4 Modulating circulation pump... -
Page 19: Settings And Safety Devices
4 Description of the product Fig.8 Boilers in cascade N N ote Please contact us for further information. 4.2.4 Settings and safety devices Note The settings and safety devices are only operational if the boiler is powered up. Tab.7 Description of the safety devices Device Description Safety thermostats... -
Page 20: Main Components
4 Description of the product 4 4 .3 Main components Fig.9 POWER HT+ 1.50 and POWER HT+ 1.70 MW-3000116-01 1 Control panel 16 Igniter 2 Flue gas measuring point 17 Spark plug 3 Flue gas connection 18 Ionisation probe 4 Power supply terminal block 19 Flame inspection window 5 Terminal block for the sensors and the remote con... -
Page 21: Control Panel Description
4 Description of the product 1 1 2 Safety thermostat against overheating 22 Emplacement for two AVS 75 boards maximum. A 13 Condensate siphon third AVS 75 board can be used by the boiler but 14 Drain valve must be fixed to the wall and powered externally. 15 Hydraulic pressure sensor 23 Emplacement for OCI 345 board 16 Igniter... -
Page 22: Standard Delivery
4 Description of the product 4 4 .5 Standard delivery The POWER HT + boiler comes in a package that includes: A floor-standing gas boiler An installation and service manual A user guide A data plate Accessories and options Tab.8 Package references Description Package... -
Page 23: Before Installation
(1) For installations with constant heating and a maximum total system output of 200 kW, the appropriate maximuwim total water hardness is 8.4°dH (1.5 mmol/l, 15°F). For installations of more than 200 kW, the appropriate maximum total hardness is 2.8°dH (0.5 mmol/l, 5°F). Note If water treatment is necessary, Baxi recommends the following manufacturers: Cillit... -
Page 24: Gas Supply
5 Before installation 5 5 .2.2 Gas supply Before mounting, check that the gas meter has sufficient capacity (in ). To do this, you should bear in mind the consumption of all applian ces. If the capacity of the gas meter is too low, inform the gas supply compa The boilers are designed to run on natural gas G20 and can be conver... -
Page 25: Choice Of The Location
5 Before installation Fig.14 Pressure drops for POWER HT+ 1 1 Q flow rate (litres/hour) 1.70 2 H pressure in metres of water column (mWC) 3 Operating water flow rate at nominal heating flow rate = 1920 litres/ hour where ∆T = 30°C 4 Operating water flow rate at nominal heating flow rate = 2880 litres/ hour where ∆T = 20°C 5 Operating water flow rate at nominal heating flow rate = 3840 litres/... -
Page 26: Ventilation
5 Before installation C C aution It is forbidden to store inflammable products and materials in the boiler room or close to the boiler, even temporarily. Caution The boiler must be installed in a frost-free environment. Make sure there is a connection to the sewage system close to the boiler to discharge any condensates. -
Page 27: Data Plate
5 Before installation S S pace to be allowed for the boilers Fig.19 Space to be allowed for the boilers MW-1000003-03 Space to be allowed for boilers equipped with a low-loss head er kit Fig.20 Space to be allowed for boilers equipped with a low-loss header kit MW-1000019-03 5.3.3 Data plate Fig.21... -
Page 28: Selecting The Position For The Outside Temperature Sensor (Optional)
5 Before installation C C aution A second data plate is provided in the instructions bag. The sec ond data plate should be affixed to a visible part of the boiler when installation has been completed. If the boiler is equipped with a low-loss header kit, a position on the side of the boiler is prefera... -
Page 29: Transport
5 Before installation 5 5 .4 Transport Fig.24 Transport precautions Transport the pallet carrying the appliance using a pallet truck, a forklift truck or a 4-wheel removals cart. Do not use the top cover of the appliance for transport lifting. >45°... -
Page 30: Connecting Diagrams
5 Before installation 5 5 .6 Connecting diagrams Fig.27 Connection example with a domestic hot water tank MW-3000022-01 1 Boiler flow 26 DHW load pump 2 Heating pump 31 Independent domestic hot water tank 24 Domestic hot water tank exchanger primary inlet 119 Boiler return 25 Primary exchanger outlet domestic hot water tank 7609474 - v02 - 04092014... - Page 31 5 Before installation Fig.28 Connection example with a solar domestic hot water tank AGU 2.55 MW-3000023-01 A A GU Connection option with a solar domestic hot water 2.55 tank 7609474 - v02 - 04092014...
- Page 32 5 Before installation Fig.29 Connection example for boilers in cascade with domestic hot water tank and several heating circuits equipped with room temperature thermostats AVS 75 MW-3000024-01 O O CI Optional interface unit for boilers in cascade A A VS Connection option for boilers in cascade Fig.30 Connection example for boilers in cascade with domestic hot water tank and several heating circuits equipped with...
-
Page 33: Connecting Diagrams
5 Before installation R R VS Connection option underfloor heating Connecting diagrams 5.7.1 Connection diagram: 1 boiler + 1 direct circuit + 1 domestic hot water tank Fig.31 1 boiler + 1 direct circuit + 1 domestic hot water tank MW-3000018-01 1 Boiler flow 26 DHW load pump... -
Page 34: Connection Diagram: 1 Boiler + 1 Direct Circuit + 1 Underfloor Heating Circuit + 1 Domestic Hot Water Tank
5 Before installation 5 5 .7.2 Connection diagram: 1 boiler + 1 direct circuit + 1 underfloor heating circuit + 1 domestic hot water tank Fig.32 1 boiler + 1 direct circuit + 1 underfloor heating circuit + 1 domestic hot water tank MW-3000019-01 1 Boiler flow 33 Domestic hot water temperature sensor... -
Page 35: Water Tank
5 Before installation 5 5 .7.3 Connection diagram: Boilers in cascade + 1 direct circuit + 1 underfloor heating circuit + 1 domestic hot water tank Fig.33 Boilers in cascade + 1 direct circuit + 1 underfloor heating circuit + 1 domestic hot water tank MW-3000020-01 2 Heating pump direct circuit 38 Remote control with or without room temperature... -
Page 36: Connection Diagram: Controlling A Boiler In 0/10 V
5 Before installation 5 5 .7.4 Connection diagram: controlling a boiler in 0/10 V Fig.34 Boiler in 0/10 V 1 Boiler flow 1a Heating flow 2a Heating return 3 4 bar safety valve (0.4 MPa) 7 Automatic air vent 27 Non-return valve 30e Drain valve 34 Modulating boiler pump 35 Disconnecting cylinder (optional) -
Page 37: Installation
6 Installation Installation 6 6 .1 General Installation must be carried out in accordance with the prevailing regula tions, codes of practice and the recommendations in this manual. Preparation 6.2.1 Accessing the internal boiler components Fig.35 Removing the front panel 1. - Page 38 6 Installation Fig.37 Ground wire 3. Disconnect the ground wire. MW-3000122-01 Fig.38 Removing the top panel 4. Pull and lift the top panel. MW-1000010-01 Fig.39 Unhooking the panel holding the 5. Unhook the panel holding the control panel to place it on the boiler. control panel MW-3000025-01 7609474 - v02 - 04092014...
-
Page 39: Water Connections
6 Installation Fig.40 Location of the disassembly instruc 6. Remove the detachable panel if necessary. tions S S ee The disassembly instructions can be found on the detachable pan MW-3000026-01 Water connections 6.3.1 Connection of the heating circuit Abide by the mountings shown in the hydraulic diagrams. Connecting diagrams, page 33. -
Page 40: Connecting The Expansion Vessel
6 Installation Fig.42 Mounting the fill and drain valves 3. Mount the fill and drain valves to the boiler's inlet and outlet (valves not provided). N N ote To facilitate maintenance work, we recommend mounting an isola tion valve on the heating flow and return pipes. Caution Position the safety valves between the boiler and the isolation valves. -
Page 41: Connecting The Condensate Discharge Pipe
6 Installation V V olume of the expansion vessel Tab.11 Volume of the expansion vessel in relation with the volume of heating circuit Initial pressure Volume of the installation (in litres) of the expan > 300 sion vessel 0.5 bar 12.0 14.4 Volume of the installa... -
Page 42: Air Supply/Flue Gas Connections
EN 1856-1 Standard. If installing discharge and intake pipes not supplied by Baxi, these must be certified for the type of use scheduled and present a maximum pressure drop in line with the values given in the table below. -
Page 43: Coaxial Pipes
6 Installation C C onfiguration Description Air/flue gas connection by concentric pipes in the boiler room and single pipes in the chimney (combus tive air with counter current in the flue). Air/flue gas connection by concentric pipes in the boiler room and single flexible pipe in the chimney (combustive air with counter current in the flue). -
Page 44: Separate Pipes
6 Installation Fig.47 Specifications of coaxial pipes for POWER HT+ 1.90 and POWER HT+ 1.110 354,5 245,5 MW-3000124-01 This type of pipe is used to discharge combusted gases and suck in com bustive air, whether to outside the building or into the flue gas pipes. The 90°... -
Page 45: Pipes In Cascade
6 Installation Fig.49 Specifications of the separate pipes for POWER HT+ 1.90 and POWER HT+ 1.110 354,5 245,5 MW-3000126-01 This type of pipe is used to discharge combusted gases either to the out side of the building or into the individual flue gas pipes. Combustive air can be taken in from zones different from the discharge zones. -
Page 46: Lengths Of The Air/Flue Gas Pipes
6 Installation 6 6 .5.5 Lengths of the air/flue gas pipes Note For configurations B and C , the lengths given in the tables are valid for horizontal pipes with a maximum length of 1 metre. For each additional metre of horizontal pipe, subtract 1.2 m from the vertical length L Tab.16 Maximum length Configura... - Page 47 6 Installation Fig.50 Maximum length of the connections Tab.17 Flue gas system connection type B23p Arrangement Configuration Unit POWER HT+ POWER HT+ POWER HT+ POWER HT+ 1.110 1.50 1.70 1.90 Ø 80 Ø 110 Ø 80 Ø 110 Ø 110 Ø...
-
Page 48: Electrical Connections
6 Installation Fig.51 Flexible flue gas system B23p Fig.52 Rigid flue gas system B23p Fig.53 Through-roof flue gas system B23p 6 6 .6 Electrical connections 6.6.1 Recommendations Earth the appliance before making any electrical connections. Only qualified engineers may carry out electrical connections, always with the power off. -
Page 49: Accessing The Terminal Blocks
6 Installation Neutral operating conditions. Tab.18 Specifications of the power cable and the power source Cable cross section (mm²) 3 x 1.5 C DJ curve (circuit breaker) 10 A 6 6 .6.3 Accessing the terminal blocks 1. Remove the front panels. Accessing the internal boiler components, page 37. -
Page 50: Description Of The Power Supply Terminal Block
6 Installation Fig.56 Attaching the wire 3. Release the pressure on the spring. The wire is attached. MW-3000039 6 6 .6.5 Description of the power supply terminal block Fig.57 Power supply terminal block Aux 1-2 230 V MW-1000015-02 1 Power supply 230V 50Hz 5 Heating circuit pump 2 Power supply auxiliary circuit 1 6 Domestic hot water pump... -
Page 51: Description Of The Sensor Terminal Block
6 Installation C C aution All connections are made to the terminal blocks provided for that purpose in the boiler connection box. The available output per out let is 180 W (1A, with cos ϕ = 0.8) and the inrush current must be lower than 5A. -
Page 52: Electrical Connection: 1 Boiler + 1 Direct Circuit + Domestic Hot Water Tank
6 Installation 6 6 .6.7 Electrical connection: 1 boiler + 1 direct circuit + domestic hot water tank Fig.59 1 boiler + 1 direct circuit + domestic hot water tank 1 2 3 MW-3000114-01 11 Heating pump 34 Primary pump 21 Outside temperature sensor 38 Remote control with or without room temperature 26 DHW load pump... -
Page 53: Water Tank
6 Installation 1 1 17 Reversing valve 1 1 58 Flow temperature sensor Configuring an installation with 1 boiler + 1 low-loss header + 1 di rect circuit + 1 underfloor heating circuit + domestic hot water tank, page 64. Connection diagram: 1 boiler + 1 direct circuit + 1 underfloor heat... -
Page 54: Electrical Connection: Controlling A Boiler In 0/10V
6 Installation 4 4 4 Safety device to safeguard against overheating of 158 Flow temperature sensor the underfloor heating system, in accordance with 200 Lead boiler prevailing regulations 201 Secondary boiler 117 Reversing valve Connection diagram: Boilers in cascade + 1 direct circuit + 1 un derfloor heating circuit + 1 domestic hot water tank, page 35. -
Page 55: Filling The System
6 Installation Fig.63 O O CI 345 interface connections for cascade DB.MB DB.MB DB.MB MW-3000042 To make the connections between the various M M B and D D B connectors, use a shielded cable with the following specifications: Type Cross section Maximum length HAR H05 VV-F 200 m... -
Page 56: Finalising The Installation
6 Installation 6 6 .8 Finalising the installation 1. Remount the front panels and the earthing wires. 2. Tidy away or scrap the various packaging items. 3. Stick the data plate found in the instructions bag to a visible part of the boiler. -
Page 57: Commissioning
7 Commissioning Commissioning 7 7 .1 General Commissioning the boiler is done for first time use, after a prolonged shut down (more than 28 days) or after any event that would require complete re-installation of the boiler. Commissioning of the boiler allows the user to review the various settings and checks to be made to start up the boiler in complete safety. -
Page 58: Checking The Gas Inlet
7 Commissioning 7 7 .3.2 Checking the gas inlet Note Ensure that the boiler is switched off. Stopping the boiler, page 69. 1. Open the main gas valve. 2. Open the gas valve on the boiler. 3. Open the front panel. 4. -
Page 59: Setting The Air/Gas Ratio (Maximum Thermal Flow Rate)
7 Commissioning S S ee Fan speed according to gas type, page 59. Fan speed according to gas type Tab.20 Fan speed for gas type G20 Parameter Output Unit POWER HT+ POWER HT+ POWER HT POWER HT+ 1.50 1.70 + 1.90 1.110 9524 R R equired speed LF minimum... - Page 60 7 Commissioning Fig.64 Connecting the flue gas analyser 1. Unscrew the left-hand plug, which corresponds to the flue gas measurement point connection. 2. Connect the flue gas analyser to the connection on the left. N N ote Ensure that the opening around the sensor is completely sealed when taking measurements.
-
Page 61: Setting The Air/Gas Ratio (Reduced Thermal Flow Rate)
7 Commissioning 7 7 .4.3 Setting the air/gas ratio (reduced thermal flow rate) Fig.65 Connecting the flue gas analyser 1. Unscrew the left-hand plug, which corresponds to the flue gas measurement point connection. 2. Connect the flue gas analyser to the connection on the left. Note Ensure that the opening around the sensor is completely sealed when taking measurements. -
Page 62: Gas Valves
7 Commissioning 7 7 .4.4 Gas valves Fig.66 POWER HT+ 1.50 – POWER HT+ 1 Gas flow rate setting screw 1.70 2 OFFSET setting screw: Remove the plug Use a 4 mm hexagonal spanner 3 Gas supply pressure outlet MW-3000045-01 Fig.67 POWER HT+ 1.90 –... -
Page 63: Adapting To Another Gas Type
7 Commissioning Tab.25 Checking and setting values for gas type G25 U U nit POWER HT+ 1.50 POWER HT+ 1.70 POWER HT+ 1.90 POWER HT+ 1.110 Diameter of the Venturi Diameter of the nozzles 4.20 (no. 2) Variable mixer 6.30 (no. 2) Variable mixer noz... -
Page 64: Checks And Adjustments After Commissioning
7 Commissioning Fig.69 Removing the Venturi unit 3. Remove the Venturi unit. 4. Replace the Venturi unit with the Venturi unit provided in the conver sion kit. 5. Remount the connection pipe to the gas valve. Tab.28 Torque R R eference Model Fastening Venturi end Fastening gas valve end... -
Page 65: Configuring Boilers In Cascade + 1 Direct Circuit + 1 Underfloor Heating Circuit + 1 Domestic Hot Water Tank
7 Commissioning S S ee List of installer parameters, page 74. 7.5.2 Configuring boilers in cascade + 1 direct circuit + 1 under floor heating circuit + 1 domestic hot water tank Connection diagram: Boilers in cascade + 1 direct circuit + 1 un derfloor heating circuit + 1 domestic hot water tank, page 35. -
Page 66: Configuring A Lead Boiler And The Secondary Boilers In A Cascade
7 Commissioning P P arameter number Parameter Setting 6020 F F unction extension module 1 Multifunctional 6046 F F unction input H2 module 1 Consumer request VK1 10V 6049 V V oltage value 1 H2 module 1 6050 F F unct value 1 H2 module 1 6051 V V oltage value 2 H2 module 1 6052... - Page 67 7 Commissioning P P arameter number Parameter Setting Description 6640 C C lock mode Slave with remote setting Setting the cascade boiler clock with a lead boiler List of installer parameters, page 74. 7609474 - v02 - 04092014...
-
Page 68: Operation
8 Operation Operation 8 8 .1 Use of the control panel 8.1.1 Modifying the user parameters Fig.70 1. Press the key to access the parameters. MENU Note Press the key to return to the main display. MENU The user parameters can now be accessed. Use the button to se... -
Page 69: Starting Up The Boiler
8 Operation Fig.73 3. Select the C C ommissioning menu by turning the button. ---------------------------------------------------- Enduser Commissioning MENU MW-3000083-EN-02 Fig.74 4. Confirm the menu selection by pressing the button Note Press the key to return to the main display. MENU The C C ommissioning mode parameters are now accessible. -
Page 70: Frost Protection
8 Operation 8 8 .4 Frost Protection The electronic management system of the boiler includes protection against frost. If the water temperature falls below 5°C, the burner starts up in order to provide a water temperature of 30°C. This function only works if the boiler is turned on, the gas supply open and the hydraulic pressure correct. -
Page 71: Settings
9 Settings Settings 9 9 .1 List of parameters 9.1.1 Shortcuts menu Tab.35 Functions accessible with the shortcut key Parameter Description Adjustment range Standby/operation Boiler standby / start-up Standby: Boiler put on standby. symbol is displayed. The boiler's operating modes are deactivated. The frost protection function is activated. -
Page 72: List Of User Parameters
9 Settings I I nformation Description Value Minimum outside temperature value memorised °C Outside temp min Note The outside sensor must be connected. Maximum outside temperature value memorised °C Outside temp max Note The outside sensor must be connected. Hot water temp 1 Domestic hot water temperature °C Note... - Page 73 9 Settings P P arameter number Parameter Description Heating circuit Heating circuit 2 Heating circuit 3 3rd Time ON Start of hourly period 3. 3rd Time OFF End of hourly period 3. Default values Reset the hourly program parameters to zero (Yes / No).
-
Page 74: List Of Installer Parameters
9 Settings Tab.42 Menu T T emps / mode CH1 – Temps / mode CH2 – Temps / mode CH3 Parameter number Parameter Description Factory setting Heating Heating Heating cir circuit 1 circuit 2 cuit 3 1000 1300 The control unit is installed on the boiler: Off: heating is deactivated. - Page 75 9 Settings Tab.44 Menu W W ireless Parameter Parameter Description number B B inding Activation of wireless connection with the base unit. T T est mode The test mode is used to check the wireless communication. R R oom unit 1 Checking the link.
- Page 76 9 Settings P P arameter number Parameter Description Unit Factory set ting Heating Heating Heating circuit 1 circuit 2 circuit 3 1060 1360 R R oom temp Cuts the heating circulation pump if the room T °C 0 0 .5 limitation °...
- Page 77 9 Settings P P arameter Parameter Description Factory setting number 1640 L L egionella function Periodically Fixed weekday 1641 L L egionella funct Determines after how many days the anti-legionella function periodically must be reactivated. 1642 L L egionella funct Determines on which day the anti-legionella function must be ac...
- Page 78 9 Settings P P arameter Parameter Description Factory set number ting 5715 T T emps / mode CH2 Activation of heating circuit 2: 5721 T T emps / mode CH3 Activation of heating circuit 3: 5730 H H ot water sensor Selecting the DHW sensor: Hot water Hot water sensor B3 : DHW sensor for tank...
- Page 79 9 Settings P P arameter Parameter Description Factory set number ting 5890 R R elay output QX1 None heating Circulating pump Q4 : DHW circulating pump. pump CH1 El imm heater HW K6 Collector pump Q5 : Circulating pump for the panels circuit. Cons circuit pump VK1 Q15 : The VK1 consumer circuit pump can be used for an additional consumer boiler.
- Page 80 9 Settings P P arameter Parameter Description Factory set number ting 5931 S S ensor input BX2 None : No function on the sensor input. None Hot water sensor B31 : Sensor in the bottom section of the DHW tank. Collector sensor B6 : Solar collector sensor.
- Page 81 9 Settings P P arameter Parameter Description Factory set number ting 5977 F F unction input H5 None Room Optg mode change CHs+HW : Heating and DHW circuit changeover thermostat mode Optg mode changeover HW : DHW circuit changeover mode Optg mode changeover CHs : The regimes of the heating circuits are switched to parameter mode line 900-1200-1500 Optg mode changeover CH1: The regimes of the heating circuits are...
- Page 82 9 Settings P P arameter Parameter Description Factory set number ting 6020 F F unction extension None Temps / module 1 Multifunctional : The functions that can be assigned to the inputs/ mode CH2 outputs Temps / mode CH1 : Settings corresponding to the operator chapter on "Heating Circuit 1"...
- Page 83 9 Settings P P arameter Parameter Description Factory set number ting 6042 S S ensor input BX21 without module 2 BX2 sensor inlet 6043 S S ensor input BX22 without module 2 BX2 sensor inlet 6044 S S ensor input BX21 without module 3 BX2 sensor inlet...
- Page 84 9 Settings P P arameter Parameter Description Factory set number ting 6110 T T ime constant Records the sensors used in the appliance building 6200 S S ave sensors Information on the manufacturer 6212 C C heck no. heat source 1 6213 C C heck no.
- Page 85 9 Settings P P arameter Parameter Description Factory set number ting 7146 D D eaeration function Venting function: 7147 T T ype of venting Venting cycle operating mode: None None Heating circuit continuous Heating circuit cycled Hot water continuous Hot water cycled 7170 T T elephone customer service...
-
Page 86: Setting The Parameters
9 Settings P P arameter Parameter Description Factory set number ting 8330 H H ours run 1st stage Value reset 8526 S S olar Gain 24 Hour 8527 T T otal Solar Gain 8530 H H ours run solar 8531 H H ours run collect overtemp 8532... -
Page 87: Language Selection
9 Settings Fig.79 3. Confirm the menu selection by pressing the button. The parameter H H ours / minutes is displayed. Information Set time and date Operator section MENU MW-3000054-EN-02 Fig.80 4. Confirm the parameter selection by pressing the button. The parameter flashes, it can be modified. -
Page 88: Changing The Operating Mode
9 Settings Fig.83 4. Confirm the menu selection by pressing the button. The language currently used flashes. 5. Modify the parameter by turning the button 6. Confirm the setting by pressing the button. N N ote Press the key to return to the main display. MENU Operator section Change language... -
Page 89: Setting The Room Temperature Set Point (O O N Mode)
9 Settings Fig.86 2. Select the 3 3 16:Hot water boost parameter by turning the button. 3. Press the button to start forcing domestic hot water. Note Press the button a second time to stop forcing domestic hot water. ---------------------------------------------------- Shortcuts menu, page 71 Standby/operation Hot water boost... -
Page 90: Setting The Domestic Hot Water Temperature Set Point
9 Settings Fig.89 2. Select the H H ot water heating parameter by turning the button. 3. Press the button to confirm. 4. Select the appropriate operating mode. Shortcuts menu, page 71. 5. Press the button to confirm. Room temperature CH3 Hot water mode Note Hot water temp setpoint... -
Page 91: Programming A Holiday Period
9 Settings 3. Confirm the menu selection by pressing the button The parameter O O perating mode is displayed. Holiday heating CH1 Temps / mode CH1 ---------------------------------------------------- MENU MW-3000068-EN-03 4. Select the R R educed temp setpoint menu by turning the button. - Page 92 9 Settings Fig.92 2. Select the H H oliday heating CH1 menu by turning the button. ---------------------------------------------------- Information Set time and date MENU MW-3000071-EN-02 Fig.93 3. Confirm the menu selection by pressing the button. The parameter S S elect is displayed. Time hot water Holiday heating CH1 Temps / mode CH1...
- Page 93 9 Settings Fig.96 6. Select the S S tart parameter by turning the button. 7. Confirm the menu selection by pressing the button. Holiday heating CH1 Period 1: Start Day / month - - / - - MENU MW-3000075-EN-02 Fig.97 8.
-
Page 94: Using The Boiler According To Thermal Output
9 Settings Fig. 13. Select the O O perating level parameter by turning the button. 14. Confirm the menu selection by pressing the button. Holiday heating CH1 Period 1: End Day / month 15/08 MENU MW-3000079-EN-02 Fig. 15. Select the boiler's operating mode during the holiday period by turn ing the button. -
Page 95: Selecting A Heating Circuit
9 Settings Fig. 2. Select the C C ontroller stop function parameter by turning the but ton. ---------------------------------------------------- Chimney sweep function Controller stop function MENU MW-3000086-EN-02 Fig. 3. Press the button to confirm. Controller stop function O O n is displayed. Chimney sweep function Controller stop function Manual control... -
Page 96: Locking / Unlocking Parameter Modification
9 Settings 1. From the home screen, turn the button to select one of the three heating circuits. 2. Press the button to confirm. 3. Turn the button to temporarily modify the temperature set point on the heating circuit selected. 4. - Page 97 9 Settings Fig. 2. Press the key and the button simultaneously for around 6 seconds. t t emporarily unlocked is displayed. Note Unlocking is temporary and lasts 1 minute. 3. Press the key to access the user parameters menu. MENU 18.
-
Page 98: Timer Programming
9 Settings Fig. 8. Select the O O ff setting by turning the button. 9. Confirm the menu selection by pressing the button The parameters can be modified. Operator unit Programming lock MENU MW-3000095-EN-02 9.2.13 Timer programming Note Activate the operating mode T T imed Changing the operating mode, page 88. - Page 99 9 Settings Fig. Example of a time range 1 1 Period of operation at the comfort temperature 2 Period of operation in reduced mode Default time ranges Tab.57 Time ranges according to the days selected 05. March 2010 Friday Groups of days Program line 514 (heating) 574 (DHW) Pre-set programs Pre-set programs...
- Page 100 9 Settings Fig. 5. Confirm the parameter selection by pressing the button. The current selection flashes. 6. Select a weekly interval by turning the button. S S ee Table 1, page 98. 7. Confirm the weekly interval selection by pressing the button.
- Page 101 9 Settings Fig. 3. Select the T T ime central heating CH1 menu by turning the button. Note For heating circuits 2 and 3, select the parameters T T ime central heating CH2 or T T ime setting 3/CHP. For the domestic hot water circuit, select the parameter T T ime hot water.
- Page 102 9 Settings Fig. 9. Confirm the menu selection by pressing the button The beginning of the first time range flashes. 10. Select the end of the first time range by turning the button. N N ote Select the value - - -:-- in order not to program a first time range. 11.
- Page 103 9 Settings C C opying a time range Note It is possible to copy a time range from one day to another. It is not possible to copy a time range from a period of several days. 1. Select a heating circuit. Selecting a heating circuit, page 95.
- Page 104 9 Settings Fig. 11. Select a target day by turning the button. 12. Confirm the menu selection by pressing the button N N ote Repeat the copy to other days if necessary. Press the key to return to the main screen. MENU Reset the timer programmes to zero 1.
-
Page 105: Setting A Temporary Heating Flow Temperature
9 Settings Fig. 6. Select the Y Y es parameter by turning the button. 7. Confirm the parameter selection by pressing the button. Note Press the key to return to the main screen. MENU The reset of the timer program to zero has been successful. Time central heating CH1 Default values MENU... - Page 106 9 Settings Fig. 2. Select the Information menu with the rotary button. 3. Confirm by pressing the rotary button ---------------------------------------------------- Information Set time and date MENU MW-3000098-EN-02 Fig. 4. Use the rotary button to scroll through the various items of infor mation.
-
Page 107: Maintenance
10 Maintenance 10 Maintenance 1 1 0.1 General We recommend having the boiler inspected and serviced at regular inter vals. Boiler maintenance and cleaning must be carried out at least once a year by a qualified professional. Have an inspection carried out and the flues swept a a t least once a year or more, depending on the regulations in force in your country. - Page 108 10 Maintenance S S ee Accessing the internal boiler components, page 37. Fig. Removing the cables from the fan 5. Disconnect the power and command cables on the fan. Fig. Removing the cables from the elec 6. Disconnect the ignition electrode, the safety thermostat and the trode, the thermostat and the sensor flame detection sensor.
-
Page 109: Cleaning The Heat Exchanger
10 Maintenance Fig. Removing the fan, the collector and 9. Remove the fan, the Venturi and the burner to access the inside of the burner the heat exchanger. 1 1 0.2.3 Cleaning the heat exchanger 1. Remove the burner. Removing the burner, page 107. Fig. - Page 110 10 Maintenance 2. Check whether the surface of the burner is damaged in any way. Replace the burner and its gasket if they are damaged. 3. Check the safety thermostat. N N ote Replace the safety thermostat if it is damaged. 4.
-
Page 111: Cleaning The Siphon
10 Maintenance Fig. Distances and tolerances to be ob served for the ignition electrode and Tab.62 Distances and tolerances to be observed for the ignition electrode the ground electrode and the burner D D istance POWER HT+ 1.50, POWER HT+ 1.70, POWER HT+ 1.90, POWER HT+ 1.110 Ignition electrode and ground electrode 4 mm with a tolerance of +/- 0.5 mm... -
Page 112: Check The Combustion
10 Maintenance C C aution Respect the torque of the burner fastening screws: 5 N.m +/- 0.5. Caution Always use a new tightness gasket to reconnect the gas supply. 3. Reconnect the ignition electrode, the safety thermostat on the com bustion chamber door and the flame detection sensor. - Page 113 10 Maintenance Fig. Checking the air in the intake circuit 7. If necessary, check the return into circulation of any combustion products if using coaxial pipes. The sensor will then be connected to the outlet connected to the combustive air intake circuit. MW-3000111-01 7609474 - v02 - 04092014...
- Page 114 10 Maintenance C C hecking combustion (reduced thermal flow rate) Fig. Connecting the flue gas analyser 1. Unscrew the plug in the flue gas measurement point. 2. Connect the flue gas analyser. Note Ensure that the opening around the sensor is completely sealed when taking measurements.
- Page 115 10 Maintenance Fig. Checking the air in the intake circuit 7. If necessary, check the return into circulation of any combustion products if using coaxial pipes. The sensor will then be connected to the outlet connected to the combustive air intake circuit. MW-3000113-01 7609474 - v02 - 04092014...
-
Page 116: Troubleshooting
11 Troubleshooting 11 Troubleshooting 1 1 1.1 Error codes Fig. Error code A Error code B Secondary error code C Description of the error Note Press the key to return to the main display. MENU symbol continues to be displayed on the control panel. After one minute, if the error is not resolved, the error code is 1 18 displayed on the control panel a second time. -
Page 117: Automatic Error Code Clearing
11 Troubleshooting D D isplay Description of the error 430:Dyn water pres too low Safety cut-off for absence of circulation (check made by a pressure sensor) Note 1. This list is not exhaustive. Other error codes may be dis played. Contact the accredited technical assistance service. 2. -
Page 118: Decommissioning
12 Decommissioning 12 Decommissioning 1 1 2.1 Decommissioning procedure Warning Only qualified professionals are authorised to work on the boiler and the heating installation. To switch off the boiler temporarily or permanently, proceed as follows: 1. Switch off the boiler. 2. -
Page 119: Appendix
13 Appendix 13 Appendix 1 1 3.1 Declaration of Conformity Fig. Declaration of Conformity 7609474 - v02 - 04092014... - Page 120 13 Appendix 7609474 - v02 - 04092014...
- Page 121 13 Appendix 7609474 - v02 - 04092014...
- Page 122 13 Appendix 7609474 - v02 - 04092014...
- Page 123 © Copyright All technical and technological information contained in these technical instructions, as well as any drawings and technical de scriptions supplied, remain our property and shall not be multiplied without our prior consent in writing. Subject to alterations.
- Page 124 36061 BASSANO DEL GRAPPA (VI) - ITALY Via Trozzetti, 20 Servizio clienti: Tel +39 0424 517800 - Fax +39 0424 38089 www.baxi.it 7609474 - v02 - 04092014 7609474-001-02...
Need help?
Do you have a question about the POWER HT+ Series and is the answer not in the manual?
Questions and answers