Table of Contents
Advertisement
Advertisement
Table of Contents

Related Manuals for Baxi Power HT


Summary of Contents for Baxi Power HT
- Page 1 Caldaie a terra a gas a condensazione manuale per l’uso destinato all’utente ed all’installatore Brennwert- Gaskessel Gebrauchsanleitung für den Verbraucher und den Installateur Floor standing condensing gas boilers Installation, operation and maintenance Manual 0085...
-
Page 2: Istructions Pertaining To The User
(ISO 9001), environmental (ISO 14001) and health and safety (OHSAS 18001) systems. This means that BAXI S.p.A. includes among its objectives the safeguard of the environment, the reliability and quality of its products, and the health and safety of its employees. -
Page 3: Table Of Contents
contents istructions pertaining to the user 1. Instructions prior to installation 2. Instructions prior to commissioning 3. Commissioning of the boiler 4. Filling the boiler 5. Switching the boiler off 6. Prolonged standstill of the system. Frost protection 7. Servicing instructions and gas change istructions pertaining to the installer 8. -
Page 4: Instructions Prior To Installation
1. instructions prior to installation This boiler is designed to heat water at a lower than boiling temperature at atmospheric pressure. The boiler must be connected to a central heating system and/or to a domestic hot water supply system in compliance with its performances and output power. -
Page 5: Commissioning Of The Boiler
3. commissioning of the boiler To correctly light the burner proceed as follows: 1) provide power supply to the boiler; 2) open the gas cock; 3) follow the directions given below regarding the adjustments to be made at the boiler control panel. Figure 1 IMPORTANT: Domestic Hot Water (D.H.W.) instructions here discribed, are to take in account only if the boiler is connected to a D.H.W. - Page 6 3.1 description of keys (2) Central heating water temperature setting key. This key can be pressed to set the central heating water output temperature as described in point 3-3. (3) Domestic hot water temperature setting key. This key can be pressed to set the domestic hot water temperature as described in point 3-4.
-
Page 7: Setting The Time
3.2 setting the time • keys to access the programming function; Press either of the the display will show the letter P followed by a number (program line); Figure 3 • keys until the display shows P1, referring to the time to be set; press the •... - Page 8 3.5 setting the daily program for operation in central heating and domestic hot water modes 3.5.1 setting the daily times for central heating mode operation - Press either of the keys to access the programming function; a) press these keys until the display shows P11, referring to the program start time; keys to set the time;...
- Page 9 3.7 table fo user-settable parameters Parameter Parameter description Factory Range setting ———- 0…23:59 Time of day setting Minimum central heating temperature setting (°C) 25..80 Start of first daily period of automatic central heating 6:00 00:00…24:00 End of first daily period of automatic central heating 22:00 00:00…24:00 0:00...
- Page 10 3.8 fault warnings and resetting the boiler If a fault occurs, a flashing warning code appears on the display. The fault warnings appear on the main display (figure 1 a) together with the symbol (Figure 4). To reset, press the reset button for at least two seconds.
- Page 11 3.9 table of faults and error messages Error Description of fault Corrective action code Outdoor temperature sensor fault Call an authorised service centre. ntc output sensor failure Call an authorised service centre. domestic hot water ntc sensor failure Call an authorised service centre. E110 safety or flue gas thermostat tripped Press the reset key (for about 2 seconds: if this device is triggered repeatedly, call...
-
Page 12: Filling The Boiler
Lastly, vent any radiators in the system. BAXI declines all liability for damage deriving from the presence of air bubbles in the primary exchanger due to the incorrect or imprecise observance of the above. -
Page 13: Istructions Pertaining To The Installer
8. general information The following remarks and instructions are addressed to Service Engineers to help them carry out a faultless installation. Instructions regarding lighting and operation of the boiler are contained in the ‘Instructions pertai- ning to the user’ section. Note that installation, maintenance and operation of the gas appliances must be performed exclusively by qualified personnel in compliance with current standards. -
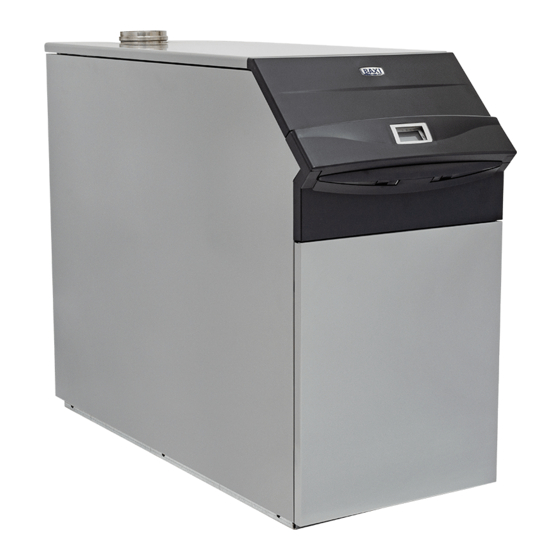
Page 14: Boiler Installation And Dimensions
Lastly, vent any radiators in the system. BAXI declines all liability for damage deriving from the presence of air bubbles in the primary exchanger due to the incorrect or imprecise observance of the above. - Page 15 Model Depth Height Wight Fitting Fitting Water contents fitting POWER HT.. (mm) (mm) (mm) ( l ) (CH) (CH) ” G 1’’ G 1’’ 13,7 1.850 1.1000 G 1” ” ” 1.1200 1024 G 1” ” ” 23,3 1.1500 1132 G 1”...
- Page 16 CONDENSATE DRAIN Figure 6 10.1 boiler pressure loss poWer ht Minimum water Water flow rate Model flow rate with ∆t=20°K 1.850...
- Page 17 POWER HT 1.850 - 1.1000 EXCHANGERS PRESSURE DROP. WATER FLOW RATE (l/h) Graph 1 120 kW POWER HT 1.1200 - 1.1500 EXCHANGERS PRESSURE DROP. WATER FLOW RATE (l/h) Graph 1.1 11. chimney flue connection Connect the boiler to the flue using a pipe made of stainless steel or plastic material with an internal diameter of 100 mm, capable of resisting normal mechanical stresses over time, as well as high temperatures (<120°C)
- Page 18 Figure 7 In case exhaust and intake flues not supplied by BaxI s.p.a. have been installed, these must be certified for the type of use and must have a maximum pressure drop in according to the values reported in the table.
-
Page 19: Connecting The Mains Supply
12. making the electrical connections Electrical safety of the appliance is only guaranteed by correct grounding, in accordance with the rules in for- Connect the boiler to a 230V monophase + ground power supply by means of the three-pin cable supplied with it and make sure you connect polarities correctly. - Page 20 12.2 connecting the pumps The pumps of the heating system (P1 and P2) have to be connected to boiler terminal block following the wiring of figure 9, a relay must be wired between the boiler control circuit board and the pumps. Cover Terminal board Terminal board...
- Page 21 12.3 description of the electrical connections to the boiler Turn the control box downward to access terminal blocks M1 and M2 used for the electrical connections by removing the two protective covers (see figure 8). Terminals 1-2: connections for the optional SIEMENS QAA73 temperature regulator. These connections do not have any specific polarity.
- Page 22 Parameter Range Default value Line no. HC1 gradient 2.5…40 Selection of central heating circuit temperature curve “kt” HC1 max. output 25…85 Central heating system maximum output temperature Light, Heavy Light Type of building Room compensation on HC1 Activation/deactivation of the influence of the room temperature. If it is On HC1 on HC2 on HC1+HC2...
- Page 23 12.5 connecting the outdoor temperature sensor probe The SIEMENS model QAC34 outdoor temperature sensor probe (optional accessory) must be connected to terminals 7-8 of terminal board M2 in figure 8. The procedures for setting the gradient of the temperature curve “kt” vary depending on the accessories con- nected to the boiler.
- Page 24 c) with AGU2.500 for control of a low temperature system: Refer to the instructions provided with the AGU2.500 accessories for connection and control of a low tempe- rature zone. In this case some electronic parameters must be modified (see §14) (H552-H553-H632). 12.6 connecting a zone system The electrical connection and settings needed to control a system divided into zones vary depending on the accessories connected to the boiler.
- Page 25 12.7 domestic hot water circuit electric pump connections Fit the hot water tank after the hydraulic header. Connect the pump of the external DHW boiler to terminals 13-14 on terminal block M3 (figure 9). Make sure that the pump has the following specifications: 230 V AC;...
-
Page 26: Adjusting The Gas Valves And Gas Change
13. adjusting the gas valves POWER HT models 1. 850 and 1.1000 have a single gas valve (figure 12 a). POWER HT models 1. 1200 and 1.1500 have a double gas valve (figure 12 b). gas nozzle Figure 12a gas nozzle... - Page 27 (V1) and (V2) fully and then, depending on the model, back off 2¼ turns (poWer ht 1.1200) or 2½ turns (poWer ht 1.1500), repeating the steps described above. • Turn both gas valve adjuster screws (V1) and (V2) so as to set the CO values as indicated in table 2.1 for...
-
Page 28: Gas Conversion
• Remove the pressure gauge from the P1OUT port and connect to the P2OUT port of gas valve 2. • Turn the adjuster screw K2 of gas valve 2 so as to set the pressure value (Pout) as indicated in table 2.1 for natural gas (G20) and in table 2.2 for propane (LPG): • Check that the CO value at minimum heat output is as indicated in table 2.1 or 2.2. The value can be optimized by making the necessary fine adjustment to screw K2. ⇑ ⇑ Figure 13a Figure 13b 13.3 gas conversion IMportant: in the event of converting the boiler from natural gas (G20) to propane (LPG), the following operation must be carried out before proceeding to adjust the gas valve as described above:... - Page 29 Gas consumption at poWer ht poWer ht poWer ht poWer ht 15 °c 1013 mbar 1.850 1.1000 1.1200 1.1500 Gas G20 - 2h - 20 mbar MJ/m 34,02 34,02 34,02 34,02 Consumption at max. heat output 9,26 10,9 13,08 16,35 Consumption at min.
-
Page 30: Setting The Boiler Parameters
14. setting the boiler parameters The boiler parameters may only be modified by professionally qualified staff proceeding as follows: a) press the , keys on the boiler’s front panel together for about 3 s until the parameter H90 appears on the display;... -
Page 31: Control And Operation Devices
If the electronic circuit board is replaced, make sure that the parameters set are those specific to the boiler model, as indicated in the documentation available from the authorised Service Centre. 15. control and operation devices The boiler has been designed in full compliance with European reference standards and in particular is equipped with the following: • Overheat safety thermostat Thanks to a sensor placed on the heating flow, this thermostat interrupts the gas flow to the main burner in... -
Page 32: Positioning Of The Ignition And Flame Sensing Electrode
16. positioning of the ignition and flame sensing electrode Figure 14 17. check of combustion parameters Drill a hole in the flue at a distance from the boiler equivalent to twice the diameter of the flue to measure combustion efficiency and combustion flue composition in accordance with the rules in force. Use this hole to measure the following parameters: •... -
Page 33: Annual Service
18. activating the chimney sweep function To facilitate measurement of the combustion efficiency and improve the cleanliness of the production products, the chimney sweep function can be activated by proceeding as described below: (2-3) together until the pointer “ ” appears on the display alongside the 1) press the symbol (about 3 seconds but no more than 6 seconds). -
Page 34: Boiler Schematic
20. boiler schematic Figure 17 Key: 1 pressure gauge 2 siphon 3 central heating NTC sensor 4 105°C overheat safety thermostat 5 gas valve 6 flue-water exchanger 7 flame detector electrode 8 burner 9 ignition electrode 10 mixer with venturi 11 gas diaphragm 12 fan 13 flue joint... - Page 35 21. illustrated wiring diagram 21.1 power ht 1.850 - 1.1000 IstructIons pertaInInG to the Installer 912.199.3 - GB...
- Page 36 21.2 power ht 1.1200 - 1.1500 IstructIons pertaInInG to the Installer 912.199.3 - GB...
-
Page 37: Technical Data
22. technical data Boiler model POWER HT 1.850 1.1000 1.1200 1.1500 Category 2h3p 2h3p 2h3p 2h3p Maximum heat input 87,2 102,7 123,2 Minimum heat input 33,1 36,8 41,5 Maximum heat output 75/60°C kcal/h 73100 86000 103200 129000 Maximum heat output 50/30°C... - Page 38 IstructIons pertaInInG to the Installer 912.199.3 - GB...
- Page 39 IstructIons pertaInInG to the Installer 912.199.3 - GB...
- Page 40 Die Firma BAxI S.p.A. befaßt sich ständig mit der Verbesserung ihrer Produkte und behält sich daher das Recht vor, die in diesen Unterlagen enthaltenen Daten jederzeit und ohne Vorankündigung zu ändern. Diese Unterlagen sind rein informativ und gelten nicht als Vertrag gegenüber Dritte.
Need help?
Do you have a question about the Power HT and is the answer not in the manual?
Questions and answers