Advertisement
Quick Links
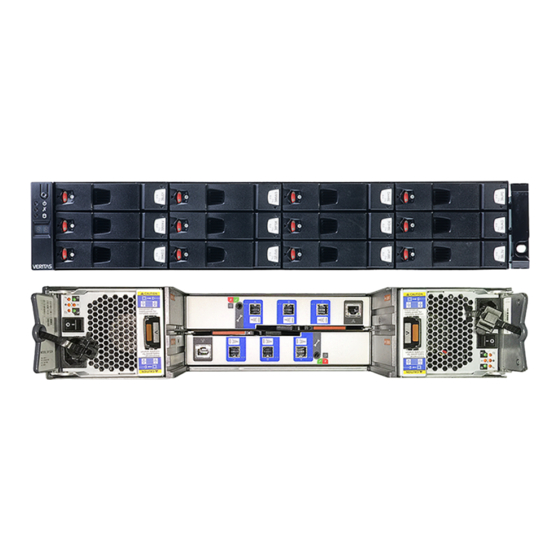
Veritas Appliance
Hardware Service Procedure
Purpose
This document provides instructions for replacing a faulty disk drive in the 3U16 / 2U12 Storage
Shelves that are connected to the NetBackup 5230 Appliance.
Electrical Safety
The static discharged by human bodies can damage static-sensitive components on the boards.
When installing and maintaining the equipment, observe appropriate electrostatic safety precautions
to prevent personnel injuries or device damage.
When operating a device in an electrostatic sensitive area, you must take electrostatic-discharge
(ESD)-preventive measures. These include wearing ESD-preventive gloves, an ESD-preventive wrist
strap, and ESD-preventive clothes to avoid personnel injury or device damage.
To prevent damage to the device, pay attention to the following during operations:
•
Do not touch devices with bare hands because ESD from the human body may damage the
electrostatically sensitive elements on a board.
•
When dealing with the server or any of the internal components, wear an ESD-preventive wrist
strap, ESD-preventive gloves, and ESD-preventive suit.
Hardware Part Replacement Procedure
About removing and replacing a faulty hot-swappable disk drive in a Veritas 3U16
24/36TB Storage Shelf or a Veritas 2U12 49TB Storage Shelf
This section describes how to replace a faulty hot-swappable disk drive in a Veritas 3U16 24/36TB
Storage Shelf or a Veritas 2U12 49TB Storage Shelf. These storage shelves are used with NetBackup
5230 Appliances.
Getting started
To replace a faulty disk drive in a Veritas 3U16 24/36TB Storage Shelf, see .
1
Advertisement

Subscribe to Our Youtube Channel
Related Manuals for VERITAS 3U16


Summary of Contents for VERITAS 3U16
- Page 1 Veritas Appliance Hardware Service Procedure Purpose This document provides instructions for replacing a faulty disk drive in the 3U16 / 2U12 Storage Shelves that are connected to the NetBackup 5230 Appliance. Electrical Safety The static discharged by human bodies can damage static-sensitive components on the boards.
- Page 2 HSP #201 Replacing a faulty hot-swappable disk drive in storage shelves that are connected to a NetBackup 5230 Appliance To replace a faulty disk drive in a Veritas 2U12 49TB Storage Shelf, see . Requirements • Replacement 2-TB hot-swappable disk drive for the Veritas 3U16 24TB Storage Shelf •...
- Page 3 Disk module release button Power activity Verify that the drive capacity matches that of the replacement drive. Veritas Storage Shelf drive carriers use Roman numeral markings in the bottom right-hand corner to indicate the drive capacity. • II = 2 TB •...
- Page 4 Remove the faulty disk drive from the slot and place it in an ESD-protective bag. Installing the replacement hot-swappable disk drive in the Veritas 3U24/36TB Storage Shelf To install the replacement hot-swappable disk drive in the Veritas 3U24/36TB Storage Shelf Remove the replacement drive from the ESD-protective bag.
- Page 5 Replace and lock the storage shelf bezel if necessary. Replacing a faulty hot-swappable disk drive in a Veritas 2U12 49TB Storage Shelf Caution: You must complete the disk drive swap within two minutes. Leaving the disk drive slot open for longer than two minutes can result in higher drive bay temperatures, which can shorten the life span of the remaining disk drives.
- Page 6 Support. Removing the faulty hot-swappable disk drive from the Veritas 2U12 49TB Storage Shelf To remove the faulty hot-swappable disk drive from the Veritas 2U12 49TB Storage Shelf Put on an ESD-compliant wrist strap or take other ESD-protective measures. Note: The static discharged by human bodies can damage static-sensitive components on the boards.
- Page 7 HSP #201 Replacing a faulty hot-swappable disk drive in storage shelves that are connected to a NetBackup 5230 Appliance Locate the drive that you want to replace. Check the status of both LEDs. Push the release button to the right-hand direction to release the disk drive lever. After you open the latch, hold the drive carrier lever and pull it open completely.
- Page 8 HSP #201 Replacing a faulty hot-swappable disk drive in storage shelves that are connected to a NetBackup 5230 Appliance Hold the drive carrier and part of the disk drive, and gently slide the faulty disk out of the slot. Place the faulty disk in an ESD-protective bag.
- Page 9 Verify that the capacity of the drive is the same as the capacity of the drive that is being replaced. Note: The capacity of a Veritas 2U12 49TB Storage Shelf disk drive is 6-TB. If the drive capacity does not match, contact the Veritas Technical Support.
- Page 10 HSP #201 Replacing a faulty hot-swappable disk drive in storage shelves that are connected to a NetBackup 5230 Appliance Check the status of the LEDs on the drive that you replaced. The activity LED is on when the connection is good. After a short period, the fault LED flashes one second on and one second off to indicate that the rebuild is in progress.
Need help?
Do you have a question about the 3U16 and is the answer not in the manual?
Questions and answers