
Related Manuals for Fristam Pumps FL2 Series


Summary of Contents for Fristam Pumps FL2 Series
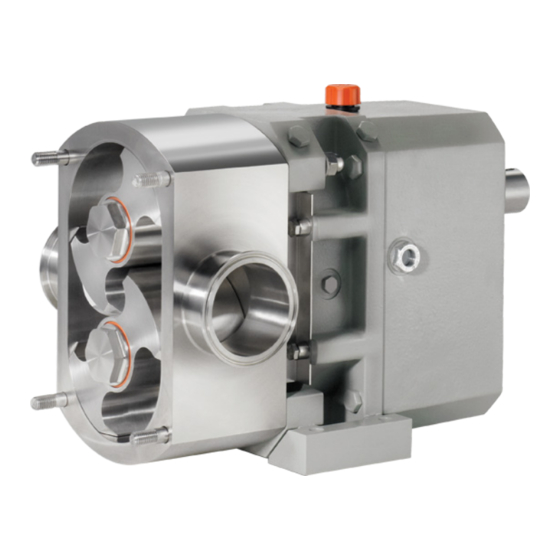
- Page 1 FL2 S erieS INSTRUCTION AND MAINTENANCE MANUAL: FL2/FL3 Series Pumps (Models: 15, 58, 75, 100 & 130) SANITARY POSITIVE DISPLACEMENT PUMPS...
-
Page 2: D Escription
With nine pump models and a full range of options, you can match your process needs precisely. The FL2 Series pump is available with any connection type desired and may be mounted with the inlet/outlet connections in a horizontal or vertical orientation. The pump should be coupled to a motor/drive assembly properly specified to give the desired performance for the required application. -
Page 3: Table Of Contents
FL2 S erieS abLe oF ontentS .....................2 escription ...................3 able of ontents ..................4 echnical nformation .....................7 nstallation ............9 ecommenDeD reventive aintenance ....................10 eplacement ............11 ingle ssembly rawing ............12 ouble ssembly rawings ..............13 isassembly .......14 DDitional isassembly ouble ............15 ssembly ouble ................15 ssembly ...............16... -
Page 4: T Echnical I Nformation
riStam umPS echnicaL nFormation peciFicationS Maximum Differential Pressure ..............FL2 15 ..145 PSI ........................FL2 58S..130 PSI ........................FL2 58L..115 PSI ....................FL2 75S, 100S & 130S..170 PSI ....................FL2 75L, 100L & 130L..120 PSI ......................FL3 75L & 100L..115 PSI Maximum Inlet Pressure ....................100 PSI Temperature Range .................... - Page 5 FL2 S erieS a1: W A4: m abLe ooDS oupLing Lignment abLe aximum peeD FL2 15 1800 RPM Type E Type H FL2 58L & S 1000 RPM Sleeve Parallel Angular Parallel Angular Size FL2 75L & S 800 RPM Y max.
- Page 6 riStam umPS a3: r abLe otor LearanceS in miLLimeterS reFerS to igure STANDARD FL2/3 ROTOR CLEARANCES Model Back Face Front Face Radial Sides Radial Top Rotor to & Bottom Rotor 0.06-0.08 0.07-0.15 0.09-0.12 0.07-0.10 0.07-0.12 (0.0024”-0.0031”) (0.0028”-0.0057”) (0.0036”-0.0046”) (0.0028”-0.0039”) (0.0028”-0.0047”) 0.1-0.13 0.14-0.23 0.175-0.205...
-
Page 7: I Nstallation
FL2 S erieS nStaLLation npacking Check the contents and all wrapping when unpacking the pump. Carefully inspect for any damage that may have occurred during shipping. Immediately report any damage to the car- rier. Leave the protective caps over the pump inlet and outlet connections until you are ready to install the pump. - Page 8 A change in conditions (for example, higher viscos- ity product, higher product specific gravity, lower head losses) can overload the motor. For technical assistance regarding operating condition changes, please contact Fristam Pumps. Make sure that the pump is rotating in the correct direction.
-
Page 9: R Ecommended P Reventive M
FL2 S erieS tart heck LiSt 1. Make sure that the pump and piping system are clear of any foreign matter. Do not use the pump to flush the system. 2. Make sure that the pump and drive are properly lubricated. Check the lubrication section (page 4) in this manual for the pump. - Page 10 riStam umPS Models 58-130: If the rotor nut gasket fails, the threaded hole on the rotor nut and the threads on the end of the shaft will need to be cleaned. A wire brush is recommended for cleaning these threads. ubrication Gearbox - The oil level should be maintained in the center of the sight glass on the side of the gearbox housing.
- Page 11 FL2 S erieS Figure 8-B: FL2/3 15 - 130 Single seal assembly DESCRIPTION ROTOR NUT O-RING ROTOR O-RING STATIONARY SEAL O-RING SEAL WAVE SPRING STATIONARY SEAL GAPPING SPACER O-RING GAPPING SPACER ROTATING SEAL *PARTS NOT INCLUDED IN FLII 15 PUMPS PRIOR TO MARCH 2009 1265000528 Rev A...
-
Page 12: D Rawings
riStam umPS Figure 12-B: FL2/3 58 - 100 Double seal assembly DESCRIPTION ROTOR NUT O-RING ROTOR O-RING FRONT STATIONARY SEAL O-RING GAPPING SPACER GAPPING SPACER O-RING FRONT SEAL SPRING FRONT STATIONARY SEAL ROTATING SEAL REAR STATIONARY SEAL REAR SEAL SPRING REAR STATIONARY SEAL O-RING SEAL FLUSH HOUSING O-RING WATER PIPE... -
Page 13: P Ump E Nd D Isassembly
FL2 S erieS iSaSSembLy Drain all product from the pump head prior to disassembly. The pump Warning head may be isolated with inlet and outlet valves. Disconnect the suction and discharge piping from the pump. Disconnect the seal flush supply and return lines to your pump if the pump is equipped with a double mechanical seal. -
Page 14: Dditional D Isassembly
riStam umPS ponents as required. Fristam recommends replacing all of the wetted elastomers during reassembly. d) Pull the rotating seals off the gapping spacers and remove both from the pump housing. e) Place the pump housing face up on a bench and rest it on the housing studs. -
Page 15: S Eal A Ssembly - D
FL2 S erieS – F SSembLy oubLe a) Place the seal flush housing face up on a bench. b) Lubricate and install the rear sta- tionary seal o-ring in the bottom of the stationary seal cavity. c) Install the rear stationary seal spring into the stationary recess. -
Page 16: P Ump E Nd A Ssembly
riStam umPS SSembLy a) Install the pump hous- ing onto the gearbox and secure the housing dome nuts. note: F FL2 15 prior to 2009: arch b) Install the gapping spacer and rotor on to the appropriate shaft. Install the rotor with one dot onto the drive shaft and the rotor with two dots onto the idle... - Page 17 FL2 S erieS Tighten the first rotor nut with a socket wrench (and Flat Cover Rotor Bolt Tool on models 15-75). to the rec- ommended torque (Table A2, page 5). f) To tighten the second rotor place the dowel on the opposite side of the pump and tighten the second rotor nut to the proper torque.
-
Page 18: S Haft And / Or B Earing R Eplacement
riStam umPS haFt anD earing epLacement Begin all pump maintenance by disconnecting the energy source to the pump. Observe all lock out/tag out procedures as outlined by ANSI Z244.1-1982 and OSHA 1910.147 to prevent accidental start-up and injury. ooLS requireD For ShaFt anD or bearing repLacement 58 L &... -
Page 19: G Earbox A Ssembly
FL2 S erieS Pull the two gears off the pump shafts. Remove the gear keys. For models 75-130 only: Remove and discard the rear bearing o-rings from the pump shafts and rear bearing lip seals from the rear bearing bore. Remove and discard the front bearing lip seals from the front bearing bore. - Page 20 riStam umPS For models 75-130 only: Generously apply grease to the rear bearing cups and insert into the rear bearing bore. For models 75-130 only: Pack the rear cone and roller assemblies with grease then heat the cones to 250°F (110°C). Place the cone and roller assemblies over the shafts with the smaller diameter end sliding over the shaft first.
-
Page 21: Fl2 15 And 58 ( Single Seal )
FL2 S erieS FL2 15 p umberS Item Item Description Qty. Part No. Description Qty. Part No. Mounting foot bolt 1101000129 Gearbox cover 1383001405 Mounting foot 1925001403 Rear oil seal 1812002503 Coupling key 1315002621 Gapping shim 1224000110 Cover stud 1103001406 Rotor nut 1102004220 Seal flush housing o-ring (viton) -
Page 22: Rawing
riStam umPS 1265000317 Rev A 15 & 58 e oDeLS xpLoDeD Mounting Foot Bolt Front Stationary Seal O-ring Mounting Foot Front Stationary Seal Gapping Spacer Gearbox Rotor Nut Gapping Spacer O-Ring Rotor Nut O-ring Cover/Housing Nut Rotating Seal Cover Rear Seal Spring (double seal only) Cover O-ring Rear Stationary Seal (double seal only) Housing... - Page 23 FL2 S erieS Gear Front Oil Seal Oil Plug Front Bearing Gear Key Gearbox Cover Bolt Gearbox Cover Idle Shaft Rear Oil Seal Rear Bearing Coupling Key Bearing Lock Washer Cover Stud Bearing Lock Nut Seal Flush Housing O-ring Sight Glass (double seal only) Drive Shaft Front Seal Spring...
-
Page 24: L Ist
riStam umPS FL2 58S p umberS Item Item Description Qty. Part No. Description Qty. Part No. Mounting foot bolt 1101000129 Gearbox cover 1383001305 Mounting foot 1925001303 Rear oil seal 1812002503 Gapping shim 1224001330 Coupling key 1315002605 Rotor nut 1103003509 Cover stud 1103001506 Rotor nut o-ring (viton) 1180000379... -
Page 25: L Ist
FL2 S erieS FL2 58L p umberS Item Item Description Qty. Part No. Description Qty. Part No. Mounting foot bolt 1101000129 Gearbox cover 1383001305 Mounting foot 1925001303 Rear oil seal 1812002503 Gapping shim 1224001330 Coupling key 1315002605 Rotor nut 1103003509 Cover stud 1103001506 Rotor nut o-ring (viton) -
Page 26: Fl2/3 75 And 100
riStam umPS FL2/3 75 & 100 xpLoDeD ieW oF Front Stationary Seal O-ring Mounting Foot Bolt Front Stationary Seal Mounting Foot Gearbox Gapping Spacer Gapping Spacer O-ring Rotor Nut Housing Pins Rotor Nut O-ring Rotating Seal Cover/Housing Dome Nuts Rear Seal Spring Cover Rear Stationary Seal Cover O-ring... - Page 27 FL2 S erieS Gear Seal Flush Housing Oil Fill Plug Front Bearing Lip Seal Gear Key Front Bearing Rear Cover Rear Cover Bolt Rear Cover Oil Seal Idle Shaft Coupling Key Rear Bearing Cover Studs Drain Plug Seal Flush Housing O-ring Bearing Lock Washer Front Seal Spring Bearing Lock Nut...
-
Page 28: L Ist
riStam umPS FL2 75S p umberS Item # Part # Description Item # Part # Description 1101000080 Mounting Foot Screw 1180000354 Gear O-ring (viton) 1812002508 Gear Lip Seal 1925004303 Foot (zinc plated) 1925004304 Foot (stainless steel) 1381001604 Gear 1925004403 Vertical Mount Foot (zinc plated) 1925004404 Vertical Mount Foot (stainless steel) 1248000023... -
Page 29: Fl2/3 75L P Art N
FL2 S erieS FL2/3 75L p umberS Item # Part # Description Item # Part # Description 1101000080 Mounting Foot Screw 1180000354 Gear O-ring 1925004303 Foot (zinc plated) 1812002508 Gear Lip Seal 1925004304 Foot (stainless steel) 1381001604 Gear (FL2) 1925004403 Vertical Mount Foot (zinc plated) 0396660004 Gear (FL3) -
Page 30: Fl2 100S P Art N
riStam umPS FL2 100S p umberS Item # Part # Description Item # Part # Description 1101000007 Mounting Foot Screw 1248000023 Vent Plug 1925004503 Foot (zinc plated) 1315002607 Gear Key 1224004515 Gapping Spacer 1383004505 Rear Cover (cast iron) 1103003709 Rotor Nut 1812002507 Rear Cover Lip Seal 1180000260... -
Page 31: Fl2/3 100L P Art N
FL2 S erieS FL2/3 100L p umberS Item # Part # Description Item # Part # Description 1101000007 Mounting Foot Screw 1248000023 Vent Plug 1925004503 Foot (zinc plated) 1315002607 Gear Key 1224004515 Gapping Spacer 1383004505 Rear Cover (cast iron) 1103003709 Rotor Nut 1812002507 Rear Cover Lip Seal... -
Page 32: Fl2 130
riStam umPS FL2 130 e xpLoDeD Gapping Spacer Rear Seal Spring Rotor Nut Rear Stationary Seal Rotor Nut O-ring Rear Stationary Seal O-ring Cover/Housing Dome Nuts Rear Cover O-ring Cover Rear Bearing O-ring Cover O-ring Rear Bearing Lip Seal Housing thru studs Gear Pump Housing Oil Fill Plug... - Page 33 FL2 S erieS 17 48 37 9 10 11 12 13 14 32 16 38 39 15 22 26 42 24 23 25 28 46 27 44 45 1265000320 11/18/05 Housing Studs Seal Flush Housing Pins Seal Flush Housing Front Bearing Lip Seal Front Bearing Rear Cover Bolt Idle Shaft...
-
Page 34: Fl2 130S P Art N
riStam umPS FL2 130S p umberS Item # Part # Description Item # Part # Description 1224004715 Gapping spacer 1248000023 Vent plug 1103001809 Rotor bolt 1315002635 Gear key 1180000384 Rotot bolt o-ring (viton) 1383001805 Rear cover (cast iron) 1180000392 Rotor bolt o-ring (EPDM) 1812002515 Rear cover oil seal 1103000012... -
Page 35: Fl2 130L P Art N
FL2 S erieS FL2 130L p umberS Item # Part # Description Item # Part # Description 1224004715 Gapping spacer 1248000023 Vent plug 1103001809 Rotor bolt 1315002635 Gear key 1180000384 Rotot bolt o-ring (viton) 1383001805 Rear cover (cast iron) 1180000392 Rotor bolt o-ring (EPDM) 1812002515 Rear cover oil seal... -
Page 36: T Roubleshooting
riStam umPS roubLeShooting robLem auSe oLution Pump not turning Interruption of electrical power. Reset circuit breaker, check fuses. Keys sheared or missing. Replace. Coupler or belts are not connected. Replace or adjust. Pump shaft or gears sheared. Replace. Wrong rotation. Reverse. -
Page 37: P Ump M Aintenance R Ecord
FL2 S erieS aintenance ecoRd eRvice eRfoRmed... - Page 38 riStam umPS aintenance ecoRd eRvice eRfoRmed...
-
Page 39: N Otice Of Terms
All orders are subject to acceptance by Fristam Pumps USA Limited Partnership. Each Fristam Pumps item is warranted to be free from manufacturing defects for a period of one (1) year from the date of shipment, providing it has been used as recommended and in accordance with recognized piping practice, and providing it has not been worn out due to severe service, such as encountered under extremely corrosive or abrasive conditions. -
Page 40: D Rawing
2410 Parview Road • Middleton, WI 53562-2524 © Copyright 2018 - Fristam Pumps USA 1-800-841-5001 • 608-831-5001 Drawing # 1250000005 Rev D Updated 10/2/2018 www.fristam.com/usa Part # 1050000037 Email: fristam@fristampumps.com Visit www.fristam.com/usa for a current list of literature.
Need help?
Do you have a question about the FL2 Series and is the answer not in the manual?
Questions and answers