Table of Contents
Advertisement
Advertisement
Table of Contents

Related Manuals for AEG CCB6760ACM


Summary of Contents for AEG CCB6760ACM
- Page 1 CCB6760ACM User Manual Cooker USER MANUAL...
-
Page 2: Table Of Contents
14. ENERGY EFFICIENCY..................33 FOR PERFECT RESULTS Thank you for choosing this AEG product. We have created it to give you impeccable performance for many years, with innovative technologies that help make life simpler – features you might not find on ordinary appliances. Please spend a few minutes reading to get the very best from it. - Page 3 ENGLISH responsible for any injuries or damage that are the result of incorrect installation or usage. Always keep the instructions in a safe and accessible location for future reference. 1.1 Children and vulnerable people safety This appliance can be used by children aged from 8 •...
- Page 4 Do not install the appliance on a platform. • Do not operate the appliance by means of an external • timer or separate remote-control system. WARNING: Unattended cooking on a hob with fat or • oil can be dangerous and may result in fire.
-
Page 5: Safety Instructions
ENGLISH Service Centre or similarly qualified persons to avoid an electrical hazard. Use only the food sensor (core temperature sensor) • recommended for this appliance. To remove the shelf supports first pull the front of the • shelf support and then the rear end away from the side walls. - Page 6 WARNING! when it operates or the door is hot. Risk of fire and explosion • The shock protection of live and insulated parts must be fastened in • Fats and oil when heated can release such a way that it cannot be removed flammable vapours.
-
Page 7: Installation
ENGLISH • Do not activate the cooking zones cleaning pads, solvents or metal with empty cookware or without objects. cookware. • If you use an oven spray, follow the • Cookware made of cast iron, safety instructions on the packaging. aluminium or with a damaged bottom •... - Page 8 3.1 Technical data 3.4 Electrical installation WARNING! Dimensions The manufacturer is not responsible if you do not Height 894 - 912 mm follow the safety precautions Width 600 mm from Safety chapters. Depth 600 mm This appliance is supplied without a main plug or a main cable.
-
Page 9: Product Description
ENGLISH • Make sure that the cover is securely Make sure that the links are fitted as fastened. shown. To open the cover of terminal board obey the procedure in opposite sequence. 3.6 Terminal board Do not remove blanking plates. 4. -
Page 10: Before First Use
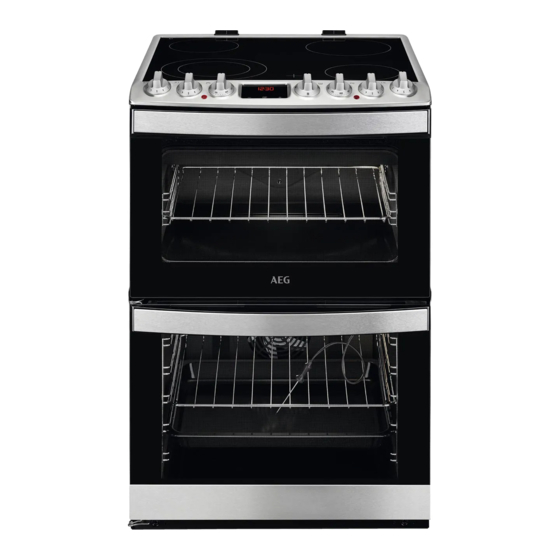
4.3 Cooker control panel Knobs for the hob Knob for the top oven functions Display Knob for the main oven functions Knob for the main oven temperature Temperature indicator / symbol for the main oven Temperature indicator / symbol for the top oven 4.4 Accessories... -
Page 11: Hob - Daily Use
ENGLISH 2. Let the oven operate for 1 hour. Accessories can become hotter than usual. The oven can emit an odour and 3. Set the function . Set the smoke. Make sure that the airflow in the temperature to 250ºC. room is sufficient. - Page 12 7.2 Minimum cookware Do not use cookware on the diameter ceramic hob with bases with pronounced edges or ridges, e.g. cast iron pans. These Cooking Cookware di‐ Power (W) could scratch or scour the zone ameter (mm) hob surface permanently.
-
Page 13: Hob - Care And Cleaning
ENGLISH Heat setting Use to: Time Hints (min) 6 - 7 Gentle fry: escalope, veal cor‐ as nec‐ Turn halfway through. don bleu, cutlets, rissoles, essary sausages, liver, roux, eggs, pancakes, doughnuts. 7 - 8 Heavy fry, hash browns, loin 5 - 15 Turn halfway through. - Page 14 Symbol Oven function Application Dual Circuit Grill To grill flat food in medium quantities in the middle of the shelf. To make toasts. Full Grill To grill flat food and to toast bread. 9.2 Main oven functions Symbol Oven function...
- Page 15 ENGLISH 9.3 Activating and 5. Put food in the appliance and close the oven door. deactivating the top / main oven CAUTION! Do not refill the cavity It depends on the model if embossment with water your appliance has knob during cooking or when the oven is hot.
- Page 16 Wire shelf and the deep pan together: Push the deep pan between the guide bars of the shelf support and the wire shelf on the guide bars above. 3. Press the button to set the core temperature. You can set the temperature from 30 °C to 99 °C.
-
Page 17: Oven - Clock Functions
ENGLISH With telescopic runners you can put in and remove the shelves more easily. 2. Put the deep pan into the oven on the necessary shelf position. You can use the trivet to grill flat dishes Put the wire shelf on the telescopic in large quantities and to toast. - Page 18 A. Clock functions C. Food sensor indicator B. Timer 10.2 Buttons Button Function Description MINUS To set the time. CLOCK To set a clock function. PLUS To set the time. 10.3 Clock functions Clock function Application TIME OF DAY To set, change or check the time of day.
-
Page 19: Oven - Hints And Tips
ENGLISH The clock function goes out after some seconds. 11. OVEN - HINTS AND TIPS 11.3 Baking WARNING! Refer to Safety chapters. For the first baking, use the lower temperature. The temperature and baking You can extend the baking time by 10 – times in the tables are 15 minutes if you bake cakes on more guidelines only. - Page 20 Baking results Possible cause Remedy The cake is not ready in The oven temperature is too Next time set a slightly higher the baking time speci‐ low. oven temperature. fied in a recipe. 11.5 Conventional Baking - Top Oven Food Temperature (°C)
- Page 21 ENGLISH Food Temperature (°C) Time (min) Shelf posi‐ tion Shepard`s Pie 190 - 200 30 - 40 Souffles 170 - 180 20 - 30 Vegetables: Baked Jacket Pota‐ 180 - 190 60 - 90 Vegetables: Roast Potatos 180 - 190 60 - 90 Yorkshire Pudding Large 220 - 210...
- Page 22 Food Temperature (°C) Time (min) Shelf posi‐ tion Pastry: Flaky 180 - 190 30 - 40 Pastry: Puff Follow manufacturer`s instructions. Re‐ duce the temperature for Fan oven by 20 °C. Plate Tarts 180 - 190 25 - 45...
- Page 23 ENGLISH Meat Food Temperature (°C) Time (min) Shelf posi‐ tion Meat in pouch 250 g 25 - 35 Meat skewers 500 g 30 - 40 Small baked items Food Temperature (°C) Time (min) Shelf posi‐ tion Cookies 25 - 35 Macaroons 25 - 35 Muffins...
- Page 24 Food Temperature Water in Preheating Time (min) Shelf (°C) the cavity time (min) posi‐ emboss‐ tion ment (ml) Plum cake, cin‐ 70 - 80 namon rolls Frozen foods Food Temperature Water in Preheating Time (min) Shelf (°C) the cavity time (min) posi‐...
- Page 25 ENGLISH Food Tempera‐ Water in the Preheat‐ Time (min) Shelf ture (°C) cavity em‐ ing time posi‐ bossment (min) tion (ml) Roast beef 1 - 1,5 1. 50 - 55 2. 60 - 65 1. Rare 3. 65 - 75 2.
- Page 26 11.11 Core temperature sensor table Beef Food Food core temperature Shelf position (°C) Roast beef 55 - 65 2 - 3 Rump steak - browning 55 - 65 2 - 3 Rump steak - roasting 55 - 65 2 - 3...
- Page 27 ENGLISH 11.13 Dual Grill - Top Oven Food Time (min) Shelf position Bacon Rashers 5 - 6 Chicken Joints 20 - 40 Chops - Lamb 15 - 25 2 - 3 Chops - Pork 20 - 25 2 - 3 Fish - Whole / Trout / Makarel 10 - 12 Fillets - Plaice / Cod...
- Page 28 Food Function Temper‐ Time (min) Accesso‐ Shelf ature ries position (°C) Fatless sponge cake, Conventional 25 - 35 Grid 1 tin (ø 26 cm) on the Cooking grid Fatless sponge cake, Thermaflow® 25 - 35 Grid 1 tin (ø 26 cm) on the...
-
Page 29: Oven - Care And Cleaning
ENGLISH 12. OVEN - CARE AND CLEANING WARNING! Refer to Safety chapters. 12.1 Notes on cleaning Clean the front of the oven with a soft cloth with warm water and a mild detergent. Use a cleaning solution to clean metal surfaces. Clean stains with a mild detergent. - Page 30 12.3 Cleaning the cavity The retaining pins on the embossment telescopic runners must point to the front. The cleaning procedure removes Install the shelf supports in the opposite limestone residue from the cavity sequence. embossment after cooking with steam.
-
Page 31: Troubleshooting
ENGLISH 12.6 Removing and cleaning To replace the glass panels, the door glasses - main oven do the same steps in reverse. Before you lower The door glass in your the trim, attach the A trim product can be different in part to the door. - Page 32 Problem Possible cause Remedy Residual heat indicator does The zone is not hot because If the zone operated suffi‐ not come on. it operated only for a short ciently long to be hot, speak time. to an Authorised Service Centre.
-
Page 33: Energy Efficiency
Product number (PNC) ......... Serial number (S.N.) ......... 14. ENERGY EFFICIENCY 14.1 Product information for hob according to EU 66/2014 Model identification CCB6760ACM Type of hob Hob inside Freestanding Cooker Number of cooking zones Heating technology Radiant Heater Diameter of circular cooking Left front 14.0 cm / 21.0 cm... - Page 34 Top oven: A Energy efficiency class Main oven: A Energy consumption with a standard load, conven‐ Top oven: 0.75 kWh/cycle tional mode Main oven: not applicable Energy consumption with a standard load, fan-forced Top oven: not applicable mode Main oven: 0.82 kWh/cycle...
- Page 35 ENGLISH 15. ENVIRONMENTAL CONCERNS appliances marked with the symbol Recycle materials with the symbol with the household waste. Return the Put the packaging in relevant containers product to your local recycling facility or to recycle it. Help protect the contact your municipal office. environment and human health by recycling waste of electrical and electronic appliances.
- Page 36 www.aeg.com/shop...
Need help?
Do you have a question about the CCB6760ACM and is the answer not in the manual?
Questions and answers