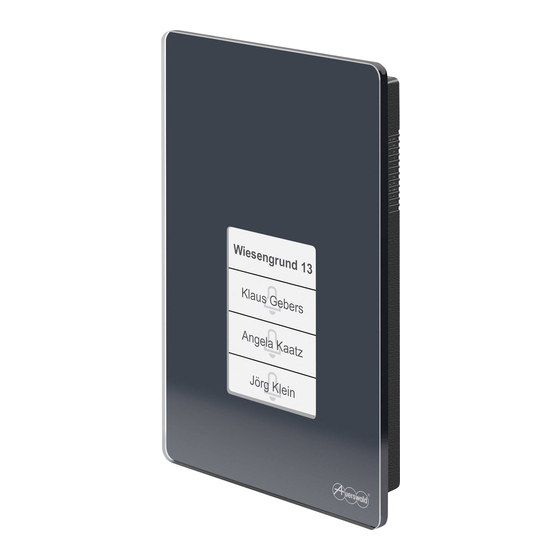
Auerswald TFS-Dialog 400 Advanced Information
Door terminal system
Hide thumbs
Also See for TFS-Dialog 400:
- Advanced information (59 pages) ,
- Instructions manual (42 pages)
Table of Contents
Advertisement
Quick Links
Advertisement
Table of Contents

Related Manuals for Auerswald TFS-Dialog 400


Summary of Contents for Auerswald TFS-Dialog 400
- Page 1 V02 11/2020 TFS-Dialog 400 Door terminal system Advanced Information...
-
Page 2: Table Of Contents
Ringer stop ....................19 a/b switching modules ................20 Configuration...................22 Configuring the door terminal in the PBX..........22 COMpact 4000/5000/5000R/5200/5200R/5500R and COMmander 6000/R/RX (device template)..........23 Other PBXs...................23 Configuration via the TFS Set app ............24 LED states during programming............26 TFS-Dialog 400 - Advanced Information V02 11/2020... - Page 3 Door conversation operation ..............41 Installation ....................42 Control with a/b switching modules............42 Setting switching frequencies ...............43 Connecting the ringer, door opener and stair light timer.......43 External door opener button and ringer stop contact ........45 Index......................46 TFS-Dialog 400 - Advanced Information V02 11/2020...
-
Page 4: About These Instructions
These instructions include additional information relating to the instructions in the TFS-Dialog 400 scope of delivery. Copyright Auerswald GmbH & Co. KG, 38162 Cremlingen, Germany, 2020 Trademarks Android is a trademark of Google, Inc. iOS is a registered trademark of Cisco in the USA and some other countries and is used under license. -
Page 5: Functions And Applications
The device has two power supply operating modes: • a/b port and door bell transformer • a/b port The behaviour of some of the device's functions depends on the power supply operating mode: TFS-Dialog 400 - Advanced Information V02 11/2020... -
Page 6: Sensor And Label Panel
Another sensor can be found below the label panel and is not indicated by an LED. The sensor and label panel has multiple functions. Some are available already in factory settings, while others first have to be configured. TFS-Dialog 400 - Advanced Information V02 11/2020... -
Page 7: Protection From Unauthorised Access
PIN for protection from unauthorised access. Note: Only programming mode can be activated on the device if the PIN has not been changed. No other functions will be available. TFS-Dialog 400 - Advanced Information V02 11/2020... -
Page 8: Code Lock
– Via the TFS Set app (in menu Code lock) • Set the switching functions. – Via the TFS Set app (in menu Code lock) Procedure for entering the code lock PIN: 1. Press the key below the label panel. TFS-Dialog 400 - Advanced Information V02 11/2020... -
Page 9: Door Bell Buttons
The device can be set individually to between 1 and 4 door bell buttons. Each door bell button is assigned a destination number which is called for the set maximal call duration when the door bell button is pressed. TFS-Dialog 400 - Advanced Information V02 11/2020... - Page 10 Select the button layout. – Via the TFS Set app (in menu Button configuration > Number of buttons) – Via an internal telephone (Button configuration > Button layout (Seite 35)) • Assign destination number. TFS-Dialog 400 - Advanced Information V02 11/2020...
- Page 11 4.5 seconds. For this purpose, you can also consult the manual of the PBX. – Via the TFS Set app (in menu Extended > Dialling the destination number) – Via an internal telephone (Extended > Dialling the destination number (Seite 38)) TFS-Dialog 400 - Advanced Information V02 11/2020...
-
Page 12: Light
– Via the TFS Set app (in menu Code lock > Switching functions) • Assign the character string for switching the light via internal telephones. – Via the TFS Set app (in menu Extended > Light) TFS-Dialog 400 - Advanced Information V02 11/2020... -
Page 13: Door Opener
• Enter the character string in the internal telephone in a door conver- sation (Door conversation operation (Seite 41)). Configuration procedure: • Configure the key with the door opener function with ringer stop. TFS-Dialog 400 - Advanced Information V02 11/2020... -
Page 14: Additional Bell
The additional bell function is used for controlling an electronic ringer or gong, among other functions. Connection options: • Direct (see instructions) • Via an a/b switching module (Connecting the ringer, door opener and stair light timer (Seite 43)) TFS-Dialog 400 - Advanced Information V02 11/2020... - Page 15 Switch the additional bell via an a/b switching module. – Via the TFS Set app (in menu Button configuration > Switching functions) – Via an internal telephone (Button configuration > Switching functions (Seite 36)) TFS-Dialog 400 - Advanced Information V02 11/2020...
-
Page 16: Door Conversation
Press the key with the call end function. • Enter the character string in the internal telephone in a door conver- sation (Door conversation operation (Seite 41)). Configuration procedure: • Configure the key with the call end function. TFS-Dialog 400 - Advanced Information V02 11/2020... - Page 17 This will be necessary in the following scenarios: – Speech channels are not switched over or only when the speaker’s volume is loud. TFS-Dialog 400 - Advanced Information V02 11/2020...
-
Page 18: Intercom
Note: The device accepts the call immediately as long as it is in configuration mode (4 minutes). Only once this period of time has elapsed can the call be handled as defined in the settings. TFS-Dialog 400 - Advanced Information V02 11/2020... -
Page 19: Ringer Stop
• Key with ringer stop. If the key assigned with this function is pressed, the call is ended. • Installed ringer stop contact (External door opener button and ringer stop contact (Seite 45)) TFS-Dialog 400 - Advanced Information V02 11/2020... -
Page 20: A/B Switching Modules
Press the door bell button. • Enter the code lock PIN. • Enter the character string in the door conversation from the internal telephone (Door conversation operation (Seite 41)) Configuration procedure: • Set the switching frequency. TFS-Dialog 400 - Advanced Information V02 11/2020... - Page 21 – Via an internal telephone (Button configuration > Switching functions (Seite 36)) • Assign the switching frequency to a code lock PIN. – Via the TFS Set app (in menu Code lock > Switching functions) TFS-Dialog 400 - Advanced Information V02 11/2020...
-
Page 22: Configuration
The device needs to be set up in the PBX configuration. The type of config- uration varies for the different PBX systems and according to the firmware version of the PBX. Topics – COMpact 4000/5000/5000R/5200/5200R/5500R and COMmander 6000/R/RX (device template) (Seite 23) – Other PBXs (Seite 23) TFS-Dialog 400 - Advanced Information V02 11/2020... -
Page 23: Compact 4000/5000/5000R/5200/5200R/5500R And Commander 6000/R/Rx (Device Template)
In the COMpact 4000/5000/5000R/5200/5200R/5500R and COMmander 6000/R/RX PBX systems from firmware version 6.8B and later, a device template is saved for the device (Auerswald TFS-Dialog 400). With firmware version 6.4A and later, a device template is supported, but it may have to be downloaded and imported from the Internet. -
Page 24: Configuration Via The Tfs Set App
Smartphone with operating system Android version 5.0 and above or iOS version 9.0 or above • TFS Set app installed • Device closed and screwed shut 1. Make the correct settings in the app. 2. Go to the Transmit configuration menu. TFS-Dialog 400 - Advanced Information V02 11/2020... - Page 25 3. Transmit the data as shown in the figure. Note: We recommend that you use a headset for the transmission, if the smartphone has more than one loudspeaker. * Press and hold the key until the display changes TFS-Dialog 400 - Advanced Information V02 11/2020...
-
Page 26: Led States During Programming
If data has not transferred correctly, all the LEDs in the second row light up. The LED displaying the error flashes: Left-hand LED Incorrect PIN Middle LED Incorrect app version TFS-Dialog 400 - Advanced Information V02 11/2020... -
Page 27: Configuration Via An Internal Telephone
Performing the configuration (Seite 29) Changing the default PIN Requirement: • An internal telephone with DTMF signalling configured for the PBX 1. Press the keys on the device as shown in the figure. TFS-Dialog 400 - Advanced Information V02 11/2020... - Page 28 4. Dial You will hear the confirmation tone (five rapid, sequential sounds). 29 <new PIN> # <repeat new PIN> 5. Dial 6. Wait until you hear the confirmation tone and then hang up. TFS-Dialog 400 - Advanced Information V02 11/2020...
-
Page 29: Performing The Configuration
4. Dial * PIN You will hear the confirmation tone (five rapid, sequential sounds). 5. Specify a function and a value (see Chapter Short reference > Configu- ration in configuration mode (Seite 34)). TFS-Dialog 400 - Advanced Information V02 11/2020... -
Page 30: Device Configuration
Only the volume and brightness device properties can be set directly in the device without using an internal telephone or the app. Requirements: • The default PIN (0000) has been changed 1. Press the buttons on the device as shown in the figure. TFS-Dialog 400 - Advanced Information V02 11/2020... - Page 31 Note: The star key (*) is assigned the cancel function while the device is being configured and in code lock mode. 3. Activate a property field (A, B or C) and then set the brightness or volume using the + and - keys. TFS-Dialog 400 - Advanced Information V02 11/2020...
-
Page 32: Restoring Factory Settings
Note: When operating the device without the door bell transformer, indirect lighting will not be available and the label panel lighting cannot be controlled. Restoring factory settings Requirement: • An internal telephone with DTMF signalling configured for the PBX TFS-Dialog 400 - Advanced Information V02 11/2020... - Page 33 1. Press the default key on your device until all LEDs start to blink and the flashing rhythm changes. 2. Call the device using its phone number and then dial 3. You can then hang up. TFS-Dialog 400 - Advanced Information V02 11/2020...
-
Page 34: Short Reference
Extended > Light (Seite 39) – Extended > Door call (intercom) (Seite 39) – Extended > Door conversation (Seite 40) – Extended > End door conversation (Seite 40) – Deleting data (Seite 41) TFS-Dialog 400 - Advanced Information V02 11/2020... -
Page 35: Button Configuration > Button Layout
1 door bell button (bottom) + address field (top) 0 2 door bell buttons (bottom) + address field (top) 2 door bell buttons 3 door bell buttons + address field (very top) 4 door bell buttons TFS-Dialog 400 - Advanced Information V02 11/2020... -
Page 36: Button Configuration > Destination Number
Button configuration > Switching functions Name/default Function Value x Automatic light / (Key 1) (off) (Key 2) (on) (Key 3) (Key 4) Additional bell / off (Key 1) (off) (Key 2) (on) (Key 3) (Key 4) TFS-Dialog 400 - Advanced Information V02 11/2020... -
Page 37: Button Configuration > Sounds
Signal sound / on (Key 1) (off) (on) (Key 2) (Key 3) (Key 4) Extended > PIN Name/default Function Value x PIN / 0000 29x...#x...# 0–9 (PIN with 4 to 6 digits, entered twice) TFS-Dialog 400 - Advanced Information V02 11/2020... -
Page 38: Extended > Dialling The Destination Number
PBXs from firmware version 6.4A – see Advanced Information relating to the PBX). The connected door opener must support switch-on time configuration. Note: The character string of the door opener function must differ from that of the light function. TFS-Dialog 400 - Advanced Information V02 11/2020... -
Page 39: Extended > Light
Function Value x Additional bell / off (off) (on) Loudspeaker / on (off) (on) Call acceptance of the door 52xx (immediate), terminal / immediate (1 s) ... (89 s), (manual call acceptance only) TFS-Dialog 400 - Advanced Information V02 11/2020... -
Page 40: Extended > Door Conversation
Note: If a door conversation is automatically ended by a door being opened and the light is also switched on, the time for "End when door opens" must be configured to longer than two seconds. TFS-Dialog 400 - Advanced Information V02 11/2020... -
Page 41: Deleting Data
Trigger additional bell ##61 Door terminal loudspeaker (off) (on) Extend call duration Switch a/b switching 1–4 (switching module frequency 1–4) Switch on the light Open the door End a call Establish active voice connection TFS-Dialog 400 - Advanced Information V02 11/2020... -
Page 42: Installation
You can install up to six switchable a/b switching modules, which are available as accessories, on the 2-core cable between the PBX and device to implement additional switching functions. TFS-Dialog 400 - Advanced Information V02 11/2020... -
Page 43: Setting Switching Frequencies
Connect this resistor to the terminal clamps on the electronic ringer or electronic stair light timer. This ensures that a minimal quiescent current is provided for the a/b switching module. TFS-Dialog 400 - Advanced Information V02 11/2020... - Page 44 Switching frequency TFS-Dialog 400 Additional resistor, if Stair light timer necessary (330 Ω, power rating a/b switching module Door opener Switching frequency 5 Door bell trans- a/b switching module Switching frequency 6 TFS-Dialog 400 - Advanced Information V02 11/2020...
-
Page 45: External Door Opener Button And Ringer Stop Contact
This contact is connected in series with the door opener and must be closed with the door closed and opened when the door is opened. * External door opener button ** Ringer stop contact TFS-Dialog 400 - Advanced Information V02 11/2020... -
Page 46: Index
..................4 Additional bell ....................19 Brightness ......................30 Button configuration Destination number ..................36 Sounds ......................37 Changing the PIN ..................... 37 Code lock ......................19 Configuration ....................... 24 Telephone ....................27, 34 TFS-Dialog 400 - Advanced Information V02 11/2020... - Page 47 ................41 Door opener Configuration ....................38 Function ....................... 13 Door opener button ..................45 Factory settings ....................32 Intercom Configuration ....................39 Function ....................... 18 Light Configuration ....................39 Function ....................... 12 TFS-Dialog 400 - Advanced Information V02 11/2020...
- Page 48 ......................19 Ringer stop contact ..................45 Sensor and label panel ..................6 Button layout ....................35 Door bell buttons ..................9 TFSSet app ....................... 24 Volume Loudspeaker ..................30, 40 Surroundings ....................40 TFS-Dialog 400 - Advanced Information V02 11/2020...
Need help?
Do you have a question about the TFS-Dialog 400 and is the answer not in the manual?
Questions and answers