Table of Contents
Advertisement
Quick Links
Advertisement
Table of Contents

Related Manuals for Maxxus RunMaxx 7.4 T


Summary of Contents for Maxxus RunMaxx 7.4 T
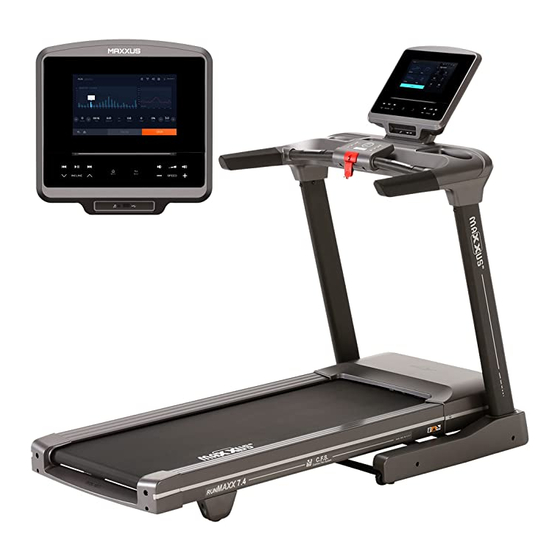
- Page 1 RunMaxx 7.4 T Treadmill...
- Page 2 This publication may not be reproduced, stored in a retrieval system, or transmitted in whole or in part, in any form or by any means, electronic, mechanical, photocopying, recording, or otherwise without the prior written permission of Maxxus Group GmbH & Co. KG.
-
Page 3: Safety Instructions
Safety Instructions Before you start exercising, be sure to read the entire operating manual, especially the Safety Information, the Maintenance and Clean- ing Information and the Training Information. Also make sure that anyone else who uses this training device is familiar with this informa- tion and observes it. -
Page 4: Scope Of Delivery
Overall View of the Device Cockpit Hand Grip Bottle Holder Hand Pulse Sensors Safety Key Side Frame Motor Housing Treadmill Deck Side Tread Scope of Delivery Part Description Part Description Main Frame Hexagon socket screw, M8x15 Cockpit Frame Pan head screw M5x16 Cockpit Washer M8 Cover, left... -
Page 5: Preparing For Assembly
Assembly Carefully unpack all of the delivered items. Two people are required as some parts of your exercise equipment are bulky and heavy. Check that all of the fastening material (screws, nuts, etc.) and components are there before starting assembly. Carefully carry out the installation as damage that has arisen due to assembly errors are not covered by the warranty or guarantee. - Page 6 Assembly Step 2 - Assembly of the Cockpit Frame: Connect the cable (E20) that protrudes from the top of the right-hand side frame with the cable (E19) that pro- trudes from the right-hand side of the cockpit frame (B). Then insert the cockpit frame (B) from above into the side frames (A07 / A08). ATTENTION: Make sure that you do not squeeze or damage the cables.
- Page 7 Assembly Step 4 - Insert the Safety Key Insert the safety key (D) in the cockpit. Cut and re- move the transport belt (P). Step 5 - Remove the Transport Lock Loosen and remove the Allen bolt M8x15 (b) which fastens the steel cable (f) to the main frame (position a). Lift up the treadmill deck.
- Page 8 Assembly Step 7 - Adjusting the Feet To compensate for slight bumps in the location where you want to set up and use the treadmill, the front feet (B02) of the treadmill are equipped with adjustment screws. Fold up the deck of the treadmill and carefully lay the treadmill on the floor as shown in picture A. Adjust the two feet (B02) so that the treadmill is level.
-
Page 9: Folding Mechanism
Folding Mechanism Hydraulic Cylinder The folding mechanism relies on a hydraulic cylinder. This is filled with oil and is under high pressure. If the cylinder is damaged, the safe folding of the treadmill deck is no longer guaranteed. It must therefore be replaced without fail before the treadmill deck is raised again. - Page 10 Folding Mechanism Folding Down the Treadmill Deck Step 1: Take hold of the rear end of the deck with both hands. Press down the safety lever on the catch with your foot to release the lock. Pull the treadmill deck down gently to the floor.
-
Page 11: Mains Connection
Mains Connection Mains Cable Connect the power cable to an electrical socket. The device may only be plugged-in to grounded socket which has been installed by a professional electrician. Do not use multiple sockets to connect the treadmill. If you need to use an extension cable, it must comply with the VDE or equivalent guidelines. -
Page 12: Safety Key
Safety Key Safety Key The treadmill will only operate if the safety key is correctly in contact with contact point in the cockpit. The tread- mill will stop automatically if the safety key is no longer in contact. Before each training session make sure to attach the safety key to your clothing with the clip. If you either want to stop the treadmill quickly, cannot keep up with the speed, or any other emergency arises, pull the string to remove the safety key out of the cockpit. - Page 13 Maintenance & Care CAUTION: Before you perform any care, cleaning, maintenance, repair or similar work on your training device, switch off the power and remove the power cable from the electrical socket. Check before starting the planned work that your exerciser is completely disconnected and switched off. Only when all work is fully completed, and the de- vice is completely re-assembled, may the training device be reconnected to the mains and switched on.
- Page 14 To achieve optimum lubrication of the belt use the MAXXUS maintenance oil bottle, remove the normal screw bottle top (Di- agram 1) and screw on the thin tube top (Diagram 2). Before lubricating the belt, make sure that the treadmill is switched-off and that the belt is no longer moving.
-
Page 15: Adjusting The Treadmill Belt
Maintenance & Care The treadmill belt must always be switched off with the mains cable plug removed from the socket before starting any maintenance, cleaning, repairs or any other works! Adjusting the Treadmill Belt To achieve as long a service life as possible, the belt should always be kept running straight along the centre of the deck. - Page 16 Cockpit Symbol / Display Description Display shows the time and date. The data will update automatically as soon as the cockpit is connected to a WiFi network. This symbol is displayed as soon as the cockpit is connected to a WiFi network. Press this icon to get to the volume control menu Displays the current user.
- Page 17 Cockpit Settings – Language Selection Press the “Language” selection key to get to the language selection menu. Now you can select the preferred language. To do this, press on your selected language. − English − German (Deutsch) − French (Francais) −...
- Page 18 Cockpit Overview of the Keypad Home Key to return to the home screen Back Key to go back a menu item Key to adjust the incline Incline SPEED +/- Key to adjust the speed START Key to start the current training program or quick start function STOP Key to end the current training session PAUSE...
- Page 19 Cockpit My Workout Press the “My Workout” key to get to this menu. Here you have the following options:Enter user details or change the current user − Access the workout report − Create your own workout programs − Fitness test and body fat measurement Entering the User Details Press on “My Workout”...
-
Page 20: Further Functions
The cockpit of this treadmill is already equipped with a receiver for wireless heart rate measurement. A transmitter chest belt, not included in the scope of delivery, is required for this. This chest belt must transmit at a frequency of 5 KHz and be uncoded. MAXXUS®... -
Page 21: Manual Training
Cockpit Quickstart Turn on the treadmill and press the START key. The treadmill will start automatically after a countdown and the training time will start running now. The user can adjust the speed and incline individually via the display or using the keypad. Training Pause: To interrupt the current training session briefly, press “PAUSE”... -
Page 22: Training Programs
Cockpit Step 3: Training Start Press “START” on the display or the START key on the keypad to start the training session. Pausing the Training Session To temporarily interrupt the current training session, press “PAUSE” on the display or press the PAUSE key on the keypad. To end the pause and resume training, press “CONTINUE”... - Page 23 Cockpit...
-
Page 24: Heart-Rate Controlled Training
Cockpit Heart-Rate Controlled Training This program is a heart-rate controlled training program. The user sets a desired target heart rate. The treadmill cockpit permanently compares this value with the actual heart rate of the user. If the actual heart rate is lower than the desired target heart rate, the treadmill will automatically increase the speed. If the value is higher, the treadmill will automatically reduce the treadmill speed. - Page 25 Cockpit Pausing the Training Session To temporarily interrupt the current training session, press “PAUSE” on the display or press the PAUSE key on the keypad. To end the pause and resume training, press “CONTINUE” or the START key on the keypad. Training End The training session ends automatically when the set training target is reached.
- Page 26 Cockpit Step 4: Setting the Training Time Enter the desired training time by pressing the “+” and “-” keys next to the time. It is possible to enter a time of between 5 to 60 min- utes. Note: The duration of the individual segments results from the total time. If, for example, the time was set to 20 minutes, the time of a segment is 1 minute.
- Page 27 Cockpit Step 2: Test Start To start the test, press the “Fitness Test” key. Before the actual 12 minute test, the treadmill will begin a 3 minute warm-up and at an initial speed of 3 km/h. This can be changed by the user at any time. The test starts at 3:00 minutes.
- Page 28 Cockpit Body Fat Analysis Here the cockpit determines the percentage of fat in the body. Step 1: Program Selection Press “My Workout” in the home screen Select “My Test” and then “Body Fat”. The display shows the current user data. Please check that the correct user has been selected, otherwise the test result will be incor- rect.
-
Page 29: Audio Playback
Cockpit Audio Playback There are two options on this device which enable you to play back an audio source over the integrated loudspeakers in the cockpit. 1. Connect an External Audio Source via the MP3 RCA Connection You can connect an external audio source (MP3 player, smartphone etc.) to the training device via the RCA connection located on the front of the cockpit, using the audio cable supplied (3.5 mm jack plug). - Page 30 Cockpit APPs The following APPs are already permanently installed: − Youtube − Amazon Prime Music − Instagram − Twitter − Google Chrome − Netflix − Spotify − Facebook − Amazon Prime Video Please note that some of these APPs can only be played if you have a corresponding account. Select the APP menu using the key for APPs in the main menu (all existing APPs are displayed here).
-
Page 31: Pulse & Heart Rate
Pulse & Heart Rate 100% of maximum heart rate of maximum heart rate of maximum heart rate of maximum heart rate Calculating your personal heart rate when training Calculate your personal heart rate when training as follows: 220 - Age = maximum heart rate This value represents your maximum heart rate and serves as a basis from which to calculate your personal training heart rate. - Page 32 Using a chest belt (we recommend the exclusive use of an uncoded POLAR® chest belt) allows you to wireless- ly measure heart rate. The chest belt is available online as an accessory from www.maxxus.com. This optimal, ECG-accurate type of measurement takes the heart rate by means of a transmitter chest belt directly from the skin.
-
Page 33: Training Recommendations
Training Recommendations Preparation Before Training Before you start training make sure that not only your training device is in perfect condition, your body must also be prepared for training. Therefore, if you have not done any endurance training for some time, you should con- sult your GP and undergo a fitness check-up. - Page 34 Training Recommendations Hydration Adequate hydration is essential before and during exercise. During a training session of 30 minutes it is possible to lose up to 1 litre of liquid. To compensate for this fluid loss apple spritzer mixed in the ratio of one-third apple juice to two-thirds mineral water is ideal since it contains electrolytes and minerals to replace those that the body loses through sweat.
-
Page 35: Technical Details
Recommended Accessories These accessories are the perfect supplement for your training device. All products are available in our online shop at www.maxxus.com. POLAR® Transmitter Chest Belt T34 (uncoded) Chest strap for determining the heart rate with optimized transmission ranges. Required accessory for the application of pulse-controlled programs and for continuous determina- tion of the current heart rate. -
Page 36: Exploded Drawing
Exploded Drawing... - Page 37 Exploded Drawing...
-
Page 38: Spare Parts List
Spare Parts List Part No. Description Specification Part No. Description Specification Bottom frame Bottom key board Mainframe Safety key seat Incline frame Safety key Display frame Handle pulse seat Handlebar frame Side rail fixation seat Display support frame Motor belt Left column Display acrylic Right column... - Page 39 Spare Parts List Part No. Description Specification Part No. Description Specification Screw ST2.9x8 AC wire Length 350 brown Screw ST4.2x60 AC wire Length 350 Screw ST4.2x12 blue Screw ST4.2x20 Earthed wire Yellow and green Screw ST4.2x12 Running board Screw ST4.2x30 Display Screw ST4.2x25...
- Page 40 Notes...
- Page 41 Notes...
-
Page 42: Terms And Conditions Of Warranty
The warranty period for your training device starts on the date of purchase and applies solely to products which were purchased directly from the MAXXUS Group GmbH & Co KG or one of the MAXXUS Group GmbH & Co KG direct and authorised distribution partners. -
Page 43: Service Contract
I accept the General Terms and Conditions of MAXXUS® Group GmbH & Co. KG. I hereby instruct the company MAXXUS® Group GmbH & Co. KG to repair the above defects. In Warranty cases I will not be charged for the cost. The costs for repairs which are excluded from liability for defects in quality will be charged to me and must be settled immediately. - Page 44 Maxxus Group GmbH & Co. KG Nordring D-64521 Gross-Gerau Germany E-Mail: info@maxxus.com www.maxxus.com...
Need help?
Do you have a question about the RunMaxx 7.4 T and is the answer not in the manual?
Questions and answers