Table of Contents
Advertisement
Quick Links
Advertisement
Table of Contents

Subscribe to Our Youtube Channel
Related Manuals for Maxxus M8


Summary of Contents for Maxxus M8
- Page 1 Treadmill User manual...
-
Page 2: Table Of Contents
This publication may not be reproduced, stored in a retrieval system, or transmitted in whole or in part, in any form or by any means, electronic, mechanical, photocopying, recording, or otherwise without the prior written permission of Maxxus Group GmbH & Co. KG. -
Page 3: Safety Instructions
Safety Instructions Before you start exercising, be sure to read the entire operating manual, especially the Safety Information, the Maintenance and Clean- ing Information and the Training Information. Also make sure that anyone else who uses this training device is familiar with this informa- tion and observes it. -
Page 4: Overall View Of The Device
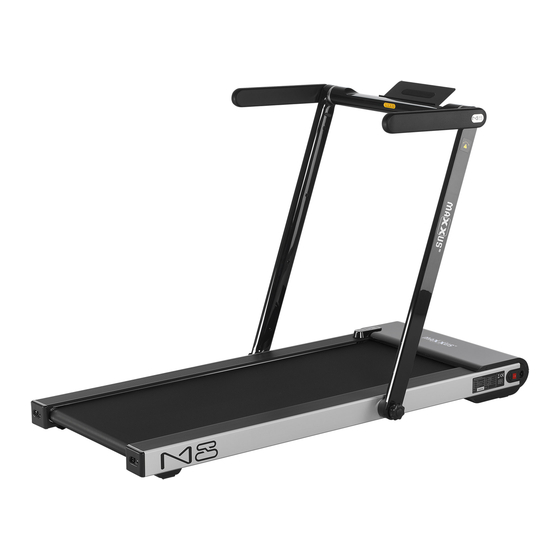
Overall View of the Device Description of Parts Tablet Holder (A): foldable, strong holder for tablet PC’s, smartphones, E-books, etc. Cockpit (B): key pad and LCD display showing the training values Motor Housing (C): to protect the motor and electronic components from dirt and soiling. Main Switch/Fuse/Mains Connection (D): Here are the main switch to turn the treadmill on and off, the connector for the mains cable and the fuse. -
Page 5: Scope Of Delivery
Scope of Delivery Laufband Treadmill Tapis de course Tapis toulant Cintas de correr Benutzerhandbuch User manual Manuel d'utilisation Manuale di istruzioni Included in delivery: Treadmill Belt (A) The treadmill belt is already pre-assembled. There are no other components to be assembled here. Audio Cable (B): Use this Hi-Fi stereo RCA jack cable to connect an audio source (smartphone, tablet PC, MP3 player, etc.) to the treadmill. -
Page 6: Assembly
Assembly Carefully unpack all delivered parts. Have someone there to help you as the treadmill has a deadweight of ap- proximately 43kg. Before assembly check that all parts in the scope of delivery have been delivered. Assemble the parts carefully as any damages or defects occurring due to mistakes made at the time of assem- bly are not covered by the warranty or guarantee. - Page 7 Assembly Now lift the cockpit frame with the two side frames and fold it up. Then tighten the two safety knobs securely by turning them clockwise.
- Page 8 Assembly Step 3: Folding Up the Tablet Holder After raising the tablet holder upwards in the direction of the arrow (see illustration) then slide it along to the left. Test if the tablet holder is secure by shaking it lightly with your hand. Only use the tablet holder if you have made sure it is fitted correctly and securely.
-
Page 9: Assembly
Assembly Step 5: Inserting the Safety Key To complete the assembly insert the safety key into its slot on the treadmill cockpit frame. ATTENTION: The treadmill cannot be used if the safety key is not inserted correctly! Step 6: Lubricating the Treadmill Belt The treadmill belt has already been pre-lubricated at the factory. -
Page 10: Mains Connection
Mains Connection Mains Cable Connect the power cable to an electrical socket. The device may only be plugged-in to grounded socket which has been installed by a professional electrician. Do not use multiple sockets to connect the treadmill. If you need to use an extension cable, it must comply with the VDE or equivalent guidelines. -
Page 11: Transport
Transport Thanks to the transport rollers, the treadmill can easily be pushed and moved around in both its assembled or pre-assembled condition. CAUTION: The treadmill should only be moved by an adult. Transport in Assembled Condition Step 1: Remove the mains cable at the plug from the electrical socket. Take hold of the back of the treadmill deck with both hands and lift it upwards until the majority of its weight is resting on the transport rollers. -
Page 12: Safety Key
Safety Key The treadmill will only operate if the safety key is correctly in contact with contact point in the cockpit. The tread- mill will stop automatically if the safety key is no longer in contact. Before each training session make sure to attach the safety key to your clothing with the clip. If you either want to stop the treadmill quickly, cannot keep up with the speed, or any other emergency arises, pull the string to remove the safety key out of the cockpit. -
Page 13: Maintenance & Care
Maintenance & Care CAUTION: Before you perform any care, cleaning, maintenance, repair or similar work on your training device, switch off the power and remove the power cable from the electrical socket. Check before starting the planned work that your training device is completely disconnected and switched off. Only when all work is fully completed, and the device is completely re-assembled, may the training device be reconnected to the mains and switched on. - Page 14 Step 1: Remove the normal screw cap from the MAXXUS Care Oil bottle and replace it with the screw top with nozzle. (Fig. 1). Step 2: Before lubricating the belt, make sure that the treadmill is switched off.
- Page 15 Deck CAUTION: Only use the oil bottle supplied or MAXXUS® care oil (available from www.maxxus.de) to lubricate the treadmill belt. Do not use any other kinds of silicone or lubricants! We do not recommend the use of silicone sprays at...
-
Page 16: Maintenance & Care
Maintenance & Care Adjusting the Treadmill Belt The treadmill belt must always be switched off with the mains cable plug removed from the socket before start- ing any maintenance, cleaning, repairs or any other works! To achieve as long a service life as possible, the belt should always be kept running straight along the centre of the deck. -
Page 17: Cockpit
Cockpit Display Display of the distance travelled from 0.00 bis 99.0 kilometres. Alternating Display: Display of the training time from 0:00 to 99:59 minutes. Training will end automatically when the display reaches the value of 99:59 minutes. Display of the number of steps taken (pedometer) from 0 to 9,999 steps. Alternating Display: Display of the number of calories consumed from 0.00 to 999 calories* Display of the current heart rate **... - Page 18 The chest belt must transmit at 5KHz frequency and be uncoded. MAXXUS® recommends using a POLAR® T34 transmitter chest belt for this. Use of a Bluetooth chest belt is not possible. Please also read the section “Heart Rate” in this manual.
- Page 19 Cockpit FitShow Please note that MAXXUS is not the producer or distributor of the FitShow App and is therefore also not responsible for content of the App. The follow- ing instructions were provided by the producer of the App and maybe subject to modifications and errors by them.
- Page 20 Cockpit If you click on the image of the device after connection, the corresponding device details with the range of specifications available will appear. As soon as you start training, the following training progress will appear for: − Training time −...
-
Page 21: Cockpit
Cockpit You will find your training history in the “Records” section. -
Page 22: Pulse & Heart Rate
Pulse & Heart Rate 100% of maximum heart rate of maximum heart rate of maximum heart rate of maximum heart rate Calculating your personal heart rate when training Calculate your personal heart rate when training as follows: 220 - Age = maximum heart rate This value represents your maximum heart rate and serves as a basis from which to calculate your personal training heart rate. -
Page 23: Pulse & Heart Rate
Heart Rate Measurement using a Chest Belt Many MAXXUS® training devices are already fitted with a receiver as standard. Using a chest belt (we recommend the exclusive use of an uncoded POLAR® chest strap) allows you to wire- lessly measure heart rate. The chest belt is as accessories available. -
Page 24: Training Recommendations
Training Recommendations Preparation Before Training Before you start training make sure that not only your training device is in perfect condition, your body must also be prepared for training. Therefore, if you have not done any endurance training for some time, you should con- sult your GP and undergo a fitness check-up. -
Page 25: Training Recommendations
Training Recommendations Hydration Adequate hydration is essential before and during exercise. During a training session of 30 minutes it is possible to lose up to 1 litre of liquid. To compensate for this fluid loss apple spritzer mixed in the ratio of one-third apple juice to two-thirds mineral water is ideal since it contains electrolytes and minerals to replace those that the body loses through sweat. -
Page 26: Technical Details
Batteries Directive. Only return or dispose of batteries and rechargeable batteries when they are fully discharged. Recommended Accessories These accessories are best suited for use with your training device. All products are available from our online shop at www.maxxus.com. POLAR® Transmitter Chest Belt T34 (uncoded) Chest belt with optimised transmission range for determining heart rates. -
Page 27: Exploded Drawing
Exploded Drawing... -
Page 28: Spare Parts List
22*75*1442L Edging insert sheet L 7.4*79.7*1288L Edging insert sheet R 7.4*79.7*1288L Edging 73.9*16.7*1218L Motor adjusting screw Φ12*M8*34.5L Pad bracket 18.3*109.8*273L Supporting wheel axis Φ12*16.5L Pad bracket fixing screw right Pad bracket fixing screw left M4 nut clip plate Running board... -
Page 29: Spare Parts List
M4*15 Screw M4*12 Screw M4*15 Screw M4*10 Screw M4*8 Screw M4*15 Screw M4*10 Screw M5*8 Screw M5*10 Screw M6*10 Screw M8*20 Screw M8*25 Screw M8*40 Screw M8*45 Screw M8*55 Screw M8*70 Screw M8*80 Screw M4*8 Screw M6*12 Screw M6*27 Screw... -
Page 30: Warranty
The warranty period for your training device starts on the date of purchase and applies solely to products which were purchased directly from the MAXXUS Group GmbH & Co KG or one of the MAXXUS Group GmbH & Co KG direct and authorised distribution partners. -
Page 31: Service Contract
I accept the General Terms and Conditions of MAXXUS® Group GmbH & Co. KG. I hereby instruct the company MAXXUS® Group GmbH & Co. KG to repair the above defects. In Warranty cases I will not be charged for the cost. The costs for repairs which are excluded from liability for defects in quality will be charged to me and must be settled immediately. - Page 32 Maxxus Group GmbH & Co. KG Nordring 80 D-64521 Groß-Gerau Germany E-Mail: info@maxxus.de www.maxxus.com...
Need help?
Do you have a question about the M8 and is the answer not in the manual?
Questions and answers